...because home doesn't happen overnight.

Last week I shared my dining area with you.
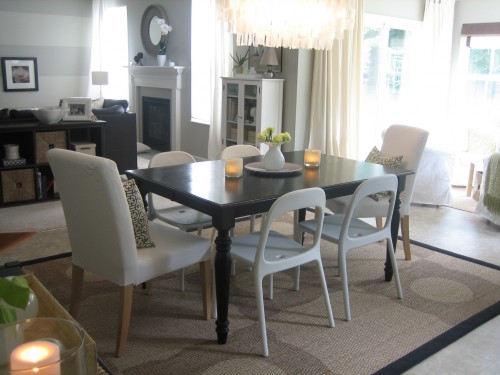
I mentioned that I had added the pattern to the rug myself.  It was SUPER easy (think less than a 45-minute project) and cheap (think less than a $6 project), so I’m letting you in on the action.  First off, I was very happy with the seagrass rug in its original condition.  I purchased it from Natural Area Rugs over a year ago and it’s held up to 2 adults and 2 kids extremely well…especially considering the fact that it lives in the messiest area of our house – right under the table where we eat on a daily basis.  But I was looking to add another dimension and maybe a little pattern to our dining area.  I got the idea to stencil the rug from Sunny’s Goodtime Paints.  Immediately, I knew that some rug stenciling would be in my future.

(courtesy of Sunny Goode)

I had thought of using the stencil Handy Hubby gifted to me for Christmas.  After all, I already used it here and here to stencil a pillow cover and laundry curtains.  But after laying the stencil out on my dining rug, I thought it was a tad on the small side and would create a busier pattern than what I had envisioned.  Hmmm?  What to do?  I considered making my own stencil but 2 boys running around like mad men turned me off to that idea.  When would I possibly find the time?  So, in a moment of desperation, I started searching my house for potential stencil candidates.  It didn’t take me long to rediscover this.

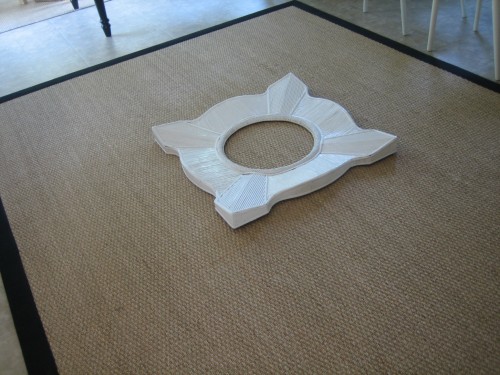
The white frame hanging above our guest bed!  I knew the larger size and shape would give me the geometric pattern I was looking for.  And there’s a little side story to this frame:  it was supposed to be a mirror.  I purchased this ‘mirror’ from Home Decorators Outlet (for $20!!!) but when it arrived the mirror had shattered during shipment.  I was sent a new one to replace it but sending the broken one back would have cost the company more in shipping charges than what the mirror was on sale for ($20).  I got to keep both!  I painted the non-broken mirror gloss black and hung it in our living room.  (It was originally a wood tone.)

I couldn’t bear to throw out the broken mirror’s frame, so I painted it white and hung it above our guest bed.  Who knew someday it would double as a stencil?

Okay, so back to the task at hand:  rug stenciling.  I had a stencil.  I cleared the rug of all furniture and vacuumed it.  (Since I was only going to be using a very thin topcoat of stain and because my rug has a latex backing, I didn’t place anything beneath the rug.) 
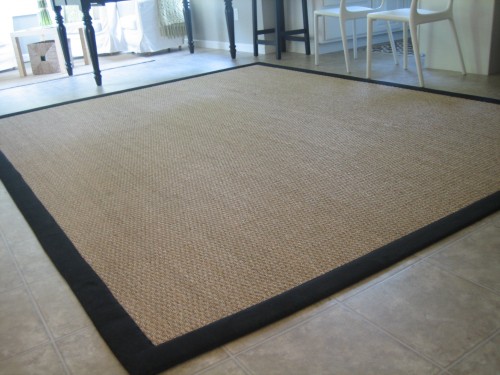
I carefully measured to find the rug’s center and marked it with chalk that could be swept away easily when I was done.  Then I placed my ‘stencil’ centered up with the chalk mark.
I used a medium brown wood Sharpie (that we normally use to fill in furniture nicks and scratches) to trace the stencil outline.
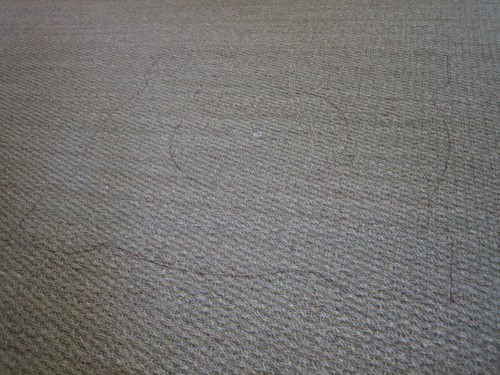
 

I traced more outlines of my frame stencil in a brick pattern, working my to the outside edges of the rug.

For the staining process, I used Minwax’s Special Walnut stain, a small plastic paint tray and 2 sizes of foam brushes. 

The rest was like coloring.  I traced the stencil lines with the small 1″ foam brush and my wood stain…
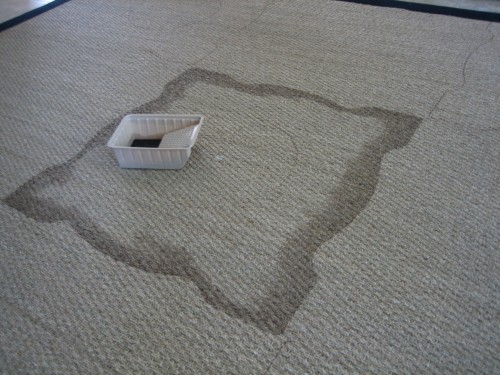
…then filled in the larger areas with the 3″ foam brush.  The 8 ounce can of wood stain was just the right amount.  OH!  It helps to start in the center of the rug and work your way out.  That way you’re not playing Twister with the wet spots you’ve already stained.
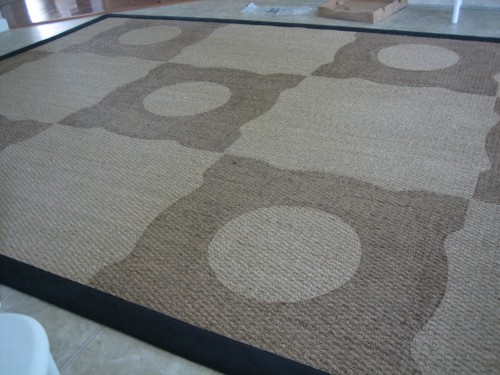
I let my stained rug dry for 4 hours then wiped the excess stain off with an old rag.  The rug was still tacky for about 24 hours after that because we were having crazy humid weather at the time.  We just made an effort not to walk on it until it was fully dry.  The final product…

The effect is subtle.  I only used one coat of stain.  You could easily do 2-3 coats for a more dramatic effect.  I would’ve liked to have done this project outside because wood stain can be fumey.  But it was sunny and 95 degrees.  Instead, I opened the windows (yes, with the AC running) and aimed a big floor fan at the rug then took the kids swimming while it all aired out.

I feel like jumping up and kicking my heels over this project.  It cost $6 and took me less than an hour.  Plus it gives the dining area that extra something I was looking for.  What do you think?

29 Comments

wow. talk about genious! too freakin’ cute.

just love it. perfect personalized addition.

15.July.2010

AWESOME!! Great job!! I love it!

15.July.2010

great tutorial!

Now I’m intrigued about the flooring underneath the rug–is it tile?

your guest bedroom looks lovely, very soothing colors!

15.July.2010

Carole – All the flooring in our dining area, sunroom and kitchen is vinyl. It’s not bad for vinyl…it’s a matte finish with some texture to it. Still, *someday* I’d like to replace it. However, it’s easy to clean and in good shape so we’ll stick with it for a while. It’s just builder boring.

15.July.2010

Sunny – Glad to see you like it! I was going to contact you but it looks like you found me.

15.July.2010

This is one of my favorite ‘tweeks’ you’ve done to our house lately. It looks even better in person!

15.July.2010

Handy Hubby – I theenk you meen ‘tweaks’. You never were a good speller. Love you nonetheless. :)

15.July.2010

yes, now that I look more closely, I should have guessed that it was a textured vinyl (we had something similar in our old kitchen). it serves as a great neutral background for your cool area rugs (nice texture contrast, too), and is so practical…

i hear what you’re saying about ‘builder boring’, but it’s waay better than some nasty builder-grade beige carpet in the ‘family zone’, been there, done that!

16.July.2010

That’s really lovely and, as you say, subtle. I bet one could even get a lighter tone-on-tone by bleaching (mild bleach solution, neutralize with vinegar) the stencil area too.

16.July.2010

Mandi – What a great idea! I never thought of going lighter.

It looks awesome and I love it! Thanks for to tutorial!

02.October.2010

very nice, looks very pretty , and the colors of your walls are lovely

03.October.2010

Angie – Why, thank you.

05.October.2010

Ok so I was so inspired by your tweaking that I decided to give it a try myself!! I managed to find a great stencil at JoAnn’s Fabric and used some stain I already had, one problem… my water based stained pattern turned into a stained blotch. Do you think a oil based stain would work better? I noticed you used a stain called ‘special’ whats the difference? Thank you and I enjoy you blog!

05.October.2010

Ashley – Hmmm. Did you first trace the stencil onto your rug before staining?…as opposed to using the stencil in a traditional way. I stenciled the rug by tracing all the outlines onto the rug first with a brown marker and then used a small (think 1″-2″) foam brush to fill in. My stain was the special walnut…but I think that was just referring to the color of the stain. It was water based. The stain was verrrrrrry runny, so I applied just a dab at a time using my foam brush to avoid any drips or blobs. This meant a lot of back-and-forth from the can to the rug but nothing difficult, just tedious. Also, I started in the middle of my rug in an inconspicuous place (my dining table would be going directly overtop) to ‘practice’ getting my technique right before moving on to areas that would be seen more. Hope that helps! It really was a great project that gave me fab results. Stick with it…don’t get discouraged.

19.November.2010

LOVE your stenciled rug! And thank you for mentioning the website where you got your rug, I’ve never seen natural rugs priced that well! Can I ask you, which rug do you have? I saw on the first picture you tagged it “natural seagrass rug”. But the website has a few different bordered seagrass rugs and I’m having a hard time deciding! Thanks for the help!

20.November.2010

Erica – The selection has changed over at naturalarearugs since I bought my seagrass rug a few years ago. I’d say mine is closest to the Half Panama Seagrass Rug with a black border. Mine is 8’x10′ to fit my dining area.

11.March.2011

Beautiful! It looks professional and compliments the room perfectly. How creative to think of the mirror frame as a stencil! And your choice to go subtle with the stain was right on. Thank you for sharing not just the before and after pictures, but the instructions and tips as well. This is exactly the sort of idea I was looking for to attempt my first stenciling project (your site was one of the first to show up in my web search for “stenciled rugs”. I never would have thought of using stain. I’m looking forward to browsing the rest of your site.
Ft. Worth, TX

What a great project! I have wanted a seagrass rug in my family room for a long time, but could never find anything that I loved with a pattern. This will be perfect and inexpensive!

Have you ever worked with burlap? I am attempting to stencil a pattern onto pieces of burlap to wrap around a pot for a plant. I was planning to use fabric paint, but maybe I should try stain for a more subtle look. Can you give any advice?

Thanks!

15.March.2011

Lori – Haven’t ever tried to stain burlap! I think it could be done though. Try applying the stain with a small foam brush like I used for the rug. The only concern I would have would be ‘bleeding’ of the stain??? Just use sparingly.

Dana, this is so unbelievably cool! Under 45 minutes? And less than $6? Even though I’m seriously stencil-impaired (I’m not kidding!) I’ll be hunting for a rug to try this on. One issue though – where to find a fabulous mirror without the mirror, lol!

I just had to feature this project this morning, even though it’s not green ;)

17.March.2011

Colleen – You could always invent your own ‘stencil.’ What about cutting one of those flexible cutting board sheets into the shape you’re wanting?

05.April.2012

Using a stain on a jute rug looks great – but my concern is does the smell ever go away?

05.April.2012

Gayle – The stain was actually applied to a seagrass rug. So little stain was used for the stenciled rug that it completely aired out within a few days – with windows open and proper ventilation. No lingering odors from the stain!

06.April.2012

Does the smell of the stain go away after it dries?

06.April.2012

Gayle – Yes! All that’s left is the glorious smell of the seagrass rug…which doesn’t ever really go away.

30.April.2013

I bought a Jute rug and I’ve only had it for one week and my cat managed to vomit on it :( I was thinking about staining my rug to hide the stain that it already has. Do you think the stain would work on Jute?
Also your rug looks great and I love the designs on your pillows. You make me want to be crafty!

30.April.2013

Jute would probably take stain pretty well but my guess is it would be more absorbent than the seagrass. Make sure to put something under the rug when/if you decide to stain it in case the stain runs.

[…] Stencil? A rug? I didn’t believe it either until I read this post by Dana @ House*Tweaking. […]