When I found a roll of deeply discounted {$15!!} designer trellis wallpaper at a Ballard Designs outlet this past summer, I didn’t know where I was going to use it. But I knew I’d think of something.
And I did. I got the idea to hang the wallpaper behind a trio of IKEA’s BILLY bookcases in our master bedroom. I had never hung wallpaper before – except for some of that chintzy border stuff in my bedroom back in the early 90’s…if that counts. I had this vision of me tackling this new project, documenting the successful process/results and sharing it all with you via a tutorial. I would add wallpapering to my repertoire of DIY projects. Well, it wasn’t that easy. Somewhere between reading online how-to’s and potty-training a toddler, I missed a few key points…about the wallpapering. {Luckily, the potty-training thing went off without a hitch.} Because I have vowed to be honest about my {lack of} home improvement skills, I’m still sharing my wallpapering adventure with you. If anything, maybe you’ll learn from my mistakes.
First, I placed my BILLY bookcases where I wanted them and patched 2 drywall holes where a mirror had previously hung.
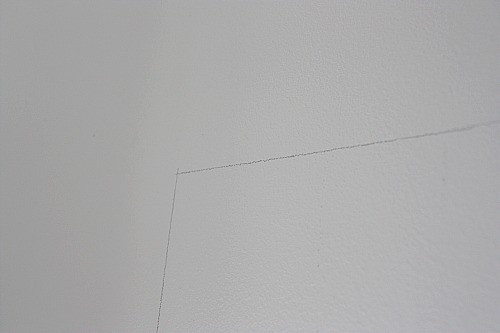
I decided to forgo the cardboard backing on the bookcases and wallpaper directly onto the wall for fear that the cardboard would shrivel and wrinkle once it got wet with adhesive. Using a tape measure, pencil and level, I marked off the portion of wall that I would cover.
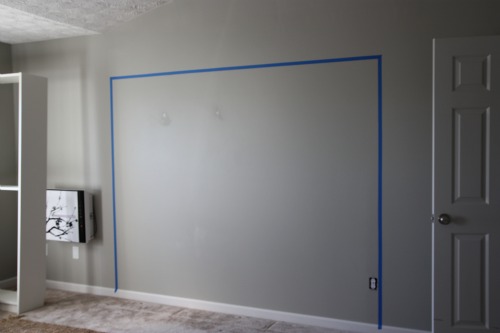
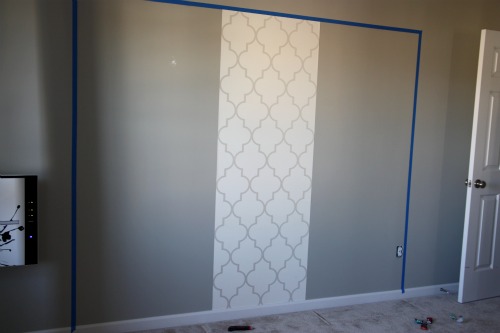
Following my pencil lines as a guide, I taped off the wall with painter’s tape. I noticed I’d be wallpapering around an electrical outlet, so I removed the cover.
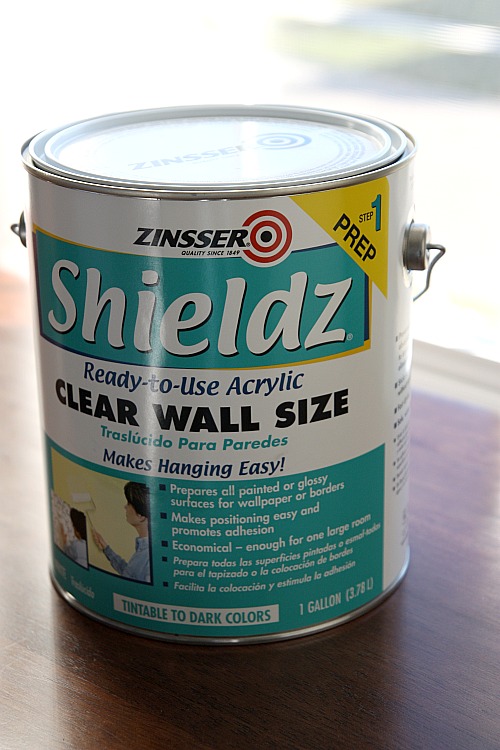
I wiped down then primed the entire taped-off area with a Zinsser formula to promote a smooth surface and adhesion. It rolls on just like paint but is clear. {This step is NOT glue or adhesive.}
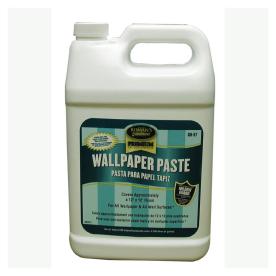
That’s when things started to get a little hairy. I measured my wall space and PRE-cut {with a sharp utility knife} strips of my wallpaper to fit. The problem? I did not match up the pattern when I cut successive strips…I just cut them to length. Rookie mistake! DO NOT PRE-CUT PATTERNED WALLPAPER WITHOUT MATCHING THE PATTERN UP STRIP-TO-STRIP! The bigger problem? I had barely enough wallpaper to cover the square footage I had taped off. In the infamous words of Tim Gunn, I had to ‘make it work.’ I applied wallpaper paste to the back of my wallpaper strip using a paint roller. Here’s the paste I used…
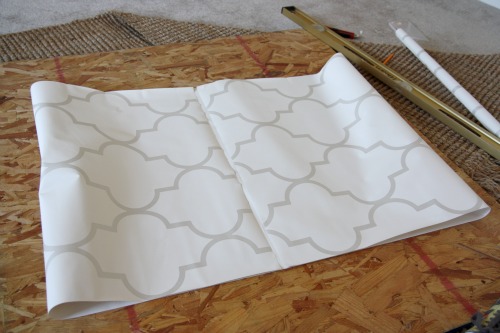
Remembering at least one thing from the tutorials I had read, I folded the wallpaper’s ends onto itself – a process called ‘booking’. Apparently, this helps the paper to absorb the adhesive and relax…whatever that means.
I was feeling pretty good about myself, conquering the ‘booking’ phase and all. Then I made mistake #2. I marked off where the left edge of my center strip should fall and hung it first. Oops. {It’s better to work from left to right when hanging wallpaper.}
Not too long after, I realized my third wallpapering fault – going it alone. It’s hard to hang wallpaper above your head. Picture me standing with my belly to the wall, arms up and spread apart trying to smooth out my wet wallpaper. The paper just kept falling down on my head. I really should have had a helper, preferably someone taller than 40″. But I didn’t, so I just kept plugging along hanging strip after strip and hoping I’d have enough wallpaper to finish the job.
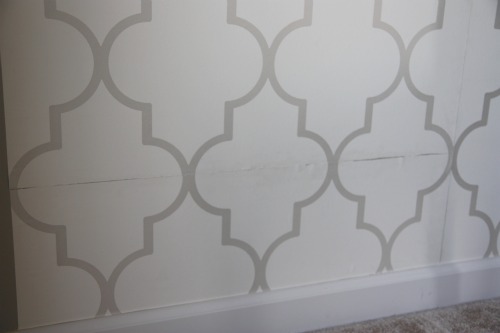
Somehow, I did manage to cover the entire area with not-so-much as a few inches of wallpaper to spare. {Divine intervention?} Because I had pre-cut my strips incorrectly, I ended up having to patch a small piece of wallpaper down in the lower left-hand corner. It’s awful. The seam has no overlap because I had no more wallpaper.
In an effort to just be done, I wiped down all the hung wallpaper with a damp rag to remove any excess adhesive then put the bookcases back in place.
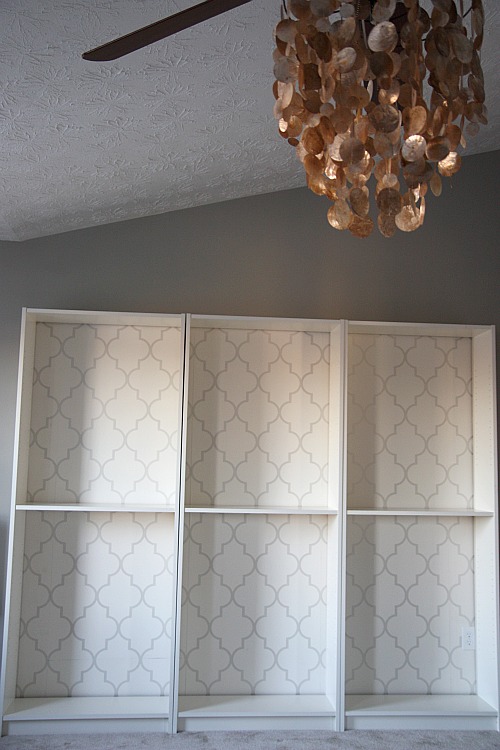
Once the adhesive dried several hours later and the seams flattened out a little, I decided the final product wasn’t too bad. It was livable. No wrinkles or bubbles. Thank goodness! At one point, I seriously thought I was going to have to rip it all down. Luckily, the awful patch job {bottom left} will be disguised when our master bedroom makeover is complete. And I must say I do love the pop of pattern behind the bookcases. {I still have shelves and accessories to add.}
But let’s review what I did wrong just so you don’t make the same mistakes should you decide to hang wallpaper.
WHAT NOT TO DO WHEN HANGING WALLPAPER
- Do not work alone. You especially need a helper if you’ll be wallpapering above your head.
- Do not forget to match up patterned wallpaper from strip-to-strip BEFORE you cut.
- Do not start in the center of a wall and work your way out. Work left to right or right to left.
Even though I made these dire mistakes, I think a few things saved my DIY project.
WHAT TO DO WHEN HANGING WALLPAPER
- Do apply a wallpaper primer to the wall before hanging any paper. I think this step helped my paper to dry smoothly in the end.
- Do use a level to mark vertical/horizontal lines on the wall guiding your wallpaper placement. This is the reason my pattern is centered and straight.
- Do use a new, sharp knife to get a clean wallpaper cut. I bought a $2 knife just for this project.
- Do ‘book’ each strip of wallpaper to maximize adhesion. My wallpaper is not coming down on its own.
- Do use a smoothing tool. I used a vinyl smoothing tool to press out wrinkles and bubbles.
- Do remove any excess adhesive immediately after hanging the wallpaper. I wiped mine down with a wet rag to avoid discoloration and dirt attraction.
I think I was being a little unrealistic when I decided to tackle my first wallpapering project alone. I could see this project being so much easier with an extra pair of hands…and another brain to work out the logistics of measuring, cutting and matching up the pattern. During the entire process, I kept telling myself I would never wallpaper again. I was that frustrated. Now that it’s done, I think I would wallpaper again. I just wouldn’t wallpaper ALONE again.
FYI – In case you’re in need of a professional wallpapering tutorial, you can find one here.
Images: 1) Ballard Designs 6) Lowe’s the rest are all via Dana Miller for House*Tweaking






budget decor, DIY