...because home doesn't happen overnight.

I don’t get a chance to write about each and every single undertaking at the Underdog as it happens.  I have lots of excuses reasons. Mainly, my job at this point is taking care of our kiddos while Handy Hubby works at the house.  And HH works on that house nearly every single day…after work in the evenings on weekdays and all day on weekends.  We go to visit him while he’s working but even then I’m trying to make sure the boys don’t lose any limbs, fall off any ladders or mess up whatever HH is working on.  So many of the times I visit the Underdog I don’t get a chance to photograph projects and document progress.

I did sneak in a little photog session this morning while we were waiting for Layne’s school bus though. Just for you.

FYI – We’re living in an apartment while we renovate the Underdog, but Layne gets on and off the school bus at the house because I want him to get use to his bus driver and the neighborhood kids. That means I drive to the house every morning to put him on the bus and then drive to the house every afternoon to get him off the bus.  It’s tedious and I’m already looking forward to not having to drive to the bus stop some day.

But back to renovation progress…

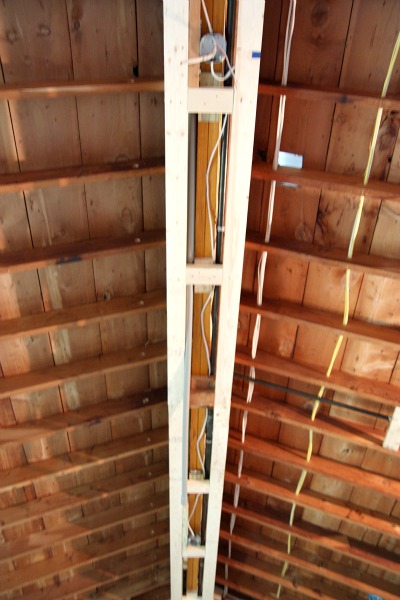
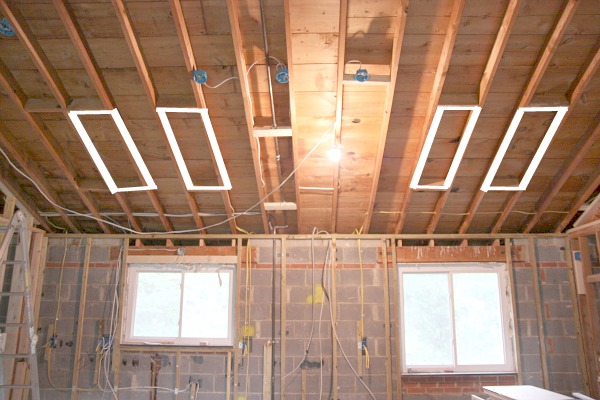
The ridge beam is framed in now.

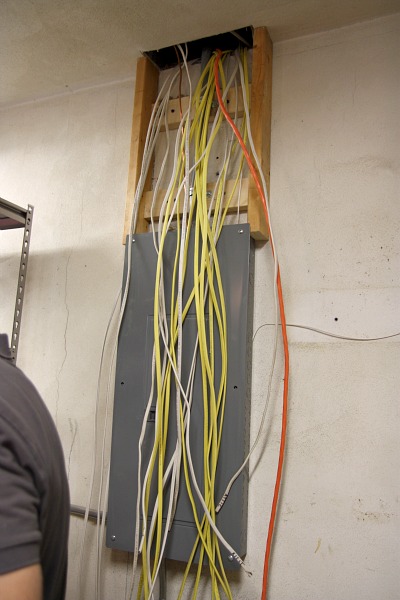
I like how it gives the beam a chunkier, more substantial look.  We had to frame in around the beam to provide space for electrical wiring and boxes.  We plan on adding track lighting and two ceiling fans to the framed ridge beam.  I apologize for the quality of the pics.  It was earrrrly in the morning. Natural light was minimal and it appears my hand wasn’t the  steadiest.  We have a single sole lightbulb hanging in the great room.  While most of the electrical upgrades are finished at this point…

We don’t have any fixtures installed.  Who am I kidding?  We haven’t even purchased any light fixtures!  We do have a good idea of what we want though, so I guess that’s a start.  Which reminds me…I should probably get on with ordering those West Elm pendants.

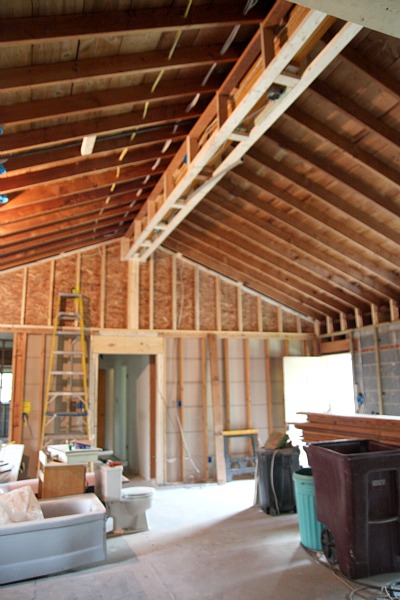
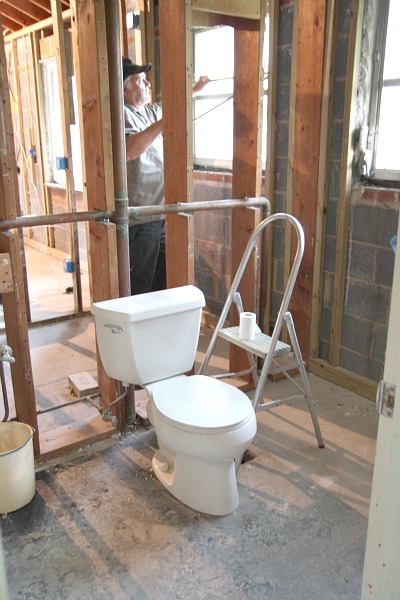
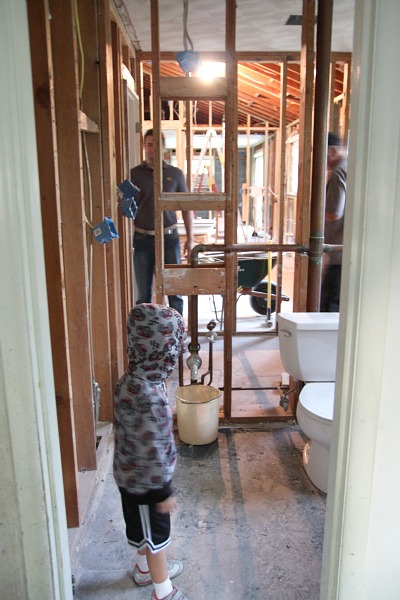
You may have noticed in the second picture of this post that there are a few bathroom fixtures hanging out in the great room. As I revealed last week, HH tore out the kid/guest bathroom due to a major mold issue.

{gutted kid/guest bath}

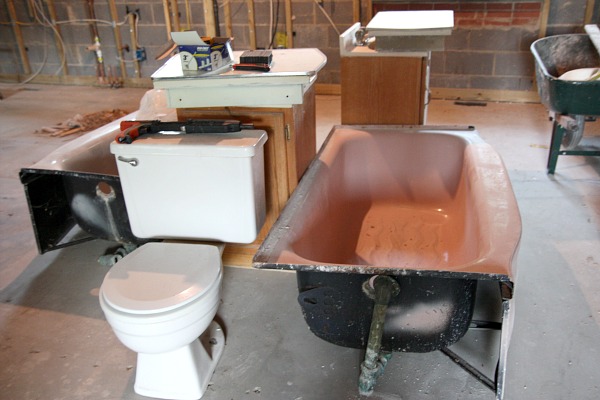
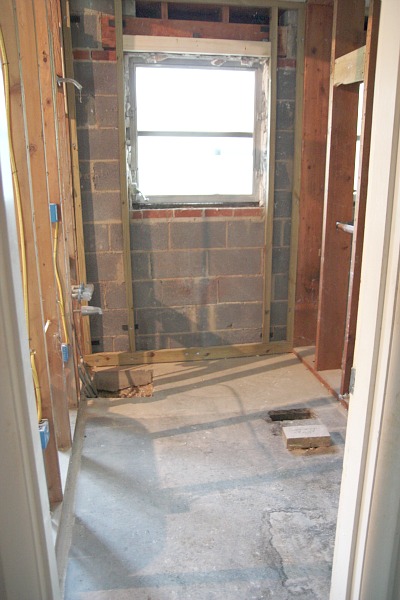
Well, as you might have guessed, HH went ahead and tore out the master bath this past weekend. He didn’t find any mold but he did say that the shower/tub tile just crumbled off the walls.

{Don’t mind the man measuring the window in the kid bath.  We’re getting quotes on window and door replacement.  While most of the windows in the house have been updated, the bathroom windows are original.}

From what we can tell from the first {furnished} tour of the Underdog and from seeing the state of the master bath firsthand, we’re not sure the master bathroom was even used in the last several years.  It’s highly probable that any running shower water would have seeped behind the badly damaged wall tile and caused a whole ‘nother mold problem.  So, we did what any renovating crazy would have done…we just added more work and time to our remodel!  As I’ve said before, it’s always been our plan to redo both bathrooms but we had thought we would live with them for a while.  Turns out that’s not going to be the case.  Such is the story of fixing up a fixer upper.

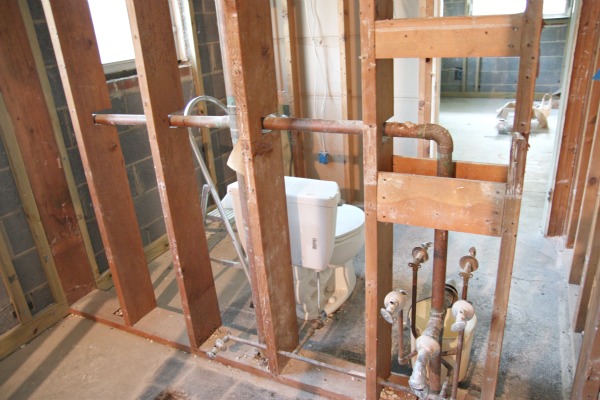
HH left the toilet of the master bath in place.  {We plan on keeping the toilets.} You know, for when he’s working and has ‘to go.’  With all the bathroom walls knocked out, there’s not exactly a lot of privacy.  At least he can admire his work in the great room while he pees now!

This also gives a better feel for the house.  The two full bathrooms in the house back up to each other…back of toilet to back of toilet.  They’re exactly the same just mirrored images of each other.

There’s that lone lightbulb I mentioned.  And those 4 rectangles are new framing for future skylights.  I highlighted them in white to make them easier to see.  In real life, HH has them framed out.  We centered them with the two kitchen windows. The new kitchen hood will be centered on the wall between the windows.  We’d like to replace the right window with french doors.  The jury is still out on that one.  We know we’d like it…a lot…but due to the size it would be a custom build and that’s expensive.  Hmmm.

If you look to the vaulted ceiling at the three blue light boxes, you’ll see that they are not centered between the skylights.  We decided the lights would look more balanced centered above the future island versus between the skylights.  If you think about it, the lights will hang lower and have visual impact at a different level than the skylights.  Plus, I didn’t want to block the focal point of the kitchen {the hood} by centering the lights right in front of it.  I hope the end result looks in real life like it does in my head!

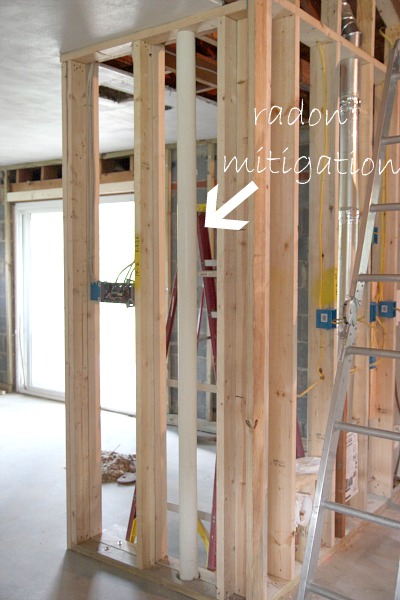
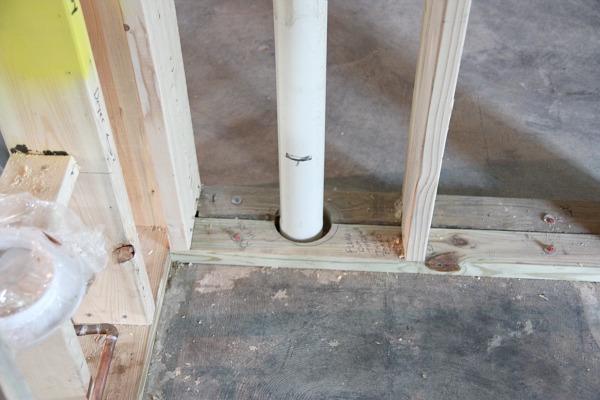
Making your way over to the mudroom/dining room/laundry closet, you’ll find our radon mitigation system.  {The house failed radon testing during inspection.} We opted to hire out for the radon mitigation.  It cost us $800.

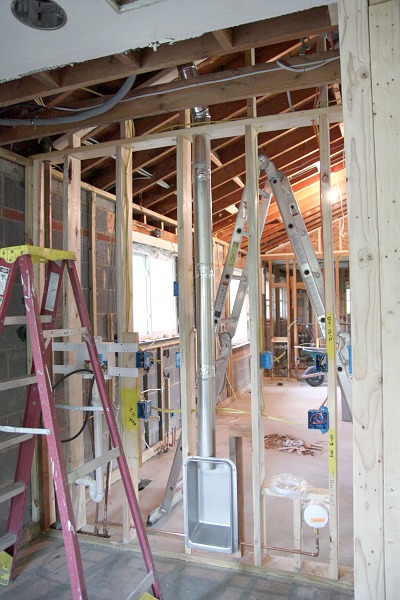
With little to no spare real estate for housing the mitigation system, HH had the grand idea of installing it right into the new framework of what will be the laundry nook.  This way it doesn’t take up precious storage space.  Fantastic!

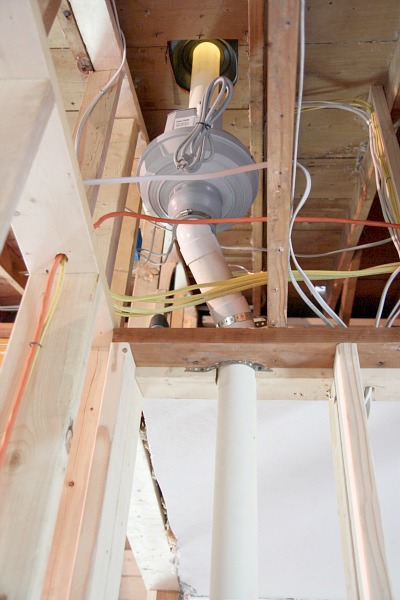
HH had the radon mitigation professional install the mitigation fan in the attic space above the former closet to preserve even more room in the future laundry nook.  HH plans to make some sort of access panel to access the mitigation system’s pressure gauge so we can check to see that it’s working properly.

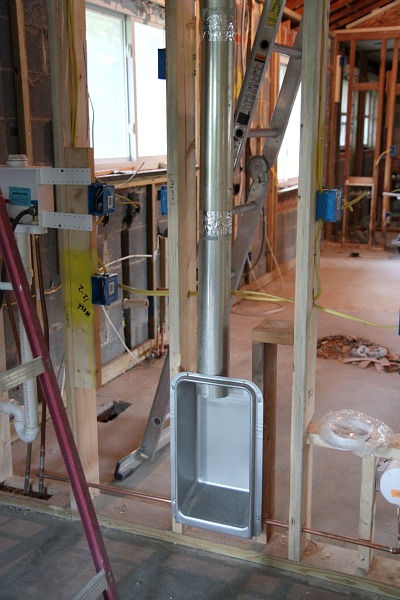
The Underdog came to us with a dryer vent that vented directly into the attic.  That wasn’t up to par with code requirements. HH installed a new dryer vent that vents to the outside through the roof. To save even more valuable space in the laundry area, he discovered this recessed dryer venting box.  Basically, it’s a recessed box installed into the wall that allows you to push your dryer right up to the wall.  Otherwise, you have to leave several inches between the back of the dryer and wall to make way for the bend in the flex hose.

This latest find should give us more room to transform our ugly laundry closet into a functional and stylish laundry nook.  I’m thinking a wood countertop above the washer/dryer and open shelving could work well.

So, that’s what has been going on behind the scenes over at the Underdog.  There’s so much that had to be done {electrical, plumbing, gas lines, radon mitigation, re-framing, etc.} while the walls are opened up.  We’re looking forward to getting insulation and drywall up soon.  It should really start looking like a house then.  Instead of a concrete jail cell.

images:  all Dana Miller for House*Tweaking

35 Comments

13.September.2011

Have you seen the pictures of Kevin Sharkey (from Martha Stewart Living)’s laundry closet? Majorly OCD and very inspirational. He has hooks and space for everything and it looks so neat and tidy, something I could only dream of I’m afraid.
http://www.marthastewart.com/photogallery/kevin-laundry-room-organizers

I’ve never heard of the laundry exhaust like that before- genius! I hate how our washer and dryer need to sit out from the wall 5-6″ taking up space in our tiny little laundry nook. http://oneprojectatatime.blogspot.com/2011/09/patching-drywall.html

Do you need to do anything to seal where the dryer meets the exhaust? Duct tape around it?

13.September.2011

That recessed dryer vent box seems like such a simple and awesome idea I almost want to knock a whole in our laundry room so I can install one too.

13.September.2011

Love the update! Look forward to seeing more as time goes on. :-)

13.September.2011

I too am smitten with the laundry exhaust! my W/D are in my kitchen, this would push the dryer even more snugly into its home. AWESOME! who knew that this could make me so happy :)

13.September.2011

It’s coming along great! Makes me want to do some remodeling at my house :)

13.September.2011

Erin I found a web site with the info for the dryer boxes.
http://www.dryerbox.com/

13.September.2011

Things are moving right along! That dryer vent box is genius!

Getting an apartment is definitely the way to go with a renovation of this magnitude. When I gutted my first home, I was living in it and it was very difficult. At least you can have a clean place to retreat to and unwind.

Adding more projects into the remodel…sounds just like us. It extended our remodel by over a month but we’re happy we did it. I too would have tore out bathrooms that were that bad. Much easier and cleaner to do it now rather than later when you’re living in it!

Adding all of those skylights will look amazing! It will bring in so much light to the kitchen. Maybe I missed it but do you have a floor plan in a post somewhere I could reference when you talk about the layout? It’s hard to tell what is going where when all you’re looking at is some open walls LOL.

13.September.2011

Alison is right, it’s was made by Dryerbox. Instead of ordering online, I used their site to find a retailer in my area. If you need a box for a 2×4 wall, they are often carried at Lowes. If you need a box for a 2×6 wall, most likely you’ll need to go to a builder supply house. They aren’t exactly cheap, this one was about $30. But to me, it was worth it for the space savings and knowing the dryer exhaust has good flow out of the house.

Erin, you can use duct tape, foil tape, or a hose clamp. I’ll probably use both a hose clamp and some tape on ours.

13.September.2011

I worked in construction for over 9 years. You win for having the cleanest job site ever!! The house looks wonderful!

13.September.2011

Wow! Who knew about the recessed dryer vent box thingy! Totally needed to know about that as we will be remodeling upstairs soon to make a new bedroom by combining space from other rooms, including forgoing a laundry room for a laundry nook/closet. I’m watching this part of the project very closely! Thanks for the update. Sometimes the mundane things are more important than the “pretty” things..

13.September.2011
13.September.2011

Martha – Now that’s an organized laundry room! So great! I’d actually like to make the nook look less laundry-ish and more dry bar-ish since the rest of the adjoining room will function as a dining room/mudroom. It’d be a great spot for beverages, desserts, etc. at a bigger gathering. So, I definitely want to be able to hide the function of the laundry nook if needed.

Everything is coming along so well! Whenever I see the new vaulted ceiling, I’m always amazed at how it makes the room so airy. It gives me hope for whenever we start our kitchen renovation, as my husband wants a ceiling like yours.

I don’t envy you in having to design/build 2 bathrooms, btw.. wow.. stress city!

13.September.2011

Wow, your husband should start his own business. I would have had to hire out for everything.

13.September.2011

Absolutely amazing, Dana! You are building a treasure…and what memories for your boys!

13.September.2011

Do you have a mood board for the master bath yet? After seeing the one for the kids/guest bath, I can hardly wait to see the one for the master bath!

13.September.2011

Awesome progress. I can’t wait to see more!

14.September.2011

Seriously Sassy Mama – I think HH would make a great contractor/professional handyman. We joke all the time about me designing spaces and him actually doing the work to bring them to life. They’d definitely be our dream jobs!

14.September.2011

PAppel – No master bath mood board yet, but I’m going to have to get on that soon! I’d like the same feel as the kid/guest bath {light and airy with some contrast} for cohesiveness but not exactly the same fixtures and materials. Should be fun!

14.September.2011

Man yall are getting a lot done! It’s looking fantastic!! Sooooo excited to see more and hear more about the renovation and everything that goes with it! You have beautiful style and amazing motivation! Keep it up, yall are inspiring!

14.September.2011

Just thinking about the dry bar idea- what if you built fronts (faux cabinet fronts like they make for dishwashers) in front of the w/d. It would mean opening the doors to access front loading appliances, but would look pretty slick.

14.September.2011

Dana.. I am curious… Do you have front loading machines?? I am assuming you do since you talk of a counter top over the top of them. have you thought of stacking them??? We have a TINY laundry room and the washer and dryer took up the entire space, I had mine on pedistals too… so they were giant! I could not even reach the cabinets that were above my machines, it was bad. We decided to stack them ( you have to buy a “stacking” kit to do this) We had them stacked at our old house and decided we should try it once again here to see what kind of space it gives us…. It gave us ALOT! I had room for 2 base cabinets with a small counter on the top and a large upper cabinet! I love my laundry room so much now that there is someplace to STORE stuff now.

14.September.2011

Abby – We’ve definitely thought of adding doors. I think we’re going to have to see what they look/feel like once they’re in the nook before we decide 100%. I like the idea of fabric curtains in front too.

14.September.2011

Nicole – We have a front loading washer and regular front loading dryer…they don’t match and aren’t stackable. We had cabinets above them in our previous home and I could reach them no problem, so I think we’ll be okay. If we could stack them, I would!

14.September.2011

Dana, will the laundry nook be soundproofed? Although our new high-efficiency Bosch laundry set are pretty quiet while they are running, the washer can whine like a jet engine when it is spinning. If it’s in your main living/dining area, you might want to consider noise abatement, if you haven’t already!

14.September.2011

Bunny – We have a front loading Bosch {a few years old} and I love it. While it doesn’t whine when spinning, it does make some noise. But it only spins for a few minutes each load and it really doesn’t bother us. For some reason I totally enjoy humming appliances…washers, dryers, refrigerators, dishwashers, etc. I think about how lucky I am not to be doing by hand what the machine is doing for me. Now, if there were some loud clanging involved or high pitched whining then I might be more bothered. So, to make my long answer short, no, we will not be soundproofing the laundry nook. I won’t be running the washer during any dining room dinner parties either though!

14.September.2011

Any thoughts on flooring? Wood? Tile? Cork?

15.September.2011

Amy – In the bathrooms, we’re probably sticking to some sort of natural stone tile. We’re also thinking natural stone may be the way to go in our mudroom/dining room/laundry nook since that room will get direct traffic {lots of dirty feet/shoes} from the garage and backyard. We’re still undecided on the rest of the home {kitchen, living room, bedrooms, hall, etc} but we’d like it all to be the same for those areas for a cohesive look. Real hardwood isn’t recommended in our case because there’s no subfloor, just a concrete slab, that can cause warping and damage to hardwoods over time. We’re considering concrete, engineered hardwood, cork, and vinyl wood lookalikes. I’ll let you know what we decide! Hopefully soon!

15.September.2011

There are so many great new concrete flooring options. That would be a super chic way to go!! ……..and then lots of rugs, right!

16.September.2011

Another idea on space saving is do you actually ‘need’ a dryer? I imagine it would free up a lot of space to not have one. I *could* fit a dryer in our laundry but we don’t have one and I’m thankful in terms of space (and the environment/power bills) as it means more cupboard space underneath, space for laundry sorters etc. Just a thought.

Looking forward to seeing what you come up with. :)

16.September.2011

That recessed dryer vent box is BRILLIANT. I wish I had known that when we re-did our laundry room! I bet we could still install, hmmm…

21.July.2014

[…] *https://www.housetweaking.com/2011/09/13/behind-the-walls-i-mean-scenes/ […]