I’m finally getting little snippets of time to tackle a few smaller projects around the house. Everything is taking me about ten times longer than it should with two kids and a baby around.
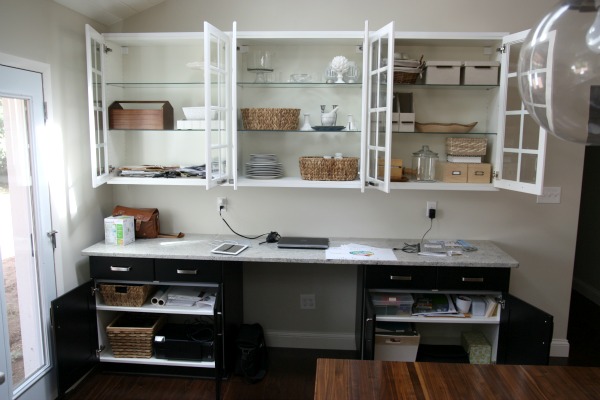
This is how the kitchen desk looked after we moved in. It remained that way for nearly four months. There was no thought in the placement of anything; I just threw everything in the cabinets and on the countertop to get it out of boxes. The stacks of papers in the far left upper cabinet are mine and HH’s mail. It’s all mail that we’ve gone through and need to either file away or act on. What a mess!
My goal in organizing the desk area was just that – to organize it. I wasn’t looking to style anything. That will come. We just need it to work first. Basically, I took an entire day to remove everything from the cabinets and drawers, clean the drawers and shelves, then put it all back in a better working order.
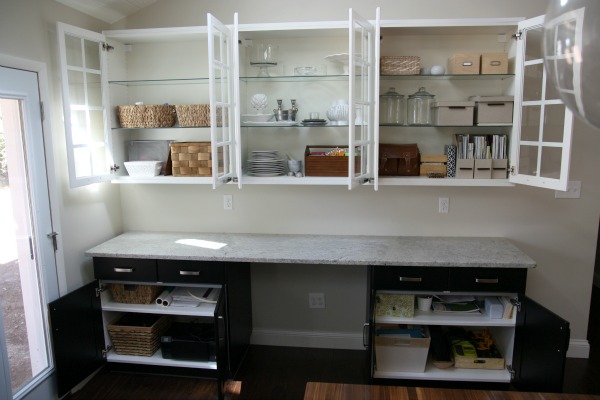
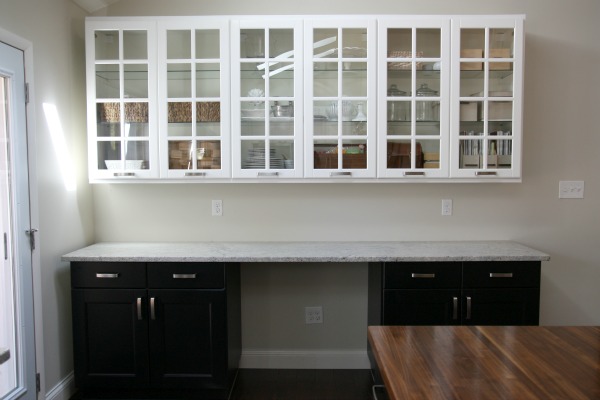
Here’s the desk area now…
Like I said, no styling. There are still plenty of empty shelves, baskets, bins and jars for growing. I tried to place things in a way that caters to our daily living.
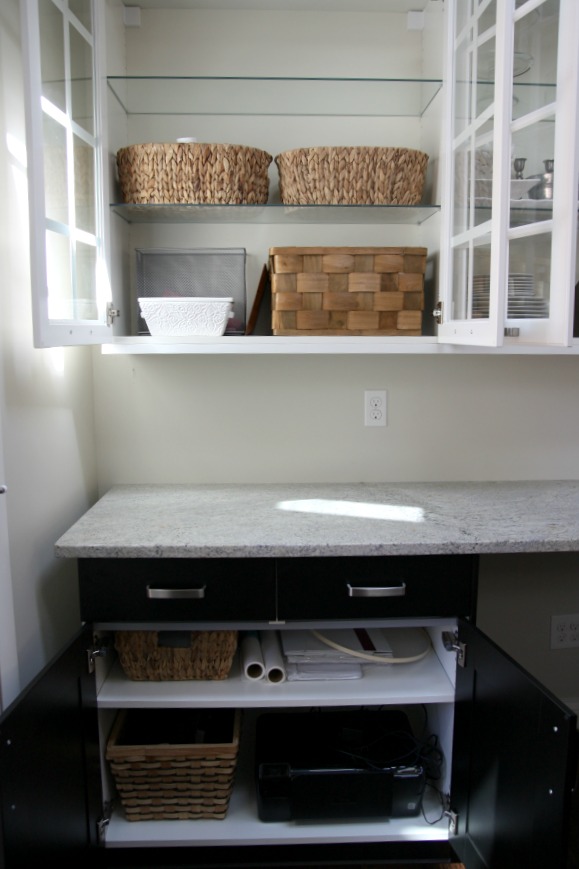
The left side of the desk area holds items that we use in the kitchen and at the desk. The baskets in the upper cabinet hold our vitamins, batteries, flashlights and a bunch of inspiration images I’ve gathered over the years. And there’s an empty shelf! Yay! That’s gotta be good feng shui or something.
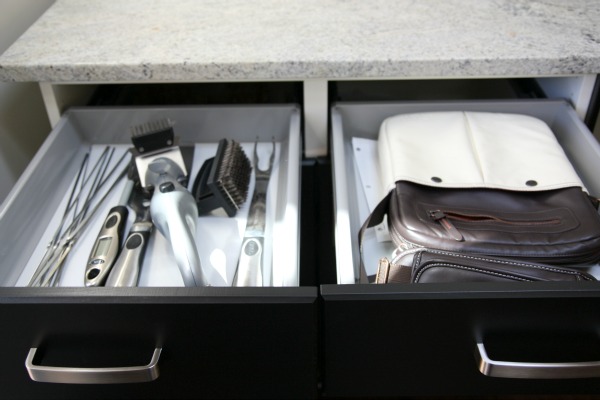
One drawer holds grilling utensils for when our grill lives on the future patio right outside the set of french doors in the kitchen. The other drawer just has my laptop bag in it for now. Eventually, I’ll hang it somewhere and have an empty drawer.
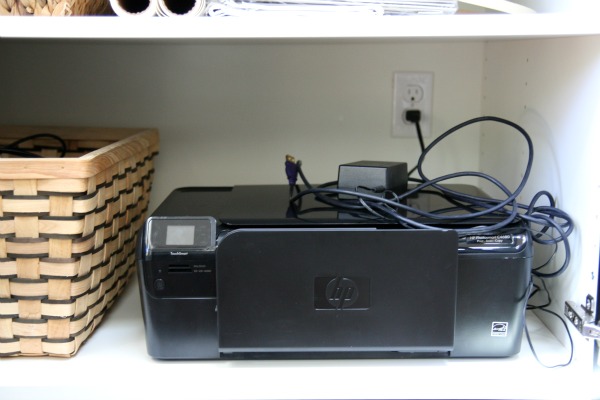
One of my favorite things about the desk area are the outlets that we wired into the backs of the lower cabinets. On the left side of the desk, we plugged in the printer/scanner. No ugly wires to wrangle! The accompanying baskets hold printer paper and computer/printer miscellaneous.
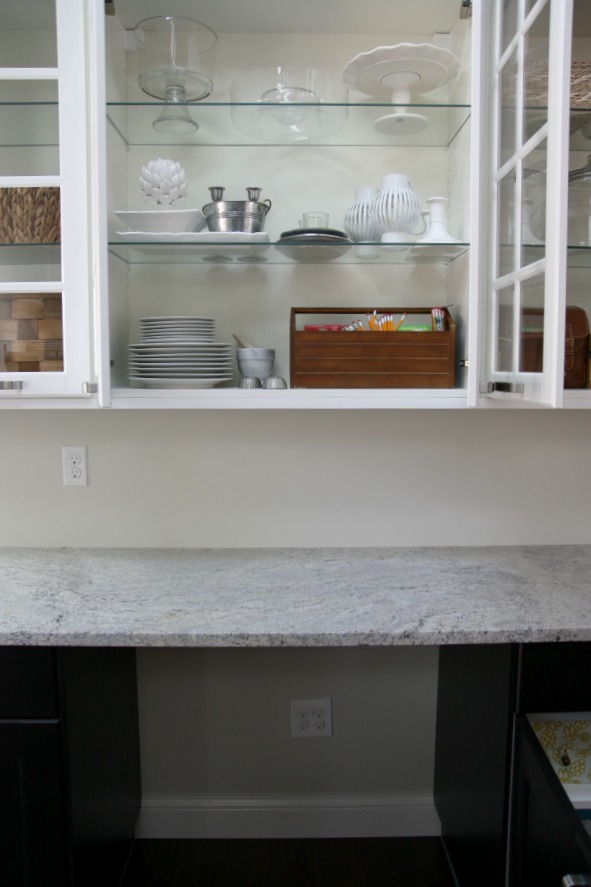
I designated the center desk area for less used kitchen serving ware. I was nervous about storing the heavy china plates on the glass shelves so they stayed on the wood bottom of the cabinet. I mixed in a warm wood utensil caddy to contrast against all the white and glass. The caddy is actually our ‘rainy day caddy.’ It holds pencils, a pencil sharpener, card games for the kids, *washable* markers, etc. I pull it down when the kids are bored and we end up drawing or playing for an hour.
Still no desk stool. I’ve been searching. I think I’m being too picky. I want something comfortable because I’ll use the desk for blogging, designing mood boards, making grocery lists and looking up recipes online. But, so far, all the stools I’ve found that are comfy and in my price range don’t look that great. It’s gotta look good too!
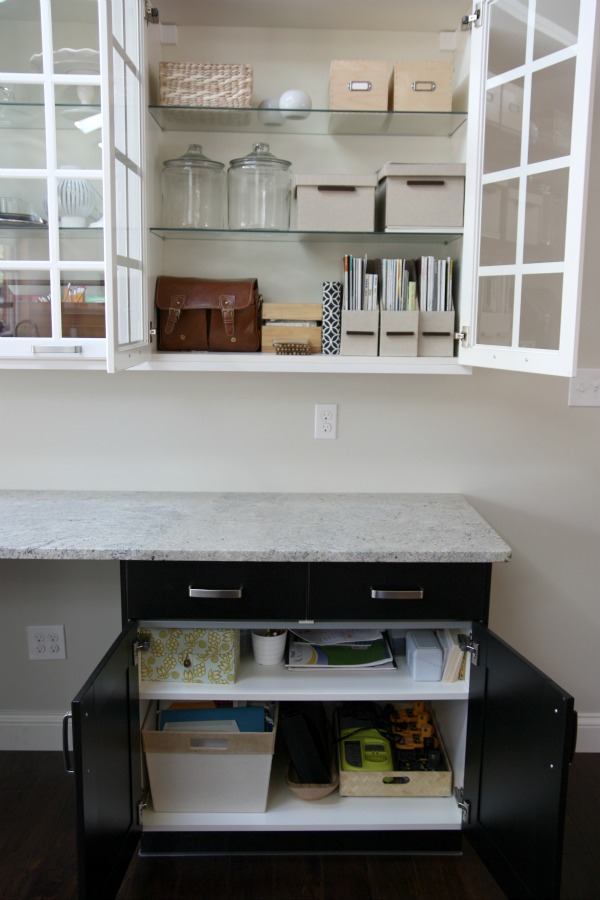
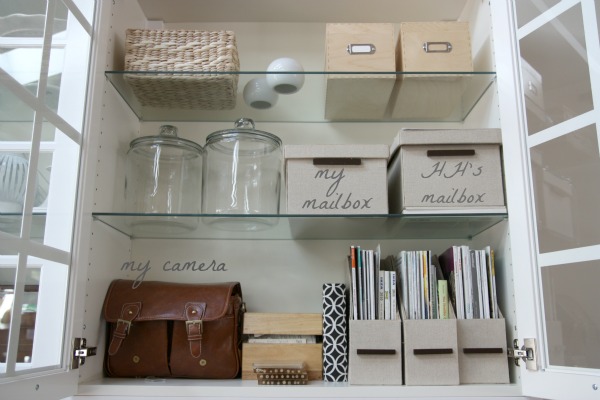
The right side of the desk houses more everyday items such as: my camera, mail, favorite magazine issues, drawing pads, file folders, coupons, note cards, etc. They’re not necessarily kitchen things.
I repurposed a few fabric covered bins as mailboxes for me and HH. My camera bag lives here where it’s easy to reach. My old recipe box {I can’t seem to let it go} and a stack of coasters camp out too. The wooden boxes on the top shelf hold kid puzzle pieces. I like storing toys and kid stuff in decor boxes, bins and baskets instead of the gaudy packaging they come in. They’re easier to live with that way.
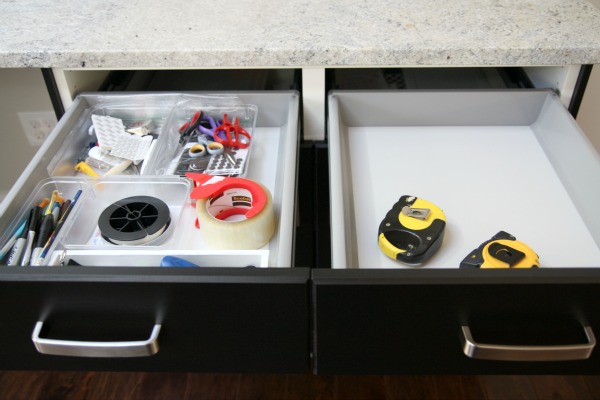
Junk drawer no more! I used some plastic drawer organizers I already had to divvy up the junk drawer into more manageable compartments. There are pens, a stapler, scissors, 3M adhesive hooks, packing tape {I hope I never use it again!}, fishing line {for invisibly hanging things}, furniture pads and other common junk drawer oddities. I saved the right drawer for HH’s smaller tools that are hanging out in the house resting from a recent project and waiting to be taken back out to the garage. There’s always something going on around here so tools deserve a kitchen drawer.
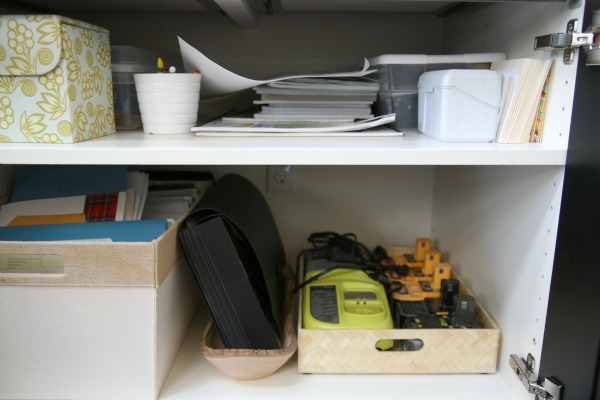
The lower cabinet has drawing pads and crayons for the kids {i.e. things I don’t mind them getting out themselves}, a 3-hole punch, note cards, envelopes, our filing system, a coupon folder and a tray of HH’s portable tool batteries and chargers. Again, LOVE the outlet in the cabinet!
With everything in its place, I can breathe a little easier. Now if I could only muster up the energy to tackle the rest of the kitchen. Ha!
Some things I still want to do with the desk area are:
*find a stool already!
*DIY one or more cork/fabric boards to pin notes, inspirational images, fabrics, etc. onto
*set up a charging station for our phones, iPad and laptop
*use a rug to make it feel homier…hopefully not homelier
*style things a bit once it’s all functional
I’ll probably shuffle items around for a while before they find their final resting spot. That’s okay. Tweaking is fun. What corners of your home have you been tweaking lately?
Check here to see who won this week’s Scribbles & Stripes giveaway! If you weren’t the winner, there’s no need to pout. You can still score a 10% discount until October 24th by entering the code ‘HOUSETWEAKING’ at checkout. Need a custom case for your new iPhone? Scribbles & Stripes is now taking pre-orders for iPhone 5 cases!
images: Dana Miller for House*Tweaking



budget decor, DIY, kid-friendly, organization