So…we had a blizzard yesterday. And thunder. And lightning. Weird winter storm. Anyhow, I promised some updates. Here they are.
Current pics of the painted french doors in the kitchen…
We love the drama of the high gloss finish.
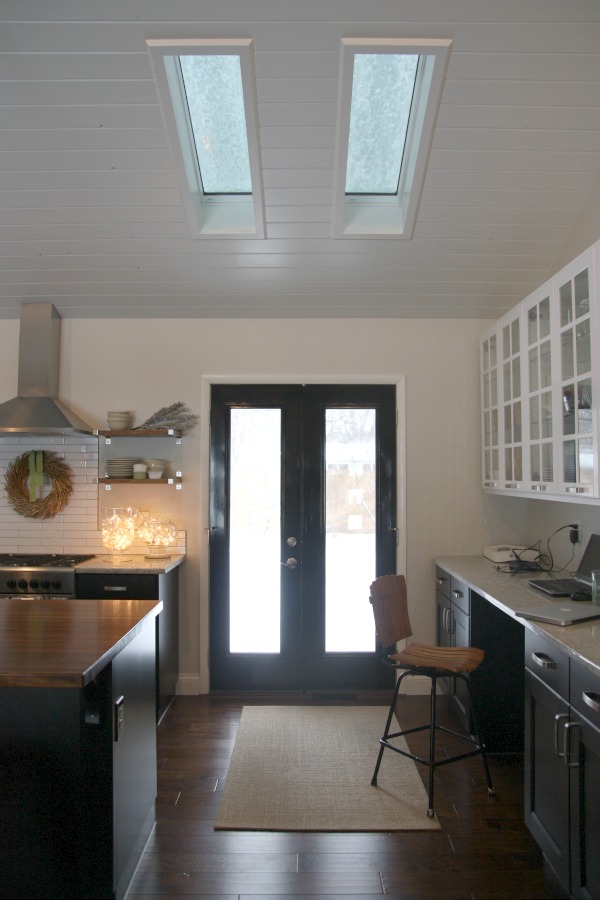
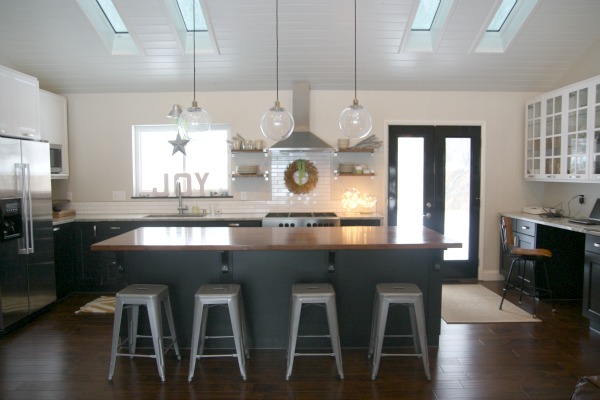
Do you see the snow covering the skylights? It’s much darker in the great room without all that natural light. I can’t imagine not having those skylights. So happy we decided to go for them.
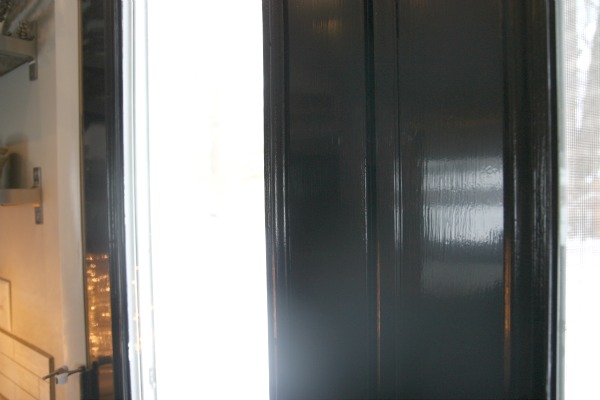
The gloss finish still looks wet to me. It should be easy to wipe down. I wanted to show you a close-up so you can see how the gel paint’s claim of ‘no brush strokes’ held up. The finish is smooth enough but not totally perfect.
Onto the mudroom…
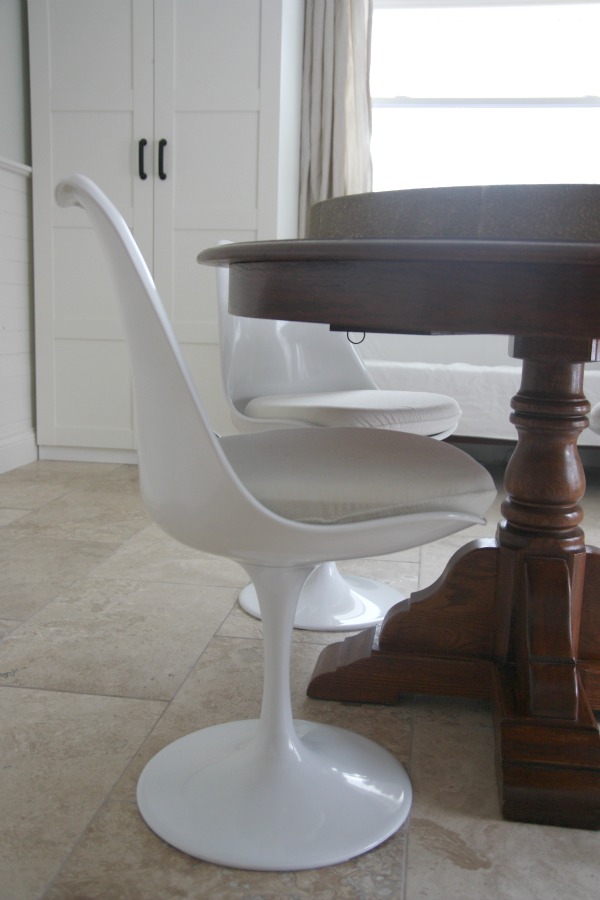
The tulip chairs are here. They are a nice modern contrast to the traditional pedestal table that was a family hand-me-down. They are super comfy too. I’m thinking of recovering the seat cushions with something textural {faux fur?} but HH suggested dying the removable covers to have a second set on hand. What a great idea! I’ve never dyed fabric before. Any suggestions or tips?

We added woven blinds and curtains to the window. The curtains were a great price – $20! – but the tabs at the top looked cheap to me. I cut them off and sewed a rod pocket instead. That did shorten the length of the panels a bit but they fall behind the sofa so it doesn’t matter.
You may have noticed that I changed my mind and slipcovered the small sofa in white cotton instead of navy linen like I had originally planned. I actually got halfway through the navy linen slipcover when I realized it wasn’t going to jive. It’s not a total loss though. I’ll be using the navy linen for pillow covers throughout the house. I DIY’d the slipcover. It’s not perfect but it’s done. And it cost me less than $50. I have pics and details for a how-I-did-it post. I wouldn’t call it a tutorial because, like I said, it’s not without flaws.
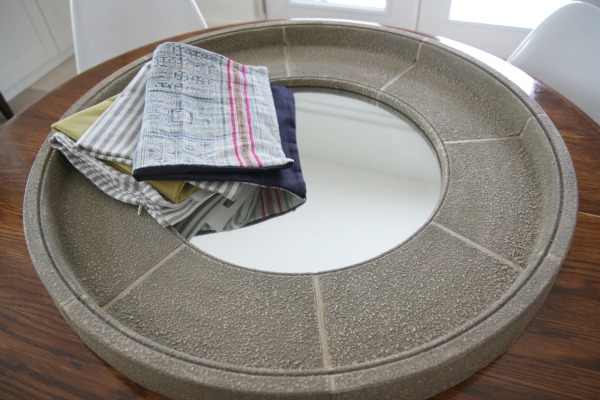
The mirror and pillow covers on the table are accessories in waiting. As far as the dining part of the mudroom goes, we have a surprise planned for the wall opposite the french doors. We’re really excited about it especially because we didn’t think we’d have time to tackle it before the photo shoot in January but we have been working our tails off to stay on schedule. Hint: The mudroom might be one of the rooms featured in the photo shoot.
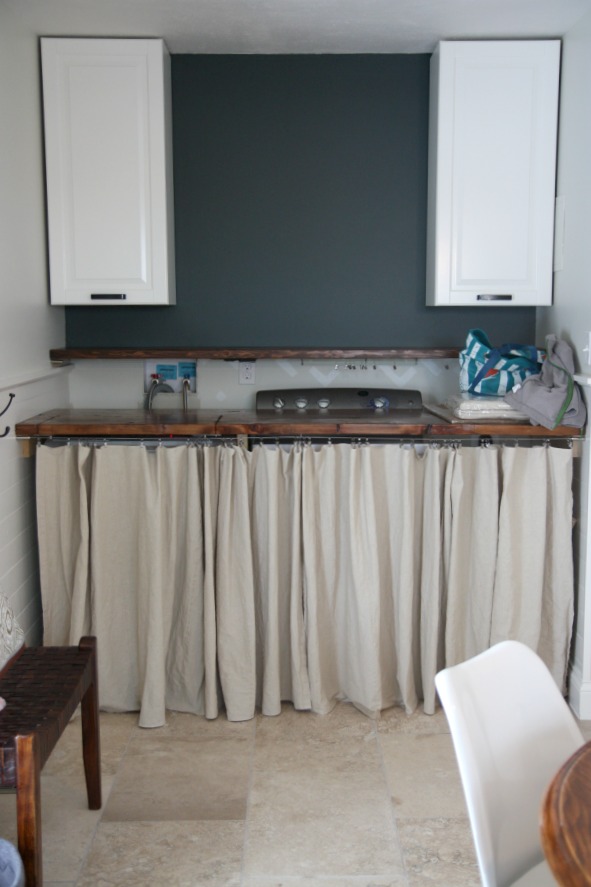
The laundry nook in the mudroom is taking shape.
I painted over the stencil. Womp-womp. Sorry stencil lovers. I loved the stencil but it didn’t feel right. I guess the lesson here is to not try incorporating something just because it’s given to you. The good news is it was an easy fix. I used paint leftover from Mabrey’s room. It’s Benjamin Moore’s dark pewter. HH saw my repainting as a home improvement mistake. I saw it as a learning experience. We see things differently sometimes. If I end up with a result I love and learn something along the way {i.e., stenciled walls aren’t my thing in this house} then I see it as a success – even if it involves extra work. I’m one step closer to the look I’m going for.
During renovation, HH found some old boards in the attic. He salvaged them and used them to construct a reclaimed wood countertop above the washer and dryer. He used wood biscuits to connect the boards to each other for a seamless look then sanded, conditioned, stained them with Minwax’s special walnut and finished them in a semi-gloss poly. Because our dryer controls are at the back of the unit, HH designed a tiered countertop. That way we still have access to the water shut-off and dryer knobs. I have plans for hiding the shut-off and knobs. To be continued…
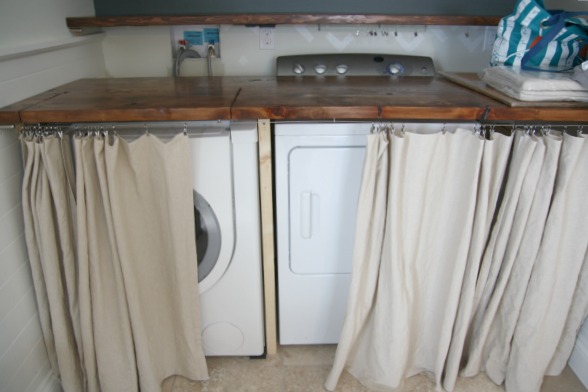
I sewed curtains from the same type of panels used on the mudroom window to disguise the washer and dryer. We hung them from curtain wire and clips. There is an eyelet ceiling hook underneath the center of the countertop to support the wire. The curtain isn’t as full as I’d like so I’ll probably add more panels. We still need to paint the cleats and vertical support white to blend in better.
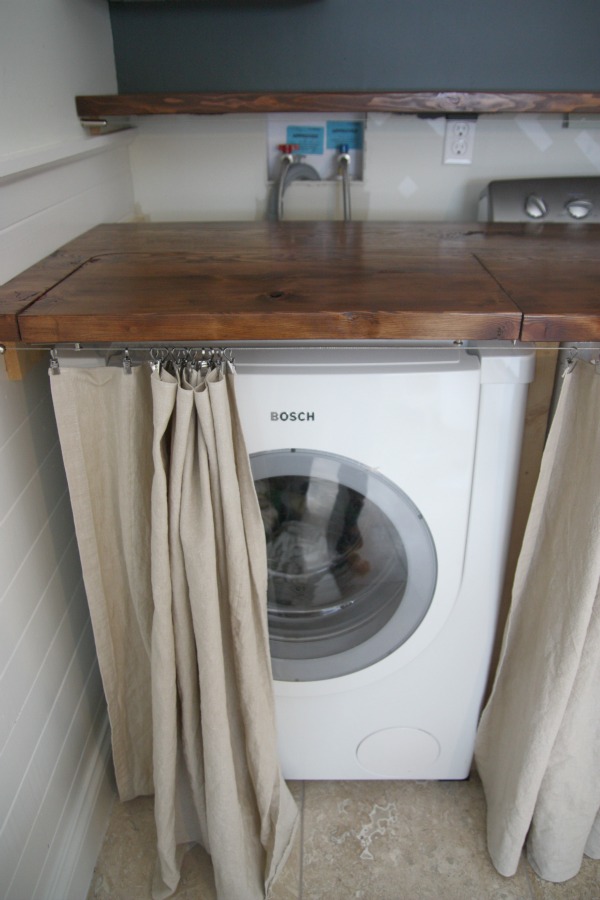
Wondering how I access the washer control panel?
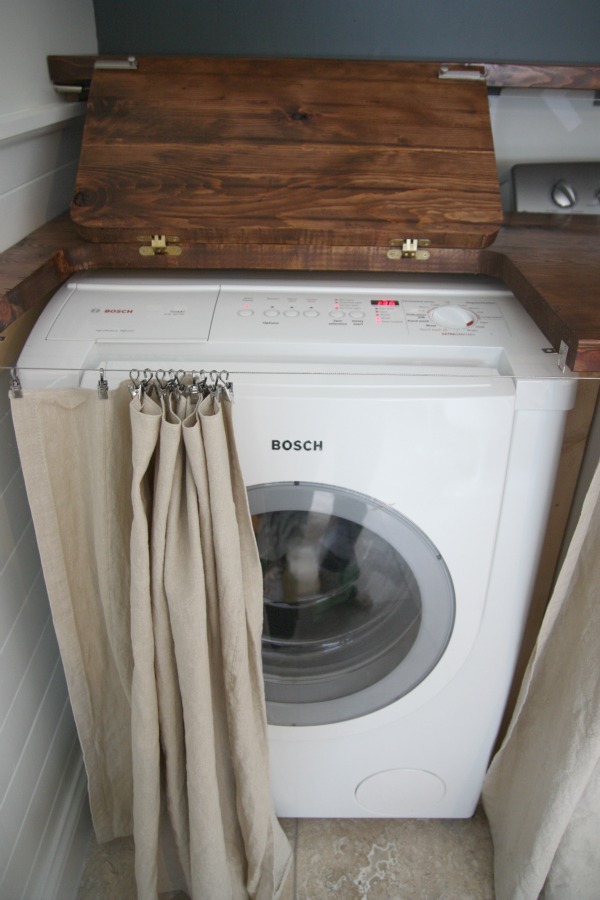
Ta-dah! HH cut an access door and added hinges and latching hardware to give me full access to the washer controls and soap dispenser.
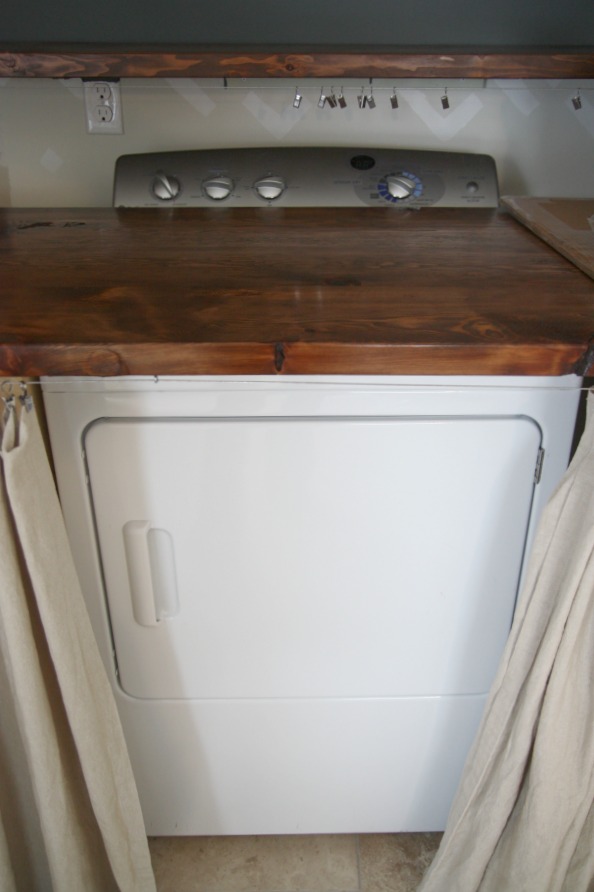
The dryer. Not much else to say about that. The laundry nook isn’t quite done but we’re close.
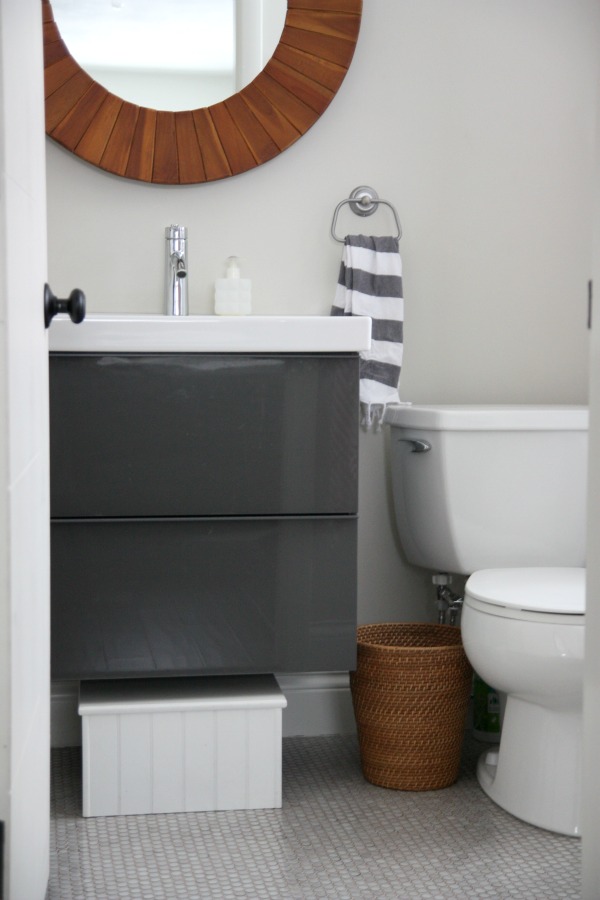
We moved the location of our bathroom hand towel and switched out the towel ring for this one. Confession: I’ve been removing HH’s electric razor from the sink every time I take pictures of the bathroom. We tweaked the bathroom a little to get HH’s razor off the sink once and for all.
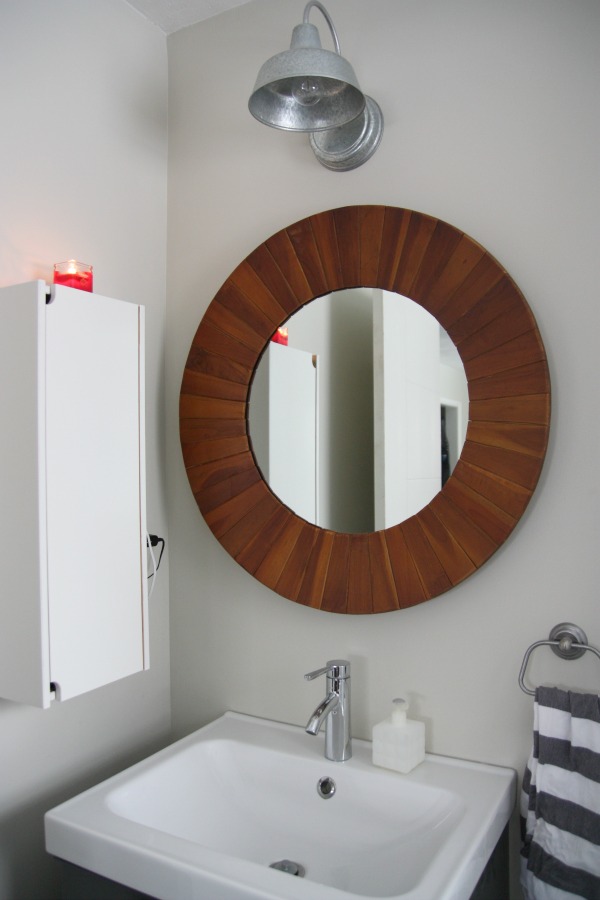
We added a shallow cabinet to the wall left of the vanity. We bought it in a birch finish and primed and painted it white.

It’s deep enough to house HH’s razor and toothbrush {What can I say? The man likes his electric toiletries.} but shallow enough not to crowd the sink and vanity.
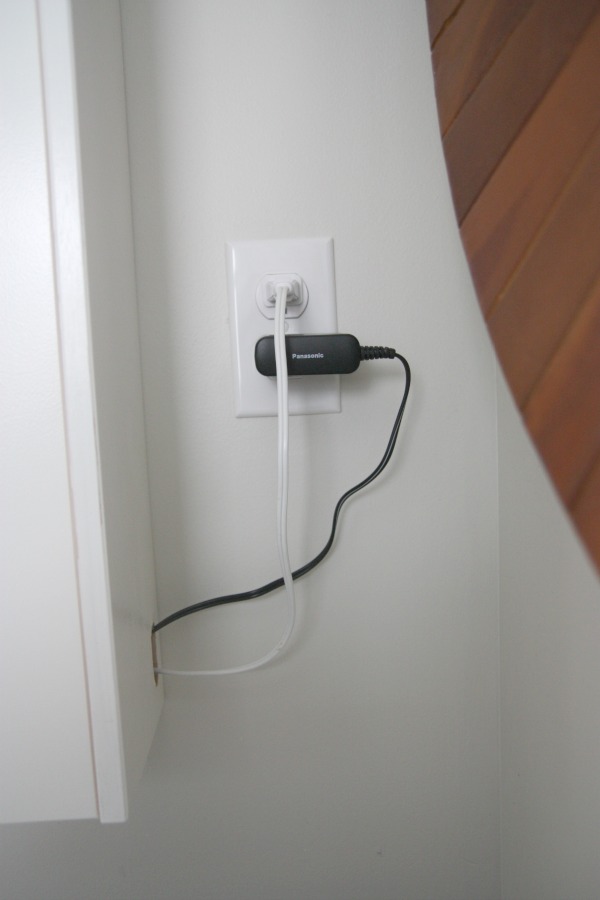
HH cut a hole in the side of the cabinet to run cords to a nearby outlet. You don’t notice it unless you’re looking at the cabinet from the shower or toilet. I’m just happy not to have HH’s razor staring at me from the sink all. the. time.
And in the midst of preparing for a photo shoot, this is happening…
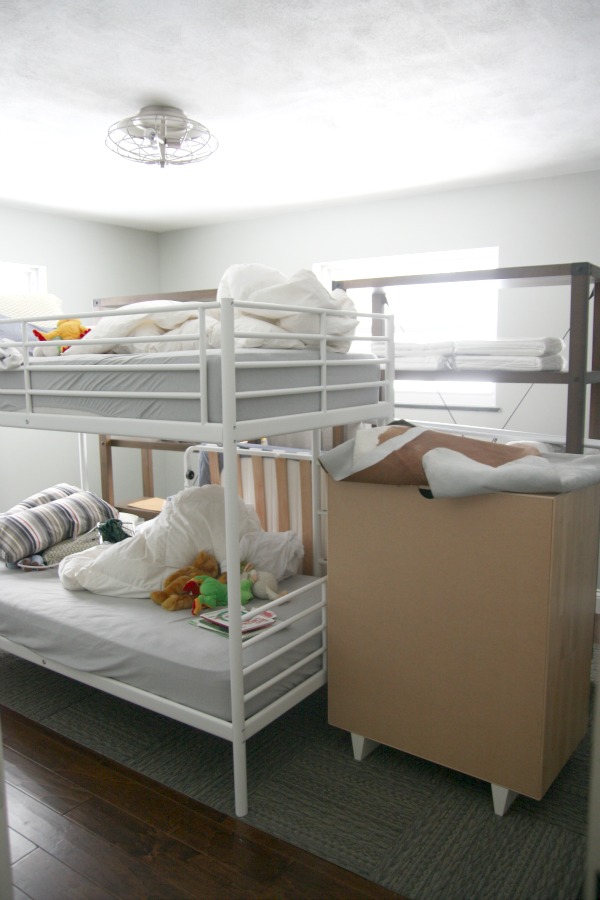
…undertaking the boys’ shared bedroom? Why not.
As if the holidays aren’t busy enough. Ha! Oh well. HH and I were talking last night and we agree that it feels great to see our house looking and feeling more and more like home with each project we tackle. You have to start somewhere.
Hope you are enjoying time with friends and family this week!
images: Dana Miller for House*Tweaking


budget decor, DIY, family life, interior design, renovation