Have you noticed the abundance of gallery walls filling the design world lately? These days gallery walls are less about structure and perfect alignment and more about creating a unique, imperfect composition. Here are nine tips to keep in mind while creating a gallery wall of your own.
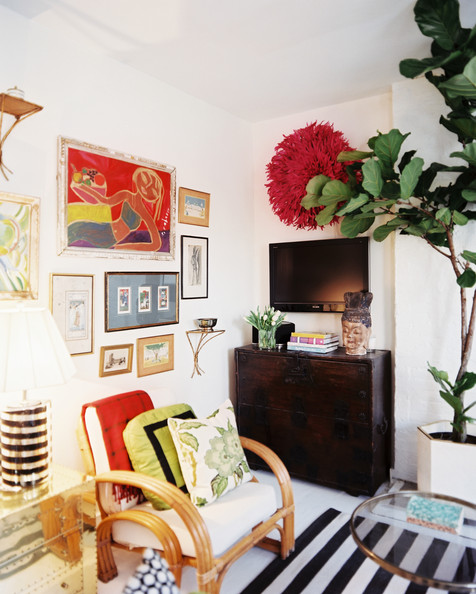
1 – Mix and match. Gone are the days of rows of matching frames. Use wood frames, metal frames, fabric-covered frames – heck, even unframed pieces are game. And don’t count out tabletop frames. If you find one you are particularly drawn to, remove the prop from the back of the frame, add a wall hanger and put that bad boy on the wall. Use larger frames to create a base arrangement then fill in gaps with smaller frames.
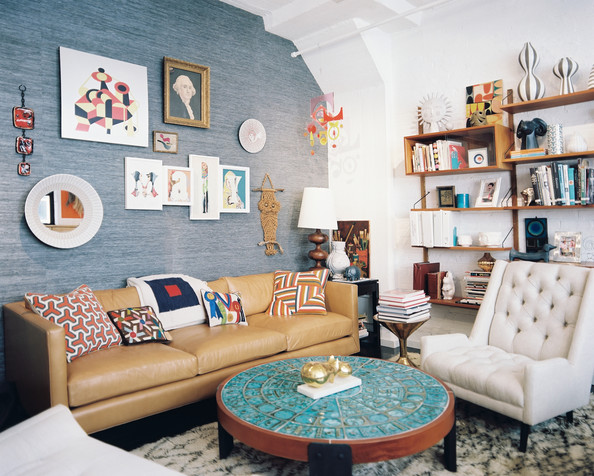
2 – Incorporate various mediums. Most people associate photographs and commissioned art with gallery walls but other artistic decor can be used as well. Try fabric remnants, petite shelves, sconces, prints, kid art, real/faux animal heads or antlers, mirrors, thrifted finds and decorative plates for an eclectic look.
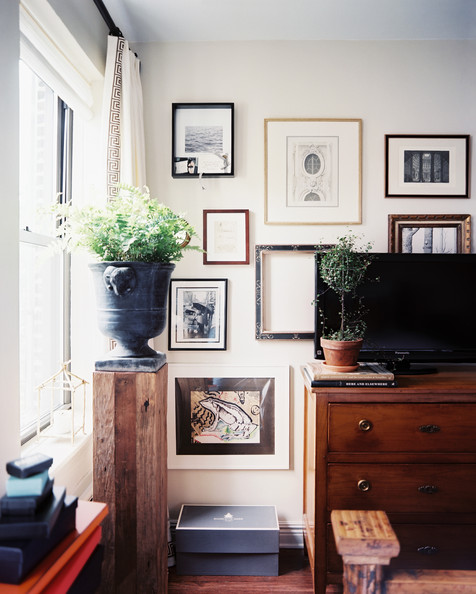
3 – Vary the spacing. Back away from the tape measure. And laser level. {I’m talking to you, HH.} Instead of exact spacing, focus more on the overall composition. Not every frame must be the same distance apart from its neighbors. One slightly crooked frame can be just the thing needed to loosen up a stuffy wall.
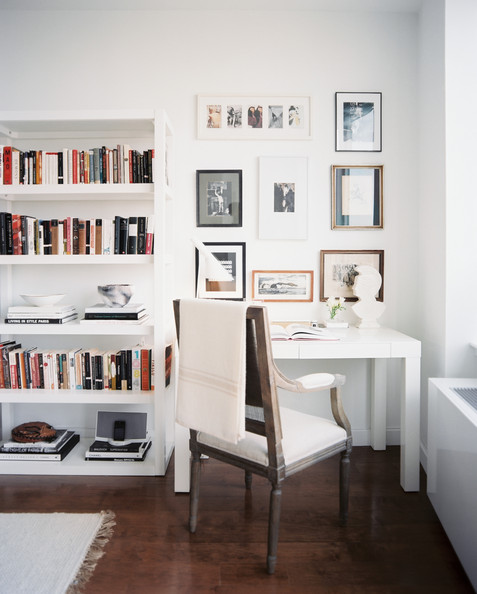
4 – Go horizontal and vertical. Hang some pieces horizontally and others vertically to avoid too perfect arrangements.
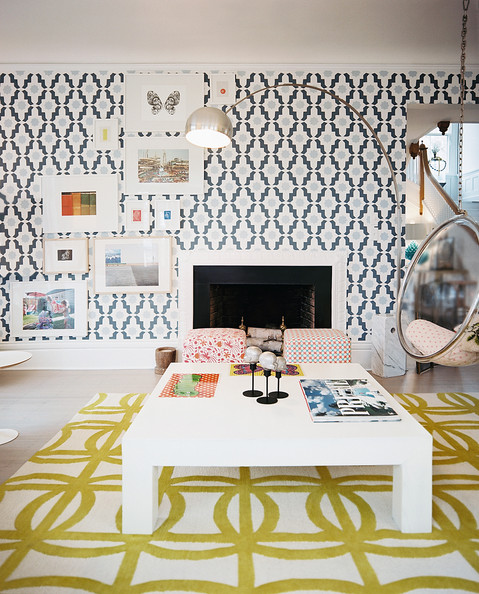
5 – Let asymmetry be your friend. A perfectly symmetrical arrangement feels formal and final. An asymmetrical layout feels casual and effortless, like it has been gathered and hung over time. Look at the wall as a whole and take away anything that makes the gallery feel cluttered or busy. Asymmetrical arrangements can be easily added onto so they can evolve with you.
6 – Bigger is, well, bigger. Use the entire width and height of a wall for a dramatic effect. This is particularly useful when considering partial walls or walls that aren’t necessarily contained within a specific room – such as walls found in stairwells, nooks and landings.
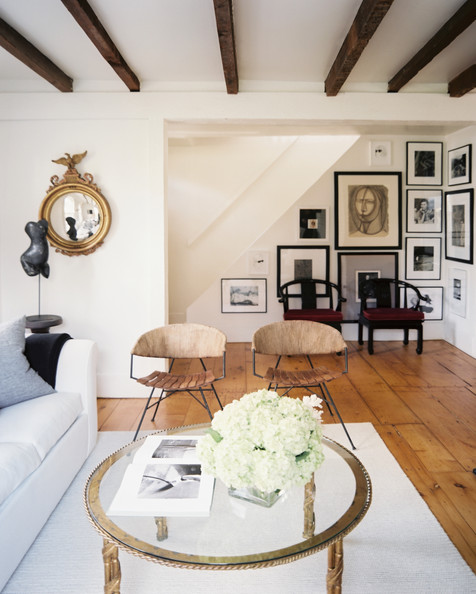
7 – Layer and connect. Gallery walls can look lonely if they aren’t connected to a piece of furniture or an architectural detail. Creating a gallery wall just above – or even slightly behind – a sofa, chair, console, desk or flatscreen TV connects the wall to the room. Automatically, the wall becomes part of a dimensional space instead of just falling to the background. Resting a frame or two on the floor, a desk, a table or even a chair rail bridges the gap between wall and room.
8 – Find inspiration. If you’re new to mixing and matching, asymmetry and eclectic arrangements, browse the internet for inspiration. Use your favorite online gallery wall as a spring board for your own.
9 – Let it evolve. Just like rooms in your home, a gallery wall develops and evolves over time. A gallery wall is a visual story that should reflect your ever-changing loves and interests. Start with a basic arrangement and add to it as your heart desires!
images: Lonny
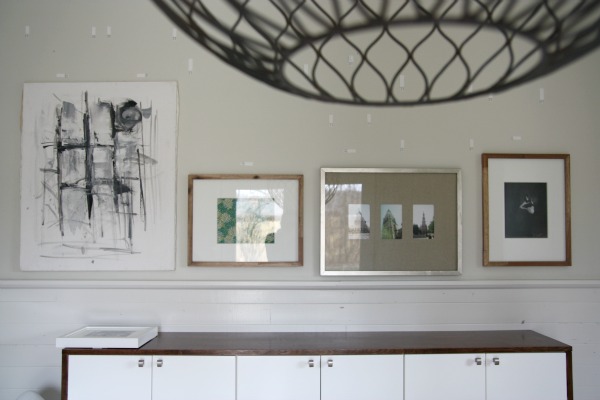
A few weeks ago I mentioned a last minute gallery wall above the fauxdenza that we threw together for the Tile Shop photo shoot. For being a totally spontaneous {i.e., unplanned and non-researched} project, it turned out pretty well and served the purpose of filling up the wall above the fauxdenza for a photo op. I guess it wasn’t totally unplanned. I had been imagining a gallery wall in the mudroom/dining room but hadn’t put any real thought into it. I was assuming it was something that would happen over time. But opportunity knocked and I answered.
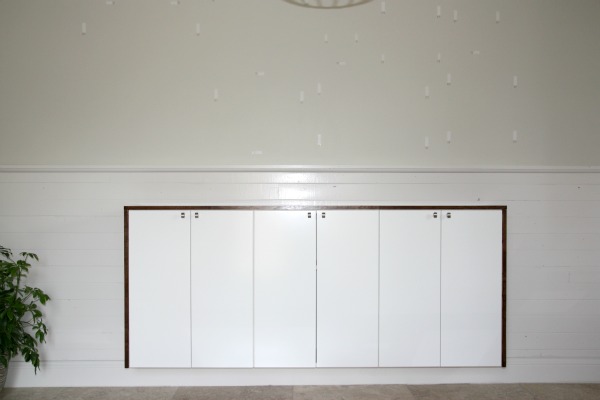
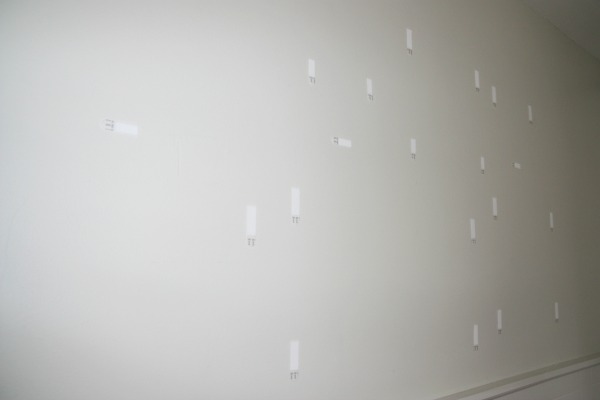
We started out with a blank canvas. Well, pretend you don’t see those white pock-marks all over the wall. Those come later. I was a baaaaad blogger and didn’t take any pictures of the wall’s creation in real time. I had a good reason. I was in bed. Sleeping. Basically, I designed the wall quickly the night before the shoot then HH took over the reigns and actually installed the gallery wall. He practically forced me to go to bed. It was midnight and I was already crazy sleep deprived and needed some rest before the big day. At least, that’s what HH told me. I obeyed and went to bed. Yeah, HH is awesome. He knows me better than I know myself.
My “in-progress” images are simulated.
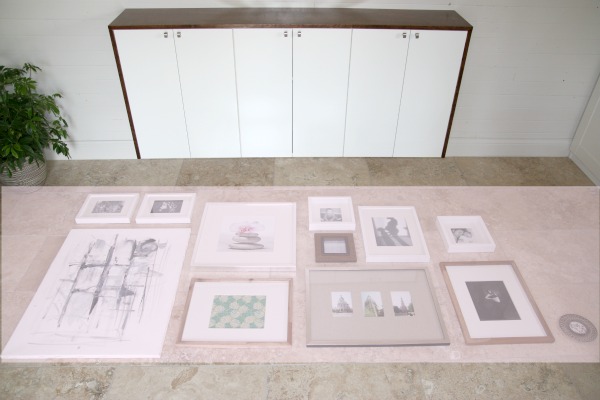
Before I hit the hay, I mapped out a spot on the floor in front of the fauxdenza to mimic the wall area above the fauxdenza. It happened that three rows of floor tile were the same height as the wall area above the horizontal planks on the fauxdenza wall but, if that happy accident hadn’t occurred, I would have just used masking tape or painter’s tape to map out a fake “wall” on the floor. I gathered frames, art, photos and scrap fabric from our attic {oh, the attic. It could use some organizing. It will happen.} and a few new frames from Target that I had picked up earlier in the day while shopping for photo shoot accessories.
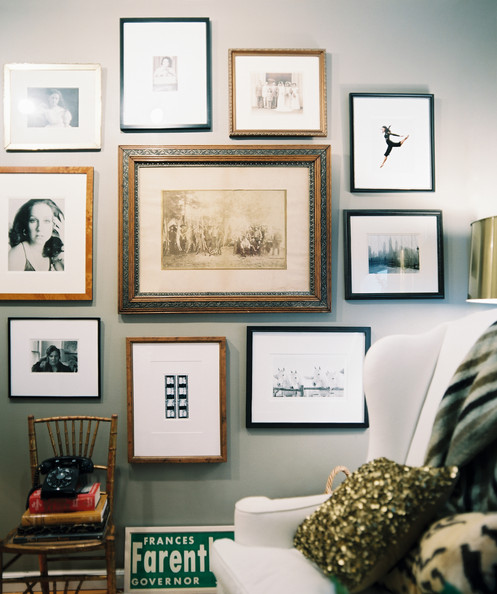
After configuring, stepping back, reconfiguring, editing, stepping back and then nearly falling over from sheer exhaustion, this is the arrangement I ended up with. I was going for an asymmetrical arrangement that looked good as-is but could be added to in the future. I didn’t fret over keeping the same distance in between all of the frames. I didn’t measure anything. The entire process was pretty loosey-goosey.
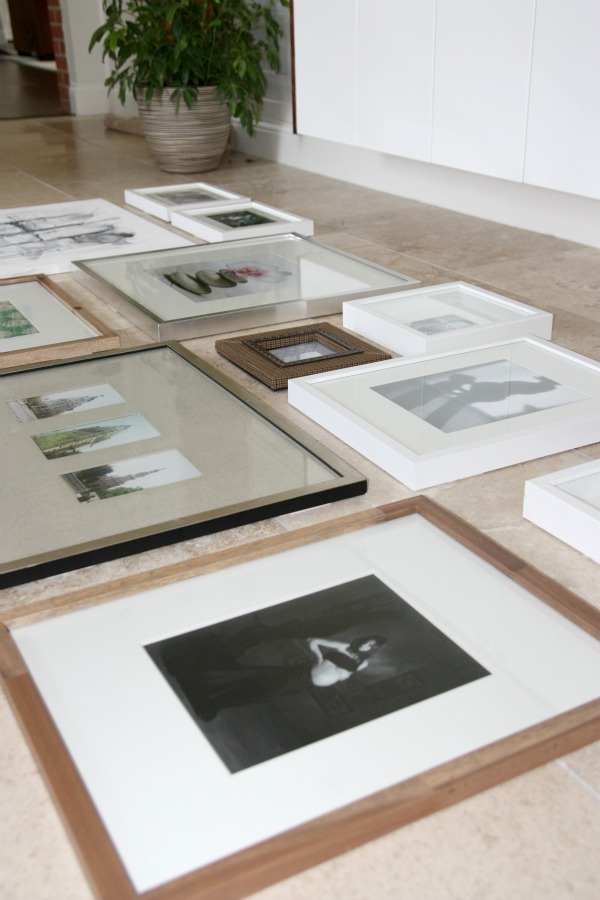
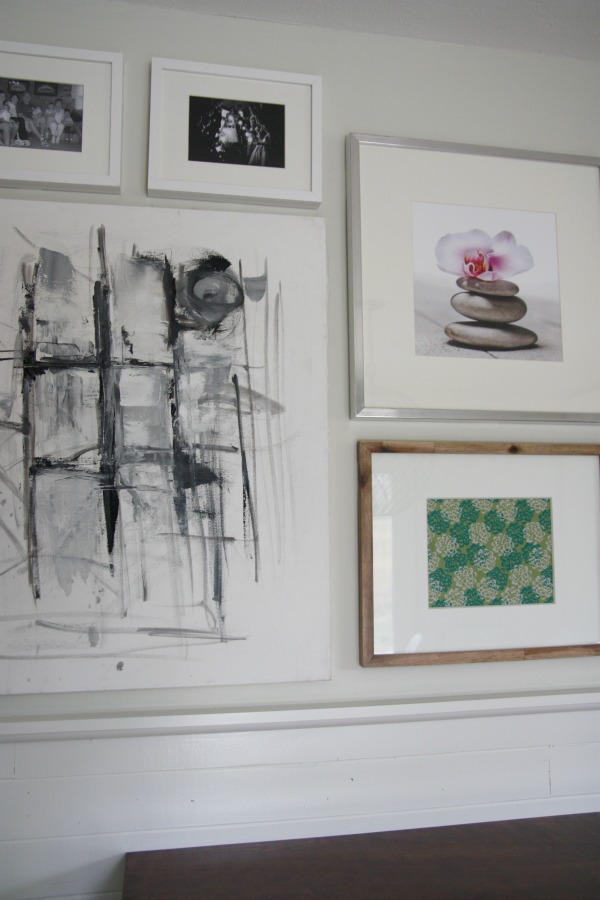
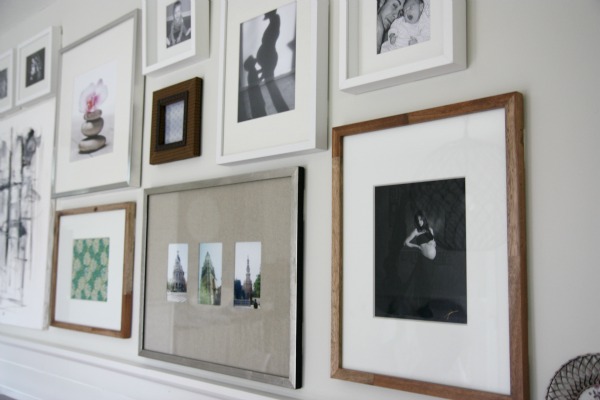
I mixed white frames, wood frames, metal frames, a fabric-covered frame and even an unframed canvas to keep things interesting.
I was under the gun to have the wall ready for the photo shoot the next morning so I used framed photos that you might recognize from my previous house. There was no time to get new photos developed. This is also why there are no photos of Mabrey included. I do have pictures of her developed but none made it into the gallery wall…yet.
While I was coming up with the layout, HH ran to Lowe’s to pick up a bunch of 3M Command picture hanging strips. It was nearly 10 o’clock at night on a Tuesday and Lowe’s was the only place open.
At midnight, HH took over the installation of the frames and art so I could catch some zzzzz’s. You should have seen his reaction when I told him not to worry about the frames being exactly level or perfectly spaced. He’s an engineer, people. When it comes to hanging stuff on a wall, the words “unexact” and “imperfect” aren’t in his vocabulary. I didn’t watch him hang everything but I’m pretty sure the finished wall is an exact replica of my haphazard floor arrangement.
Why the 3M strips? Two reasons: 1) The wall that the fauxdenza hangs on is a block wall. On the other side of the wall is the garage. Drilling into a concrete wall would have been time-consuming and labor intensive. 2) Drilling into a concrete wall at midnight would have awakened all the sleeping little people in our house. I don’t know about you but when our little people are asleep, we like to keep them that way as long as possible.
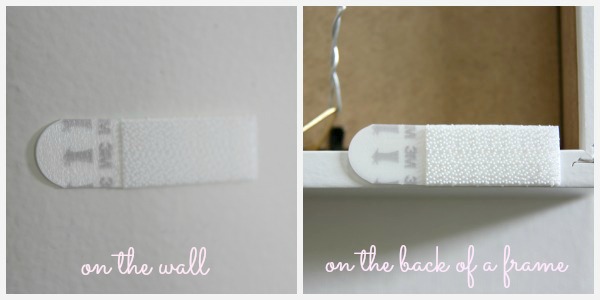
The picture hanging strips are basically velcro strips that adhere to the wall and frames. They are super strong and can handle up to 16 pounds of weight. You stick one side of the velcro onto the wall and the other onto the frame so they will line up with each other. Then hold the frame up to the wall and press. You will hear a loud “click” when the strips line up properly and secure themselves to one another. Pretty sweet stuff right there.
FYI – Be sure to adhere the velcro directly to the frame – not the cardboard backing that holds the frame’s contents in. We had one casualty due to overlooking this important detail. When I woke up early the next morning, one frame had fallen and busted on the tile floor. Oops.
It helps to start with the lower frames and work your way up the wall.
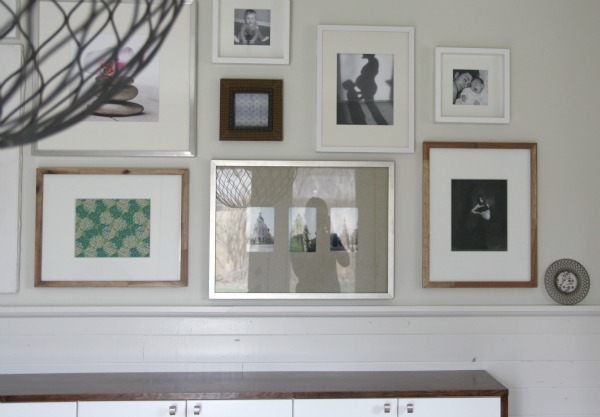
There she blows.
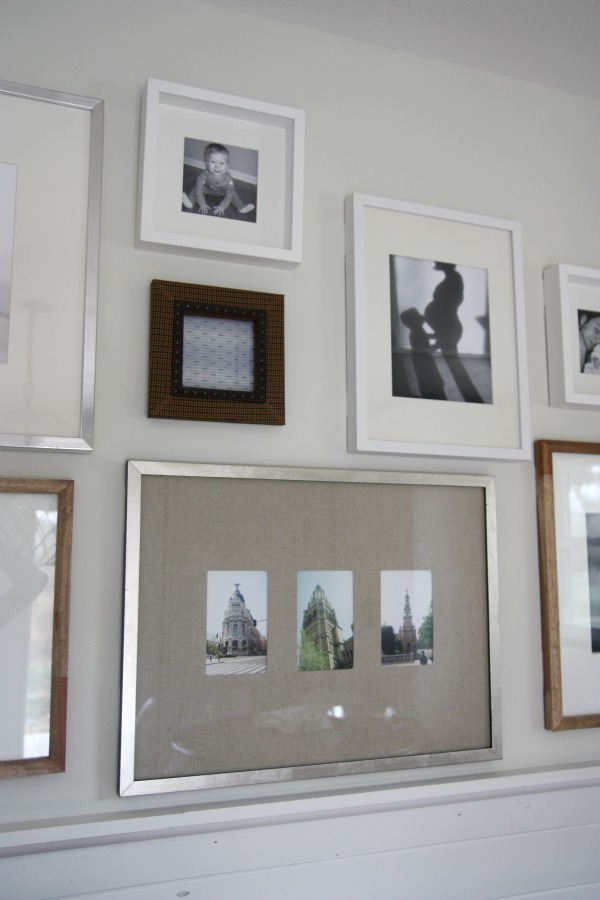
Up close, from left to right…
It’s difficult to take non-glaring pics of the gallery wall because it’s directly across from a set of french doors. If it wasn’t BELOW FREEZING here I would have opened the doors and got a wider angled shot. I tried my best.
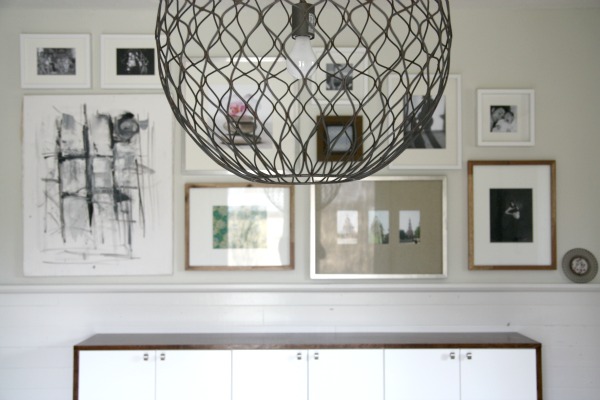
I absolutely love how the open ironwork of the pendant light lets you peek beyond to the gallery wall.
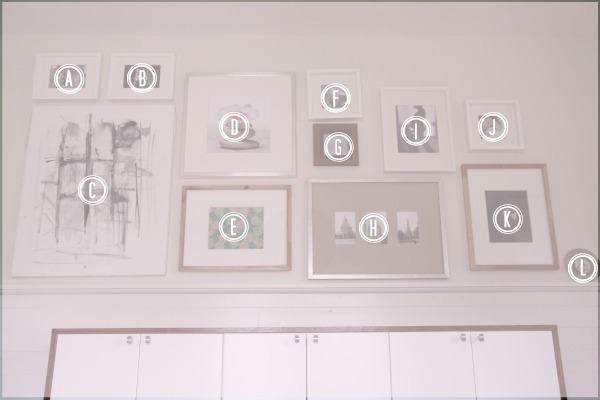
And because I know I would want the specifics if I were reading about a gallery wall on someone else’s blog…
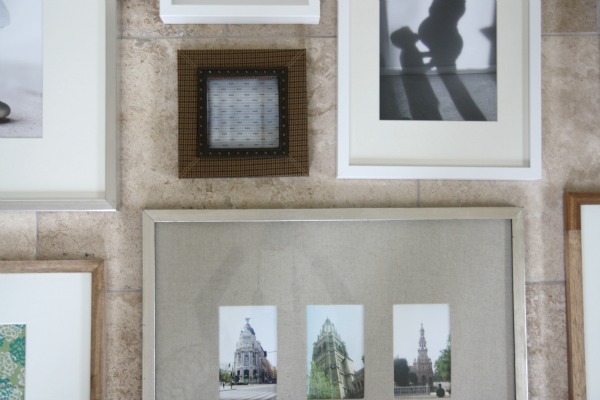
A – IKEA frame, family vacation photo
B – IKEA frame, wedding photo
C – estate sale, abstract painting on canvas
Fun fact #1: The previous owner of our house painted the abstract art. I bought it at the Underdog’s estate sale before the house was officially ours. I’m so glad we finally found a place to hang it.
D – Ikea frame, Allposters.com print
E – Target frame, fabric scrap
F – IKEA frame, candid photo of Everett at 7 months old
G – Target frame, fabric scrap
H – West Elm frame, photos of Spain from HH’s high school trip abroad
I – IKEA frame, photo of Layne’s shadow kissing my shadow’s belly when I was nine months pregnant with Everett
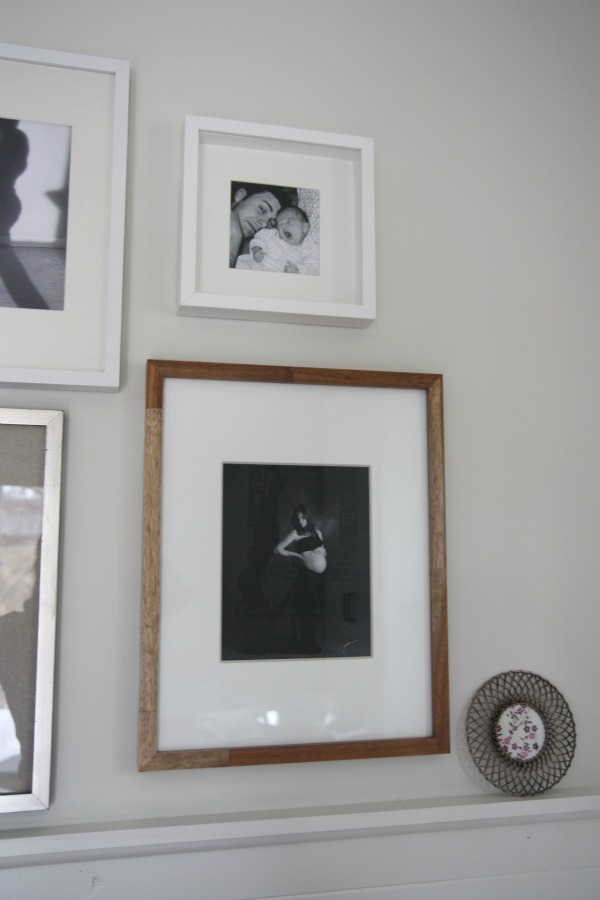
J – IKEA frame, photo of HH and Layne as a newborn
K – Target frame, photo of me pregnant with Layne
Fun fact #2: HH gifted me a professional maternity shoot when I was pregnant with my firstborn, Layne. It was so much fun!
L – Target frame, fabric scrap
Fun fact #3: After failing to get this little round tabletop frame to stick to the wall, we decided it looked better just resting on the chair rail.
My favorite frames are the new distressed wood ones from Target. I’m pretty sure I need to run back and grab at least a half-dozen more. Megan, from The Tile Shop, said the frames tie into the reclaimed wood shelves in our kitchen. That must be why I like them!
The wall isn’t done but it’s done for now. I’d like to switch out some of the contents of the frames and, over time, I want to add to the gallery wall. {Don’t worry. I’ll share any changes I make.} As-is, it’s feeling a little too feminine and white-on-white for my taste. But it sure does make our house feel more personal and homey. Gotta love any project that does that.
I want to share a few tips for creating a unique gallery wall but think this post is already too lengthy to include here. So, look for my gallery wall tips in a future post. Coming soon!
images: Dana Miller for House*Tweaking


DIY, inspiration, interior design