...because home doesn't happen overnight.

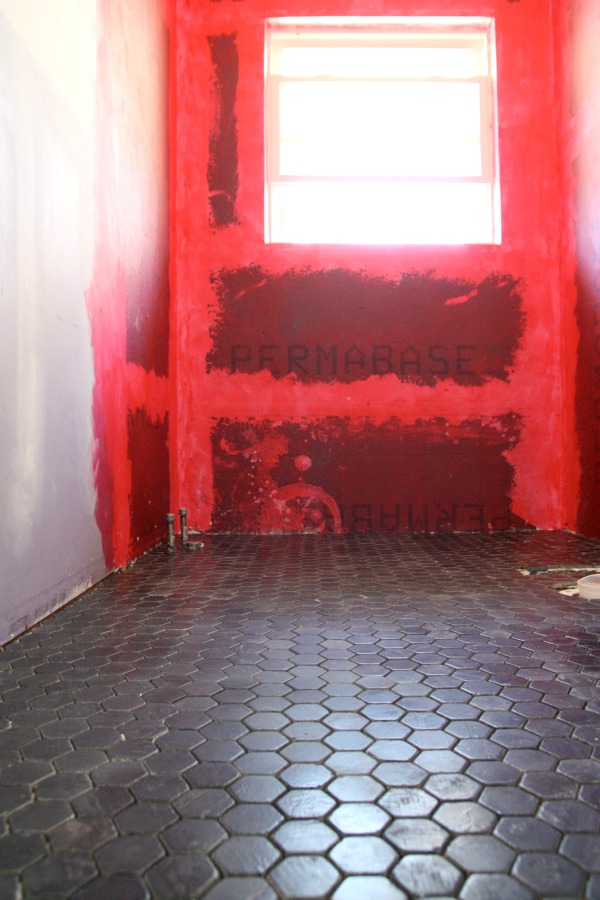
noir hex 4

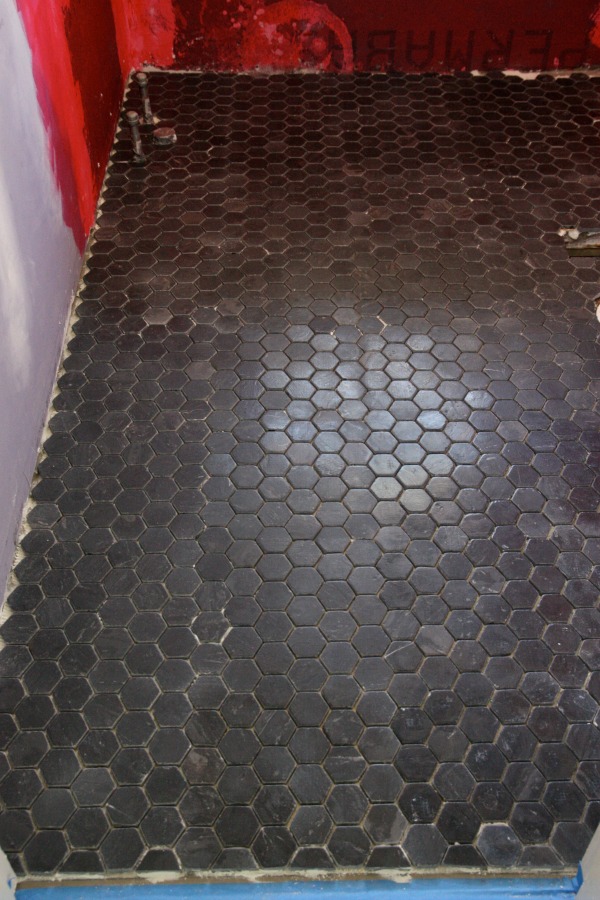
We have floor tile in the kid / guest bathroom! It took two tries along with the help of a friend with more tiling experience than us to knock it out. We need to address a few wall and corner tiles in the far right corner and we haven’t grouted yet but I couldn’t wait any longer to share our progress – especially since this project proved to be more difficult than we had anticipated. The floor tile was in as of Sunday and I would have shared images sooner but The 2014 Plague had me down and out the last two days. The last few days have felt like weeks but things are finally returning to normal around here.

noir hex 3

We had family in from out of town so I took the kids to visit them while Steve and our contractor friend, James, tackled the bathroom flooring. As much as I want to be an active, hands-on participant in this bathroom project, often it’s more helpful if I’m the one keeping the kids occupied and out of the way.

I thought I would share the tiling tidbits that Steve found most helpful when laying the hexagon tile. Some of the tips are basic ones you’ve heard before but were easily forgotten in the heat of the #epicfail. Others come from the experience of our friend, James. Maybe you will find them useful.

*First, don’t rush! Steve was in a hurry to get going the first time around because the project had been postponed from the day before and he had to be at work the next day. It’s imperative to have a good game plan and be patient. You’re better off with a really nice half-tiled floor or wall than a shoddy “finished” job.

*Work from the center out. Define your reference line based on where / how you want your tile to hit in the most critical areas. Mark off a second line perpendicular to the first. Essentially, this breaks the room up into four quadrants. Start where the two lines intersect and work your way out, constantly checking your reference lines and adjusting as needed. For this project, Steve focused on perfecting the entrance and visible floor-wall seams. He wasn’t as concerned with tile that will eventually be hidden by the tub or vanity.

*Inspect and dry fit everything. Steve did dry fit the first time he attempted to lay the hexagon tile – but only partially. When he discovered there was an issue with the tile sheets matching up correctly, he assumed he would be able to “make it work” as he went along. James suggested inspecting each box of tile before dry fitting. Upon inspection, one box contained tile that was 1/8″ smaller than the rest of the tile with tighter gaps between the individual tiles. And wouldn’t you know, that was one of the two boxes Steve started with the first time around?!

*Mix up small batches of thin-set. Mixing up a large bucket of thin-set might seem like a time-saving step but, actually, it could be detrimental to the whole “don’t rush!” mindset. In the grand scheme of things, it really doesn’t take that much time or effort to mix up smaller batches of thin-set as opposed to one big batch.

*Be clean with your trowel. This takes time and experience. Steve admits to slathering on a bunch of thin-set then forging ahead. But you really only need to trowel on a little more thin-set than what’s required for the current tile sheet you’re working with at the moment. Also, be aware of your reference lines when troweling and don’t wipe them out completely.

*If an individual tile needs adjusted, it’s easier to make the adjustment after the sheet has been laid. Just trace the outline of the tile with a utility knife, cutting the backing in the process. Shift the tile into the proper position. Use spacers or even small pieces of cardboard to hold adjusted tiles in place. This works for tiles that are thinner as well. Cut the tile out, pull it up, back-butter it and then place it back at the same height as the rest of the tile. Steve guesses he had to adjust ~1 tile per sheet due to spacing and height issues.

*If you have help, let someone else cut the tile. This saves time running back and forth between the wet saw. If your tile and layout allow, hand-held tile nippers or scorers can save time and energy, too.

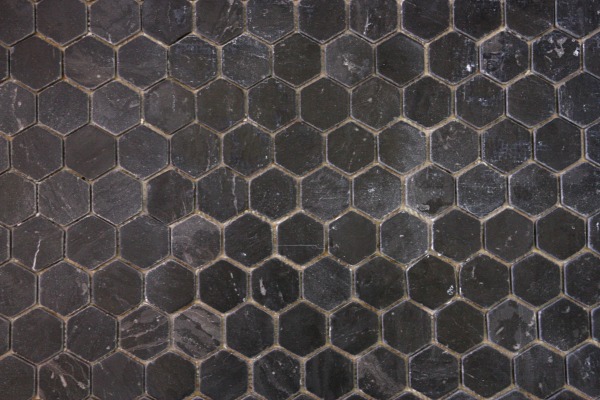
noir hex 2

I called Steve a few hours into the job to see how things were going. Just from his tone of voice, I knew it was going well and I was able to breathe a huge sigh of relief. When a DIY project isn’t going as planned, it helps us to take a break, take a step back, start over, get back to basics and enlist experienced help if possible. We’re so thankful James was willing to help us out. (FYI – We’re compensating him for his time with dinner and concert tickets.)

I hope you learned something from our tiling snafu. We sure did. Next up? Grout!

images: Dana Miller for House*Tweaking

31 Comments

02.April.2014

Thanks for all the great info! Wish I had seen this before I did my shower floor. It really is going to look wonderful when everything is done – I love your style.

Whew! What a relief it must be to have that all laid now. I’m about to hex tile a tabletop, that I’ll use for my nightstand. I’m hopeful the tiny area won’t be as intimidating as a whole floor!

02.April.2014

Your floor looks beautiful. I’m glad round two went a little more smoothly.

02.April.2014

The floor looks wonderful! Was Steve able to use the smaller tile, or did he exchange it for larger? Can’t wait to see it all finished!

02.April.2014

Tile looks great! Glad you are feeling better.

02.April.2014

At first I was a little confused as to why you were going to lay tile under your tub, but then I remembered that awesome sketch of the claw foot tub. This is going to look so amazing!

02.April.2014

That tile looks amazing! We have few teeny, tiny gaps in our dining room floors because we didn’t inspect our wood as closely as we should have. Thankfully we have rustic floors so they don’t detract from the floors at all, but when we redid the flooring our living room we inspected everything with greater scrutiny and have zero gaps! It’s crazy that two boxes of tile were the problem, but I can see how that would throw everything off.

http://jax-and-jewels.blogspot.com

02.April.2014

LOVE it. I want to reach through the screen and pet it, it is THAT. PRETTY. Glad the second time was the charm, and can’t wait to see this how this bathroom shapes up!

02.April.2014

It looks amazing. I really need to stop forcing things to “work” sometimes. Clearly backing off and doing it right is the way to go.

02.April.2014

It looks great!
Also, I was looking at the shopgoodwill(dot)com website and up for auction is a concrete Buddha bust. Made me think of you. You should snag it for your collection! Here is the title:Cast concrete Tibetan style Buddha bust sculpture (16024693). The current bid is only $5.99. I’m sure it will go up a bit, but I bet it’ll still be a steal.

Lookin’ good! Now I’m excited to see the grout. And the rest of the room. Really, just everything!

02.April.2014

Looks great, and these tips are so helpful. Can’t wait to see the rest…the current red room makes me think of The Shining every time I see it. Redrum, redrum!

02.April.2014

Those tiles are a favorite of mine. Can’t wait to see the finished space!

02.April.2014

So after all is said and done do you think that some of the issues you had were because of the product you chose? I ask because I am also considering a hex marble tile for my guest bathroom floor. Would you recommend the tile you chose to others and if you don’t mind my asking where did you find it and what is the price point? Thanks. I love your blog and I can’t wait to see the progress and final results on the bathroom its going to be incredible.

02.April.2014

the black hex tile looks SOOOO GOOOOOD. I can’t wait to see the finished floors! I second the question asked earlier; what did you do to the box with the smaller tiles? Did you return them/use them?

02.April.2014

Wow! It looks so awesome. HH … I mean Steve :) … did an awesome, awesome job!

02.April.2014

Steve enjoys telling people he painted the walls with his own blood. Brings a whole new meaning to putting “blood, sweat and tears” into a project.

02.April.2014

I can’t wait to see the finished project! It’s already so awesome it’s blowing my mind, so I bet when you get it all grouted and prettied up it’s going to knock me over. ^_^

So glad you had a friend to help. That tile is killer. As much as I love marble, this is surprisingly taking the sexy up a few notches!

02.April.2014

So this is actually a travertine hexagon tile. We have larger, lighter travertine in our mudroom / dining room and love the way it has held up over the last two years. From what we’ve heard, hex can be tricky but once in place properly, everyone seems to think it’s totally worth it! I’ll let you know how we feel once the bathroom is finished.

02.April.2014

We probably could have exchanged the box of smaller tiles but we were itching to get it done and didn’t want to wait for another box to come in. (The tiles we’re using aren’t carried in-store.) Out of necessity, Steve did have to use some of the smaller tiles. He cut up a sheet into strips (instead of using the whole 12″ x 12″ sheet) and worked with them that way so he could get proper spacing between the tiles. The smaller tiles were mainly used on the floor where the vanity will go so if there are any imperfections they won’t be obvious.

03.April.2014

Hi Dana, I’ve been following your blog for a while and really love the fact that you were brave enough to post about a failed attempt. We are in the middle of renovating our house and have had some of those moments. The feeling is always, “why can’t I be like those people from the blogs”. I am very happy to read that you guys succeeded in laying these beautiful tiles.

looks gorgeous Dana. Im so happy you all were able to step away and reapproach it with great results. I cant wait to see the space come together.

04.April.2014

Perfect timing! We’re about 5 sheets into laying the matte black hex in our entry! So tricky to work with but so pretty too! I wanted the travertine but the hubby wouldn’t budge on the budget for it! Only 50+ feet to go! Seeing yours was the encouragement I needed to get it done! Thanks for the tips!

07.April.2014

[…] floor has grout! The grouting process went smoothly and was a welcome “easy” step after the tiling fiasco. Steve says he would install tile all day long if the only thing involved was […]

[…] and read this tutorial before you start tiling – I wish I had.  These sheet-tile-laying tips from House*Tweaking are also super helpful.  And if all else fails, use the same color grout as […]

25.August.2014

[…] a contrasting grout for a split second. But when we pulled back the cardboard protecting the hex floor tile, things felt very busy all of a sudden. So we decided to stick to our original choice of white […]

06.October.2014

[…] home and home improvement. (Kristina’s husband, James, is the one who helped Steve with the pesky hexagon tile in the main bathroom.) We’ve bonded over renovation stories – good ones and not-so-good […]

18.November.2014

[…] (whew!) and in minutes the tub was in place resting on the cradles. It was level, too! Because of the hex floor tiling fiasco, we were sure we’d need to shim or readjust things but we didn’t. Rarely are things […]

07.January.2015

[…] We (and by we I mean Steve) tiled the main bathroom. Twice. […]

06.February.2015

[…] *https://www.housetweaking.com/2014/04/02/the-noir-hex-is-in-tips-for-laying-pesky-sheets-of-tile/ […]