A quick update on the bathroom…
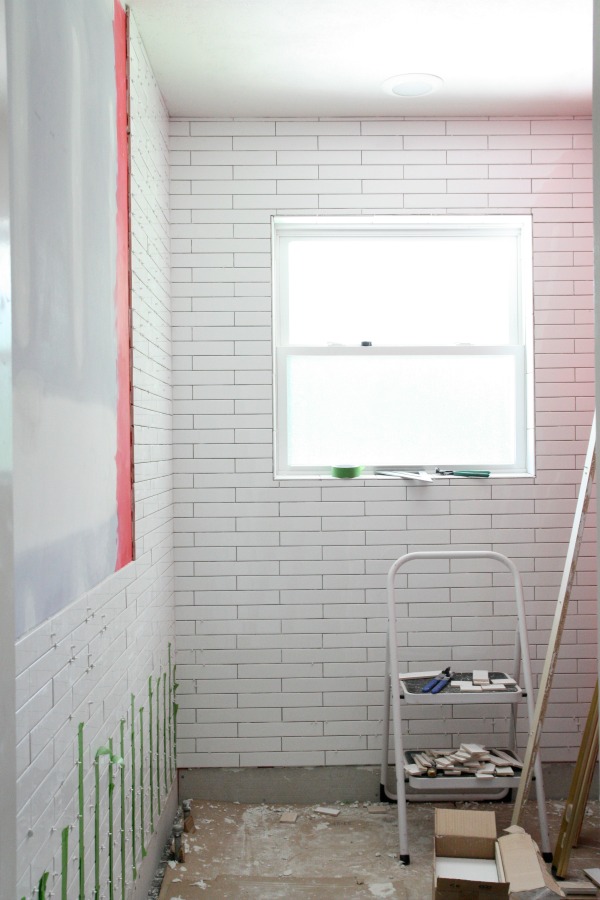
We have two walls of subway tile! Tiling the uneven window wall was difficult. Tiling the smoother wall on the left was like tying a shoe in comparison. Steve knocked it out in one evening.

Look at those perfectly wrapped corner tiles. Reason #99 you should marry an engineer.
In case you’re just now tuning in (or maybe you didn’t even know we had a second bathroom because we’ve shunned it for the last two years), this is the main bathroom in the house. A freestanding shower / tub will eventually live right in front of the back wall. We’re taking the tile to the ceiling around the shower / tub and the rest of the room will have tiled wainscoting. After much debate (I wanted tile. Steve wanted baseboards.) we’re installing the same chunky baseboards in here as the rest of the house. That’s why you see a gap at the bottom of the walls between the wall tile and floor tile.
As the shell of the room started to take shape, I got to thinking about how we would trim out the wainscoting and shower walls.

I don’t even remember doing it but I selected this curvy tile to act as molding atop the tiled wainscoting. I don’t know what I was thinking. Oh, wait, I was pregnant. I probably wasn’t thinking. Maybe I was thinking about lunch. Maybe I was thinking about a nap. Most likely, I was contemplating how I could eat lunch and nap at the same time.
But I digress.
There’s nothing wrong with the tile itself but when you butt it up against the skinny modern subway tiles it looks strange. The profile is all wrong. And Steve and I were confused about where exactly to install it. Just along the wainscoting? Up the side of the shower walls? It would look weird if we ran it along the top of the wainscoting and dead-ended it at the shower. And it would look just as weird to have a mitered inside corner at the shower wall and continue the molding up the edge of the shower only to dead-end at the ceiling. We were at a loss.
That’s when an image of black pencil liner popped into my head. It was similar to this. I tried explaining my vision to Steve but he wasn’t catching on. (This happens a lot.) It was decided that I would head to The Tile Shop the next morning to scope out some options to help Steve better grasp my idea.
I wasn’t there five minutes before I found exactly what I wanted. Which was a good thing because my kids were play fighting in slow motion and everyone was staring. I quickly snapped a picture of the simpler design I had in mind and sent it to Steve. “Gorgeous” was the reply back. We had a winner.
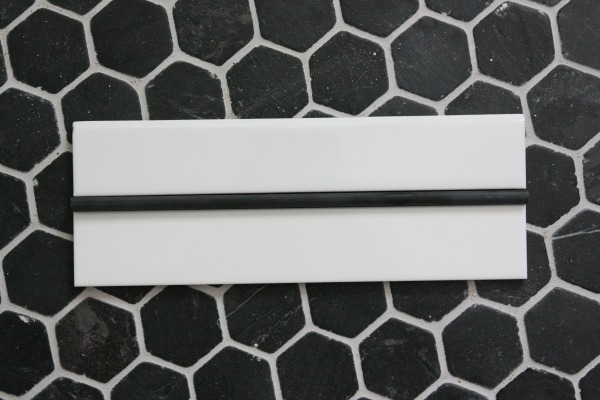
I bought the imperial bianco bullnose to match the subway tile and the noir honed somerset to tie in to the floor tile. We’ll run both along the wainscoting and shower. The end result will be similar to the last photo seen in this bathroom renovation post. The pencil liner is a little thicker than the subway and bullnose tiles but I think the difference in profile will be a nice finishing touch. I love that the single black stripe will pick up on the hex floor. And you know how I feel about stripes in general! The liner is also a subtle nod to the bathroom’s midcentury roots. Many ’50’s bathrooms boasted contrasting pencil liner. This is my attempt to bring it back in a modern way. What do you think?
Can’t wait to share more progress as we make it!
images: Dana Miller for House*Tweaking


DIY, interior design, renovation