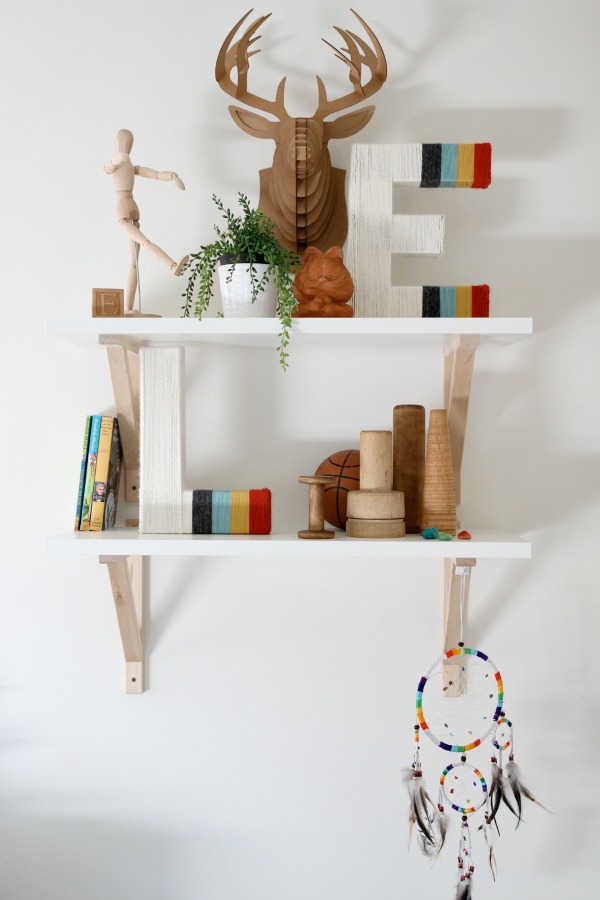
Did you happen to notice the yarn-bombed letters in the boys’ room? The answer is yes. Because they took me forever. I bought two paper maché letters (one for each boy) from JoAnn’s when they were 50% off. I had them for a while and as the boys’ room took shape I realized the brown paper finish was screaming meh. Or mumbling meh?
Anyway, I considered painting the letters but decided to wrap them in yarn for more texture. I thought it would be a quick and easy project. I mean, how long does it take to wrap some yarn around a paper maché letter? HOURS. It takes hours! And several hot glue sticks. (The ‘E’ was particularly mind-numbing.) Who knew and didn’t tell me?
I hadn’t planned on devoting an entire post to these letters. I wrapped the ‘E’ first and didn’t take any pictures of it in progress. I was so annoyed! For the most part, I really liked the way it turned out though. When I tackled the ‘L’, I was feeling more confident mostly because I knew what to expect (lots of time, yarn, glue and burnt fingertips) and also the basic ‘L’ shape was a lot less intimidating. In hindsight, I probably should have started with the easier letter. Oh well. Hindsight is 20 / 20.
I took some pictures of the ‘L’ in progress to demonstrate a few talking points. This isn’t a step-by-step tutorial because different letters pose different challenges. If you want to try this craft, my advice is to stare down your letter and come up with a plan of action before you start wrapping and gluing. (Remember, you want all sides covered!) Or just (re)name your kid something that starts with an ‘I’.
I came up with a design that would mimic a Hudson Bay blanket in the boys’ room: white with dark blue-black, turquoise, mustard and red stripes. I bought my yarn at JoAnn’s and tried to choose colors that weren’t too primary to keep with the Hudson Bay scheme. I also decided I wanted the end result to have only vertically wrapped yarn showing from the front. Keeping those things in mind, this is what I did…
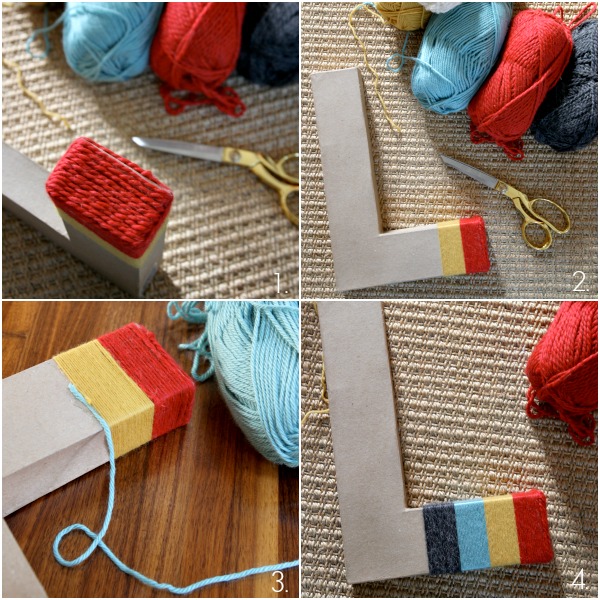
1 – I started on the lowest part of the ‘L’. I cut several small lengths of red yarn and hot glued them to the side of the point at which you would normally end the letter’s formation when writing. I made sure the small lengths were ~1″ longer than I needed so I would be able to wrap (hide) the cut ends once I started wrapping back to front. (See step 6 below for an image of some not yet wrapped small lengths of white yarn to better demonstrate this point.) Once the side was covered, I started wrapping the letter back to front with red yarn, tucking and gluing the cut side ends as I went.
2 – Once I finished the red stripe, I continued on with the mustard stripe. It’s important to wrap the yarn snug!
3 – I always started and ended each color on the back of the letter with a little hot glue and added more glue on the back periodically as I wrapped to keep the yarn in place.
4 – The stripes are done! I didn’t measure the width of each one – just eyeballed them.

5 – I started a length of white yarn next to the dark blue-black and wrapped it to the interior corner of the ‘L’. Then I continued that same length of white yarn horizontally up the longer line of the ‘L’ to cover the sides.
6 – At this point, the majority of the sides were covered save for a small section at the bottom exterior corner. I cut several small lengths of white yarn (~1″ longer than necessary) and individually hot glued them to cover the exposed side. (Much like I did with the red yarn in step 1.) You can see the top of the ‘L’ is still exposed but I take care of that in step 7.
7 – I wrapped the longest line of the ‘L’ back to front with white yarn, tucking and gluing the cut side ends as I went. This step gave me only vertically wrapped yarn showing from the front and covered the exposed top too.
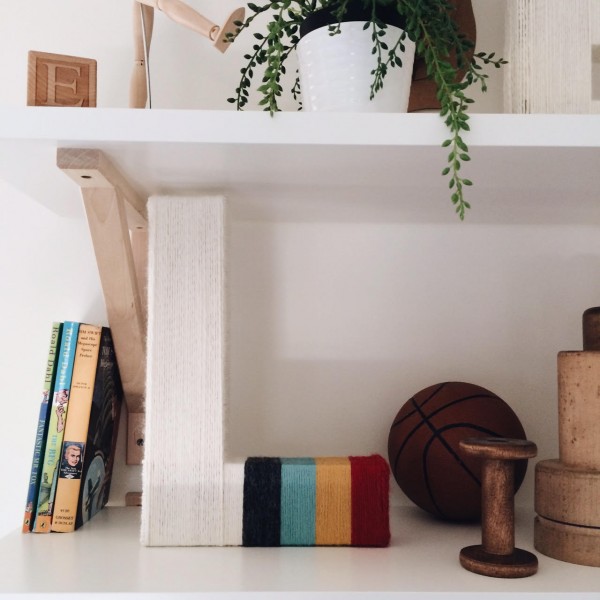
The finished product! If you scroll back up to the first image in this post, you’ll notice that the ‘L’ turned out much better than the ‘E’. I was focusing so much of my attention on the logistics of covering all sides of the ‘E’ that I wasn’t pulling the yarn as taut as I should have been so some areas are a little sloppy. Whatever. I’m not doing it over.
Yarn-bombed letters. Man, they’re tedious but I do like how they turned out. They’re great for children’s rooms and nurseries. If I ever craft them again, I’ll make it a party so I don’t suffer alone. Someone will be in charge of bringing wine.
Have you ever started what you thought would be a quick and easy project only to discover it was way more involved than you had anticipated? I’d love to hear your stories.
images: Dana Miller for House*Tweaking


budget decor, DIY, inspiration, kid-friendly