...because home doesn't happen overnight.

play kitchen after 2

Santa gifted Mabrey this play kitchen last year. I didn’t find it obnoxious for a toy. But Mabrey kept asking, “When are you going to paint my kitchen?” Girl catches on quickly. Store bought items rarely stay the way I find them.

play kitchen before 1

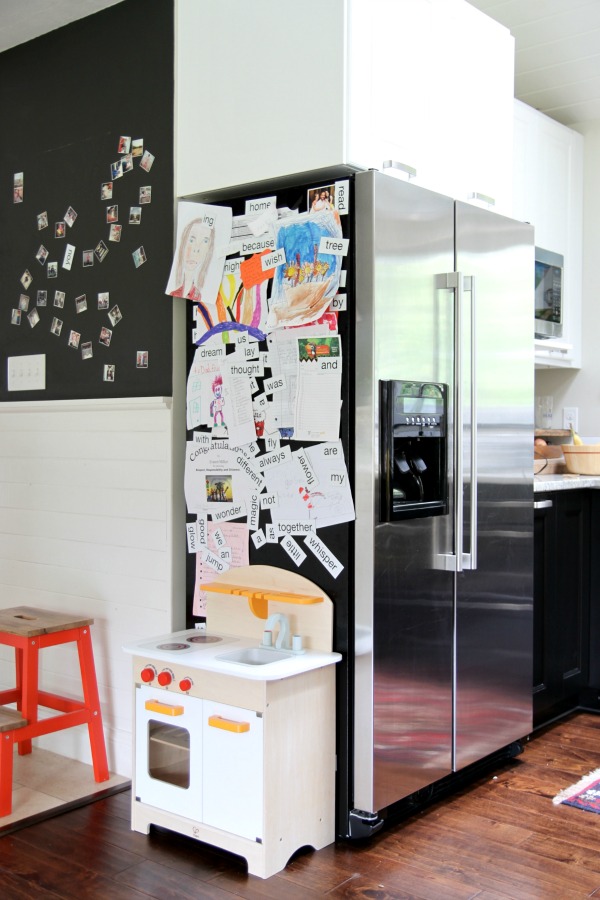
In an effort to tidy up the side of the fridge, I decided to tweak the play kitchen with paint. And by paint, I mean paint, backsplash, new hardware, open shelving and an oven light. I may have taken things too far. Oops.

play kitchen before 2

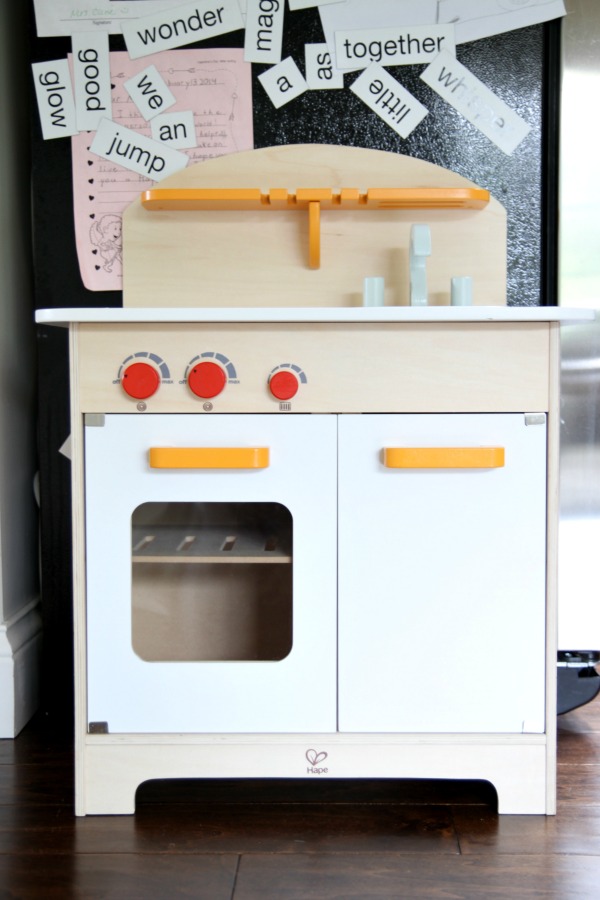
The before. Again, it wasn’t obnoxious but there was room for improvement.

play kitchen steps 1

1 – The first thing I did was remove the chunky handles and patch the holes with wood putty.

2 – After a few applications of putty, I lightly sanded the patches and surfaces to be painted – just enough to scuff them up a bit.

3 – I taped off the oven window, control knobs and countertop.

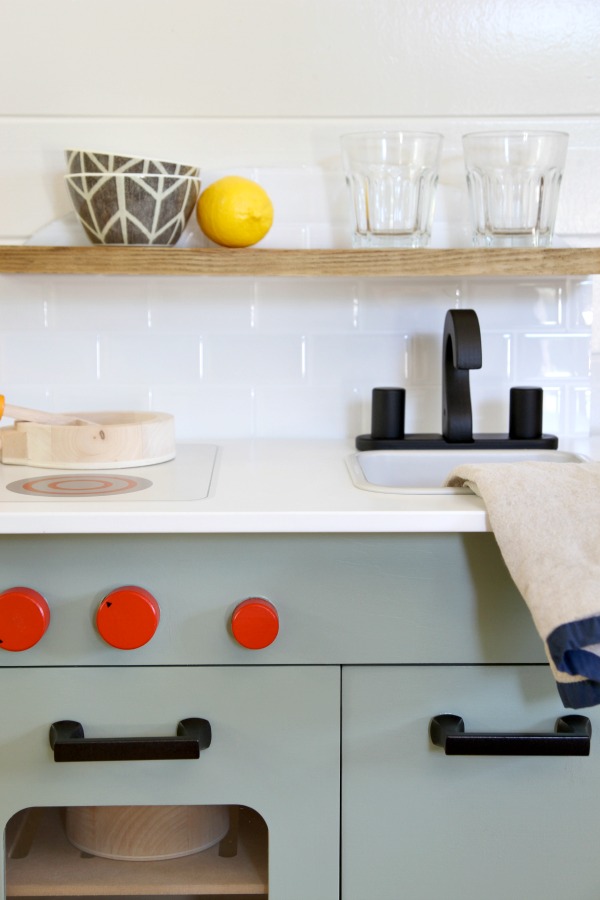
4 – I gave the kitchen two coats of Sherwin-Williams coastal plain in a satin finish. (Btw, did you know you can purchase Sherwin-Williams paint at Lowe’s now? So convenient!)

play kitchen steps 2

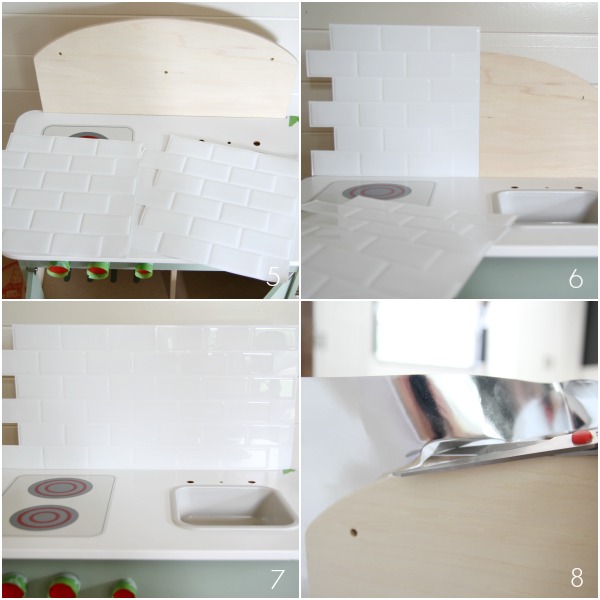
5 – I bought two sheets of Smart Tiles subway tile in white. I had been eyeing them for a while but many sellers only sold them in packs of six and I didn’t need that much. When I saw them on sale at Wayfair for $5.99 per sheet and sold individually, I bit.

6 – The sheets are self-adhering vinyl with an easy peel-and-stick installation. The tiles are staggered on the edges for an overlapping seam.

7 – When positioned properly, the seam is barely noticeable. Lining up the grout lines carefully is key. I had to readjust the second sheet a few times to get a perfect fit. I don’t know that I would ever use these in a real kitchen (maybe a rental?) but they’re perfect for this application.

8 – I cut away the excess tile with utility scissors.

play kitchen steps 3

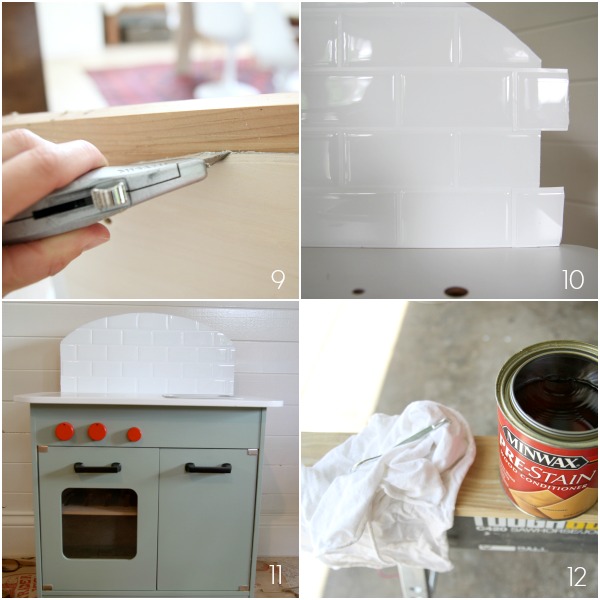
9 – I cleaned up the edges with a utility knife. I cut from the backside of the kitchen and pressed a board against the front side of the backsplash for more control. I ended up painting the top of the wood backsplash white for an even cleaner look.

10 – I used scraps cut from the first sheet to fill in small portions of tile on the second sheet. I had just enough tile!

11 – I added new handles. Because the play kitchen’s cabinet doors aren’t a standard thickness, the included screws were too long. I had to rummage around in the garage to find a few random ones that would work.

12 – (This is where Steve says I went overboard.) I cut a piece of lumber (thrifted from our garage) to fit the width of the backsplash. I sanded it smooth by hand and added a quick coat of wood conditioner.

play kitchen steps 4

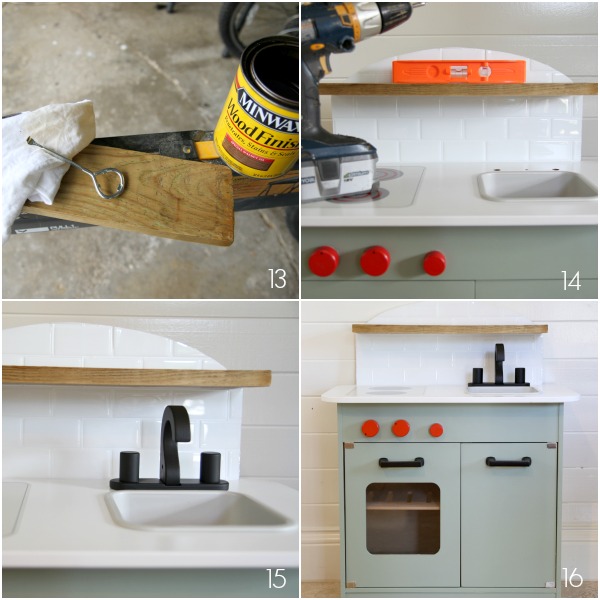
13 – I applied two coats of wood stain. (It’s Minwax special walnut, my favorite.)

14 – I secured the shelf with two wood screws, using the original screw holes (from the original shelf) as my pilot holes. It’s super sturdy.

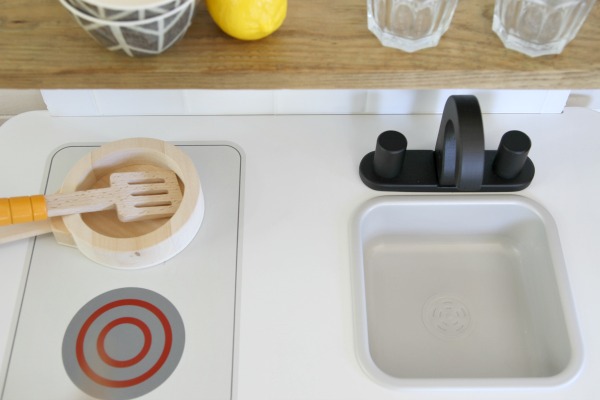
15 – I spray painted the faucet flat black to tie in with the new hardware. (Don’t think I didn’t consider adding a small bathroom faucet, but that really would have been too much. Ha!)

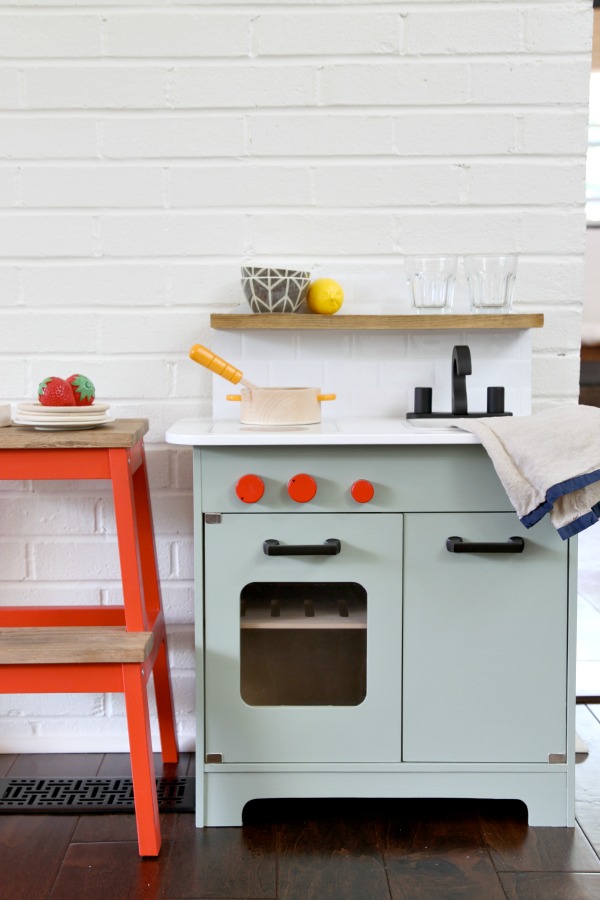
16 – The finished product!

play kitchen oven light

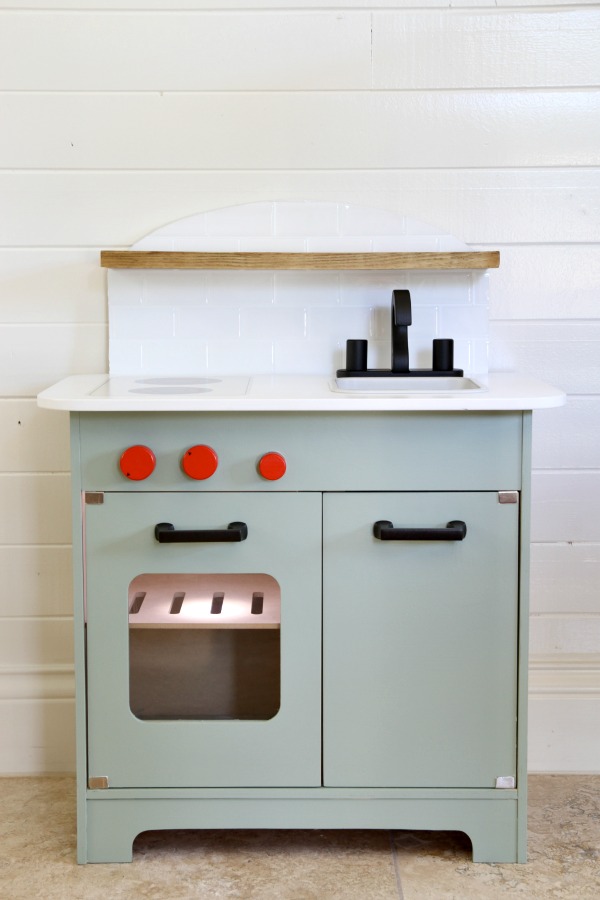
For fun, I added a battery-powered LED tap light in the “oven.” Mabrey LOVES this new feature.

play kitchen after 5

play kitchen after 4

play kitchen after 3

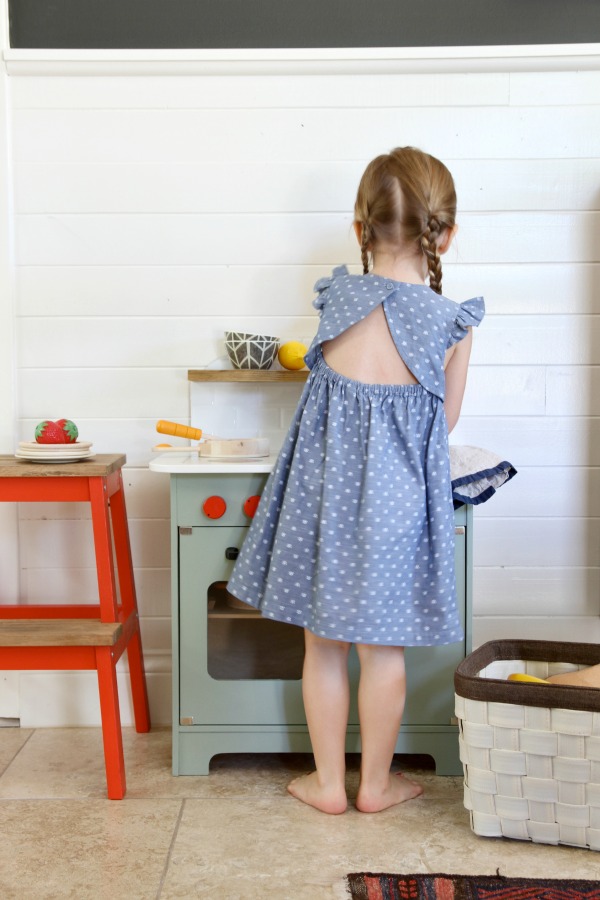
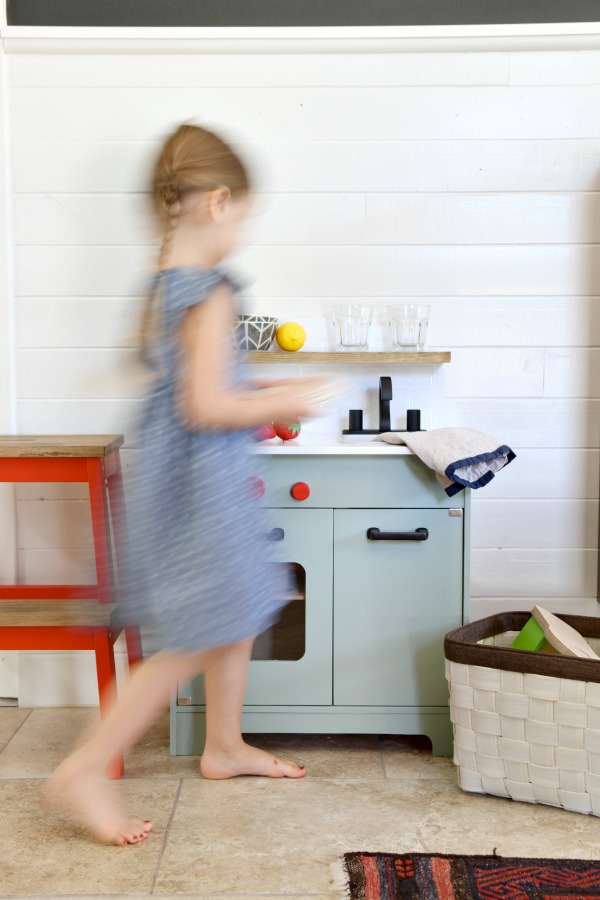
Just this morning she made me a broccoli cake ;) She couldn’t care less about the gray-green / subway tile / reclaimed wood / matte black hardware mix, but I’m all over it. One in my size, please?

play kitchen basket 1

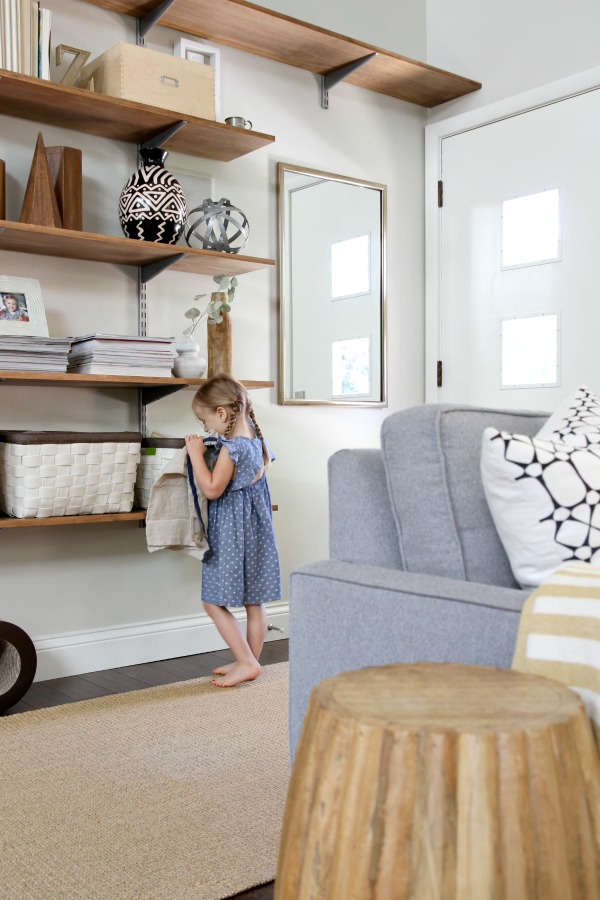
Mabrey has a basket of play kitchen accessories. I keep it on a low shelf in the living room when she isn’t playing chef. She likes to carry it over to her kitchen when she’s playing. The red stool stands in as extra countertop space.

play kitchen basket 2

She was gifted this toaster, this coffee maker and a slew of faux food including some felt items from etsy. So cute!

play kitchen after 6

When I was tweaking the play kitchen, I couldn’t help wondering if there was a market for unfinished playthings that consumers could put their own spin on. Someone should do that. I think it’s so nice when toys (especially larger ones out in the open) meld with a home’s decor. I’m more likely to leave it out which means it’s more likely to be played with which is the whole point anyway, right? Or, I might be cray-cray.

At any rate, it was a fun little project and Mabrey seems to enjoy it. Now to tackle that messy fridge!

images: Dana Miller for House*Tweaking

54 Comments

19.May.2015

So cute and I need to know about that dress! I took an old bookshelf that went on top of a dresser and made a barbie/doll house out of it. My daughter loves it.

19.May.2015

I LOVE this! I adore play kitchens, I have a whole Pinterest board devoted to them. Great job! I think unfinished play things would be AWESOME!

19.May.2015

I love that you gave it a subway tile backsplash!! Now it matches the big girl kitchen :) Also, Mabrey’s dress is so cute!

19.May.2015

The dress is from Target. I bought it for Mabrey for her birthday :)

19.May.2015

Not cray-cray. Amay-may.

19.May.2015

You have a lot of time on your hands. Not a criticism, just an observation. I’m glad this project made you happy!

19.May.2015

It’s super adorable – love the color combo! Add a small hook on the side wall by sink to hang the towel. Or would that be too much? LOL.

I don’t think glass and small children are a good combination even if you did stage the picture that shows the glass cups. You can always add clear plastic cups for aesthetics and actual play.

19.May.2015

This is precious! Love how it blends into your own home.

So I see a cute pillow on your grey chair…where’s it from?

19.May.2015

That’s a totally awesome play kitchen!
but yeah, maybe a bit cray cray. :-)

19.May.2015

You are hilarious. It’s perfect, well done!

19.May.2015

love!
So the shelves in your entry…do they slide around when you move things on the shelf? I have similar ones and mine are all over the place. Seems it’s the brackets that slide side to side. If you have a solution I would love to hear it.

20.May.2015

Glad there is someone out there as crazy as I!!

This is so perfect. I genuinely love seeing play furniture done up like this because when I was a child I was forever wanting to customise things and make them my own. And I still do!

Can’t wait until we have little ones so I can do this too :)

20.May.2015

I went from your blog to Brooklyn Limestone and what do I find? Both your girls wearing the same dress (http://www.brooklynlimestone.com/2015/05/outdoor-magnetic-chalkboard-diy.html). Too funny.

20.May.2015

Great minds think alike! ;)

20.May.2015

Hmmmm…our shelves don’t budge. Sounds like it might be a problem with the brackets and accompanying vertical standards?? Do the brackets swing from side to side?

20.May.2015

It’s from Crate & Barrel, a year or two ago.

20.May.2015

We built a play kitchen for our girl last Christmas, but I had this one from Hape on standby in case the project went south. Fortunately, it’s adorable and I love having it out in my living room. I agree with you, it’s nice to have the larger toys not be so…obnoxious. And also, I wanted a kitchen that wasn’t so super girly that my son and my nephews might feel like it wasn’t okay for them to play, too.

Love it. You know how much I love a play kitchen reno :)

20.May.2015

I’m with you on the gender-neutral toys! Everett LOVES playing kitchen with Mabrey.

20.May.2015

;)

20.May.2015

There are screws underneath that hold the shelves to the brackets. These keep everything from sliding around.

20.May.2015

That is the cutest play kitchen! And you’re not crazy. A little customizable kitchen would be perfect! Also, my daughter is sitting next to me and has the same dress and asked if that was her in the picture. Ha! Nope.

20.May.2015

You are adorable! Love it!

I purchased a used wood kitchen off a fellow mama a few weeks ago, with plans to do exactly this for my daughter’s upcoming 2nd birthday gift. Love your spin!!

xo.

20.May.2015

that paint color would be nice on your hallway ceiling. Just a thought.

20.May.2015

It’s such a great color!

20.May.2015

I’m totally getting this kitchen for my daughter. On a side note, are those magnet photographs on the wall? Did I miss that post?

21.May.2015

Hi Dana, I can’t help but notice that your floors still look great. We are looking for wood flooring to put in our house and I was wondering how they are holding up and if you would do anything differently?

21.May.2015

So adorable! Now a playhouse with kitchen cabinets, pantry, dining table and chairs, living room with fireplace,…you can tell I would go nuts!

21.May.2015

That is too funny! The dress is adorable on both of these girls. We made our girls their kitchen cabinet and matching table to match the living room space so it didn’t stand out. I wanted the kids to feel free to play close by BUT I didn’t want their toys to rule the entire house. I bet she gets a lot of fun out of cooking close by!

21.May.2015

I have plans to “hack” the Ikea Latt table and Duktig kitchen since they are basically begging to be customized as well! Love the color scheme and little details you added to Mabreys!

22.May.2015

I love this for grown up kitchen inspiration! We have the same play kitchen, and matching fridge. If I weren’t in my first trimester with my third right now, this would be on my weekend to do list . . . maybe next month. I would love to know where you got the baskets that hold the play food in though. Our play food is haphazardly shoved into the play kitchen, or just scattered around outside. I love those baskets!

23.May.2015

HomeGoods!

23.May.2015

For what we were willing to spend (these ran us ~$2 per sq ft) for this house and considering our options were limited because we’re on a slab, I think these engineered floors have been perfect for us. Probably the biggest issue has been nicks and scratches. We don’t wear shoes in the house but birch is a softer wood so when you drop something heavy, it leaves a mark. Not a huge deal. I go around with a brown Sharpie from time to time to fill in spots. Works like a charm. The floors are hand scraped which helps conceal nicks, too. I think it just adds to the character. In my dream home and with a bigger budget, I would have real wood and maybe a slightly lighter stain to hide dust better but I’m somewhat of a clean freak so I try to stay on top of the dust anyway.

23.May.2015

They are little Instagram magnets! I shared them here…

https://www.housetweaking.com/2014/02/13/instalove-diy-magnetic-photo-wall/

I love them! Thanks for reminding me to order some current ones ;)

26.May.2015

OMG I beyond love this Dana!! I also love that you have all the kids artwork displayed on the side of the fridge:) Im pretty anti “stuff stuck to the fridge”. BUT I do use the space on the side. Love seeing little firecracker Mabrey in her element:)

28.May.2015

[…] help you manage everyday life. I plan on using them to create an organized, interactive side panel next to the fridge. I’m also keeping the card stash on hand for last minute note writing. (You know how I feel […]

13.June.2015

I’ve been wanting to do this for my little girl’s kitchen- did you use spray paint? Also did you use a primer of any sort? I’m a little worried about the paint sticking to this faux wood/plywood material.

15.June.2015

No spray paint. I brushed it on. Since this kitchen is real wood, I just scuffed it up a bit with some sandpaper before painting. It is holding up beautifully, no scratches. If you’re thinking about painting over faux wood, try a primer + paint in one.

10.July.2015

Not a criticism…sure…topping it off with “I’m glad this made you happy” certainly doesn’t sound critical at all! Sorry, but comments like these are starting to drive me a tad bonkers… Keep it to yourself, love!

10.July.2015

Love, love, love this! If only my own kitchen looked like this!

16.July.2015

Love the shelves, where can I get them?

01.March.2016

Could you share the paint colors you used for the kitchen (Including the knobs and ikea side table)? So beautiful!

02.March.2016

I mentioned in the post that I painted the kitchen in Sherwin-Williams coastal plains. The knobs are the original red. I didn’t paint them, just taped them off while I painted the rest. You can read more about the IKEA step stool here…

https://www.housetweaking.com/2014/02/24/i-call-it-the-stop-stool/

Hope that helps!

03.March.2016

Thanks a bunch!

30.November.2016

Your kitchen is beautiful! I’ve been looking at this same Hape kitchen. It looks perfect for my daughter’s room except for the height. Do you think it would be possible to add furniture risers or adjustable cabinet legs to the existing legs to raise them up?

09.December.2016

Hi! I have plans to do a similar “hack” to my son’s Hape kitchen. It seems you painted it while fully assembled? Just curious why you chose that approach? I was thinking to do each piece separately then put it all together, but perhaps I should rethink my method? Also I love your blog and instagram – long time follower here :)

12.December.2016

I only did it that way because Santa put it together for her a few months prior ;)

12.December.2016

There is solid horizontal piece ~2″ up from the bottom of the kitchen pieces. I think adding legs would be feasible!

17.December.2016

I LOVE this. I was wondering if you could share where you got the new handles? Thanks!!

20.February.2018

We have the exact same play kitchen and I have been wanting to update ours ever since you first posted this. I think it’s beyond gorgeous. You have such beautiful style. Xx

06.November.2019

Just wondering how this has held up! Wanting to paint our identical Hape Kitchen, but I am worried it will chip and I will regret it ;)

05.April.2020

It’s still kicking!! I’ve only had to touch it up once…after moving houses.