*THIS GIVEAWAY IS NOW CLOSED.*
Congrats to Chris who plans on using the cabinet fronts in a tiny guest home she’s currently building!
It’s about time for a studio update, right? I could list a dozen valid (and another dozen invalid) reasons why I haven’t done this sooner but I won’t waste your time. The truth is I’m embarrassed. A few weeks turned into a month. A month turned into a few months. A few months turned into six. Now it’s December. Life is crazy like that.
Anyhow, the studio!
I think the last time I shared pictures the walls and ceiling had just received a few coats of white paint. I went with Sherwin Williams pure white (SW 7005). Since then, the drywall dust has been cleared (Oh my word! Such a mess!! Cleanup took me forever.) and the concrete floor has been painted.
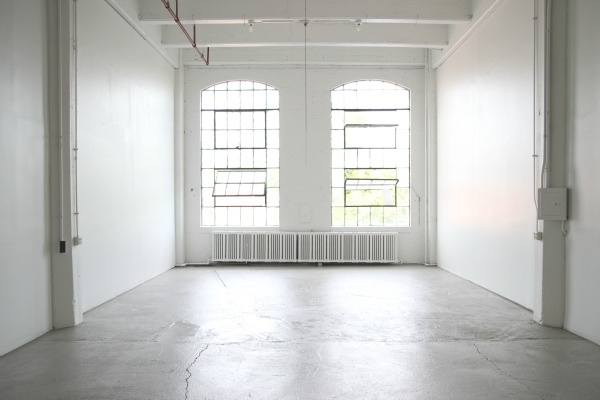
The original concrete was in rough shape. There were cracks, stains and some spalling. I could literally sweep chunks away with a broom. The space is accessed via a loading dock so all kinds of dirt and grease are tracked in on a daily basis. I decided painting the floor a dirty gray was the way to go.
To select the perfect gray I spread out a bunch of color swatches on the floor then walked all over them and picked the one that hid my footprints best. Oh, if only picking a paint color was always so easy! The swatch that made the cut was Sherwin Williams dorian gray (SW 7017) and it’s actually a really great color, a warm muddy gray. I had it color-matched in Valspar’s latex porch and floor paint then rolled on three coats. (That makes it sound so quick and easy but, I assure you, painting a floor with kids underfoot is anything but quick or easy. I do not recommend it.)
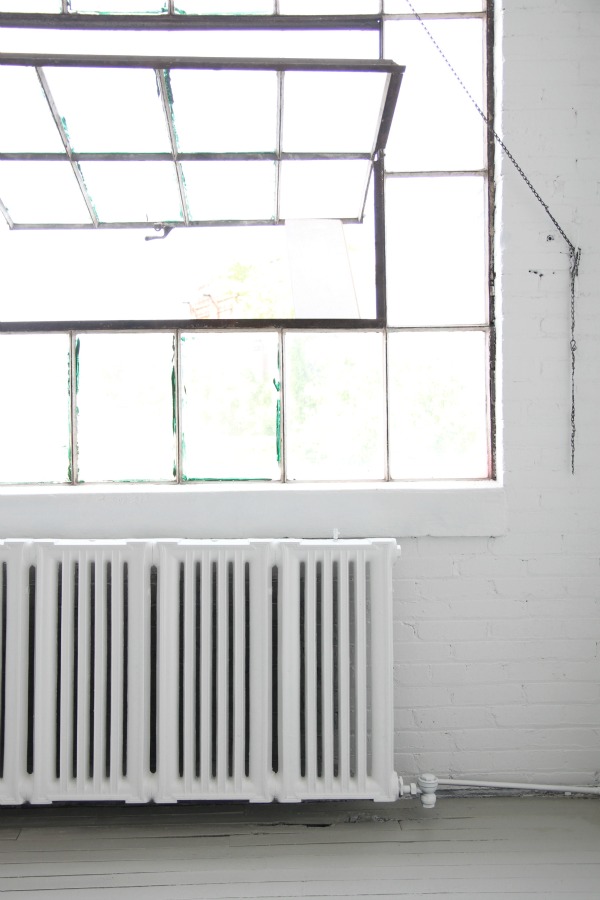
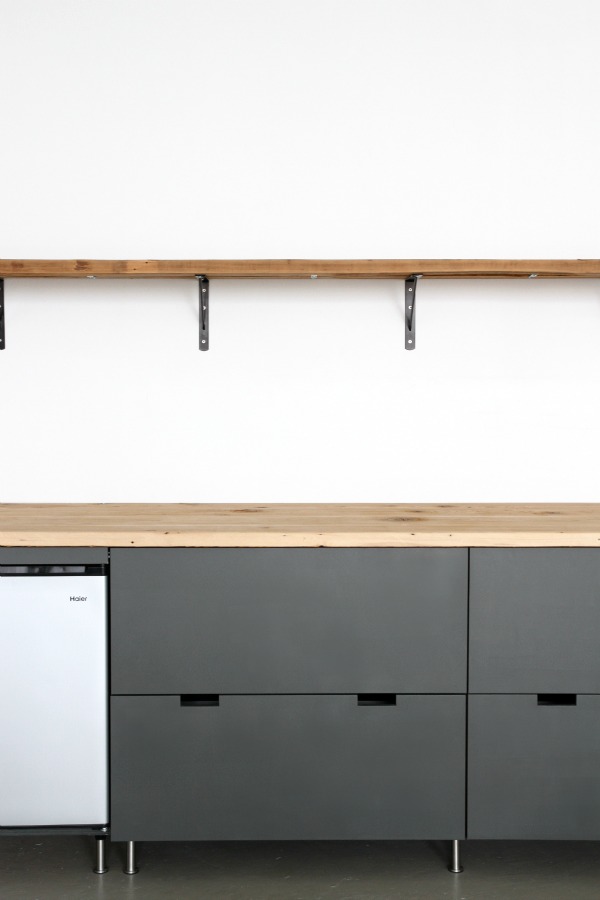
Way back when, there was discussion about what to do with the grimy radiator. After giving it a good scrub, I ended up spray painting it white. I did not attempt to do this with kids around (which made finding time to do it even more difficult) and I tackled it before painting the floor. It took an insane amount of paint (eleven spray cans I think?) and I’m pretty sure I lost whatever brain cells I had left after baby #3 was born. Which explains why maybe this post isn’t the most bestest.
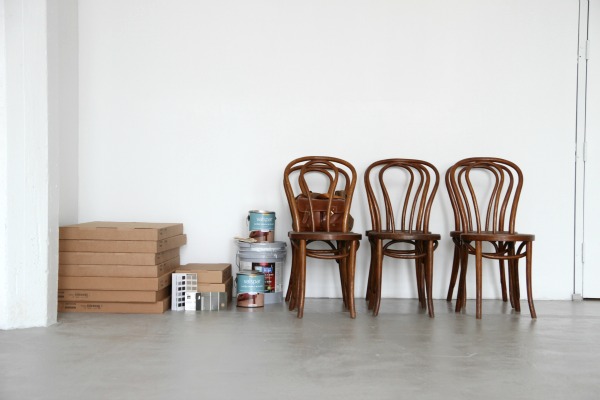
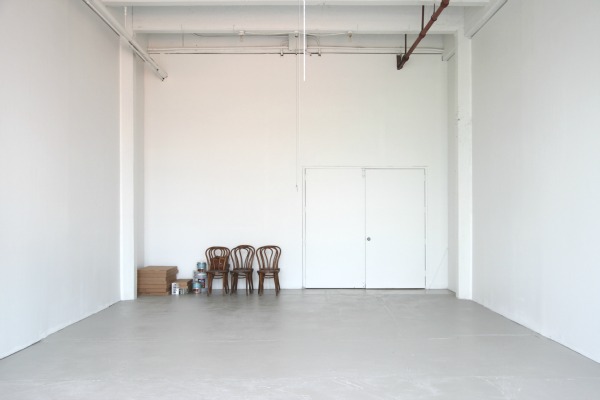
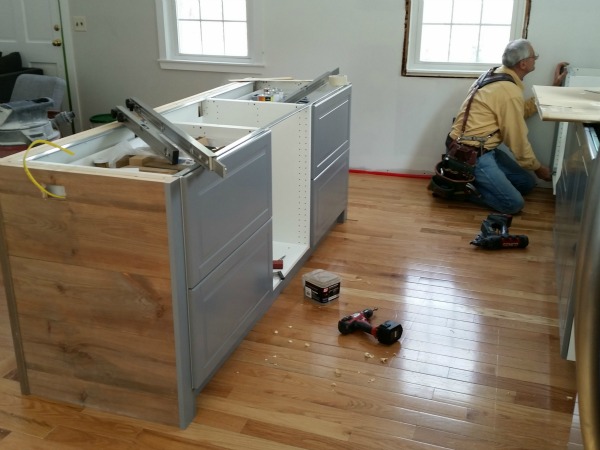
After everything was cleaned and painted, I got to work on the dry bar. (I also scored six Bentwood knockoffs at our local Habitat ReStore for $12 total!) I used cabinets from the SEKTION line at IKEA. I bought a pair of 36″ base cabinets with two drawers each and one 15″ base cabinet with three drawers. I chose the Ma drawer style and, since I planned on painting the fronts a dark color, I chose the wood effect brown frames which I so wish had been available when we were renovating our kitchen. (Our fronts are dark and slivers of the white frames peek out in a few places.)

I built the cabinets and Steve helped me install them. Everything you’ve heard about assembling IKEA cabinets is true: Staring at all the boxes and pages of instructions is daunting but, after you’ve put one together, you can put together a hundred. We opted for steel legs instead of a toe kick since it is a warehouse after all.

After that, the studio turned into a drawer graveyard. Layne offered to help. Start ’em young! Seriously. It’s so easy even a ten-year-old can do it. We had a drawer building race and he totally beat me.
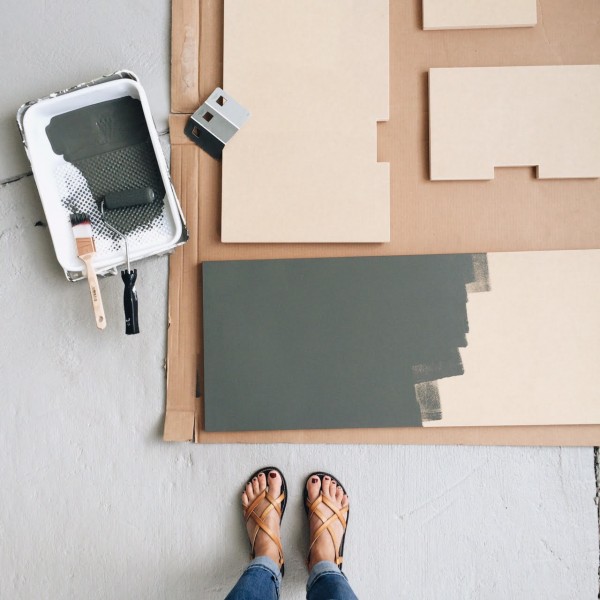
I’d been itching to try Semihandmade for a long time so I ordered seven of the DIY slab drawer fronts with notched pulls and painted them using a 4″ foam roller. The MDF really soaked up the paint. It took three coats of Valspar Reserve latex. The color is Valspar sable evening in a satin finish and it’s one of those chameleon colors. Depending on the light, it can read charcoal or green-gray. I love it.
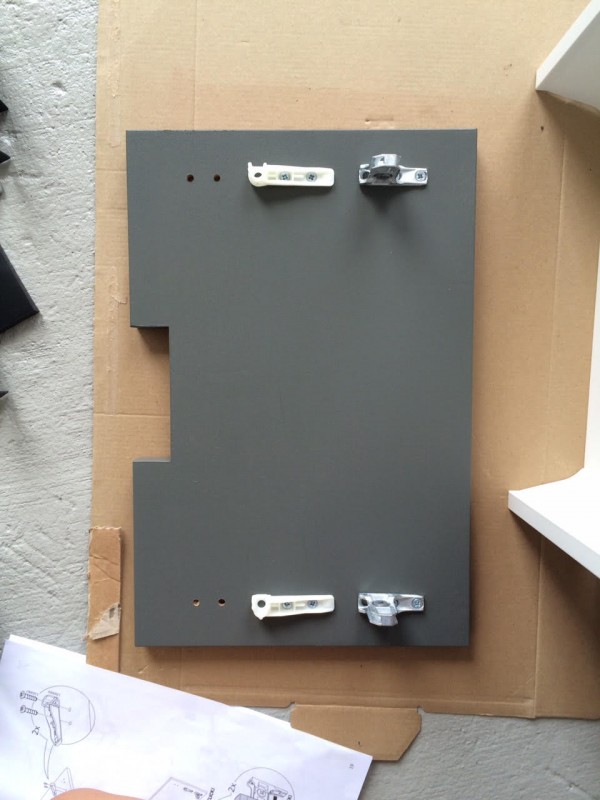
Semihandmade fronts come pre-drilled so I simply screwed the hardware (included with the IKEA drawers) into the proper holes and snapped the fronts onto the drawers.

Voilà! Super easy.
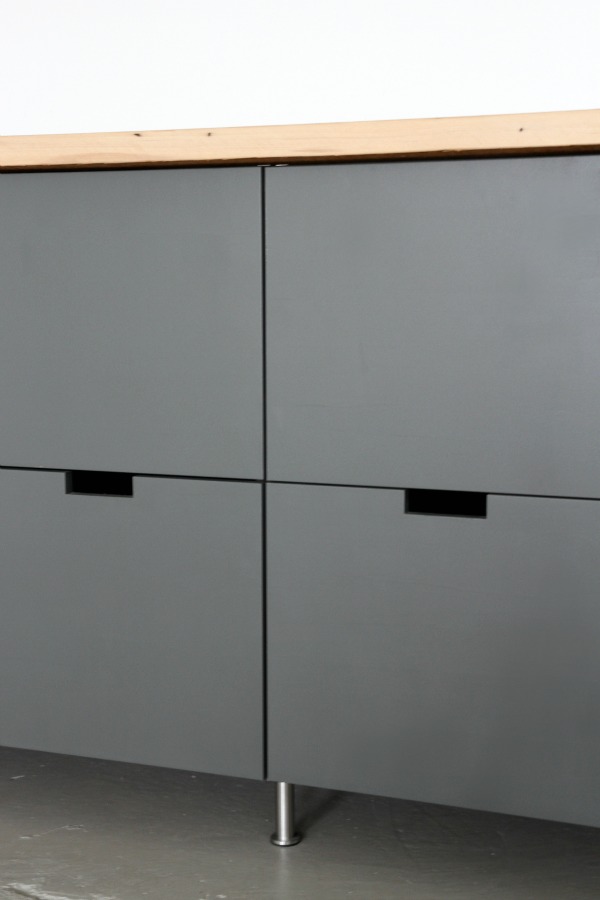
IKEA drawers have special mechanisms on them to tweak the fronts so they line up properly. I didn’t have to adjust them too much. The top drawers open by pulling on their bottoms via the notch below.

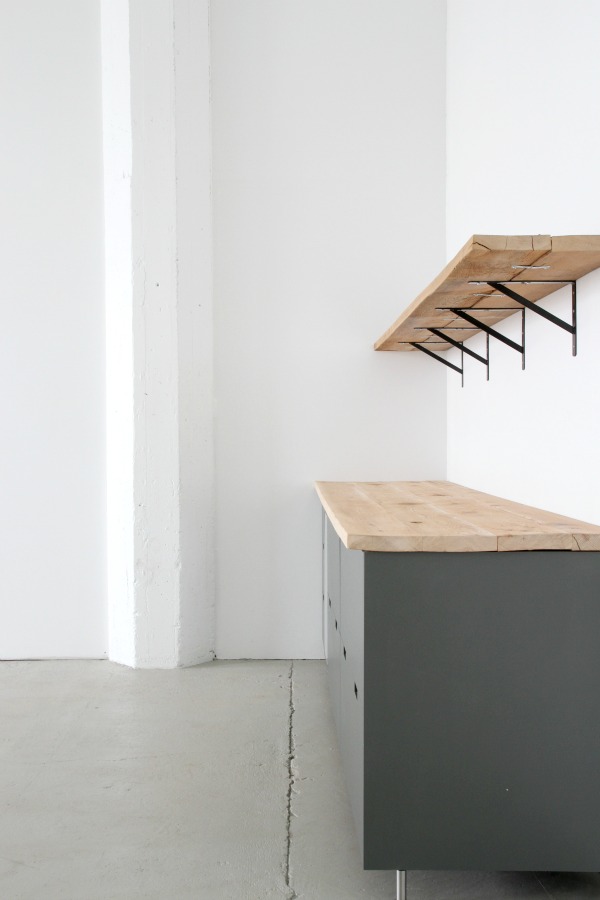
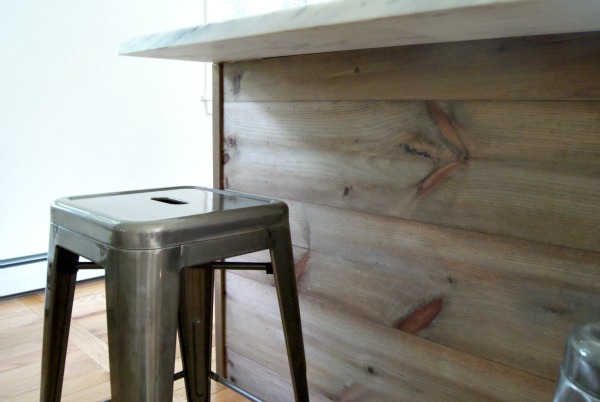
Just as we did for our laundry nook, Steve built a wood top out of boards we found in our attic during renovation. Being the typical engineer, he fretted over the warped boards but I told him not to worry. That’s the beauty of the studio! Nothing has to be perfect! We sanded the wood but left it raw for a rustic look.
Along with the drawer fronts, I also ordered a panel from Semihandmade to cover the exposed side of the end base cabinet. We cut it to size for a custom fit and I painted it the same color as the fronts.
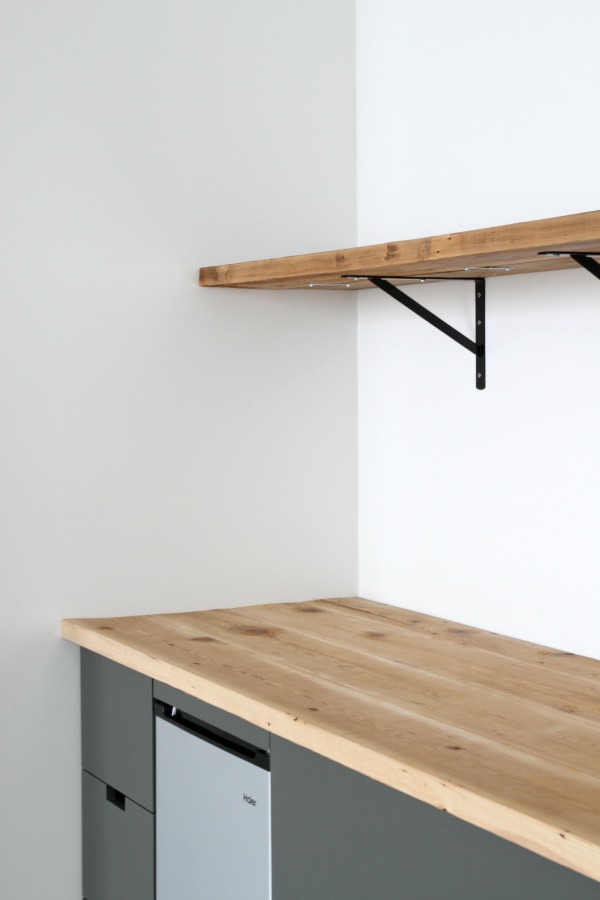
The shelf is made from off-the-shelf brackets and more reclaimed lumber from our attic. Once again, Steve was worried because the wood was warped and the tone of the shelf didn’t match the bench top. I’m like, “It’s free! It doesn’t have to match!” One thing I don’t like is the spacing of the brackets but we didn’t have a choice. We had to tie in to the studs.
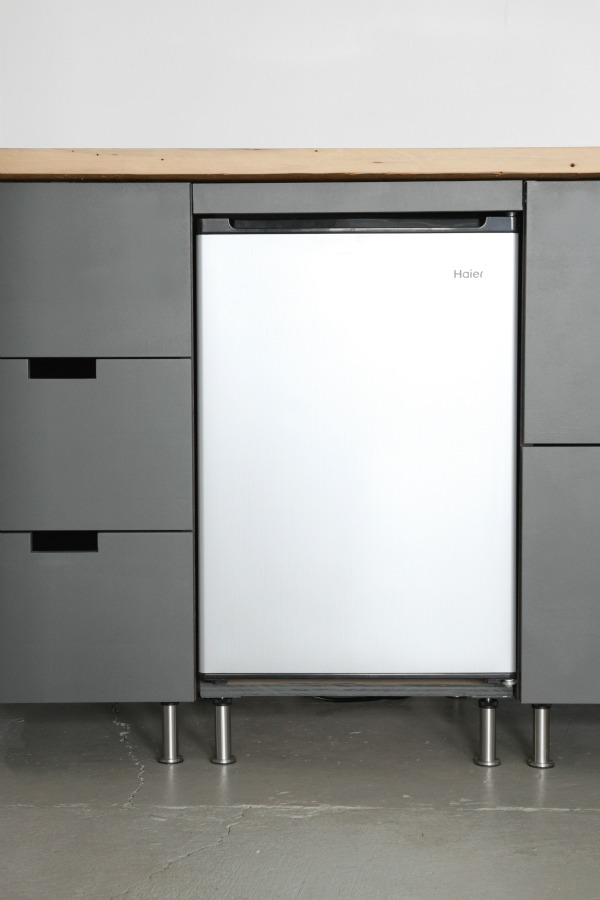
The kids’ favorite part of the studio is the mini fridge. I bought an inexpensive model and Steve made a platform using leftover plywood and IKEA legs to level it with the cabinets. Then he cut a piece of filler from scraps of the Semihandmade side panel to fill in the gap at the top. I painted everything to match.

Overall, I’m super happy with how the dry bar came together. I’m impressed with the Semihandmade fronts. They have more weight to them than IKEA fronts and I like that there are more options for customization. I should note that the notched pulls are no longer an option. The notches had to be cut by hand and creating them became dangerous and time-consuming. I love the clean, modern look of the notches but reaching down to open the top drawers does feel a little awkward. If I were putting these fronts in my house, I would probably spray them or have them professionally sprayed for a perfect finish. The foam roller worked great but I would be pickier about the finish in a real kitchen.
I’ve had experience building cabinets from both the IKEA AKURUM and SEKTION lines and, in my opinion, the current SEKTION line has better hardware when it comes to assembly and stability. A few things that were plastic in the AKURUM line are now metal in the SEKTION line. I don’t know if or how that will effect longevity but it’s a difference I noticed.
I know this setup probably isn’t feasible for a house (um, no sink) but my hope is, even though I’m putting my spin on a workspace, someone out there might find something that translates to a living space. If you’ve been considering Semihandmade for a project (they do IKEA wardrobes and bathroom vanities too!) then you might want to check out entry details for the giveaway below. Hint, hint.
PRIZE: one $500 credit to Semihandmade (Offer is not redeemable for cash.)
RULES: You must be at least 18 years old and have a shipping address (no P.O. boxes please) within the continental U.S. or Canada. One entry per email address.
TO ENTER: Leave a comment on this post proclaiming “SEMI ME!” Double your odds by liking this Instagram post.
DEADLINE: Enter before 9:00 p.m. EST on Sunday, December 20th. One random winner will be announced Monday, December 21st.
WHILE YOU’RE AT IT: Share what project you would tackle with the prize money. New kitchen? Bedroom wardrobe for clothing organization? Bathroom makeover? So many possibilities!
Good luck!
images: Dana Miller for House*Tweaking
It seems the consensus is that you guys would like to continue seeing and reading about Ikea kitchens regardless of which cabinet line – AKURUM (previous) or SEKTION (current) – is featured. For that reason, I will continue to share the best of the bunch that come my way. Thanks for reading!
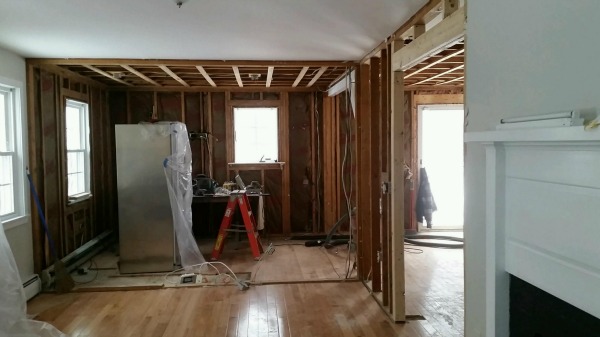
Obligatory preamble rambling: When we were renovating our kitchen, I searched high and low for any information I could find on Ikea kitchens. The results were few and far between. We did end up with an Ikea kitchen (which we love) but I’d like to shed more light on Ikea kitchen renovations from the perspective of other real life homeowners. It’s something I wish we would have had access to when we were considering Ikea for our own kitchen remodel. Plus, it’s fun to see how others use Ikea to suit their personal style and needs in the kitchen. I hope you find these posts helpful and inspiring – whether you ultimately end up with an Ikea kitchen or not. Enjoy!
Lauren, along with her husband and one-year-old daughter, moved from New Jersey to just outside of Boston in May of 2014. In the process, the family bought an older Cape Cod. Lauren admits the kitchen wasn’t horrible but it was dark and closed off from the rest of the first floor. Even though it boasted many cabinets, actual usable cabinet space was minimal. The young family craved more natural light, more countertop space and a layout more conducive to gathering and entertaining. To achieve their kitchen goals, they opted to remove walls (one of which was load-bearing) that separated the kitchen from the living and dining rooms and to utilize Ikea cabinetry from the new SEKTION line. Lauren was happy to share more about the renovation with me (shortly after giving birth to baby #2 no less!). Find her interview and the inspiring results below!
Which items in your kitchen hail from Ikea?
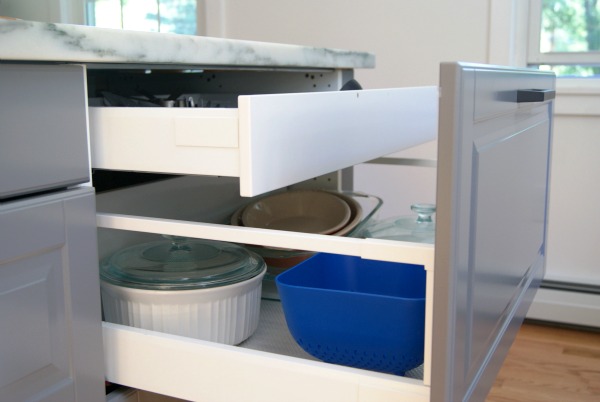
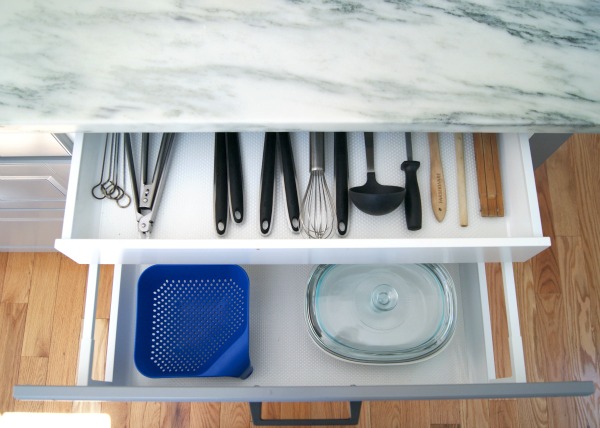
Our cabinet bases, drawer and door fronts, integrated dishwasher, vent hood and interior organizers are all from Ikea.
What made you decide to source these items from Ikea?
We had been eyeing Ikea’s kitchen options for almost a year after reading great reviews about them on blogs (like yours!) and interior design websites. We didn’t personally know anyone that had installed an Ikea kitchen but we were confident in the feedback we had read online and in the 25-year warranty. We looked into custom cabinetry but the price was far out of our budget. Plus, we really like the simple, modern aesthetic that Ikea offers with their modular system.
Who designed your kitchen? What aesthetic were you aiming for?
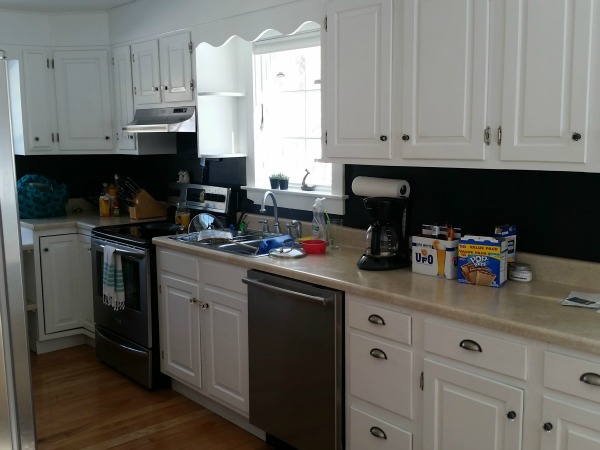
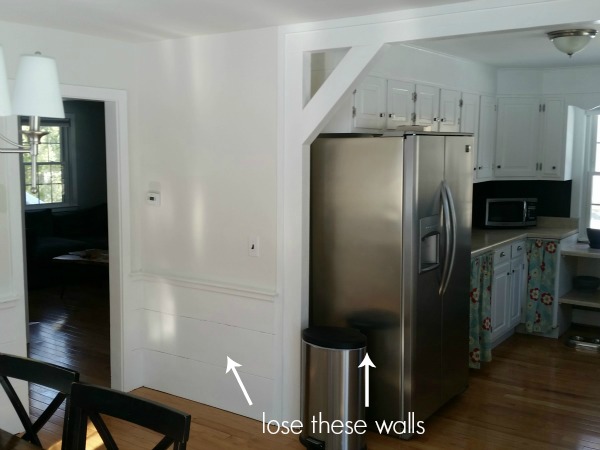
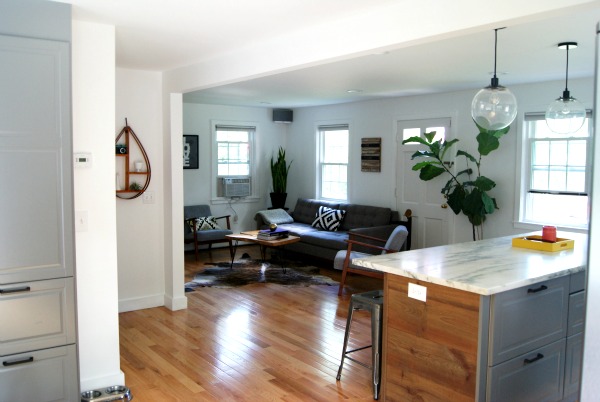
Our kitchen redesign was actually part of a larger project to open up the first floor of our home. The original layout was choppy with small, dark rooms. When we purchased our home, one of the first things we promised ourselves we would do was take down a large load-bearing wall that separated the kitchen from the living space.
Once we had a general idea of what we wanted, we turned to the online Ikea kitchen designer to plan out a few different layout options. Then we chose the layout we thought would work best for our lifestyle. I had a folder of photos for inspiration. Ultimately, we wanted a kitchen with clean lines, a minimalistic vibe and classic features that we would love for years to come.
Did you assemble and install all Ikea kitchen components yourself? If not, what did you seek help with?
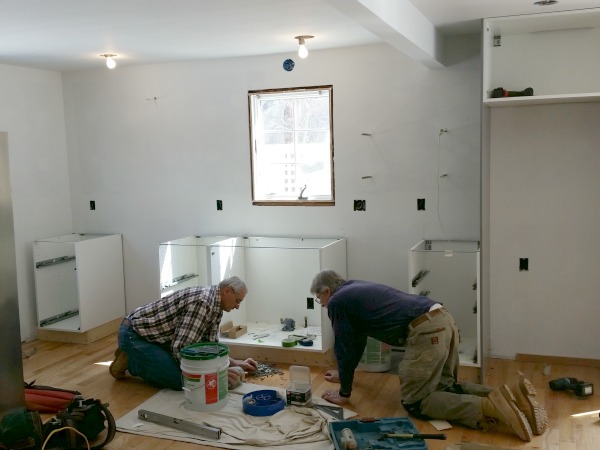
My husband assembled all of the cabinets over the course of two weeks. Our entire basement was filled with Ikea boxes. At first sight it felt daunting but, once the first few cabinets were completed, the process went fairly quickly and smoothly. The actual cabinet installation was completed by my father and his business partner who are general contractors in New Hampshire. Although I like to tell people that I was the project manager, they truly spearheaded the entire renovation process from taking down the load-bearing wall and patching in the hardwood floors to all of the finish work that was done to give the kitchen a custom, built-in look.
How did you customize your Ikea kitchen to suit your needs and preferred aesthetic?
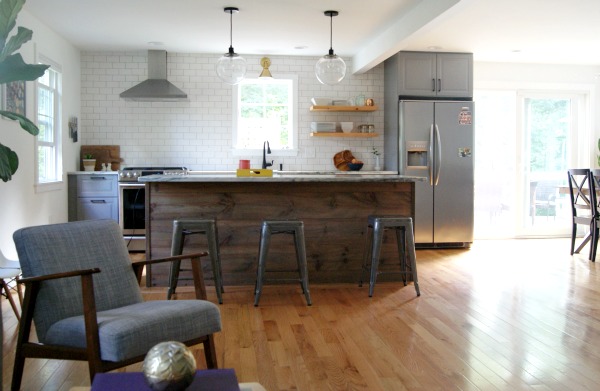
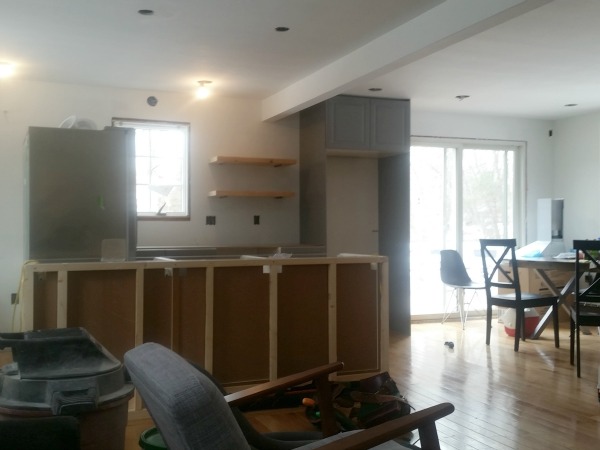
Our previous home had a tiny kitchen with hardly any counter space which never allowed us to use the area as a gathering space for holidays or parties. We knew that a large island would give us the extra space we wanted and we made it a top priority. We wanted a unique look for the island so we purchased shiplap pine boards and hand-distressed them with steel wool using a a mixture of coffee grounds and vinegar. Our garage smelled for a few days but the finished product came out better than we even imagined!
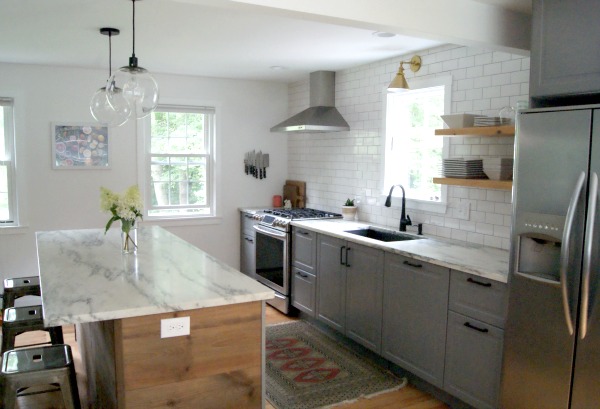
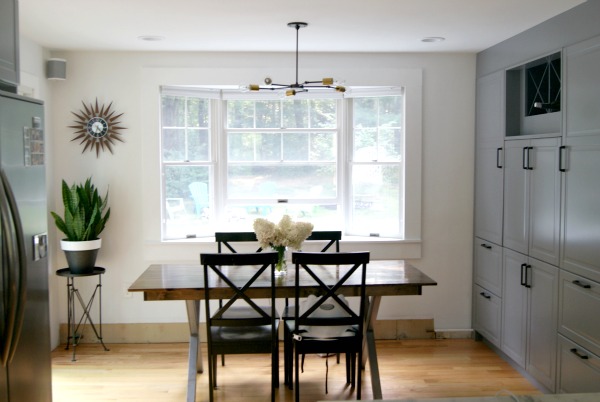
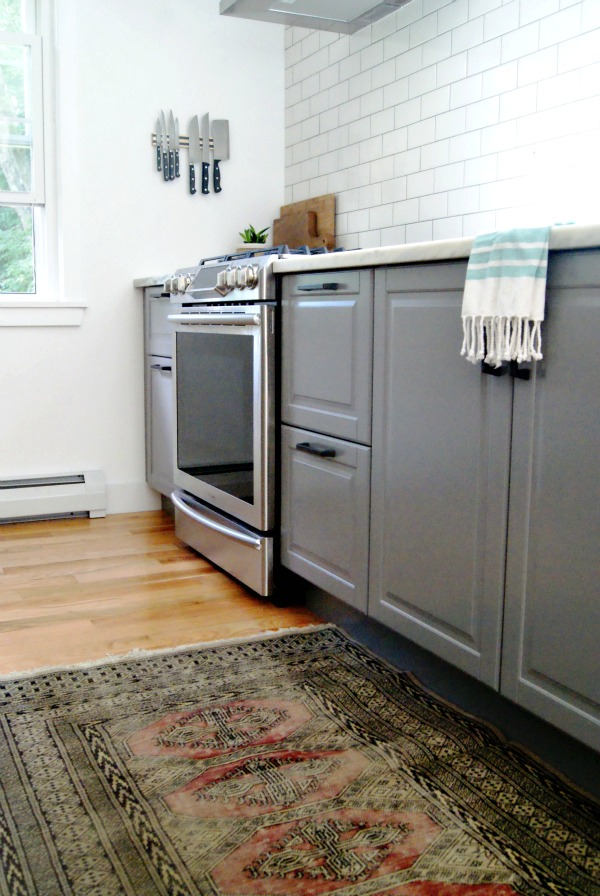
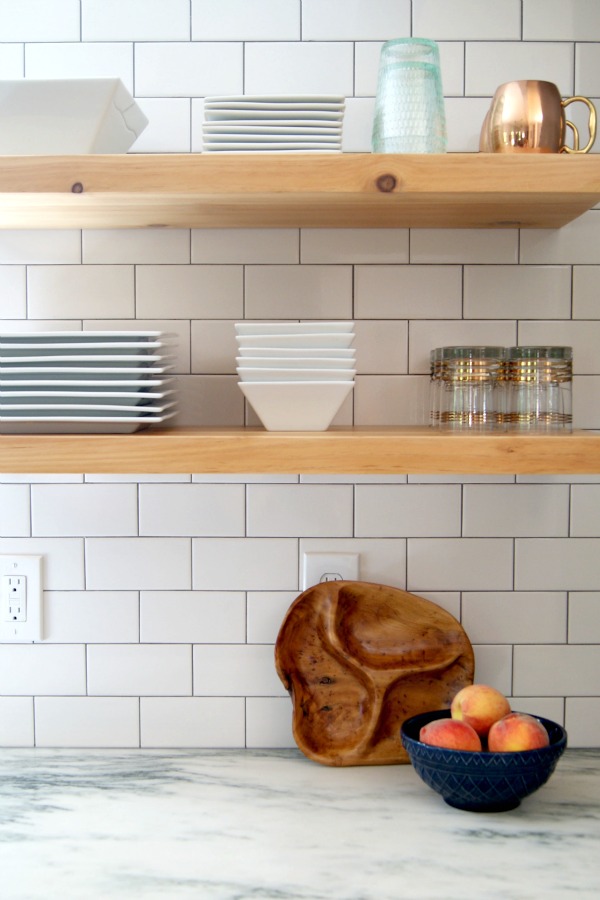
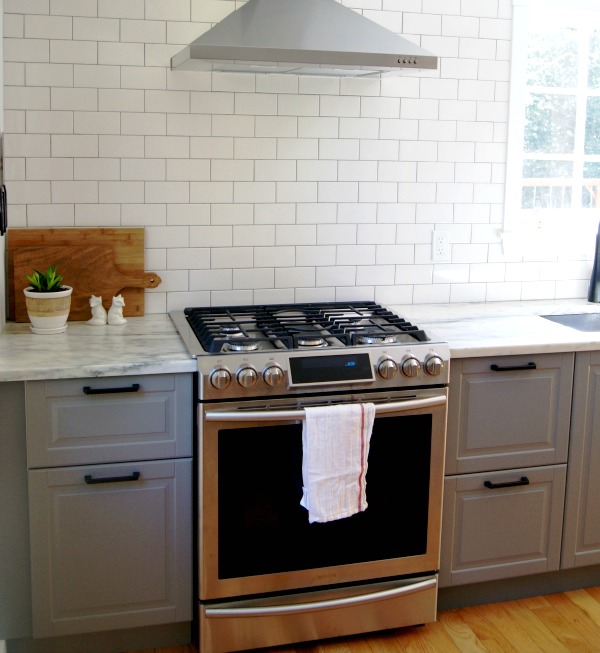
For the rest of the design, we chose a mix of high and low to achieve the aesthetic we wanted. We used honed marble for both the island and the back run of countertops. The drawer pulls and backsplash are off-the-shelf items from Home Depot. The wine racks integrated into the dining room pantry are from CB2. Schoolhouse Electric & Supply Co. has always been a favorite source of mine. Being able to purchase both the sink and dining fixtures from Schoolhouse was a dream come true and really brought all of the different areas within the open concept together. Lastly, my father recommended using wood (color-matched to the gray cabinets) for the toe kicks and filler pieces in place of the flimsy offerings from Ikea. He also sourced thick pieces of pine for the open shelving.

How long was it from design to the final product?
We started the design process back in November of 2014 based on the previous (now discontinued) AKURUM cabinet system. When we found out Ikea would be launching the new SEKTION system with some great upgrades in early 2015, we decided to wait it out. We purchased the cabinets in February 2015 during one of the kitchen sales. The kitchen was completed by mid-April of 2015.
How long have you lived with your Ikea kitchen? Have you encountered any problems?
It’s only been about six months but, so far, we love everything about our kitchen. It functions so much better than the old kitchen. Little things like the soft-closing hinges and spacious drawers (instead of cabinets) really make it feel high-end. Everyone who sees our kitchen can’t believe the cabinets are Ikea!
What is your favorite thing about your kitchen? Least favorite?
By far, my husband’s favorite feature is the large 7′ x 3′ island. It gives us so much space to spread out and entertain. I love the new open concept design but, most of all, I adore the white subway tiles with contrasting grout. They make me smile each morning when I see them and reflect an enormous amount of light into the space. We don’t really have a least favorite aspect but the drawer front on the trash pull-out doesn’t line up with the other drawer fronts when closed. It drives us crazy.
Would you recommend Ikea as a source for a kitchen remodel?
Absolutely! We got the exact look and feel we wanted for a fraction of the cost. Our kitchen still looks high-end to us even though it was budget-friendly, and cooking in it is so much more fun!
Would you consider Ikea for a future kitchen remodel?
If we get the opportunity to renovate another kitchen, Ikea will definitely be tops on our list of sources.
Resources of note:
wall paint – almost gray by Benjamin Moore
flooring – Home Depot
cabinets, drawer fronts & doors, interior organization – Ikea
countertops – honed danby marble from Montes Marble & Granite
hardware – Home Depot
sink – blanco granite composite, Amazon
integrated dishwasher – Whirlpool, Ikea
range hood – Ikea
gas range – Samsung
refrigerator – Frigidaire
backsplash tile & grout – Home Depot
counter stools – Target
pendants over island – West Elm (spray painted black)
brass sink light – Schoolhouse Electric & Supply Co.
dining room pendant – Schoolhouse Electric & Supply Co.
faucet – Moen
soap dispenser – Kohler
wine racks – CB2
Thank you Lauren for sharing your kitchen! I love your style. I hope baby #2 is treating you well ;)
Okay readers, what are you taking away from this one? The mix of gray cabinetry, honed marble, subway tile and wood accents has such a natural, organic vibe. I love it! Knocking down walls (especially load-bearing ones) can be intimidating but I’m so glad Lauren and her husband were gutsy enough to do it here. It completely opened up the main living space to suit their casual lifestyle and gave them more possibilities when it came to reconfiguring the kitchen. Speaking of reconfiguring kitchens…did you notice the lack of upper cabinetry in the finished product? It gives the room a lighter feel and allows the tiled wall to take center stage. To make up for lost upper storage, the couple incorporated an island and pantry (in the adjacent dining area) with drawers and cabinets galore. (Psssst…the microwave is hidden in a pantry cabinet outfitted with an electrical outlet.) It’s such a good balance of form + function. My absolute favorite thing(s) about this kitchen are all the little DIY touches that keep it from feeling generic and falling flat. The spray painted globe lights, the vinegar + coffee-treated wood planks on the island (genius, btw!) and the pine shelves go a long way in adding interest to the space by providing warmth and breaking up matching materials. So inspiring!
Want more inspiration? Click the “See Real Ikea Kitchens” button in the sidebar to read about all of the kitchens featured in this series.
Do you have a project (big or small, Ikea or non-Ikea) that you would like to share with House*Tweaking readers? Email me at housetweaking (at) gmail (dot) com for consideration. Thanks in advance!
images: Lauren Santagate


budget decor, DIY, IKEA kitchens, inspiration, renovation