For years I’ve been thinking it would be great to have extra seating near the fireplace. We spend the majority of our winters huddled around the fire trying to stay warm. The poufs I tossed down several years ago are super kid-friendly and worked well when our kids were a little younger. They were essentially glorified bean bags. However, as you can imagine, they were quite low and not really suitable for adults. An epic chair hunt commenced.
For a while, finding a chair wasn’t a huge priority. The poufs were fine, and we were trying to wrap up the main bathroom anyhow. But it didn’t stop me from looking. I knew I wanted something low and squatty to keep sight lines unobstructed from all angles. (Something like a tall wingback would have cut off the space.) I also wanted something unique which meant I was willing to wait for the right chair to come along.
I browsed thrift stores, craigslist, ebay, etsy and several other online sites for over a year before I found THE ONE on ebay. It was listed as a “Danish chair with walnut armrests and neckrest in Kurt Østervig style” – although I don’t think it’s a legit Østervig. While the frame was in great condition, the upholstery left a lot to be desired. It was upholstered in a satinish, tone on tone floral fabric (most likely not the original upholstery) and it was badly stained. (See the before here.) The scale and lines were perfect though, and I knew a good upholstery job would make a world of difference. I immediately nabbed it for $150.
Then it sat in the garage for another year while I saved up the money to have it reupholstered. I wasn’t even going to try DIYing my way around those walnut armrests and neckrest. When it came time to select an upholstery fabric, I considered a nubby polyester in mustard or gold (similar to this), but ultimately decided I’m too fickle when it comes to textiles to commit to it. I wanted a true neutral that would stand the test of time. With a saddle leather sofa and an oversize gray chair already in the room, I kept it simple and chose ivory.
But.
BUT!
It had to be 100% family-friendly. I worked with a local upholsterer who suggested a fabric line pre-treated with Nano-Tex. You can learn more about Nano-Tex here, but it basically renders fabrics stain- and spill-proof…permanently. Sign me up!
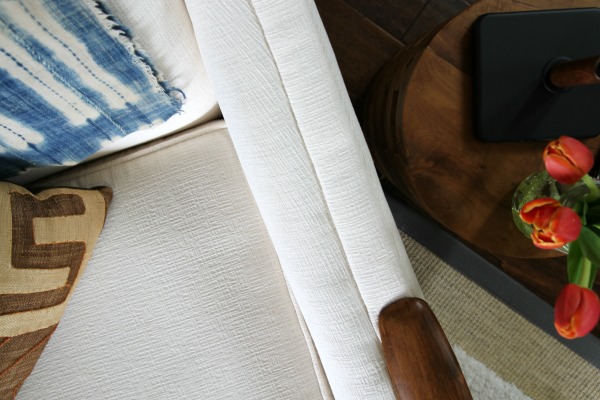
I brought a bunch of samples home and tried them out in the space. In the end, I went with dublin oyster (pre-treated with Nano-Tex) from Luxury Fabrics. It’s a chenille that feels like velvet, looks like linen and wears like microfiber. Upholstery trifecta! Then I had to wait ANOTHER SIX MONTHS before I could pick it up from the upholsterer.
(For locals, I use Springboro Upholstery. The guy does excellent work, but he isn’t exactly cheap – this cost ~$525 for the fabric + labor – and lead times can be crazy. He’s busy for a reason though. I also used him for the tulip chair cushions in the dining room. They’re a leather lookalike and have held up tremendously well.)
It was totally worth the wait! When I picked it up from the upholsterer he said, “It’s definitely the most unique piece I’ve ever worked on. Very 60s.” Bingo.
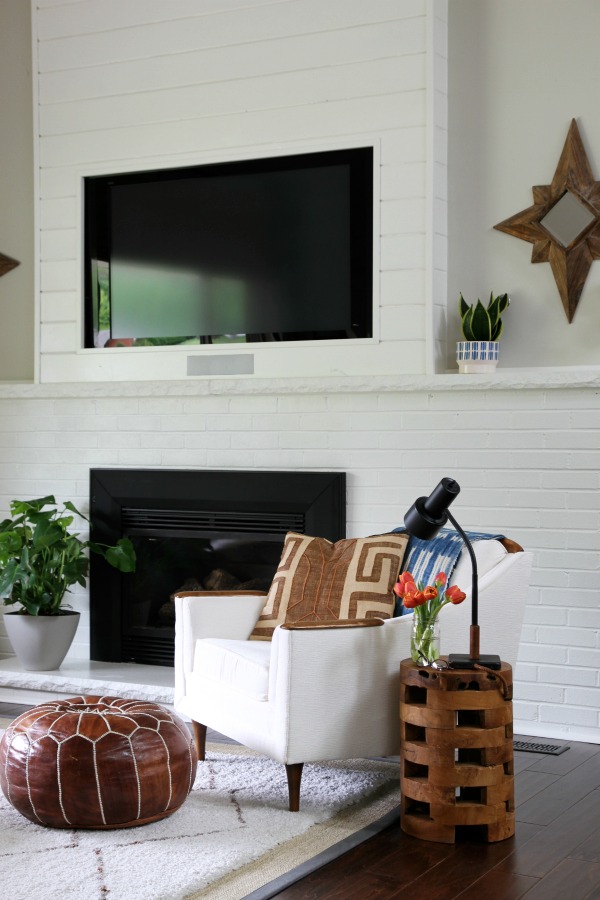
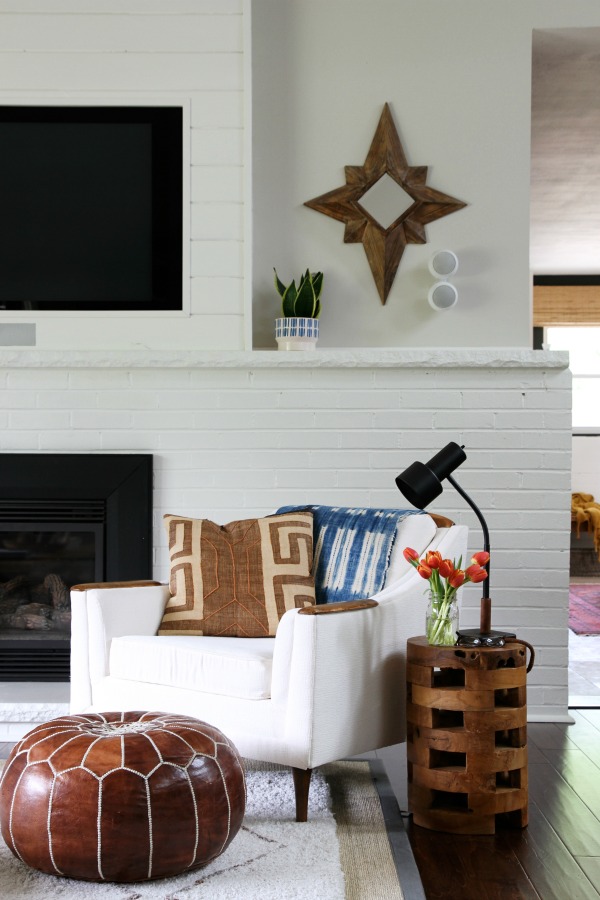
I love it. It’s even better than I had envisioned. It’s low-slung and kinda sexy and looks amazing from every angle which is great since it’s visible from the living room, dining room and kitchen. To me, it looks like the chair form of those preppy equestrian blazers with leather elbow patches. I would totally wear this chair.
The day I brought it home, Cheetah was curled up in it within five minutes, and that very same evening Mabrey wiped spaghetti sauce on it. The spaghetti sauce literally came up with one swipe of a wet cloth. If we were to have a fourth baby (we’re not), I would name it Nano-Tex.
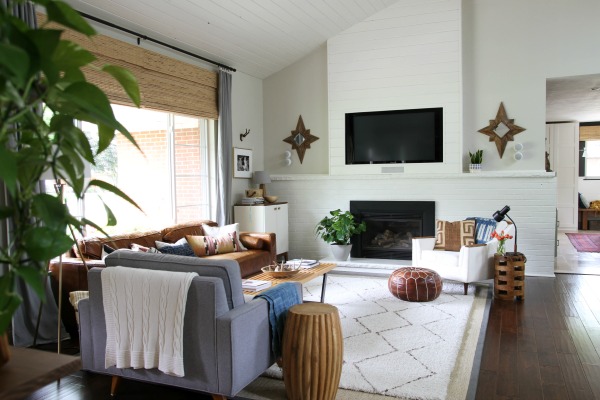
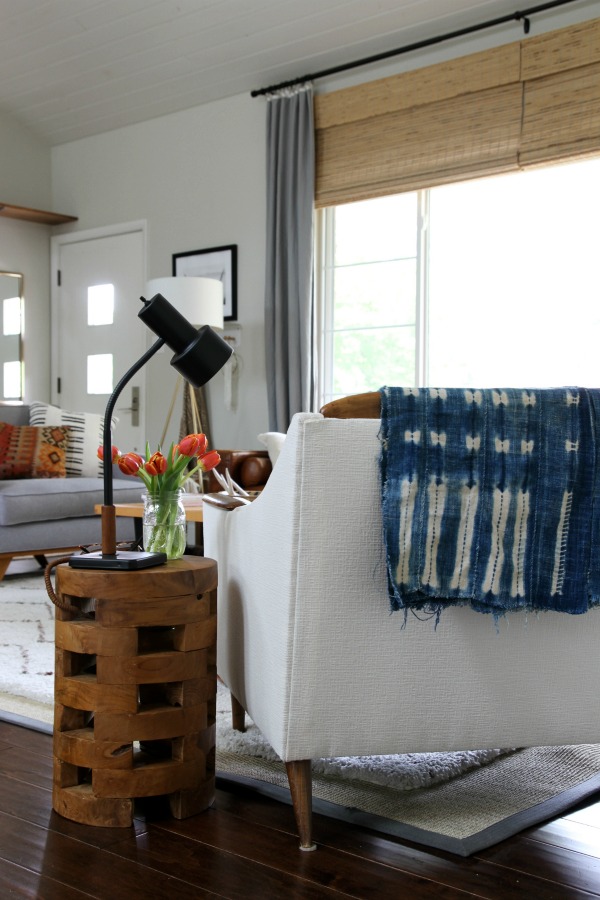
I placed the front feet on the shag rug and angled the chair in toward the coffee table. I stuck felt pads (from the junk drawer) on the back feet to protect the wood floor. Eventually, I’ll probably upgrade to these, but the “free” felt ones are fine for the time being. I really like how the chair closes off the seating area. Before, the space always felt a little lopsided with most of the furniture sitting off to one side. It feels more balanced and intimate now.
Obviously, I couldn’t leave the chair floating by itself looking all lonesome.
Obviously.
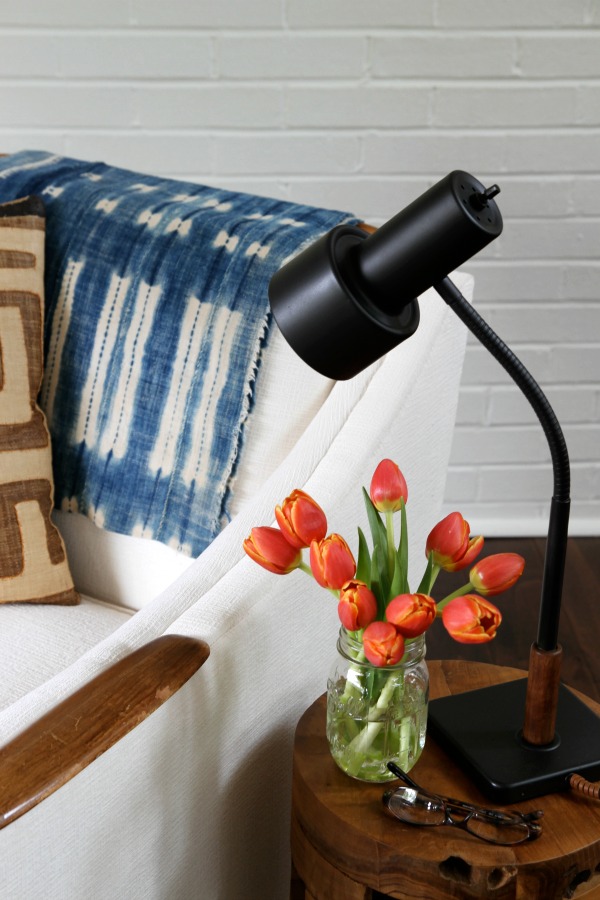
It needed a side table and a reading light to keep me it company. Since the chair was a splurge, the table and light had to be budget-friendly, but, again, I wanted them to be unique. I wanted a petite, round table to allow traffic to flow freely and mesh with the low arms and scale of the chair. It took me a while, but I found the perfect reclaimed teak table from Overstock of all places. (Shopping Overstock is a lot like shopping secondhand stores, except the inventory is new. You have to sort through a bunch of junk to find the good stuff.) I scored it for $111 with a 12% coupon. The natural wood and organic curves give it a bohemian vibe. The open spaces keep it from feeling too heavy.
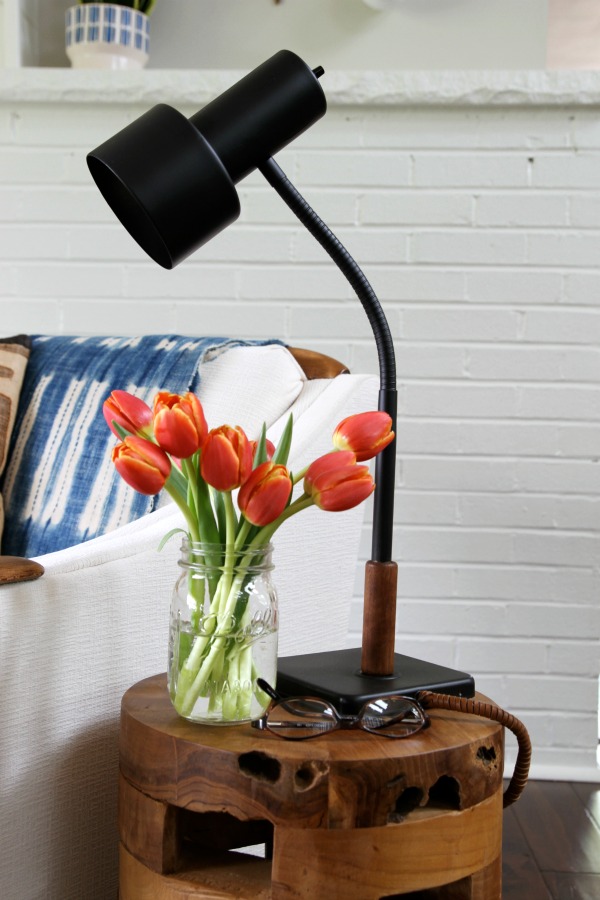
The lamp is vintage from ebay. It set me back $25 and was originally a weird mauve-brown color (seen here). I taped off the wood accent, light socket and cord and gave it a few coats of flat black, heat-resistant spray paint which we already had on hand. I love how the black paint sets off the shape.
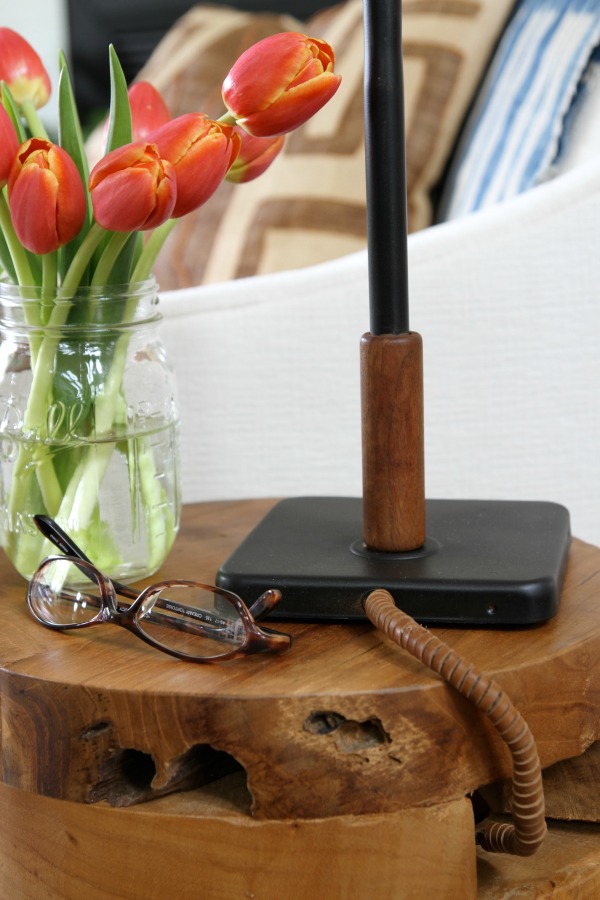
I wrapped the upper third of the fugly cord in leather lace from JoAnn’s ($4 with a coupon) using the same method I used on the kitchen desk lamp. Then like the sly cord hater I am, I snaked the cord through the table. One more reason to love that lil’ table!
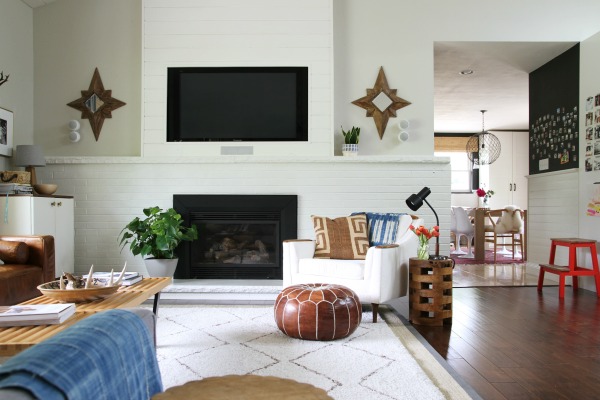
The kuba cloth pillow and indigo mudcloth throw are from here and here, respectively. I stole the pouf from the gray chair and now no one wants to sit there because it’s impossible to lounge with your feet on the floor. Which begs the question, “Are two poufs in one room too many?” The little blue and white pot on the mantel is the peruvian planter from West Elm. The snake plant hides the gas shutoff for the fireplace. I still haven’t figured out a way to disguise the dreaded boob speakers :/
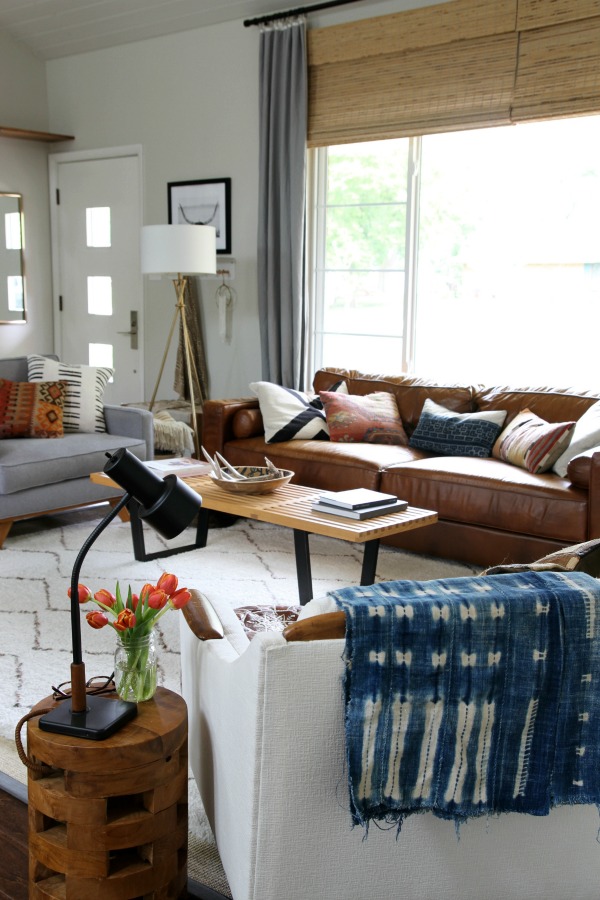
I’ve been jokingly referring to the new chair as my mama chair, yet every time I go to sit in it someone has already beat me to it. It’s the new favorite seat in our house. Burning fire or not, it’s a great little reading and/or wining spot regardless.
But seriously, kids and cat, BACK OFF IT’S MINE. If you’re good, maybe I’ll leave it to you in my will.
images: Dana Miller for House*Tweaking


budget decor, inspiration, interior design, kid-friendly