During our stay in Toronto, I kept noticing colorful baskets in various sizes and shapes all over the house. A large basket in the living room held books. A smaller version in the playroom held a toy Viewfinder along with a pile of reels. A tall, slender basket in the master bathroom held magazines. Several baskets in the laundry room held sewing supplies. By the end of the week, I was so smitten with the baskets that I messaged the homeowner about them. She said they were bolga baskets from Ghana. An online search quickly revealed a whole new world of baskets to me. Bolga baskets are on pinterest, etsy, ebay… you name it! Where have I been?

They’re pretty and practical, and you know I’m all over that woven texture. Of course, I had to have one. (Or two.) After some slightly obsessive internet stalking, I discovered affordable options from this online retailer. They offer free shipping on all U.S. orders and are members of the Fair Trade Federation.
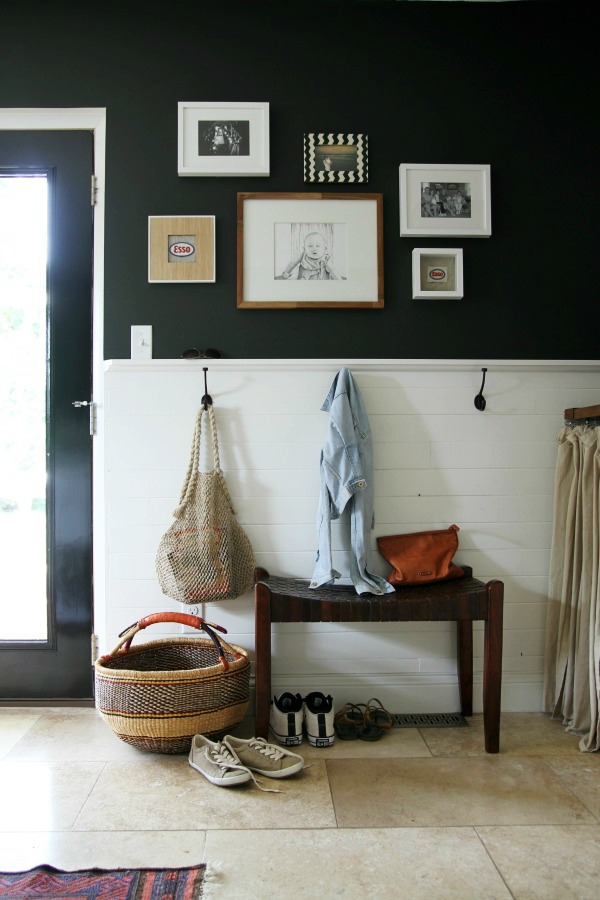
We now have bolga baskets hanging out in our mudroom…

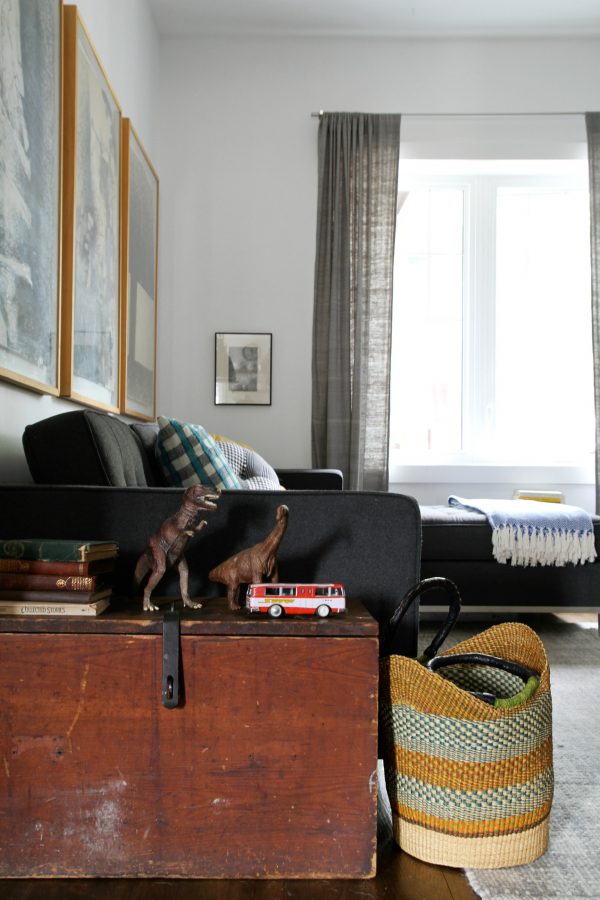
…and living room. They’re perfect for corralling shoes, toys, reading material, craft supplies, produce, cats and, oh I don’t know, maybe your 23 Olympic gold medals. They arrive flattened to keep shipping costs down but are easily reshaped with water. I wetted, reshaped and dried mine in the bathtub. Bam! Baskets!
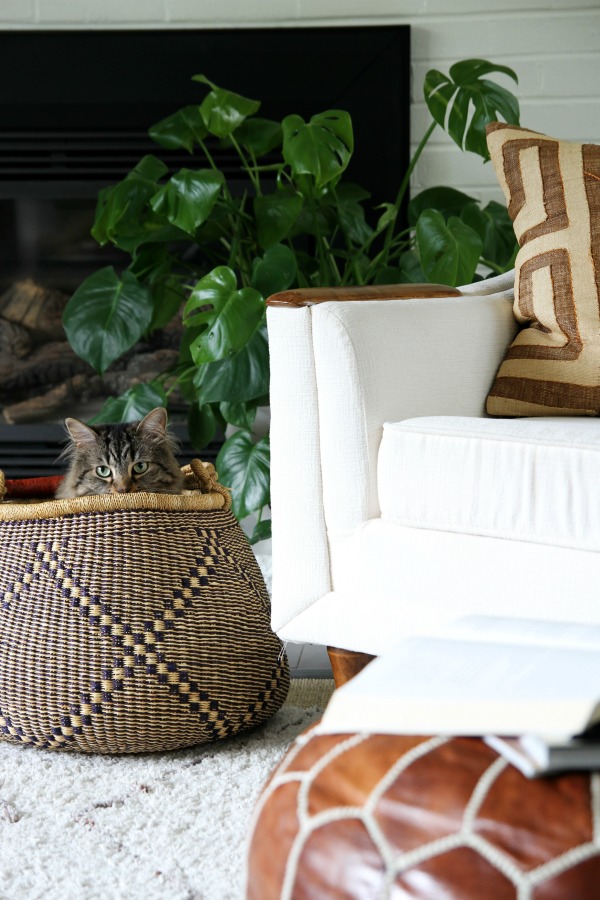
I wasn’t kidding about the cat part.
Did you already know about the bolga basket thing? If so, sorry to bore you, but I was too excited not share! #basketnerd
images: Dana Miller for House*Tweaking
Fair warning: You’re about to commit to a very winded post on the search for an ideal big kid bed. There are few images and lots of rambling. Words > pictures. What I’m trying to say is…you will have to use your imagination. Coffee might help. Or wine.

It’s official. Mabrey is a big girl. She potty-trained on her own over a year ago but didn’t stay dry through the night on a regular basis until recently. I learned the hard way with my first that making a deal out of potty-training before they’re ready just makes more work for me. So I was happy to let her figure out the nighttime thing on her own, and she did just that. My only incentive to her was a “big bed” once she showed me that she could stay dry through the night consistently. Well, the time has come.
Part of me is a teensy sad. I love her room the way it is but her needs are changing. She barely fits in the IKEA GULLIVER crib / toddler bed. It had a good, long run (nearly four years!) but she really needs something larger. The dark pewter on the walls is still one of my favorite hues of all time. It’s so conducive to sleeping and napping (oh naps! where have you gone?!) which makes it perfect for a nursery but I think it’s time for a change. Mabrey is spending more and more time in her room during the day playing, and she’s developed such a spunky personality. I’d love for her room to reflect these latest developments.
Of course, I can’t be sad for long because, HELLO, I get to tweak her room! I’ve started a very rudimentary moodboard and I’m already giddy about the possibilities. I’m channeling my inner Mabrey and having fun with some of the details. But before I get too carried away, I want to share my ideas for the obvious – the big bed!
Mabrey requested bunk beds. Of course. Her brothers have bunk beds. But her brothers also share a room that’s substantially larger than hers. Sure, bunk beds would fit in her room but that’s about it. It would essentially be a bunk bed closet. With her room being so small, I’d like to keep most of the furniture low to create breathing room. I gently broke the news to her and told her we’d find something she liked. She took it in stride.
Right off the bat I had several stipulations regarding the new bed: 1) Twin size. Her ~9′ x 9′ room can’t accommodate anything larger. 2) Extra sleeping space. It would be great to incorporate another sleeping surface into our three-bedroom home for sleepovers or overnight guests. The boys have a separate, pull-out trundle under their bunk that has come in handy over the years. 3) Clean lines. Not only do I like the look, but straight lines take up less space physically and visually – a necessity in a small room. 4) Not a bazillion dollars. Don’t get me wrong. I’ve spent more time than I care to admit drooling over Oeuf and Dwell Studio kid beds, but I just can’t stomach the price tags when I know there are other viable options out there for half the cost (or less). I’m more likely to splurge on items that will be used by everyone in our main living areas. Beds in kid rooms? Notsomuch. Which is probably why, currently, all the little people beds in our house hail from IKEA. We’ve had great luck with them. So it should come as no surprise that IKEA was the first place I browsed.
I looked at the TARVA and considered using a SVÄRTA trundle underneath it. The setup was most definitely budget-friendly but I wasn’t convinced of its staying power. I also looked at the BRIMNES which is a pretty smart concept. It’s a daybed / single bed / double bed / bedroom storage in one and includes two mattresses and two drawers. However, upon further inspection I noticed that the included mattresses aren’t standard thickness. Plus, we sometimes bring the boys’ trundle out into the living room for sleepovers and that isn’t possible with the BRIMNES. I couldn’t see paying $600 for something that didn’t check all the boxes so I nixed it.
That’s when the search really intensified. Ha! I searched craigslist and ebay for vintage beds but everything was too expensive, too ornate and / or didn’t offer a trundle option. I considered daybeds with trundles but I wasn’t excited about anything in my price range (<$500) which most likely meant I wouldn’t like them a few years from now. I stopped looking for a while. Then I started back up again just a few days ago and found this crazy affordable trundle ensemble. I know what you’re thinking.
WHAT IS SHE THINKING?! SHE ISN’T. SHE ISN’T THINKING! SHE’S FINALLY GONE MAD. IT’S ONLY A MATTER OF TIME BEFORE SHE QUITS BLOGGING. THANK GOODNESS AND GOOD RIDDANCE.
But wait a minute. Hear me out. Forget about all that brown for a minute. Take away the espresso finish and the really bad styling. (Is that a beige microfiber comforter?) Yes, the headboard and footboard are slatted but at least they’re relatively wide slats. Now click on the “natural” option. Things just got a little better, didn’t they? Now imagine the “natural” frame painted in a modern shade of olive green. Lose the country knobs on the trundle. Replace them with elongated brass pulls. Do you see it? Let me help you.
Now look at the price. Subtract $10. Did you get $283.95? Great. You win another cup of coffee. Or wine. Go ahead. Pour yourself a second round. I’ll wait. UPDATE: The price has increased since this post was originally published. Grrrr. But it’s still pretty affordable.
Good? Good. Let’s continue.
So, yeah, I bought that bed + trundle setup for $283.95 thanks to a $10 credit on my Wayfair account. (You can earn store credit for leaving reviews on past purchases.) It checked all the boxes. Twin size. Pull-out trundle. No ornate frills. No commas on the price tag. I’ll actually be able to afford mattresses to go with it. Imagine that! The fact that it’s made of solid wood and can be converted to a bunk (with the purchase of another twin) are just bonuses. And with a fresh coat of paint and some killer hardware, it’s going to look way less vacation rental…especially against light walls…maybe some fun wallpaper? I won’t finalize the paint color and exact hardware until after the bed arrives so I can see how things shake out in person, but I’m diggin’ the olive + brass combo. Mabrey is stoked and so am I.
I bookmarked the first image in this post years ago as inspiration for a child’s room and it’s stuck with me. I’ll be loosely referring to it for Mabrey’s big girl room. More details soon!
Here’s to no diapers (cloth or disposable) in my house!
P.S. – A crib review & transitioning from crib to toddler bed.
images: 1) Reath Design 2) Dana Miller for House*Tweaking


budget decor, inspiration, kid-friendly, organization