I want to thank all of you for your well wishes and words of encouragement. THANK YOU. I wasn’t planning on it, but I had to take some time off. The kids ended up getting sick, too. Luckily, Cheetah hasn’t made anymore attempts to run away and I haven’t had anymore run-ins with opossums ;)
I’ve been tweaking things here and there in our bedroom. Mostly because I like change every now and then, but also because a few things felt slightly off. Take the IKEA HEMNES shoe cabinet, for instance. It actually started out in our entry, then I moved it to the master bedroom after I realized it made more sense functionally. (We don’t enter through the front door on a regular basis, so we don’t really need shoe storage there.) I hung a mirror (an octagonal one at first, then a rectangular one) and spray painted the knobs gold, but the vignette always felt flat to me. (Also, looking back at old posts is a little like looking at pictures of myself from college or high school. It’s embarrassing.)
Additionally, in my opinion, the cabinet knobs were awkwardly placed. They were positioned about one-third of the way down the drawer fronts. We had to give them a good tug to open the shoe compartments. I always thought handles/pulls located higher up on the fronts would work and look better. (IKEA must have received similar feedback because they now offer the STÄLL cabinet with notched handles.) I decided to try my hand at making leather pulls for the shoe cabinet.
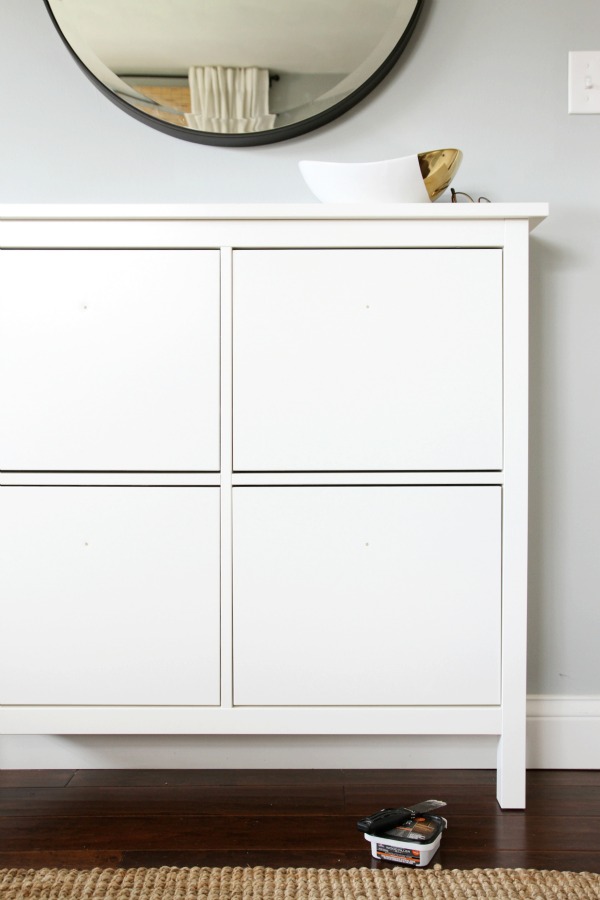
I removed the original knobs, filled the holes with wood putty then sanded the putty smooth taking care NOT to sand the surface of the drawer fronts. (I just wanted to do a quick and easy patch & touchup job. If possible, I didn’t want to paint the entire fronts/cabinet.) After the putty had dried completely, I used a small watercolor brush from my kids’ art supplies to brush on two coats of paint over the putty only. I used Benjamin Moore white dove in semigloss (leftover from our baseboards and trim) because it was what I had on hand and there was a snow storm and I wasn’t dragging the kids to the store for eight drops of paint. It isn’t a perfect match but it worked just fine for the minuscule touchups. These photos are untouched other than lightening them up a little, but you really can’t tell where the knob holes used to be unless the sun is shining and you look at the cabinet from just the right angle.
Of course, you can have paint color-matched for a flawless finish if you’re worried about inconsistencies.
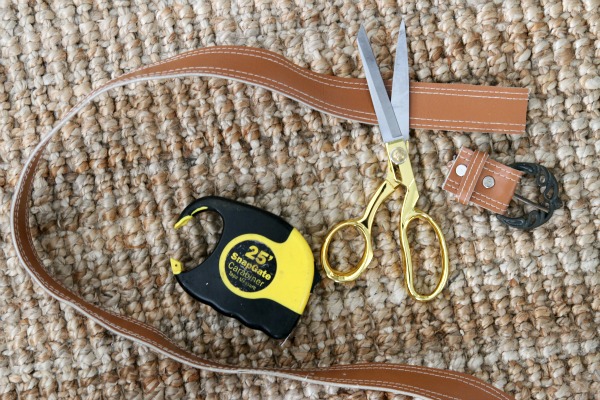
Once the holes were patched and painted, I got to work on the pulls. I found a faux leather belt at my local Salvation Army store. It was long enough for four pulls and the $1.99 price tag was perfect. When I got to the counter and found out it was included in the daily special (50% off all yellow tags!), I was stoked. The belt rang in at a whopping 99¢ and, after a grueling week from hell, it completely made my day. It’s the little things, people.
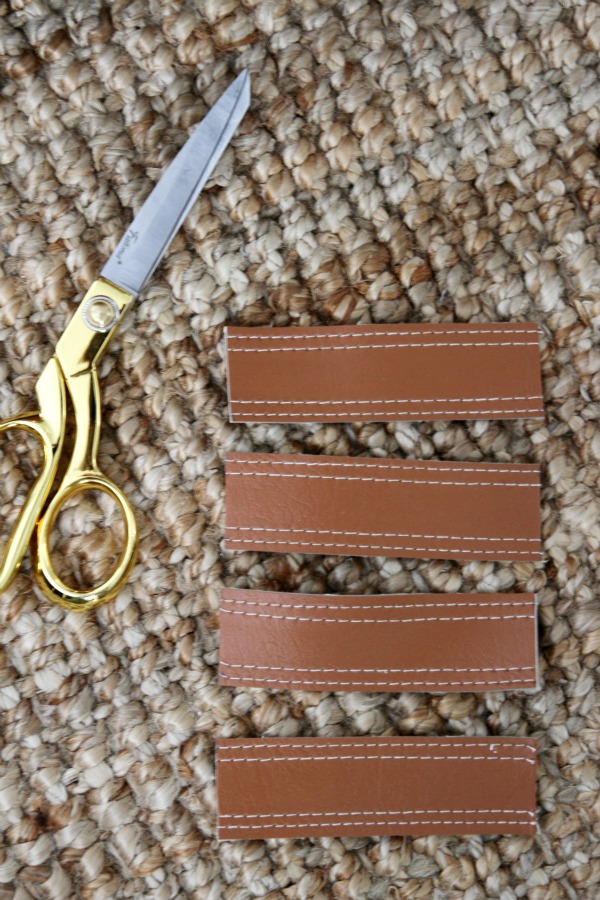
I cut the buckle off the belt then measured and cut four 4½” strips for the pulls.
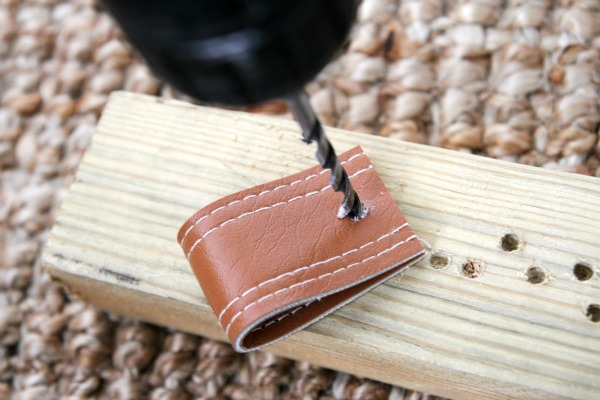
I folded each strip over on itself, measured 3/8″ down from the cut ends then drilled a hole through each pull. (I don’t remember the exact size of the drill bit, but it was slightly smaller than the shaft of the machine screws I bought for the project. Keep reading for more info on those.) I used the same wood scrap from the DIY wood bead strand for a cleaner cut and to protect the floor. If you haven’t noticed by now, I tend to work on the floor in whatever room I’m working on at the moment. I’m too impatient to set things up elsewhere!
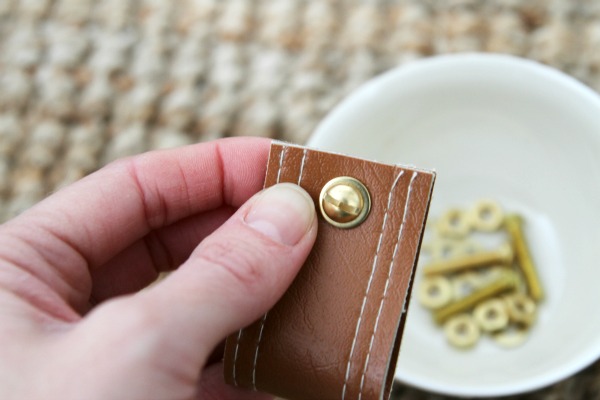
I bought four 10-24 x 1″ brass machine screws plus washers and nuts in the same size for this project. I found them at Lowe’s and they cost ~$6 total. For each pull, I slipped a screw through a washer then the hole in the leather.
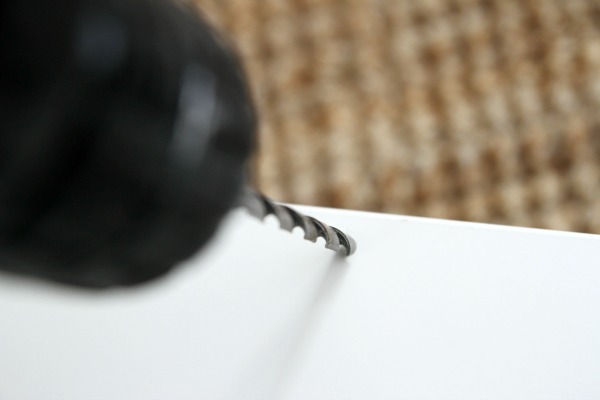
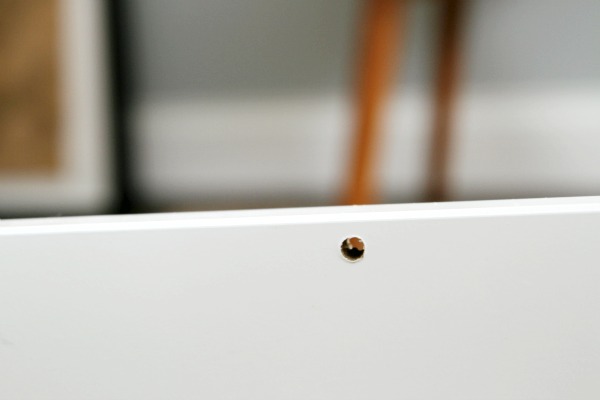
I removed the shoe compartments from the cabinet (they simply pull up and out) and used the same drill bit to drill a hole in each front ~½” down from the top. I wanted the tops of the pulls to line up with the tops of the fronts without interfering with opening/closing. Again, I used a wood scrap underneath for a clean cut.
Then I used a flathead screwdriver to screw the pulls onto the fronts. I secured them with a 10-24 brass nut. I probably could have used a slightly longer screw as I had to bust out pliers to screw the nuts on, but it all worked out. Steve says the screws are perfect because they don’t stick out and pose a hazard to hands reaching into the cabinet for a pair of shoes. One thing is for sure. They aren’t going anywhere!

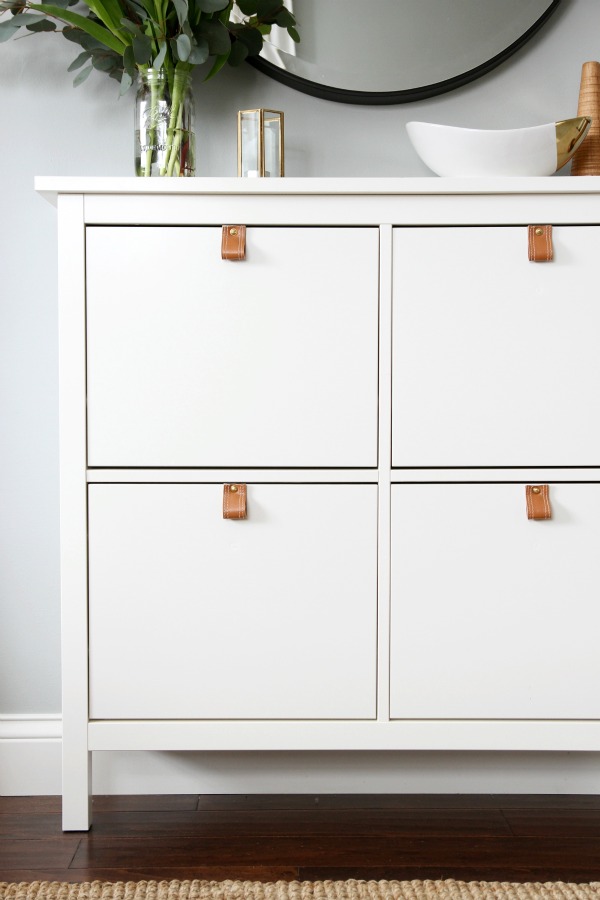
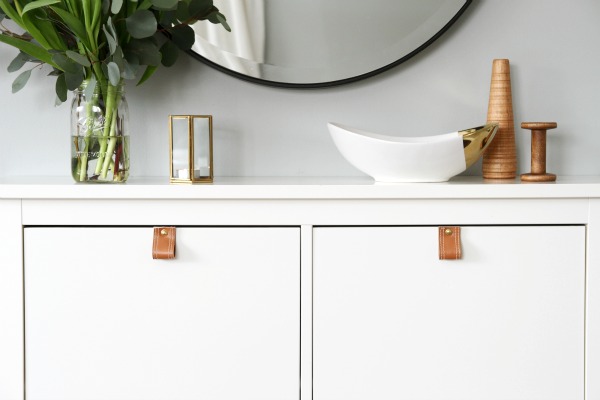
I love, love, LOVE how the brass looks against the (faux) saddle leather. I was worried the pulls might scream “BELT!” but I actually like the stitching. Especially at <$2 per pull!

The new pulls are way more functional, too. No more tugging at awkwardly placed knobs.
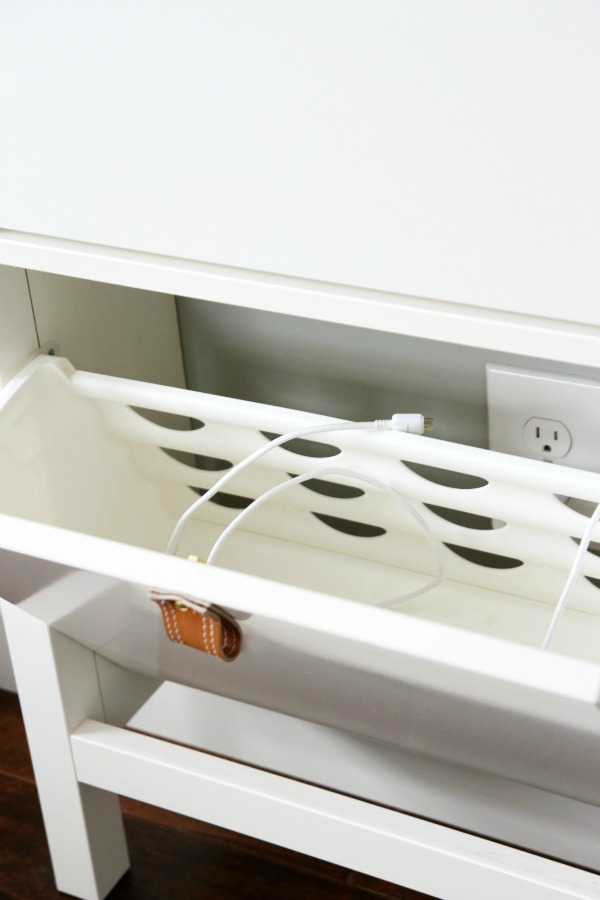
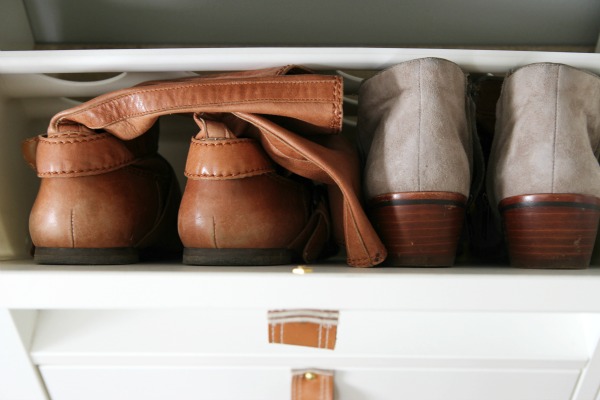
Surprise! Two of the compartments are empty. Steve uses the one on the bottom left as a hidden charging station for his phone.
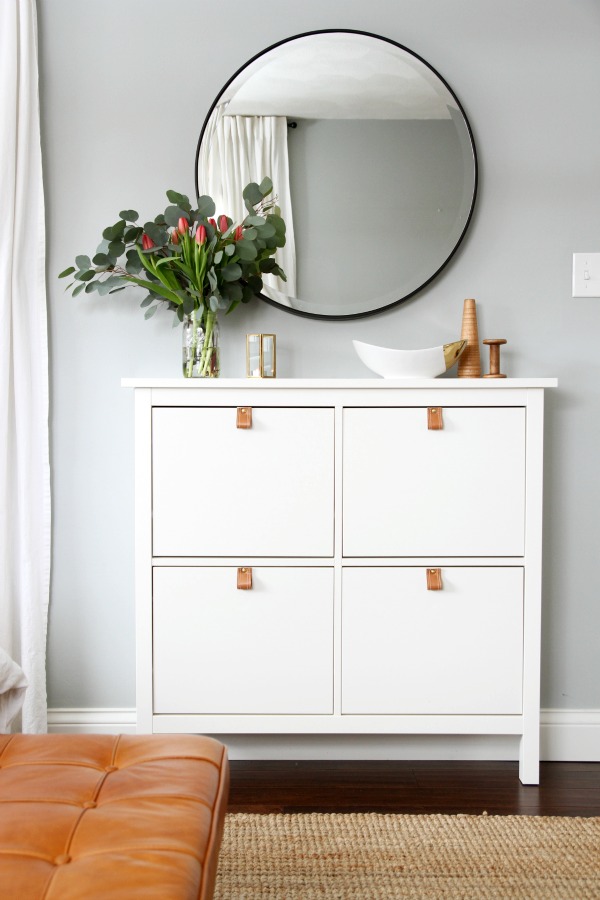
I didn’t plan for it, but the new pulls tie in to the leather bench at the foot of the bed. #happyaccident I sprung for a new mirror. Maybe you noticed? I really felt like we needed something round to break up all the straight lines and I wanted a touch of black. I found an affordable, round mirror with a black frame here. The scale is spot on. FYI – It’s heavy!
Thanks to the new leather pulls, round mirror and some Trader Joe’s blooms, I’ve fallen in love with this little corner of our bedroom. It just feels right. And now I want to add leather pulls made from thrifted belts to all the things. #savethebelts
Stay tuned for more bedroom updates, coming soon!
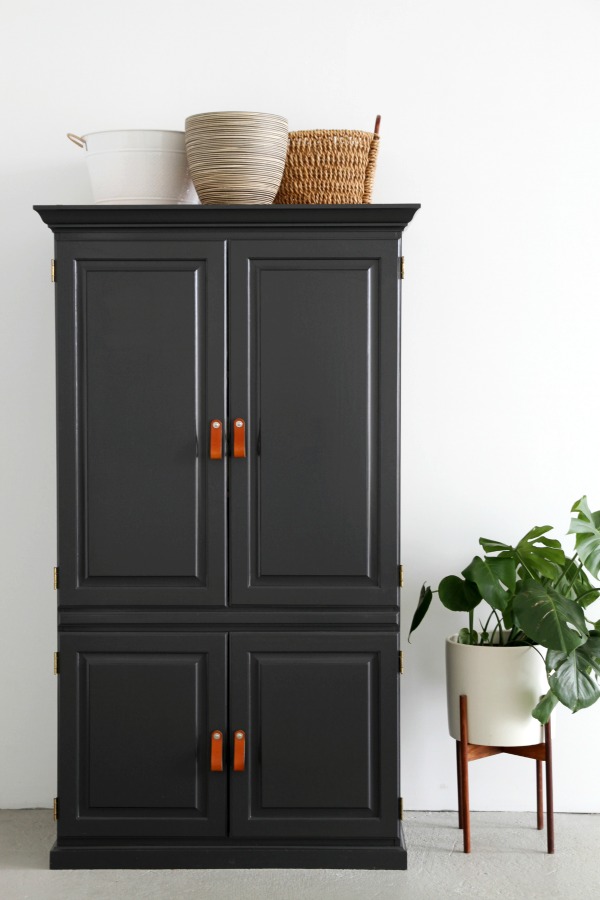
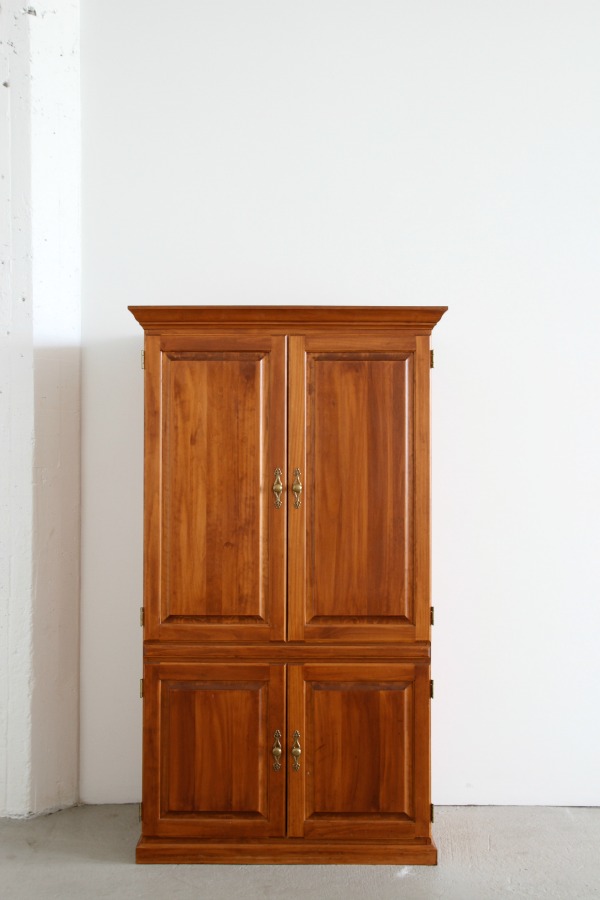
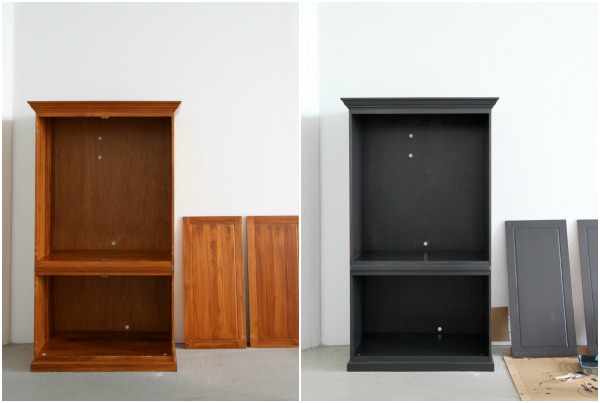
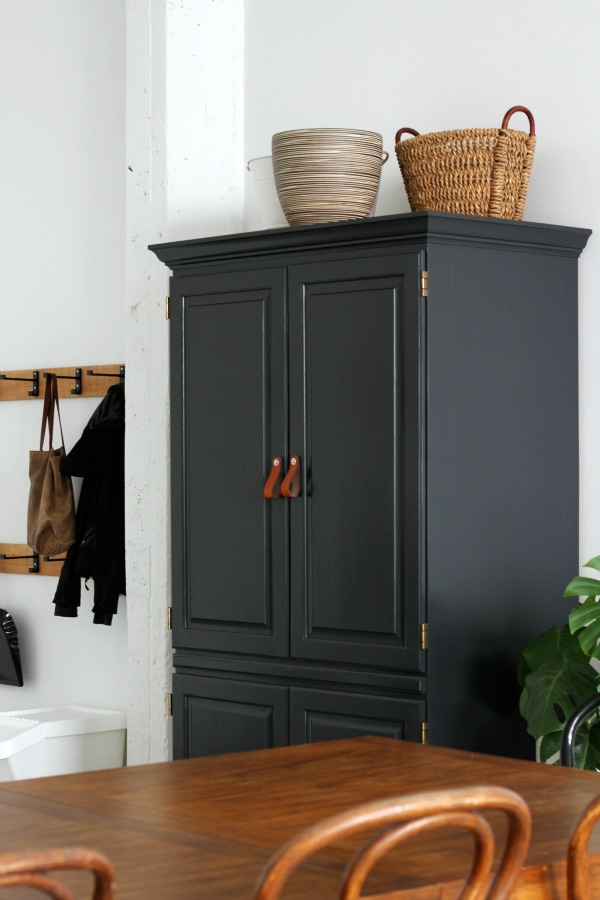
P.S. – If DIY isn’t your thing, pre-made leather pulls on an armoire.
images: Dana Miller for House*Tweaking


budget decor, DIY, inspiration, organization