By now you should have a draft mood board of items. To polish it up and make it presentable for a blog post or client, you can add embellishments such as titles, text, arrows and decoration. This step can be likened to taking a loose photo and making it into a scrapbook page. It’s all about dressing it up and being creative.
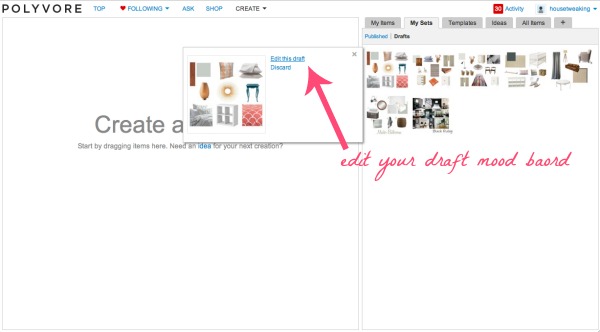
Log into polyvore, click ‘create’, click the ‘my sets’ tab, click ‘drafts.’ Select the draft board you want to embellish and click ‘edit this draft.’
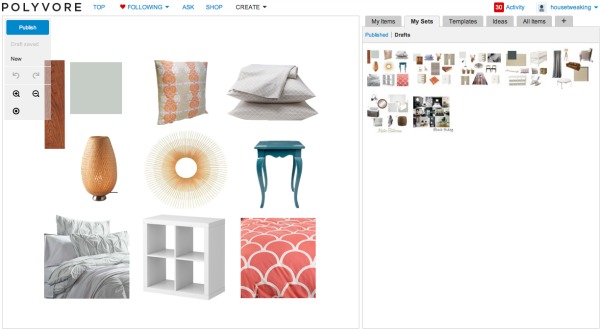
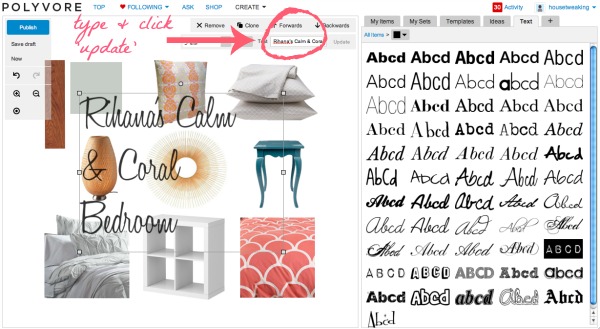
This should bring up the draft board that you saved previously. To add text to your board, click the ‘all items’ tab. Under the ’embellishments’ category, select ‘text.’
This will bring up a text box. Select a font and type in your desired text. Click ‘update’ to see it appear on your board. You can enlarge, shrink and pivot your text box the same way you would an item. Change the font or color of your text by using the drop-down menus in the text bar.
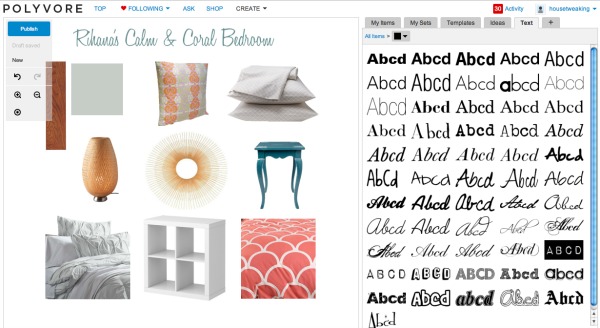
I widen my text box by dragging the right line of the box to get my title all in one line. I shrink my text and use a teal color to go along with my mood board’s color palette. I center the title above the board. Then I save my draft.
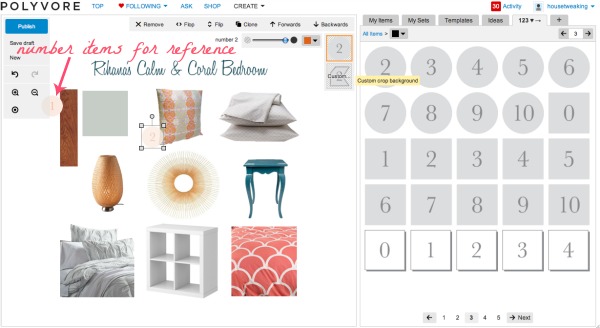
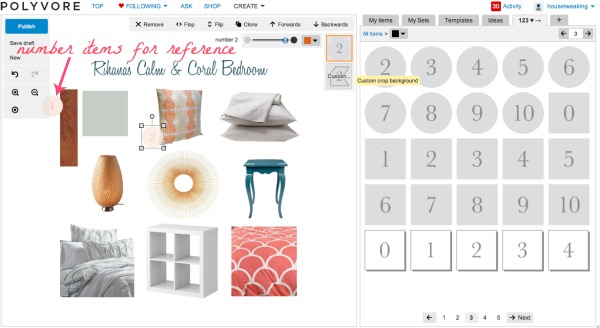
Sometimes it’s useful to number items in your mood board. This is helpful when you’ll be discussing each item in depth within a blog post or with a client. You can simply add lone numbers like you did with the title and then position them next to each item OR polyvore gives you the option of using ready made numbers that have a more professional appearance. To access the ready made numbers, click the ‘all items’ link in blue to the right of your board. Select ‘123♥→.’
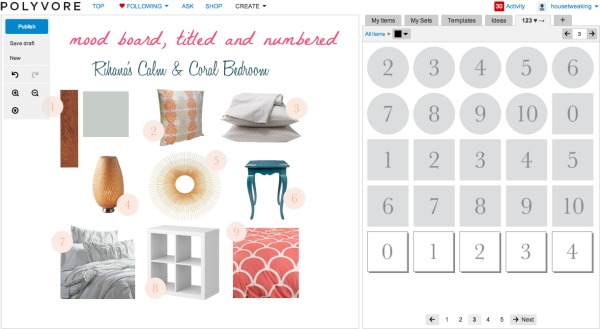
This will bring up pages of arrows, numbers and other decorative labeling aides. Select the label you want and ‘add to set.’ You can change the color via the drop-down menu in the box. You can also lighten or darken the color using the fade feature. I use the round number stickers in orange and fade them so that they mimic the coral in my mood board.
When numbering, I like to layer the numbers slightly over the items so there’s no question which number goes with which item. I also try to stagger the placement of the numbers so your eye moves around the board in a flowing manner. With my mood board titled and numbered, I give it a once-over and save my draft.
For fun and to show you a little more of what you can do, I play around with my title’s color and give it some flair. {“I don’t really like talking about my flair.” Name that movie.}
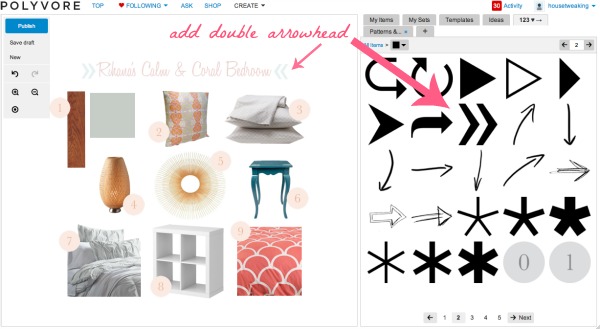
To highlight the title, I add double arrowheads to each end of the title. I decide the teal font and coral arrows work best. I save my draft.
If you’re wondering, I use the ‘text’, ‘123♥→’, ‘effects & textures’ and ‘patterns & overlays’ embellishments most frequently. My best advice here is to practice playing around with the embellishments. Try layering text over patterns and using different extras to amp up the wow factor on your boards. It’s just like cropping…you’ll get better with practice. That being said, if I’m making a mood board for personal use, I usually don’t add embellishments. I just want a feel for how certain items will look all together in one space.
Ta-dah! Wait…how’d I get my board onto my blog you ask?
Once you complete a mood board you have two options: 1) save it as a draft to view personally OR 2) publish it to share with others.
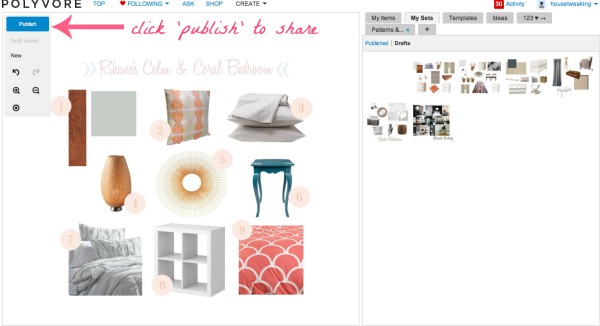
If you want to post your mood board to a blog or email it to a client, you will need to publish it. Click ‘publish’ in the upper left hand corner of your board.
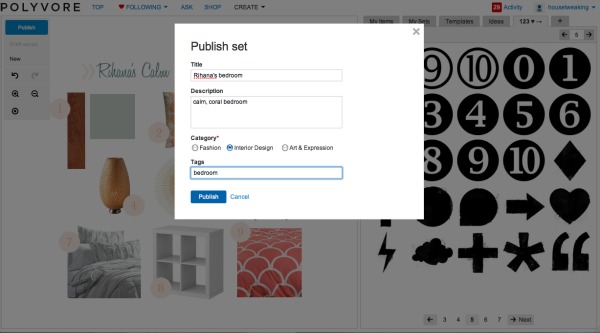
Populate the fields as directed. I don’t spend a whole lot of time or thought on this part since I don’t target my boards toward the polyvore audience. Click ‘publish.’
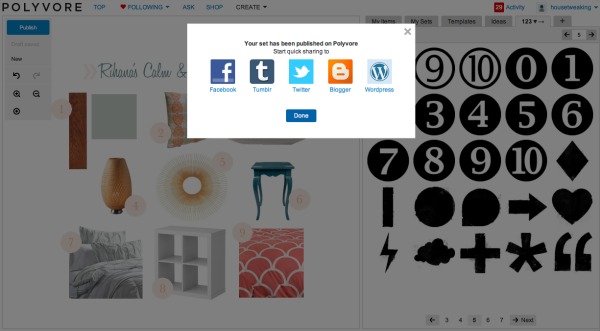
You are able to quick share via different social media sites but I click ‘done’ here. My boards are usually going into a blog post that I haven’t written yet or to a client via email.
Congrats! You just published a mood board! Feels good, doesn’t it?
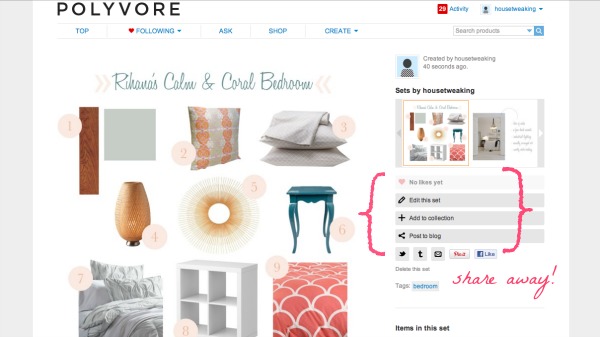
A great feature about a completed mood board is that you can hover over any of the items and it will bring up links to the items. Super convenient. There are share buttons for twitter, tumblr, email, pinterest and facebook. I use the email button to email mood boards to clients. The email includes links to all the items in the mood board which is another convenient feature. I also send a separate email to clients from my personal email account giving more details about the board – this is where those numbers come in handy. I specify furniture arrangements, each item’s placement, my thoughts on why I chose each item and other pertinent info. It’s easier for me to discuss one item at a time and I’m sure it’s easier for the client to see the mood board broken down into smaller bits.
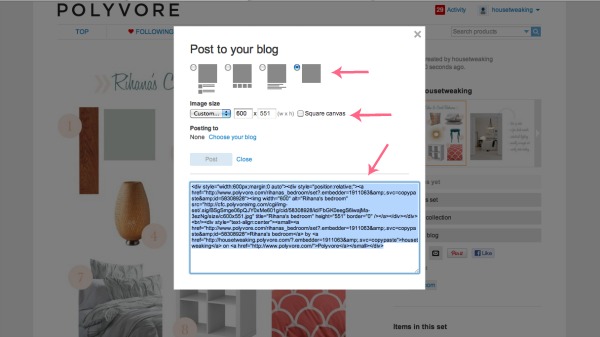
To post my mood board to House*Tweaking I click ‘post to blog.’ This brings up a box giving me appearance options. I always choose the last option in the first row which basically means I don’t want a list of all the items included with the mood board…I just want the mood board itself to appear on my blog. I set the image size to 600 pixels wide because that’s how wide my post column is on H*T. I skip the ‘choose your blog’ option and instead opt to copy the HTML code for my board. I paste the HTML code within the blog post I write pertaining to the mood board.
With the board in my blog post, I’m able to refer to each item via its labeled number. Voilà!
I’ll bet you would have never guessed all that went on behind the scenes when you’re reading a mood board post on H*T. No one is ever going to ask how I create anything tech-y again! Ha!
Sorry if this week was a total wash and you have no interest in mood boards. I’m happy if I inspire just one person to create their own. Playing around with mood boards is my idea of fun. I wish a step-by-step tutorial for polyvore had been around years ago when I started using it, so this is my way of paying it forward. Another reason I wanted to share this tutorial now is that NEXT WEEK I will begin offering mood board services for a fee. I know not everyone will be able/want to shell out the moolah for a custom mood board, so I thought sharing my process would give those readers the chance to DIY their own.
Happy embellishing! And I apologize in advance to the husbands, boyfriends, wives?, girlfriends?, children and pets of any polyvore monsters I created this week. SORRY. I would love for readers to link to their polyvore mood boards in the comments section below so I can see what lovely sets you’ve created.
Please feel free to ask any questions about polyvore and mood boards in the comments section below. Refer to Parts I, II and III of this tutorial if you’re just tuning in.
images: Dana Miller for House*Tweaking






budget decor