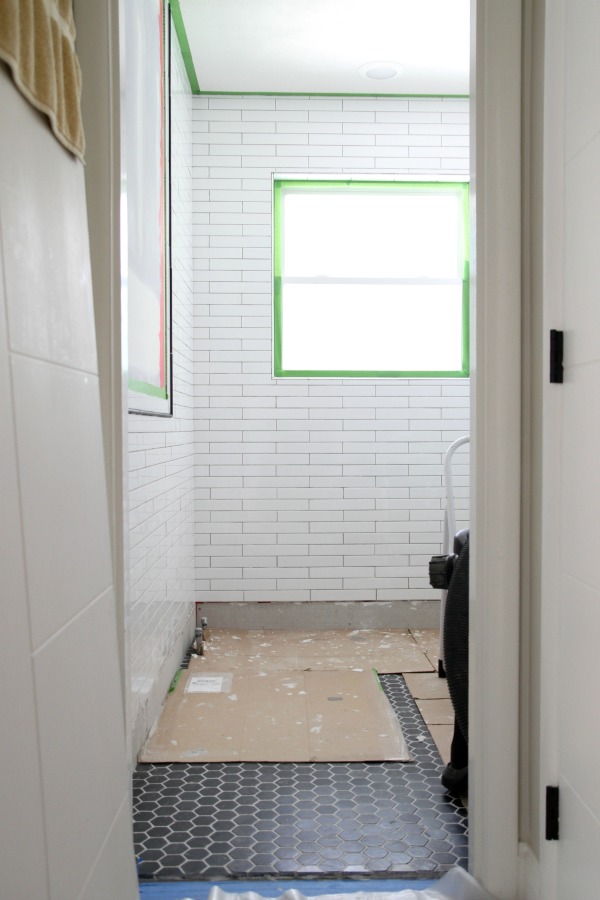
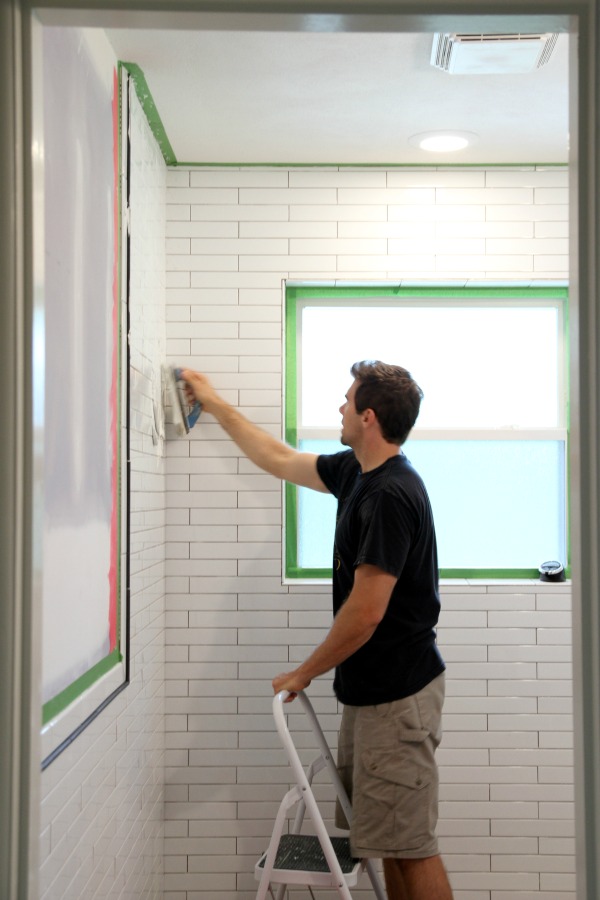
Steve finished tiling the bathroom walls two weekends ago. Working in spurts around his real job, family life and appendectomy recovery, the entire process strung along for most of the summer. Between the uneven walls and Steve’s perfectionist tendencies, it wasn’t the most enjoyable DIY. The window wall put up a good fight. It was all kinds of wonky. And our choice of tile probably wasn’t the easiest to work with on the wavy wall. The narrow subway tile is extra long at 12″ which didn’t allow for much “play” along some of the most troublesome spots. Luckily, the worst spot (along the bottom of the window wall) will eventually be hidden behind the bathtub so it shouldn’t be too noticeable in the end.
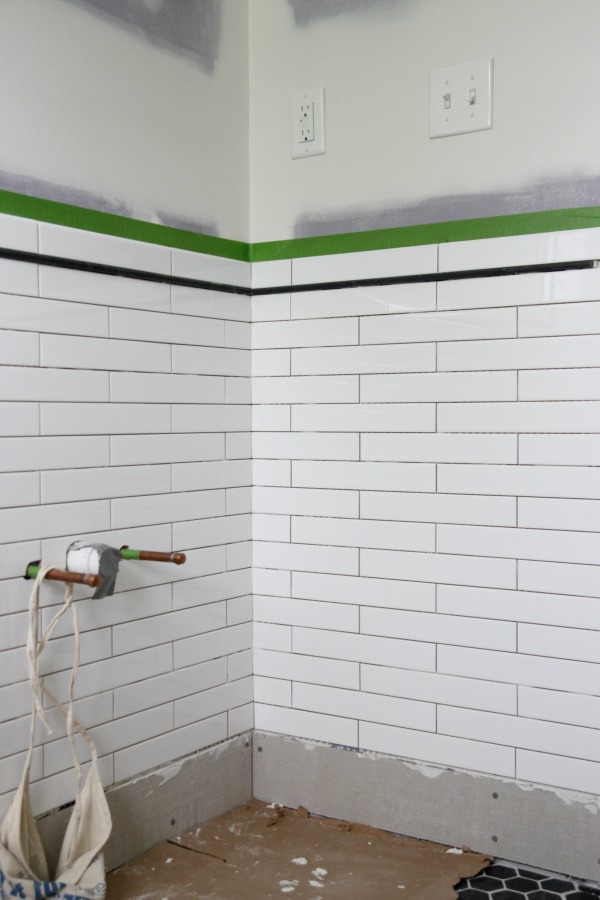
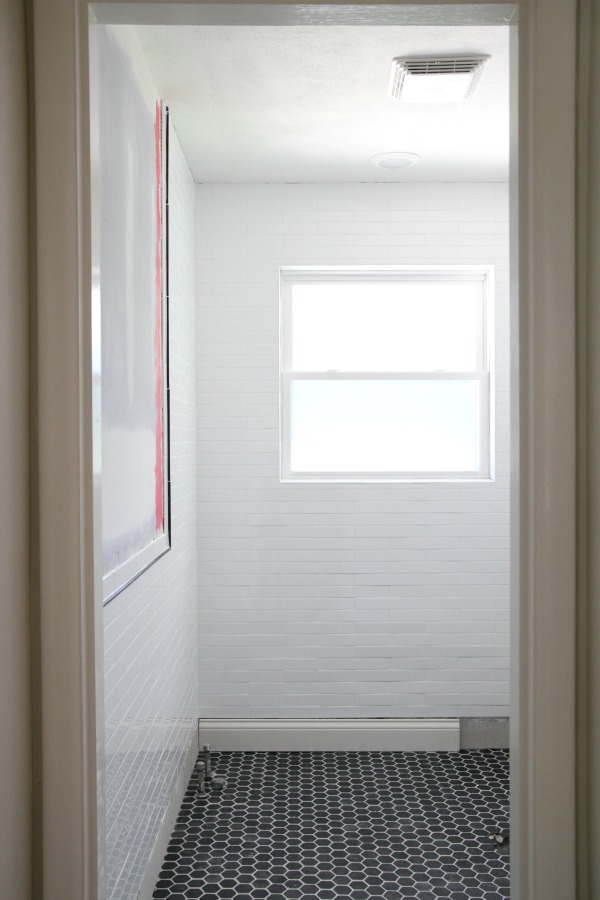
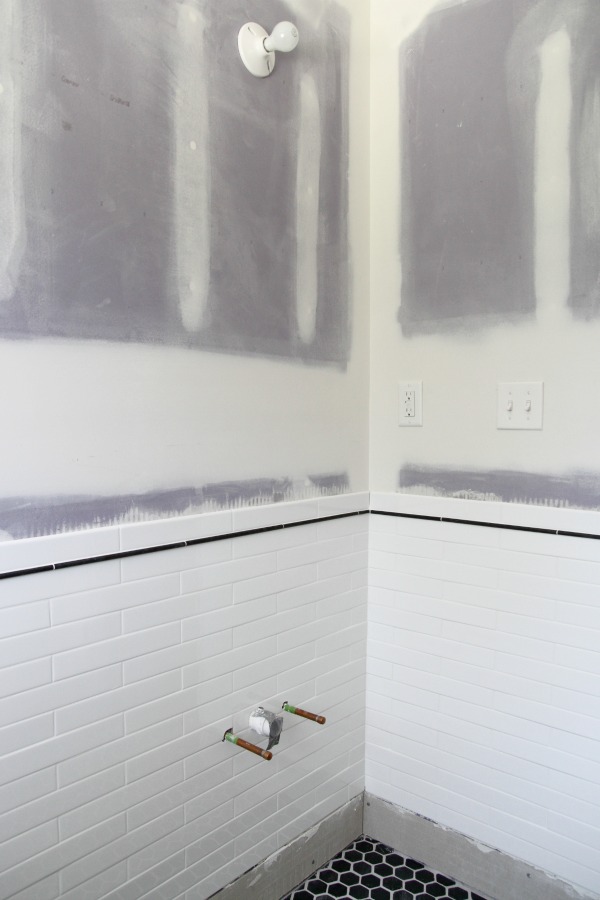
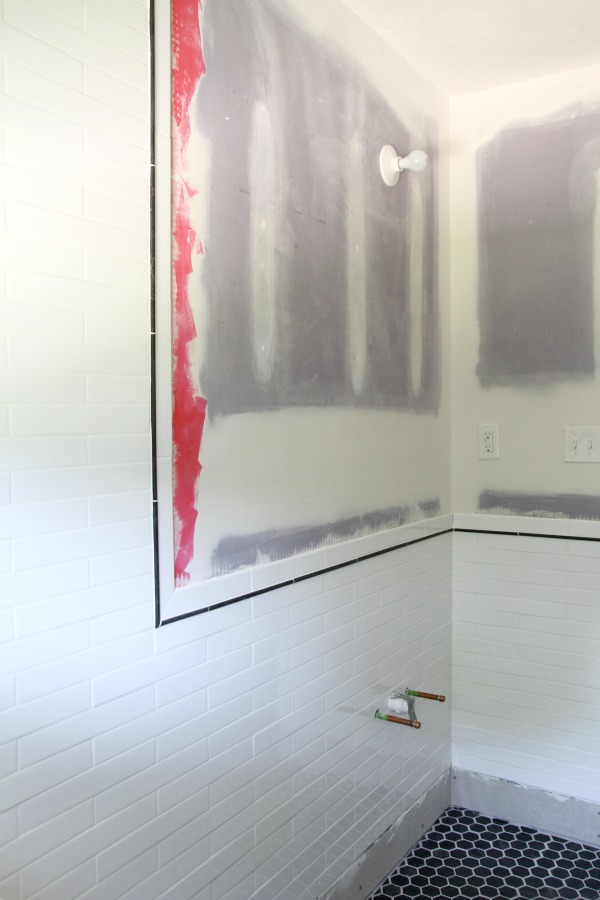
But we do have perfectly wrapped corners. (The water lines denote the vanity’s location.)
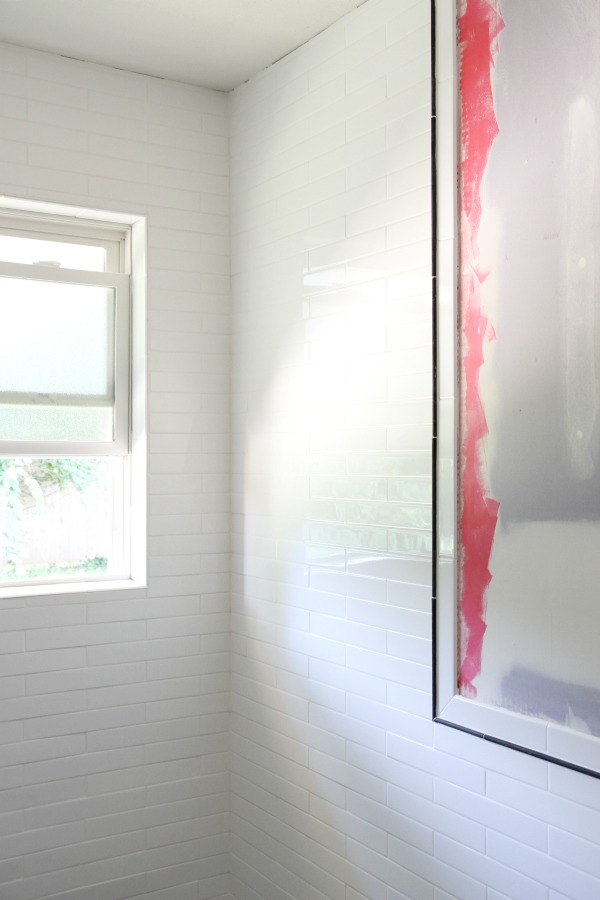
And exact 90º angles. Those are always fun.
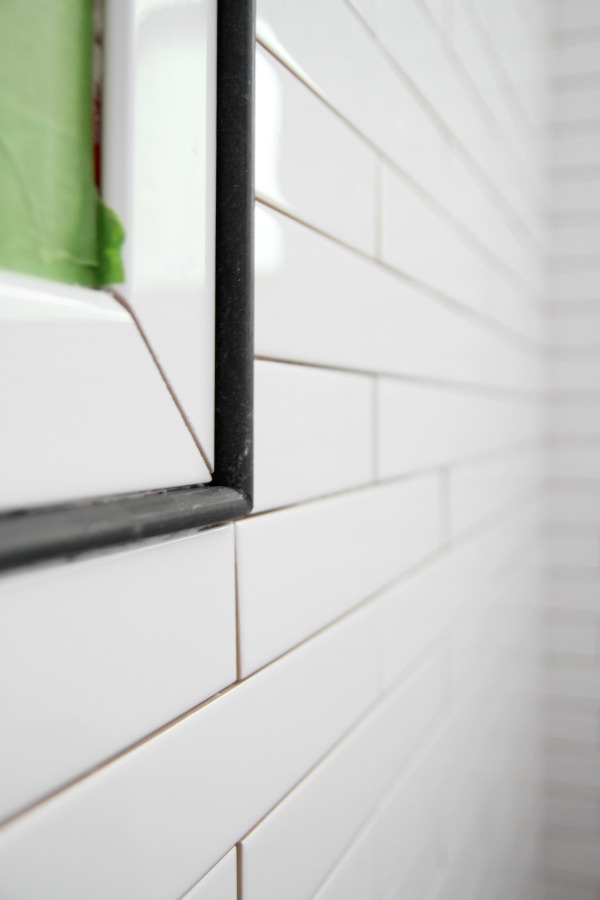
We are SO HAPPY with how the black pencil liner and bullnose trim turned out! I was a little worried about the profile of the pencil liner sticking out further than the subway tile but I actually love it. It’s a great finishing touch that’s simple yet sophisticated. And it gives the walls some added dimension, too.
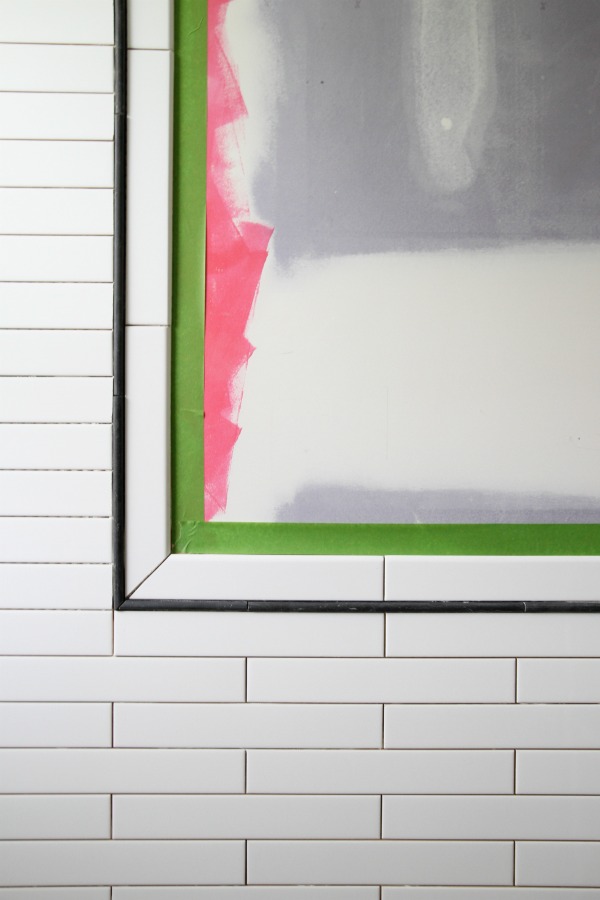
With all the tile in, we started to second-guess our choice of white grout for the walls. The contrasting spaces between the subway tile looked decent so we contemplated a contrasting grout for a split second. But when we pulled back the cardboard protecting the hex floor tile, things felt very busy all of a sudden. So we decided to stick to our original choice of white grout.
Which we tackled this past weekend! It was a joint effort and we let the kids fend for themselves while we knocked it out. Let’s just say, once we were finished, the rest of the house was looking waaaaaaaay scarier than the bathroom. When you have three kids and a bathroom remodel on your hands, you do whatcha gotta do. Sometimes the bathroom takes precedence while your kids run wild and eat whatever / wherever they want for a day. It’s all good.
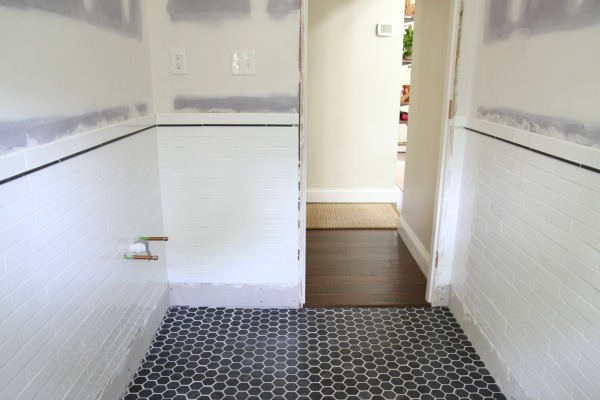
The freshly grouted bathroom! And a piece of unpainted baseboard for reference! I’ve never been so in love with a room that doesn’t serve any purpose (yet!).
The grout is standard white unsanded grout from The Tile Shop. It’s the same color we used on the shower walls in the master bathroom.
Pictures really don’t do this room justice. It’s difficult to photograph because of the small size and layout. Just being in the space – even sans fixtures – feels like a luxury. At one point, we considered only tiling the shower / tub area but I’m so, so glad we went for a tiled wainscoting around the entire room.
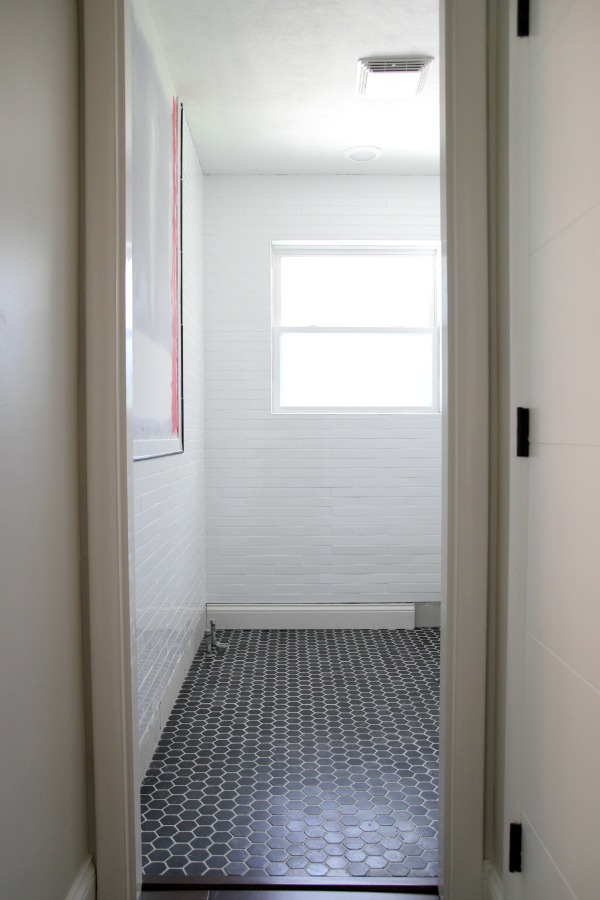
I was having so much trouble capturing the room on camera that I went outside and snapped some shots through the window to give you a different perspective. Do you spy a glimpse of the open shelves in the living room?
Someday, a toilet, vanity and wall sconce will live on this wall.
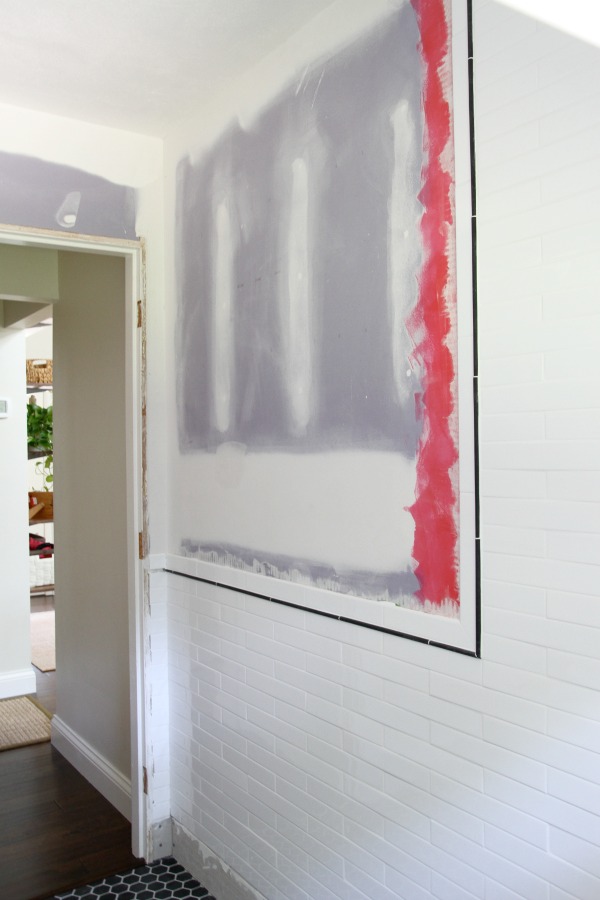
Someday, towel hooks and shower / tub plumbing fixtures will live on this wall. Maybe one day we’ll even have a bathroom door. Who knows?! The possibilities are endless.
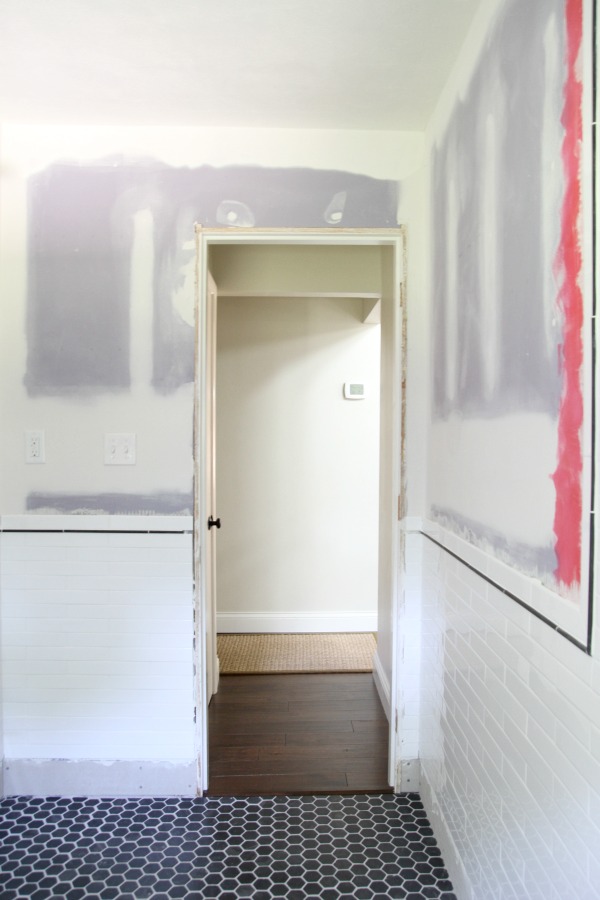
Here you can see how the short hallway (to the bathroom) juts off from the main hallway. There’s a small linen closet to the left just beyond the bathroom. I don’t think I’ve ever shown this view before but, hopefully, it gives you a better idea of the bathroom’s location in relation to the rest of the house. Hint: on the other side of the right-hand wall is the kitchen desk.
We still need to seal the walls, install baseboards and caulk. (The floor is already sealed.) Then we start work on the tub. We’re equal parts stoked : horrified. Especially considering what happened the last time we touched it. If anything, it should be a good learning experience. At least, that’s what we’re telling ourselves.
*Thanks to The Tile Shop for partnering with us on this bathroom remodel. Tile and grout were graciously donated to the project. All product choices, labor and opinions are ours.
images: Dana Miller for House*Tweaking
When we bought our house three years ago, the plan was to scrub the original bathrooms really well and live with them for a few years before renovating them. But in the midst of demolition, we discovered black mold behind one of the bathroom walls when we demo’d a shared kitchen wall. Upon further inspection, there were cracked shower tiles in each of the bathrooms allowing water to seep into the walls. We ended up gutting both bathrooms to remedy the mold problem. We finished the master bathroom before moving in and it’s been our only functioning bathroom for the past 2+ years. Yep, all five of us use one bathroom. And I’m still alive to tell its story.
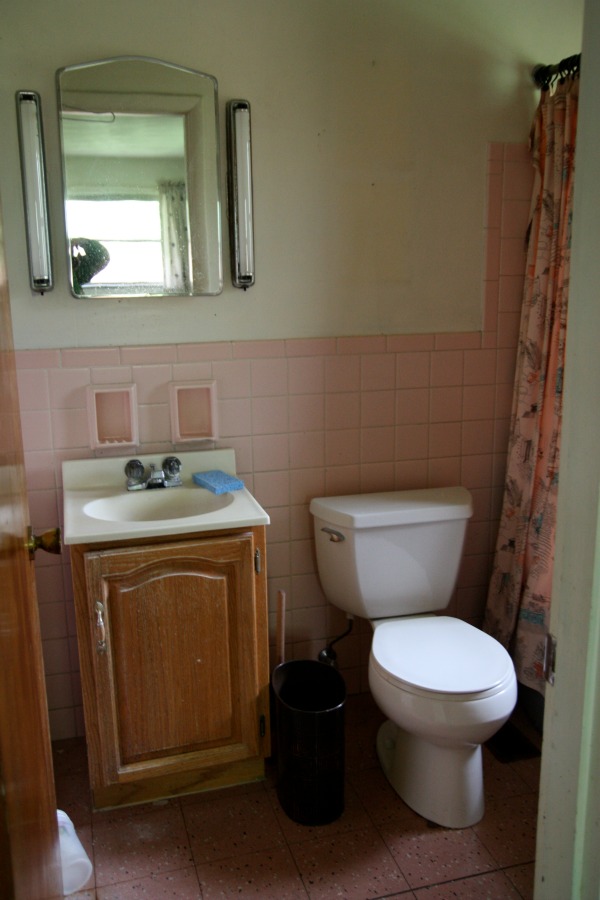
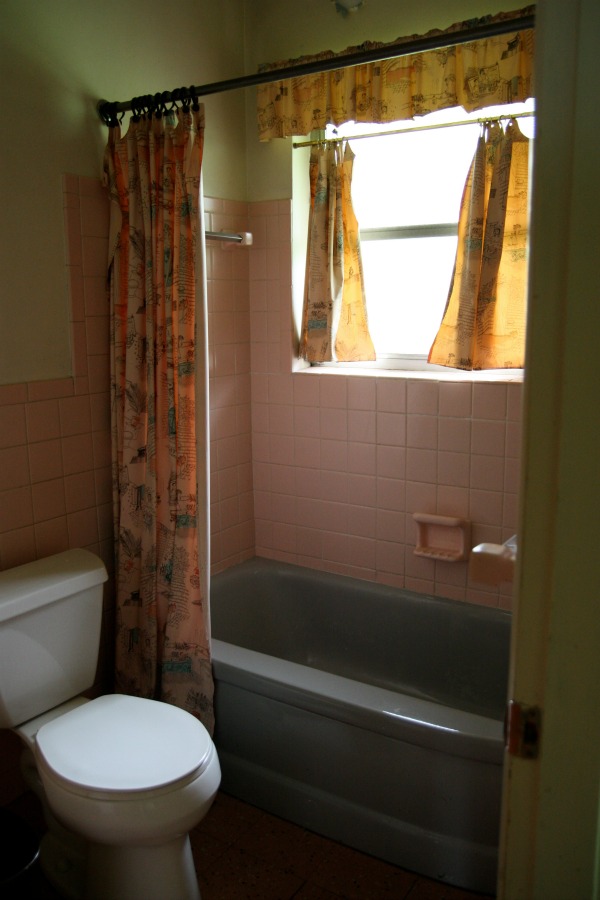
The original bathroom was pink and gray – complete with a matching vinyl shower curtain, window curtain and valance (!). The vanity was way too small. The fluorescent lighting had to go and the only ventilation was an open window. However, we didn’t mind the layout and the window in the shower provided a decent amount of natural light.
To save time and money, we kept the original layout and toilet but all the other fixtures and finishes are new. The electric was upgraded to service a sconce above the vanity, a can light above the tub and a proper ventilation fan.
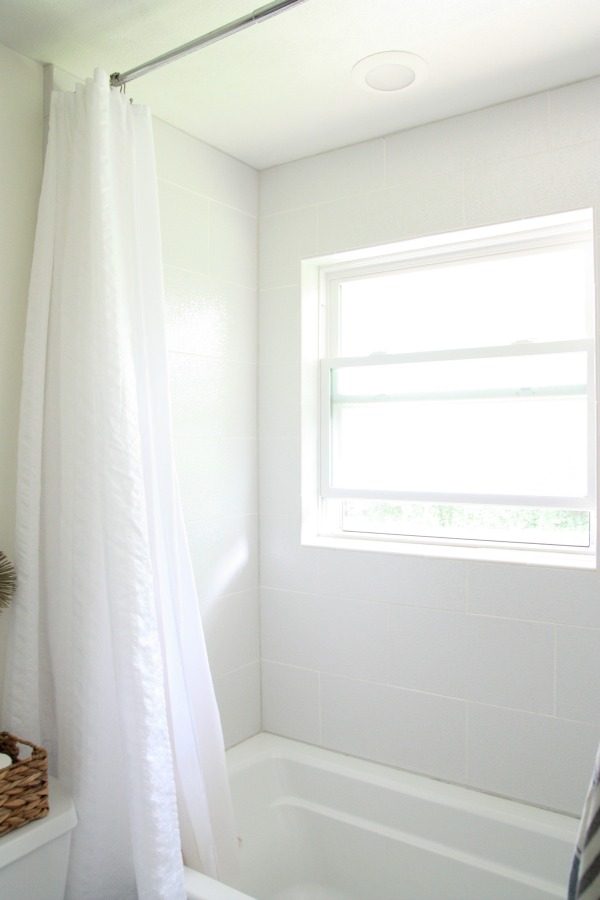
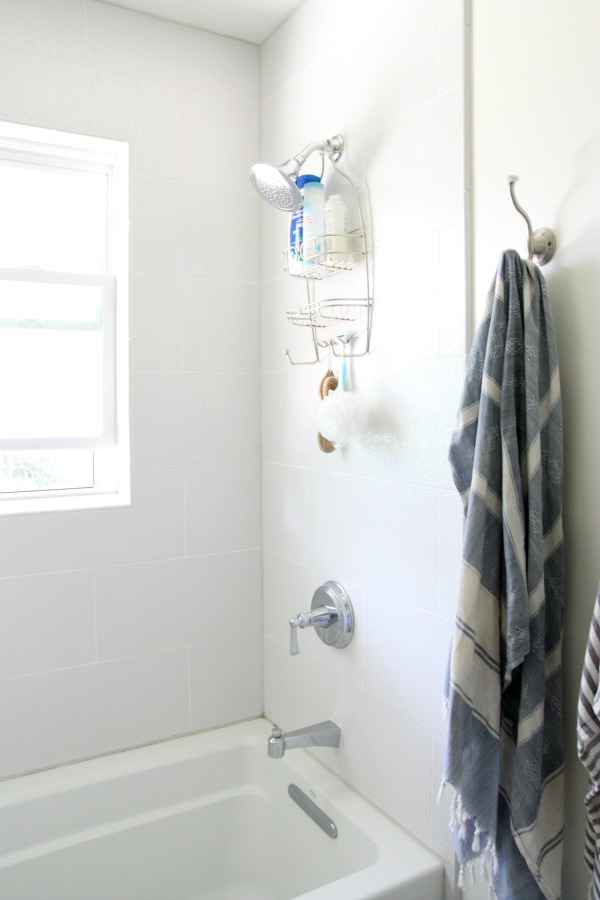
The original aluminum window was replaced with a vinyl one featuring privacy glass. The glass is smooth to the touch (and easy to clean) but textured in between the double panes for privacy. I am so, so, SO happy to have a window in the shower! It’s as close as I’ll ever get to an outdoor shower in Ohio.
The original shower tile was only installed about two-thirds of the way up the wall. We chose to take the new wall tile to the ceiling to give the appearance of taller ceilings and a bigger space. We contemplated a glass door or partition on the tub / shower but the placement of the plumbing would have made entry / exit into the shower tricky. We opted for a simple floor-to-ceiling shower curtain instead and it works great.
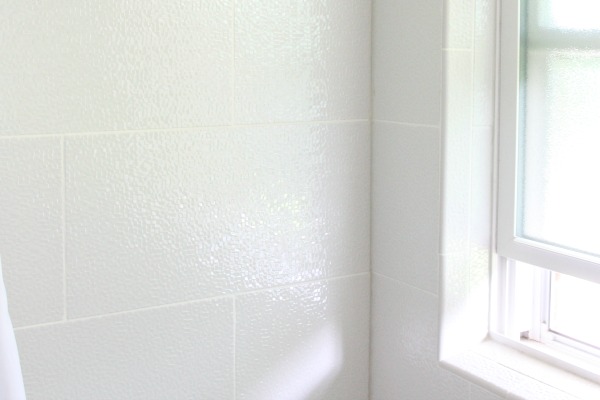
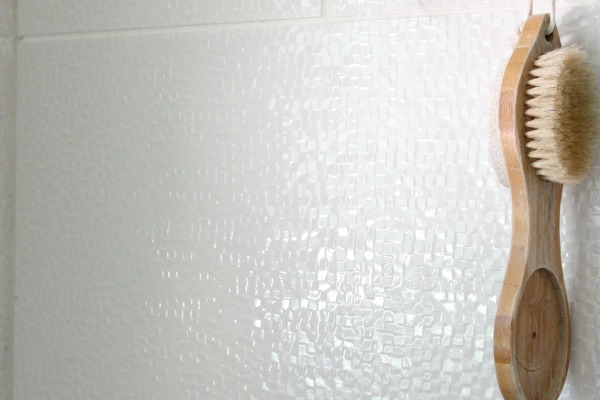
Bathrooms tend to feel very slick and sterile but I’m drawn to natural, nubby and woven textures. To achieve that tactile vibe I love, I chose tiles with interesting textures. The shower tile almost has a glittery appearance. It shimmers in the light from the window. Not to mention, the reflective surface is another way to trick the eye into seeing a brighter, larger space.
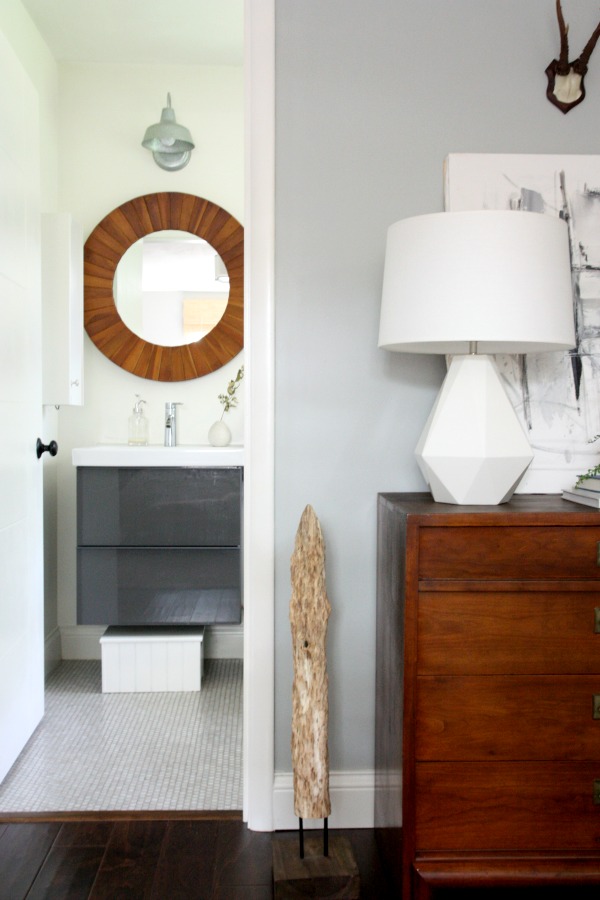
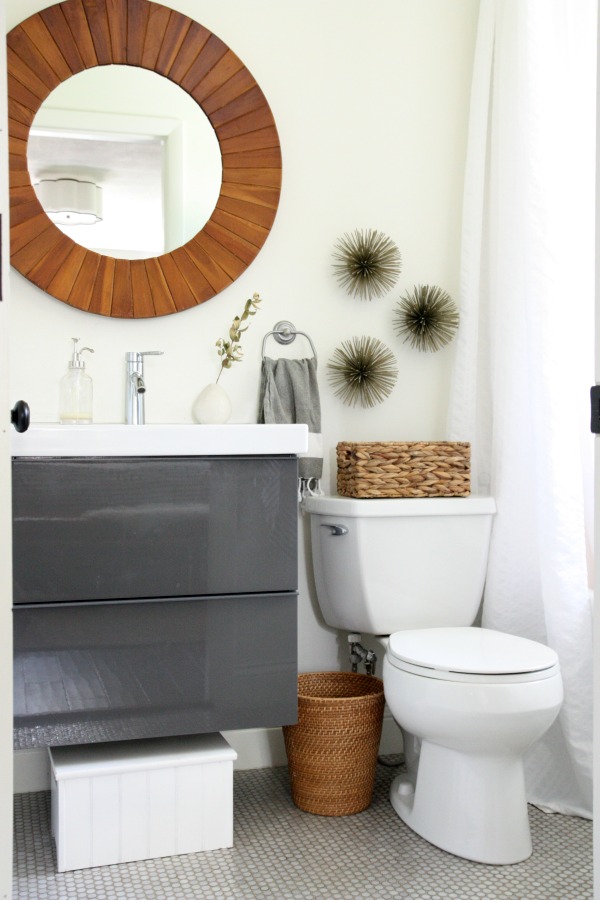
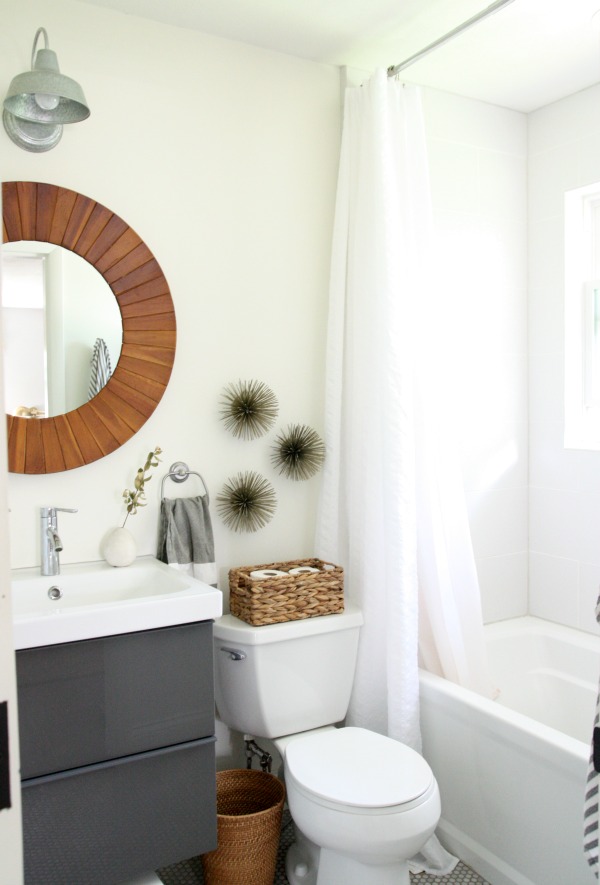
The sink area of the bathroom is visible from our bed(room) so I wanted something super simple that would tie in to the bedroom and not look too utilitarian. I had my heart set on a floating vanity but Steve requested drawers for all of his beauty supplies. (He’s kinda high maintenance.) The compromise was a floating vanity boasting two deep drawers. It was the perfect solution! We have plenty of storage and I can slip the kids’ step stool underneath the vanity. The floating design makes for quick and easy floor cleaning, too.
Eventually, we added a small wall cabinet to the left of the sink to house Steve’s electric razor, electric toothbrush and more of his manly toiletry surplus. (I told you he’s high maintenance.) I got tired of knocking over all the charging stations on the sink. We cut a hole in the side of the wall cabinet to gain access to an outlet so Steve can charge his grooming tools sight unseen and no one’s the wiser. THIS IS HOW YOU STAY MARRIED, PEOPLE. You won’t read about this in any of those self-help marriage books. Good communication? Showing appreciation? Healthy sex life? Yeah, those are all noteworthy and all but, I’m telling you, hidden charging stations are where it’s at! And they lived happily ever after…
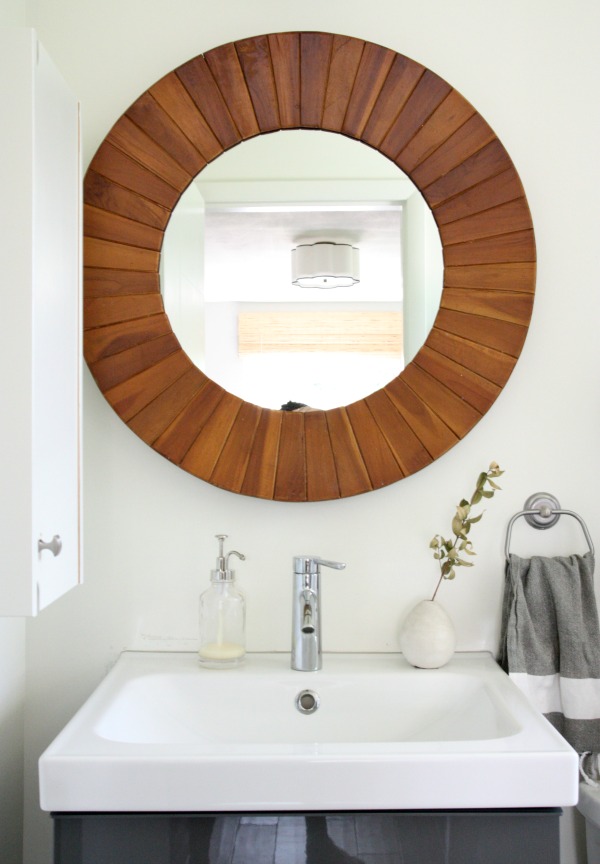
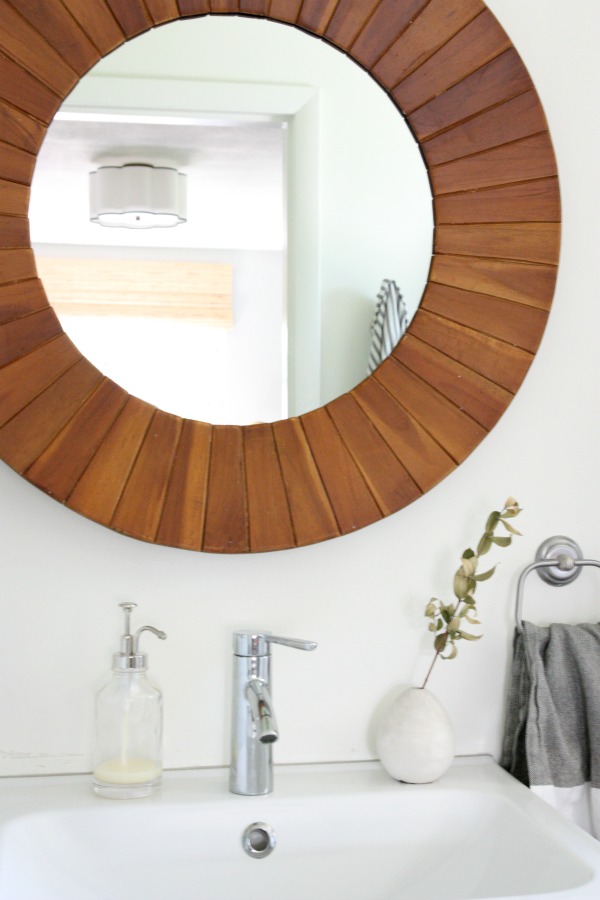
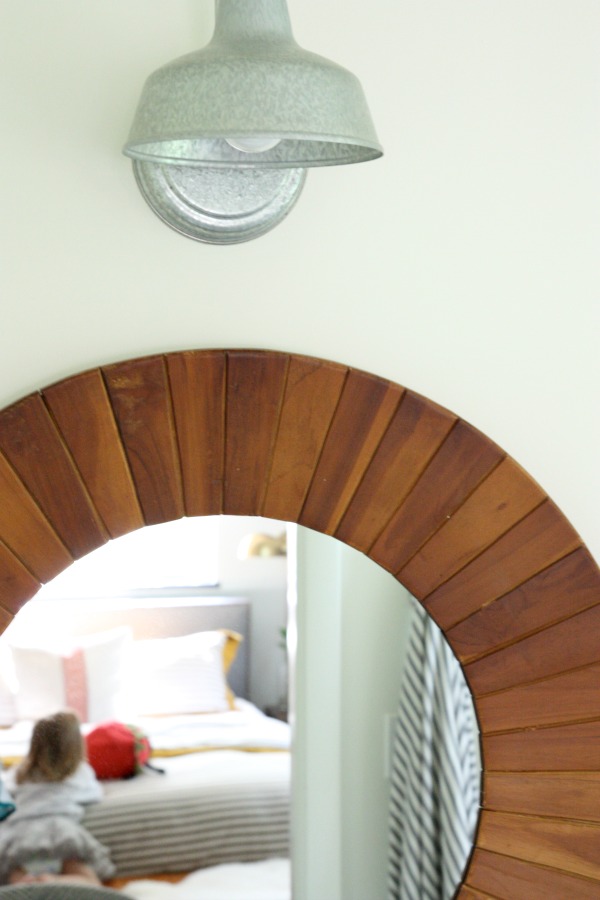
For warmth, I hung a round teak mirror above the sink. I didn’t seal it or anything and it looks as good as new. Teak has a good reputation in wet conditions so it’s kinda perfect for a bathroom.
The original floor tile tested positive for trace amounts of asbestos but there was no way we were keeping it. Now the proper way to remove asbestos tile (at least in the great state of Ohio) is to hire a certified abatement contractor for anything >50 square feet. (This one bathroom contained less than that but we were dealing with two bathrooms which put us over by ~20 square feet.) But that is expensive and Steve will try anything at least once. So he removed the asbestos tile himself using a wetting method along with full-body coverup gear and a respirator. I was pregnant at the time so the kids and I steered clear of the house during and for some time after removal. Steve did dispose of the tile in a landfill that accepts asbestos. In sharing this, I’m NOT saying you should attempt this yourself. I’m just being honest about what we did. You should probably follow your state’s regulations, m’kay? M’kay. Now that that’s settled…
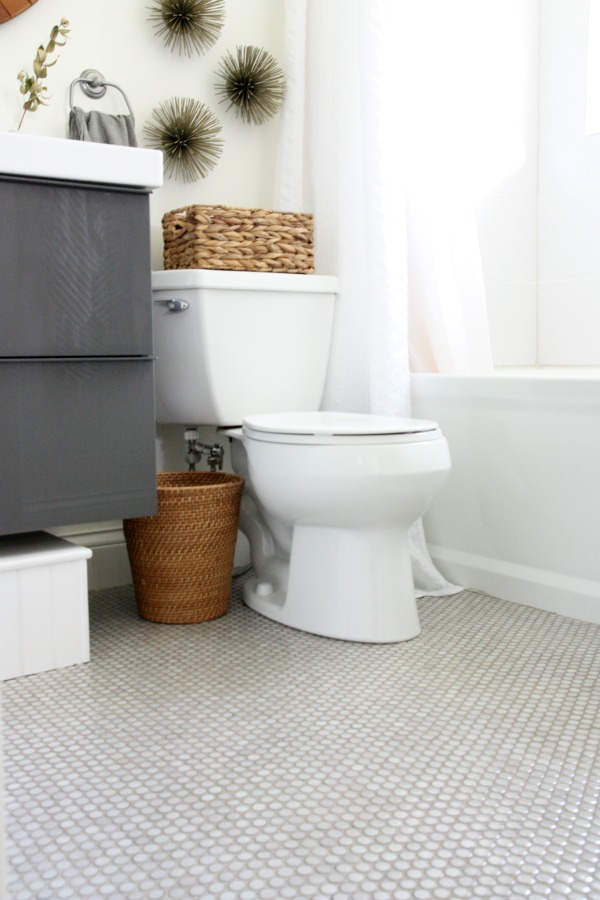
The new floor features (asbestos-free!) penny rounds and they lend yet another texture to the bathroom. It reminds me of reptilian scales and, after we first installed it, I wanted to rub myself all over it. We chose a sandy, dirt-colored grout that has held up well over the past two years. A woven trash can disguises ugly water lines. The basket on top of the toilet tank holds toilet paper. We couldn’t decide on a good place to hang a toilet paper holder (I vetoed the side of the vanity because I didn’t want to see toilet paper from the bed) so we threw a few rolls in the basket temporarily and, well, now it’s permanent.

I don’t think either of us expected to live with only one bathroom for this long. (We’re slowly plugging away in the other bathroom as I type.) But if we must share a bathroom, I’m happy it’s this one. On any given night, you can find all five of us squeezed in here getting ready for the kids’ bedtime. It works but, man, I am totally looking forward to having a second bathroom. It’s going to be a game changer. No more difficult questions about what happened to my penis!
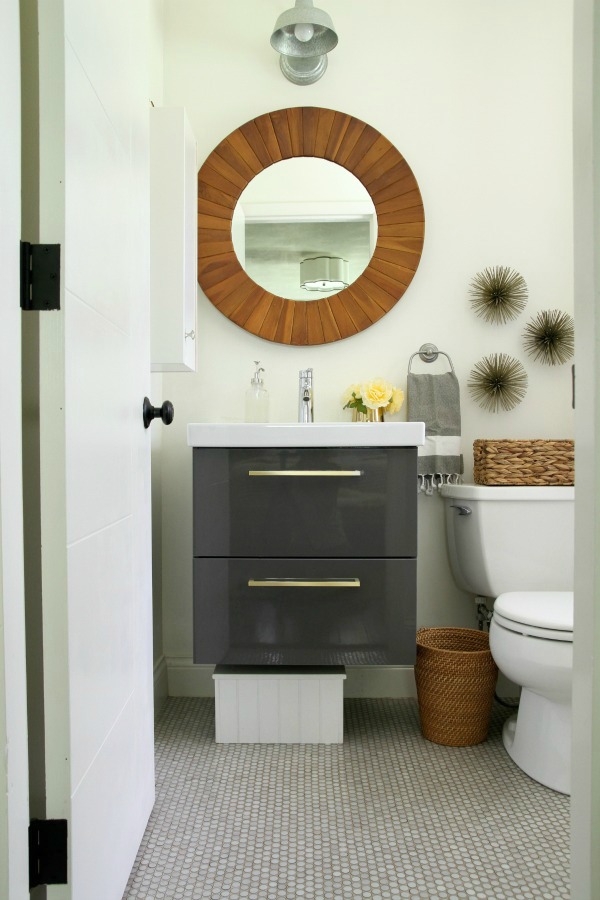
UPDATE: We added brass pulls to the IKEA vanity. See them here.
Resources of note:
wall & trim paint – Benjamin Moore white dove
floor tile – penny round moss from The Tile Shop
shower tile – capua blanco from The Tile Shop
tub, drain, shower fixtures – Kohler archer
shower curtain – 96″ seersucker curtain from Amazon, discontinued
double hook shower curtain rings – Amazon
shower curtain liner – Amazon
toilet – reused, Kohler
wall sconce – Barn Light Electric
mirror – Home Emporium
vanity – Ikea GODMORGON, high gloss gray
sink – Ikea ODENSVIK
faucet – Ikea DALSKÄR
soap dispenser – Target
wall cabinet – Ikea, painted white
towel holder & hooks – Lowe’s
trash can – Target
wall urchins – Target (I spray painted them gold because that’s what I do.)
hand towel – West Elm
peshtemal towels – etsy
Curious about the evolution of this bathroom? Here are a bunch of bathroom-related links:
RENOVATION
*https://www.housetweaking.com/2011/08/18/the-underdog-sans-scaffolding/
*https://www.housetweaking.com/2011/08/30/a-few-new-things/
*https://www.housetweaking.com/2011/09/13/behind-the-walls-i-mean-scenes/
*https://www.housetweaking.com/2011/10/11/new-windows-doors/
*https://www.housetweaking.com/2011/11/06/we-have-walls/
*https://www.housetweaking.com/2011/11/01/in-case-youve-never-seen-foam-insulation/
*https://www.housetweaking.com/2012/02/03/let-there-be-light-and-some-cabinets/
*https://www.housetweaking.com/2012/02/29/master-bathroom-tiling-progress/
*https://www.housetweaking.com/2012/03/02/windows-in-showers/
*https://www.housetweaking.com/2012/03/06/master-bathroom-progress/
*https://www.housetweaking.com/2013/05/20/fade-to-white/
FIXTURES & DECOR
*https://www.housetweaking.com/2011/09/
*https://www.housetweaking.com/2011/10/05/the-master-bath-master-plan/
*https://www.housetweaking.com/2012/01/13/a-bathroom-vanity-compromise/
*https://www.housetweaking.com/2012/02/09/recent-purchases/
*https://www.housetweaking.com/2012/02/23/gettin-teaky-with-it/
*https://www.housetweaking.com/2012/03/27/master-bathroom-reveal/
*https://www.housetweaking.com/2012/05/15/recent-purchases-2/
*https://www.housetweaking.com/2012/11/29/bathroom-vanity-sanity/
*https://www.housetweaking.com/2012/12/19/the-peshtemal-plunge/
*https://www.housetweaking.com/2013/04/30/three-sea-urchins-a-trash-can-a-tumbler-a-soap-dispenser-walk-into-a-bathroom/
*https://www.housetweaking.com/2014/06/18/easy-and-awesome-toilet-seat-upgrade/
*https://www.housetweaking.com/2014/09/15/schoolhouse-electric-supply-co-giveaway-new-bathroom-vanity-hardware/
You can now access this master bathroom tour along with a general house tour and individual room tours under the “See My House” tab in the side bar. Thanks for reading!
images: Dana Miller for House*Tweaking


DIY, renovation