It’s 20 degrees outside and I’ve lost count of how many inches of snow are on the ground. Cold weather, snow and dismal skies conjure up pictures of warm, inviting fireplaces in my mind. Below are a few fireplaces that I could cozy up to real nice like. (All courtesy of Decor Pad.)

The tiled surround and ornate framed TV looks polished but not overdone.

The color scheme of this fireplace and mantlescape would fit right into my home. I’ll take one!

The natural stone of this fireplace adds some much needed texture in an otherwise flat room.

I think Handy Hubby would like this one…modern and sleek.

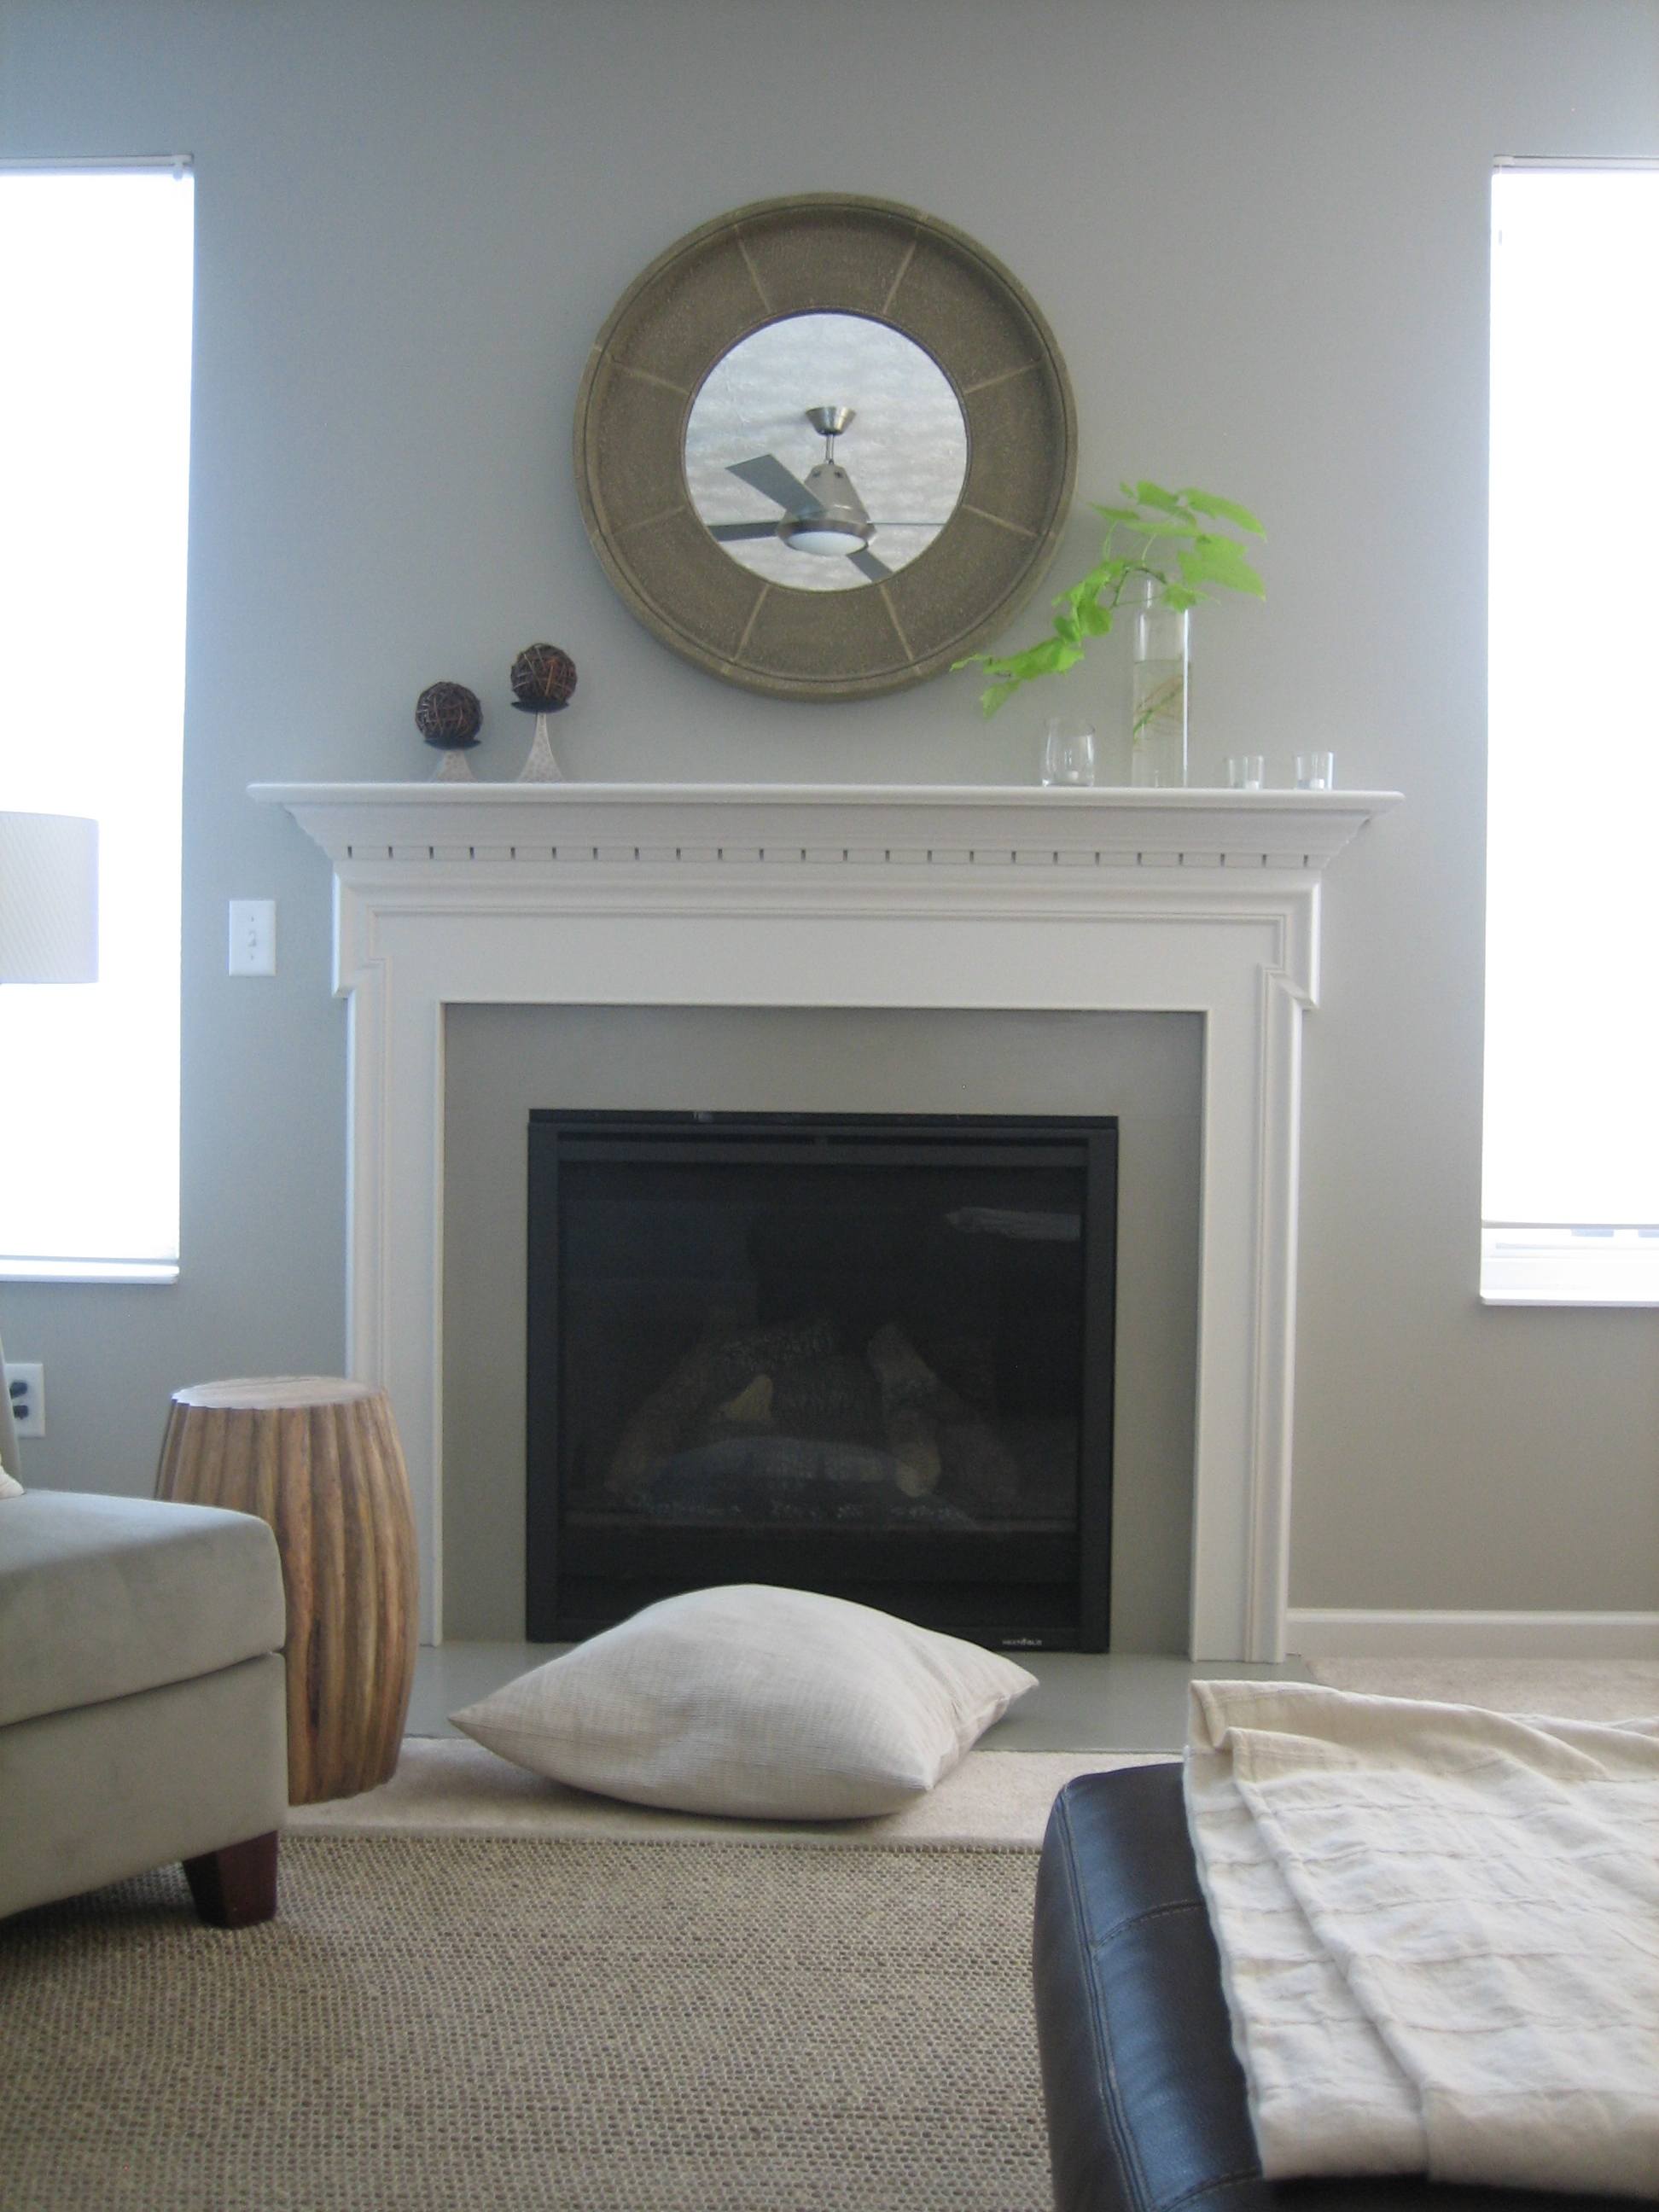
This mantle extends under two craftsman windows for a built-in effect.

I would live outside for this outdoor fireplace.

The neutrals in the fireplace allow small pops of blue, green, orange and yellow to stand out.

And nothing says cozy like a big, fluffy rug to lie on in front of the fireplace.
So, if you’re snowed in like me, take it as an opportunity to snuggle up with your favorite loved one, book, four-legged friend or hot beverage in front of a roaring fire. This is where you’ll find me tonight…

If you followed my Laundry Room Makeover last week, you may be wondering how I made the knot detail on the curtains that hide the mechanical eyesores (i.e. water shut-off valves and electrical cords).

Contrary to popular belief, I did not sew them onto the linen fabric. I actually hand-painted them using a stencil. And I tried the technique on a plain pillow cover first, before using it on the laundry room curtains. Luckily for you, I documented it all in photos so you can try it too! But before we delve into that…a tangent…because I’m feeling a little scatter-brained today.
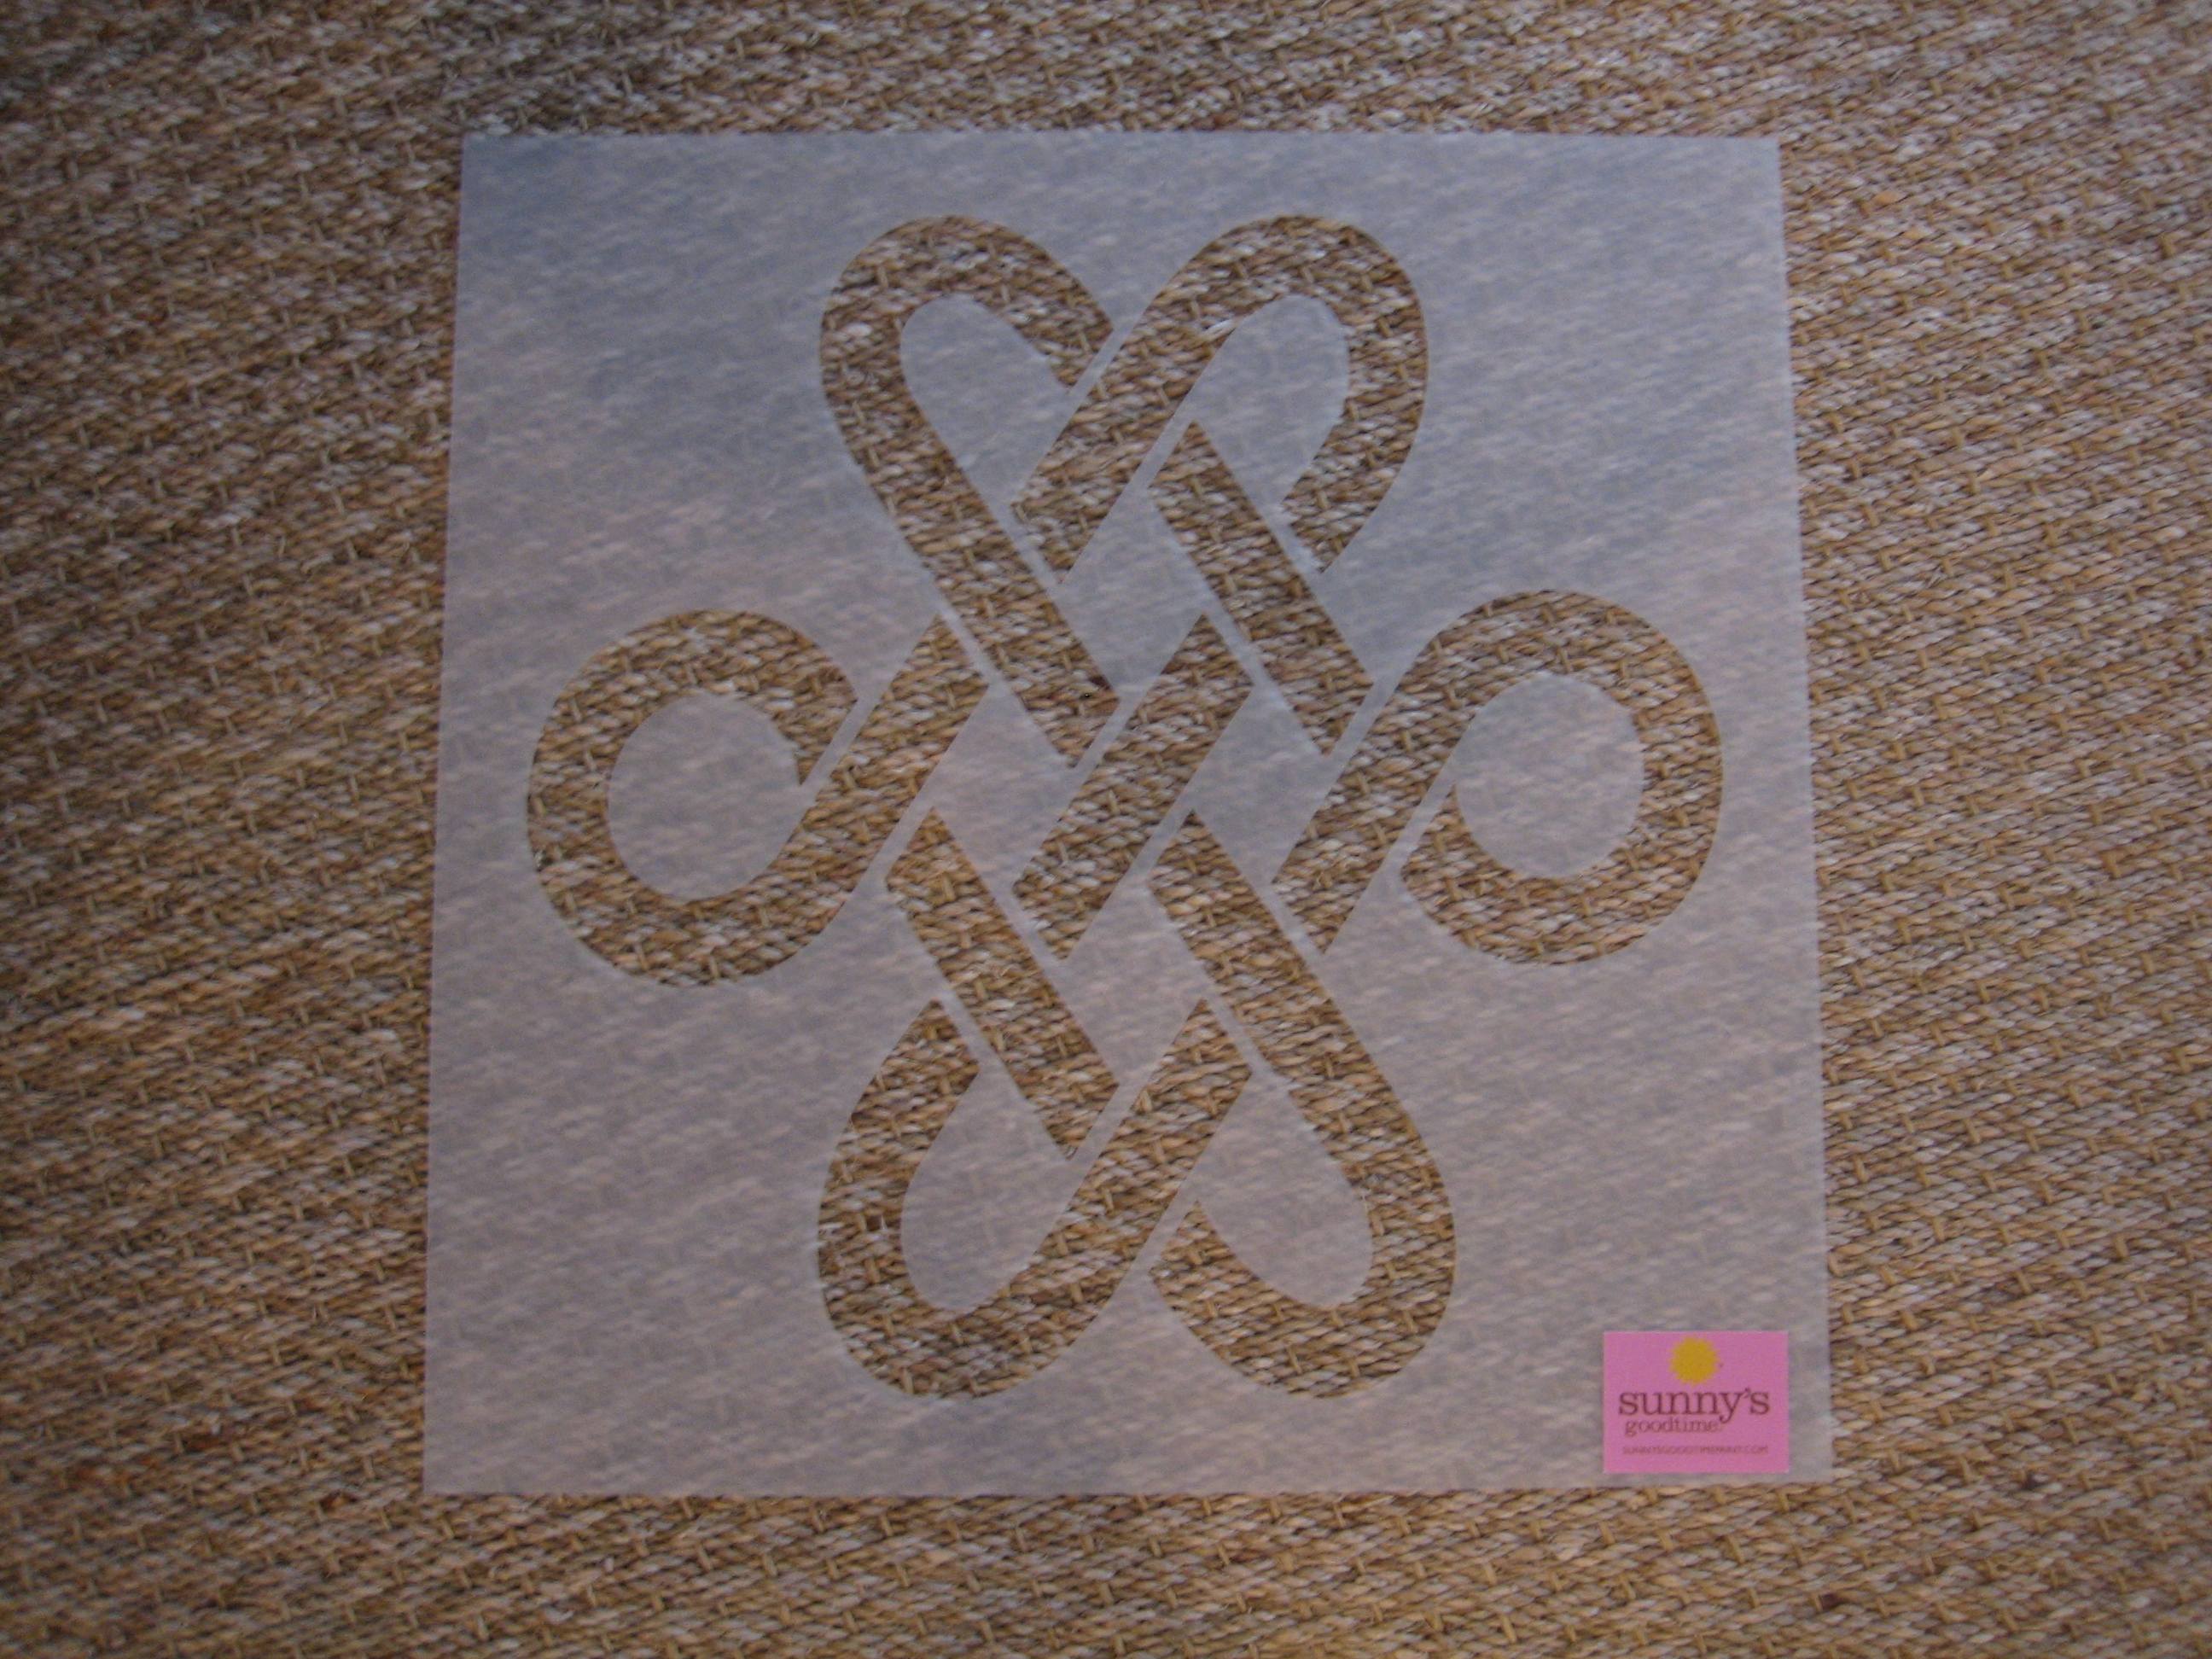
I got this stunning stencil as a Christmas gift (you may remember my other Christmas gift from this project) from Handy Hubby. The Knot stencil is made of pliable yet durable plastic that is intended for multiple uses. And, yup, it’s easy to clean!

It’s from Sunny’s Goodtime Paints which offers more than just stencils. They offer paints, glazes, paint books and tips for unique painting techniques. Paint is a great, inexpensive way to dramatically change a room and Sunny’s ideas can get the creative juices flowing. Check ’em out!

And now back to your regularly scheduled programming… (yeah, this is how my brain works)
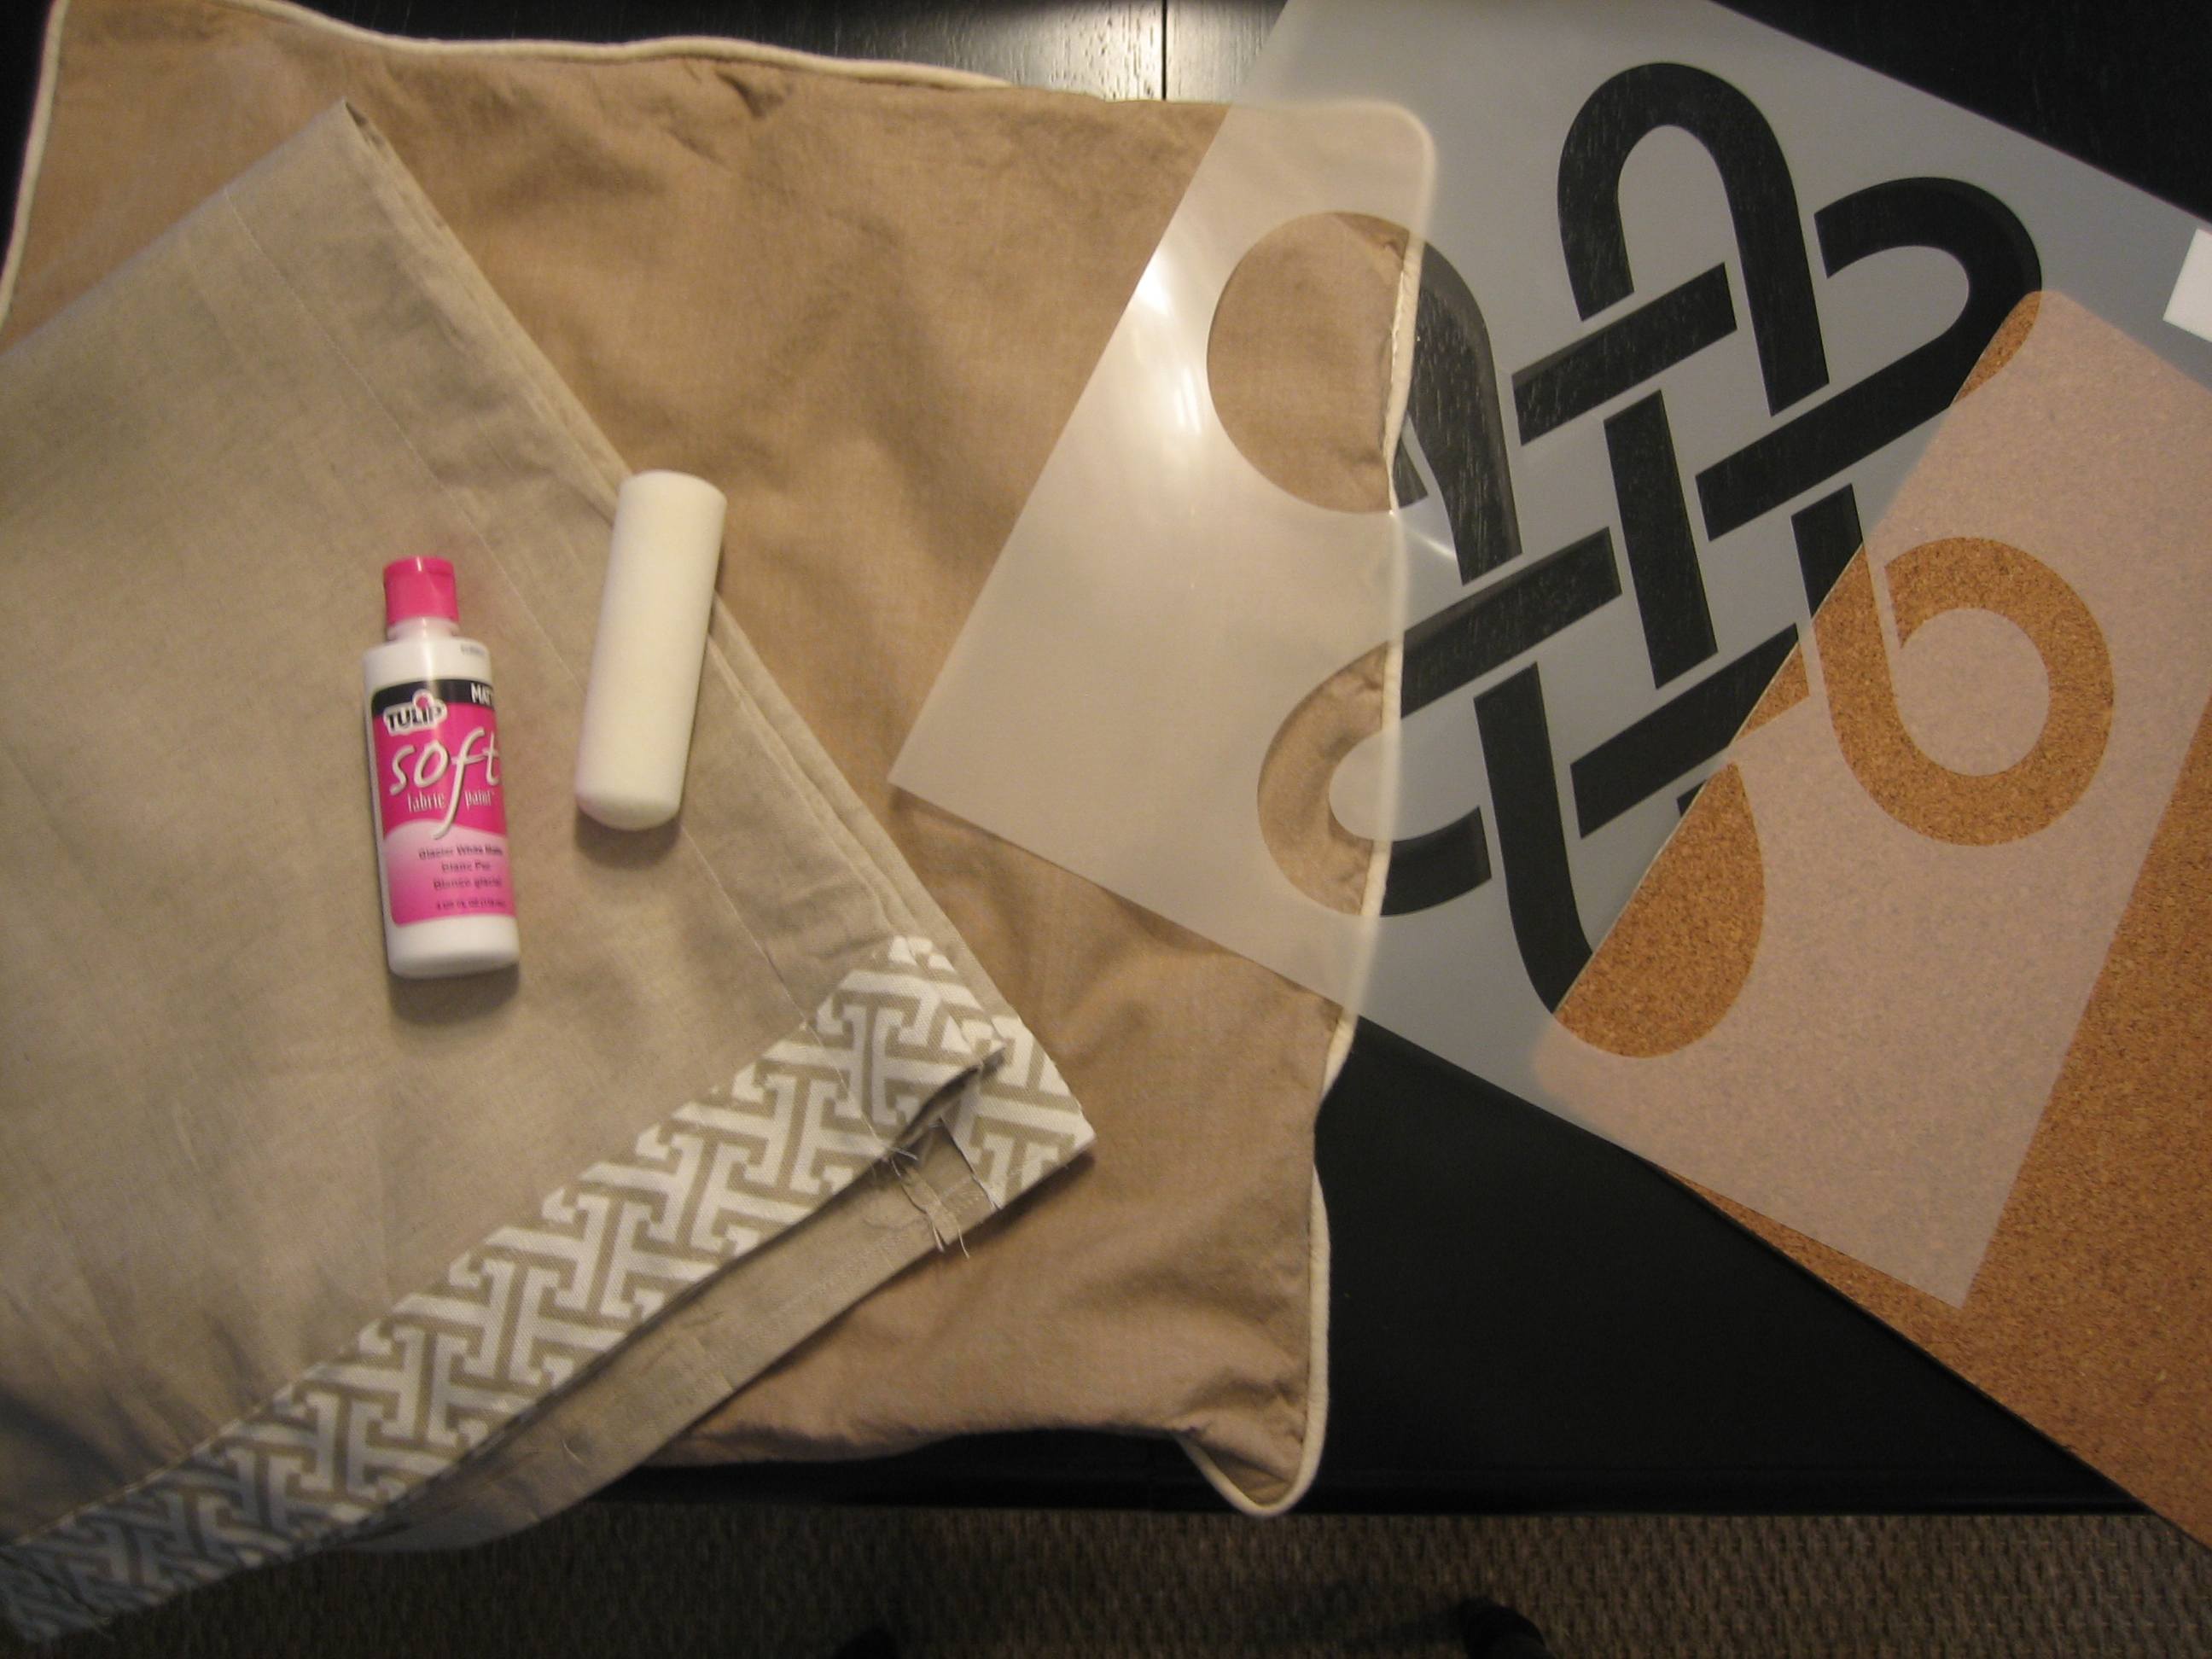
Here are the supplies you will need to paint fabric:
*fabric – washed, dried and ironed
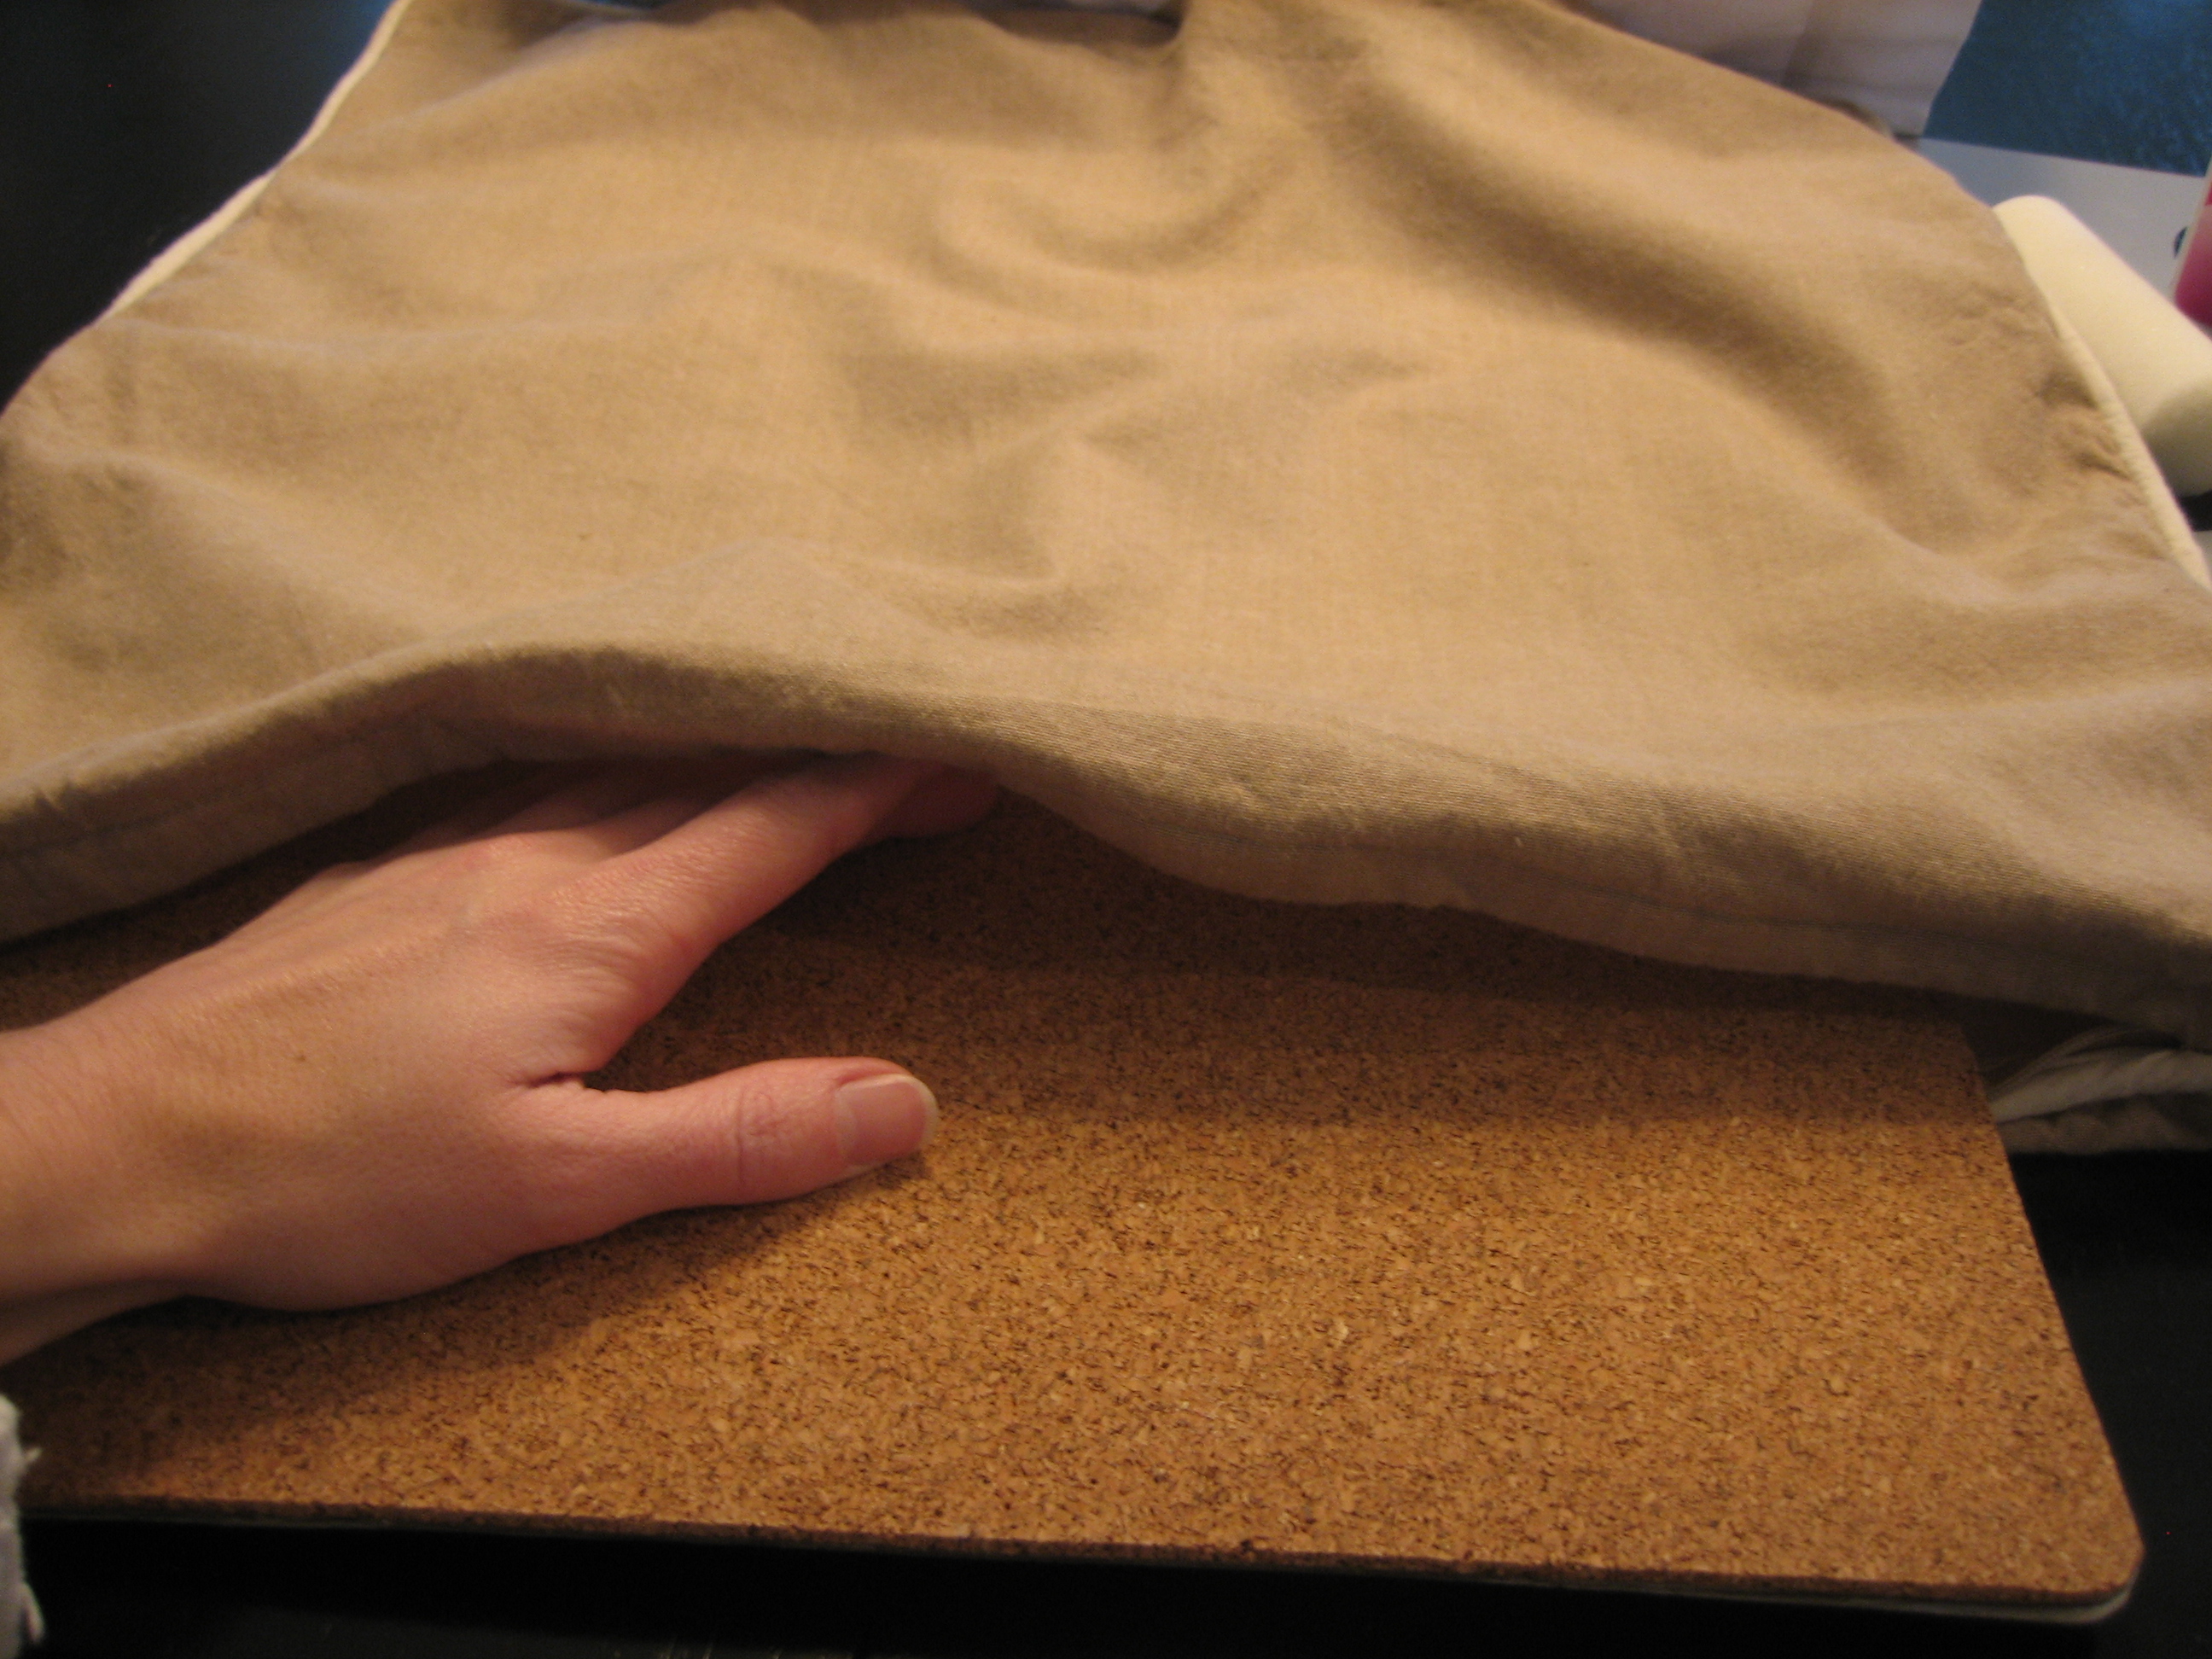
*cardboard – large enough to lie beneath the area of fabric you’ll be painting…I used a scrap piece of cork
*fabric paint – got mine at JoAnn Fabrics
*paper plate
*foam paint brush – from any home improvement store
*stencil

First, you need to wash and dry the fabric you’re wanting to paint. This may be the most important step. If you skip the prewash, the painted fabric can shrink causing your painted detail to crack and flake. Do not skip this step! Then, for ease, iron the fabric. (I know, I hate ironing too! But if I can do it, so can you.) Then place your cardboard underneath your fabric to catch any paint that may bleed through. Again, I used a scrap piece of cork instead of cardboard.

Tape your stencil into place to keep it centered.

Squirt some fabric paint onto your paper plate. Use your foam brush (I improvised with an on-hand foam roller as I was snowed in with two lil’ kids and no way to get a proper brush) to dab into your fabric paint. Get rid of excess paint by dabbing around the paper plate a few times.

Press the fabric paint onto your fabric, making sure to use an up-and-down motion to avoid getting paint under the stencil.

Do one layer of paint for an old, worn look or two coats for a more clean, crisp feel. (For my pillow cover I did two coats; for my laundry curtains I did one coat.) When you’re done, it should look something like this.

Carefully remove the stencil from your fabric. Follow your fabric paint’s instructions for drying times. I let mine dry for 4 hours. The label should also list a minimum setting time…the time required to pass before you can wash the fabric. Mine was 72 hours; however, in a miraculous turn of events (i.e. my kids haven’t dropped snacks on it) I haven’t needed to wash it yet. Here’s my happy little pillow cover…

Isn’t it so cute and sweet?

A close up of the stenciling detail…

Here it is hangin’ with da boyz…

Super easy. And quick. I stenciled the pillow cover and 2 laundry curtains in 30 minutes. Total. It doesn’t get any better than that! I’m already dreaming up a big scale stenciling project now that I’ve completed some mini ones…hmmmm, what could it be?


inspiration