...because home doesn't happen overnight.

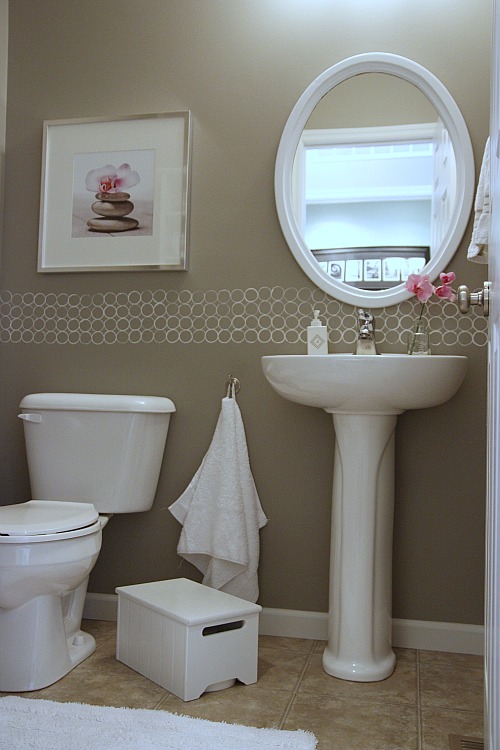
This is my powder room.

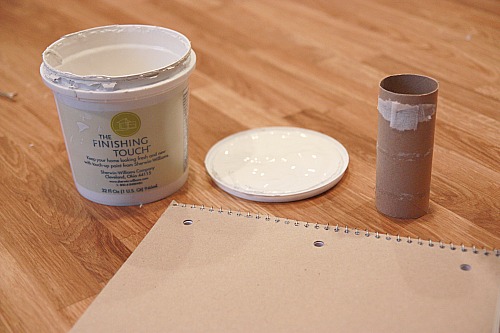
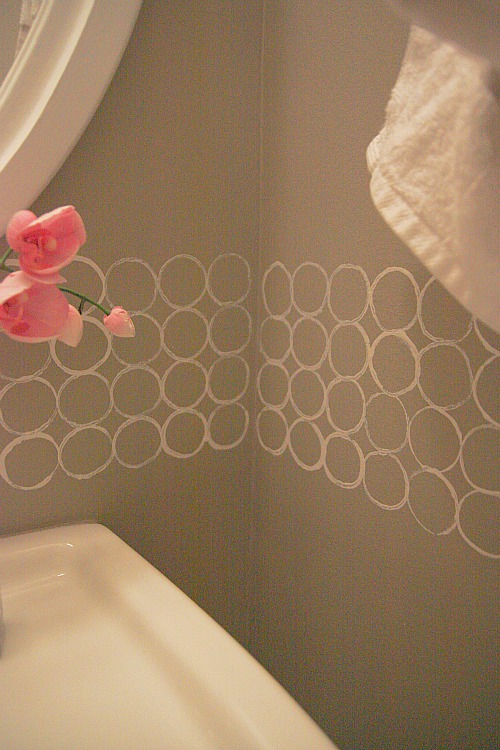
I hand painted the circles border for FREE during my kids’ naptime a few years back.  I just used a tape measure, level, pencil, painter’s tape, a few empty cardboard toilet paper tubes {paper towel tubes would work as well}, a teeny paint brush {fabric brushes are a good choice} and leftover matte paint.  Here’s how I did it:

**This is a reenactment of actual events.  Names of characters may have been changed.  If only I’d have known what a blog was when I originally took on this project, I could give you the real deal.**

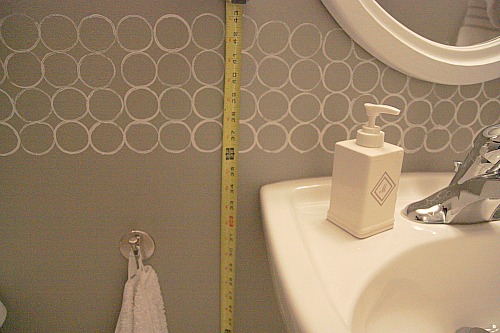
I knew I wanted the border to run just above the sink and toilet.  I measured up from the floor to figure out where I wanted the bottom of border.  36″ looked good.

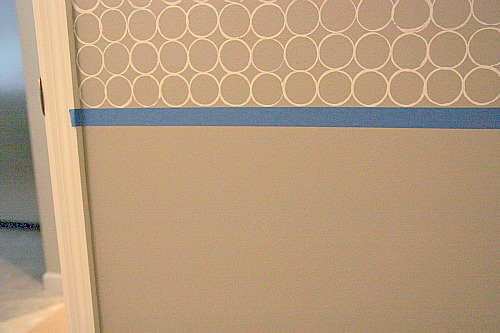
Starting at the door, I used a level and pencil to mark off the bottom of my border all the way around the room.  Then I taped if off with painter’s tape.

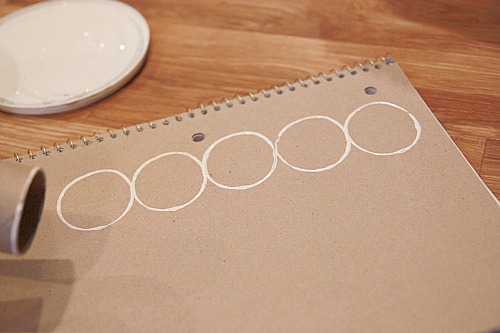
I practiced my painting technique on the back of a notebook before applying it to the wall.

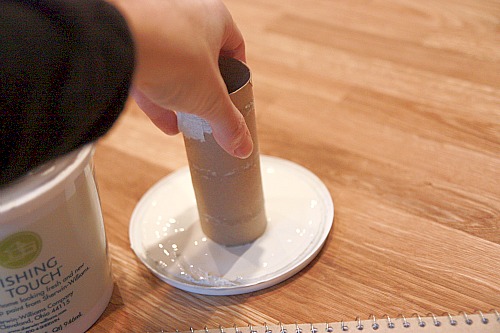
I used the paint off the lid of some leftover trim paint that the builder gave us when we bought our spec home.

I pressed the wet tube firmly onto the paper.

Notice the circle isn’t perfect.  It’s okay.  {That’s what gives it texture in the end.}

I perfected my technique…

…and decided on a border that would be 4 circles high {5 circles was too high}.  I used the same painting technique to ‘paint’ circles on the powder room walls, following the 36″ high tape line.  I painted column-by-column – meaning I would make one circle right above the tape line and then add 3 more above it before moving on to the next column of circles.  When my cardboard tube would get soggy on one end, I’d just flip it over and use the opposite end.  When both ends were soggy, I threw it away and got a clean one.  {This is why you’ll need more than one paper tube.}

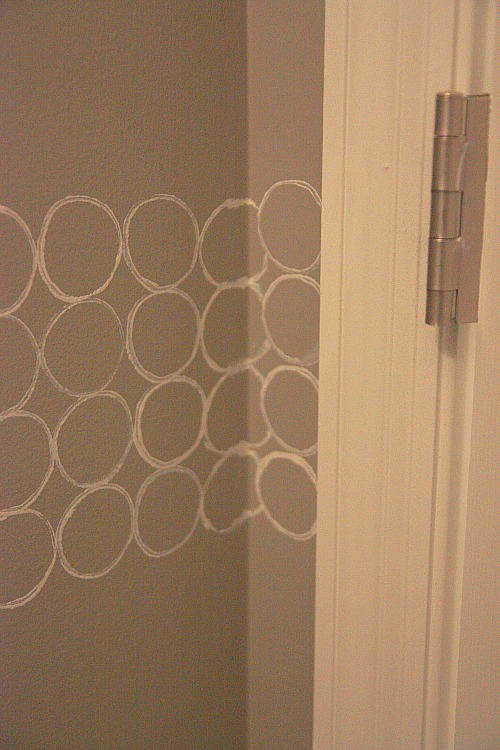
Now, let’s talk corners for a minute.  I was 1 for 4 in the corners.  Only 1 corner in the powder room didn’t have to be touched up in some way.  The way the circles fell, I was able to press a painted circle right at the corner and then go on to the next perpendicular wall.

In the other 3 corners, though, I had to hand paint the circles using a stiff fabric brush.  {Really, any small paint brush would work as long as you have a steady hand.}  I don’t think I did a great job, but no one notices unless I point it out to them.  It helps that I did my first ‘touch-up’ in the corner behind the door.

After the border was complete, I simply removed the painter’s tape and let the paint dry.  This DIY project took me about 45 minutes from start-to-finish and cost me $0.  This is definitely a good naptime project for moms…quick, easy and painless.  Everyone that visits our home and uses the first floor powder room complements the border and then asks how I did it.  They’re always surprised when I tell them I did it with a cardboard toilet paper tube for FREE.  It is a little ironic that I used an empty toilet paper roll to paint my bathroom, isn’t it?

images: all by Dana Miller taken in bad lighting

18 Comments

18.November.2010

HI,
I have been checking your blog for a few days now. I love your house, and especially this border. So I had to leave a comment when I saw this DIY. I know for sure I want to do this in my powder room, I am just not brave enough yet .
Thanks for sharing this DIY project.

– J

18.November.2010

Jayashree – What do you have to lose? If you don’t like it, just paint over top of it. That’s what I was telling myself the whole time I was painting those circles. But I ended up being very happy with them! Good luck, no matter what you choose to do.

18.November.2010

I love it! Part of what I like, though, is the wall color. What paint did you use for the rest of the wall? It’s a lovely shade.

18.November.2010

I know you’ve posted before that the powder room is a shade darker than your living area, but is there a name for the color? I’ve been looking for something like this :) Love it!

18.November.2010

it’s so simple and thrifty, but such a perfect design element, I really love this project! I bet you could use this same technique to make a cool border for something hanging on the wall (like an intial or monogram) or to ‘bulk up’ the visual impact of a too-small frame, or maybe even to create a ‘frame’ for a collection of smaller objects on the wall…time to start collecting those rolls!

18.November.2010

Sorry, I just found it on your paint post that the color is Valspar’s Magic Spell. Thanks!

18.November.2010

What color is the wall paint in this room?

18.November.2010

You have to know that is incredibly genius! I have a powder room that looks to be very similar to yours and I am definitely going to give this a try (err.. that is as soon as I finish the other 5 projects I have going!) :)

18.November.2010

OMG – I love that. I need somewhere to try it out in. Thanks for sharing!

18.November.2010

I fell in love with your blog the first time I saw this. So creative! Love the fact that you used a toilet paper roll for your bathroom walls – love it!

18.November.2010

Thank you!! I’m excited to try it this weekend.

18.November.2010

What sheen of paint did you use in your bathroom(s) and kitchen? If you stuck with eggshell, has it been durable/washable enough? Our kitchen opens into and shares a wall with the family room. Switching sheens in the middle of that wall makes an obvious line (the builder did it with flat abutting semi-gloss ). If I need more durability than eggshell gives, I could do the kitchen and that whole shared wall in satin. I’m planning to do the rest of the main floor in eggshell. Do you think a sheen change would be obvious at a corner? Thanks for your input!

18.November.2010

Kim – All of our walls are eggshell finish. I find them very durable/washable in our family home. If you think you need to use the satin finish, I don’t think it’d be readily obvious at the corner where the 2 different finishes meet. Most paint dept employees I’ve talked to say there’s little difference between the eggshell and satin finishes.

18.November.2010

Diana & MEP – The powder room wall color is Valspar {Lowe’s} Magic Spell. It’s one shade darker than Bonsai {the main living area color} but looks even darker in the powder room because there’s no window to let in natural light. I really like it for our powder room!

18.November.2010

Carole – Oh, yes! I could see so many different ways to use this technique- not just as a border!

18.November.2010

Kim W – It’s Valspar {Lowe’s} Magic Spell. #345-3

<3 your powder room. Lovely!
-ashley

16.March.2012

Thank you for kindly and generously sharing your amazing talent with the rest of us. I do not have a decorating bone in my body but I know what I like. I really like your powder room. It looks a lot like mine. Although I’ve never done anything like this, I’m going to try to incorporate your idea in mine. I should collect enough paper rolls in two weeks. I’m very much looking forward to it! Thanks.