...because home doesn't happen overnight.

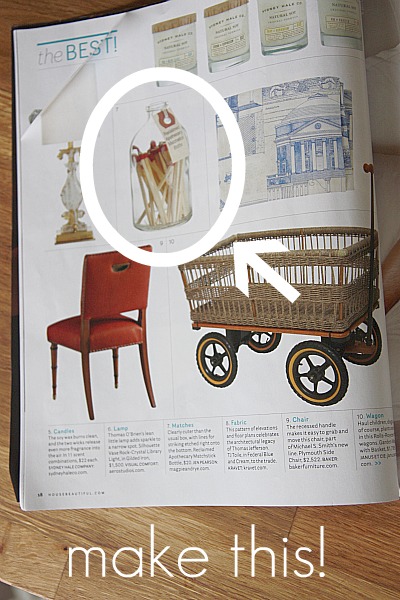
I saw this vintage apothecary matchstick bottle in the most recent issue of House Beautiful and thought, “I should try DIYing that!”  It was simply a small glass bottle filled with matchsticks and etched on the bottom for lighting the matches.  I already had a perfect little glass vase that I had found at Goodwill for $1 but had trouble scoring long {think 4″-6″} matchsticks to fit inside.  I finally found these 4″ matchsticks on Amazon.

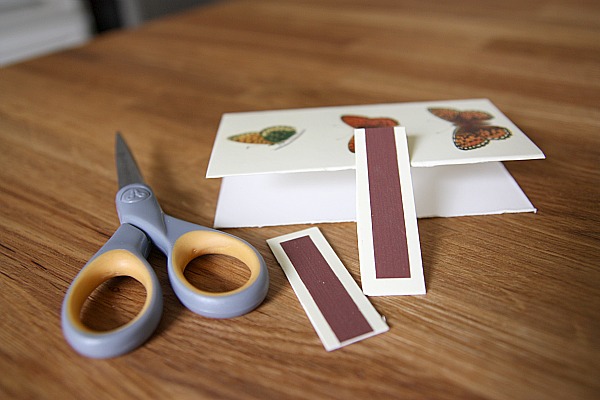
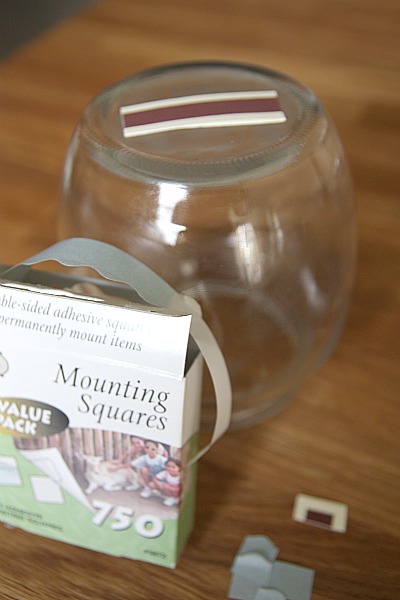
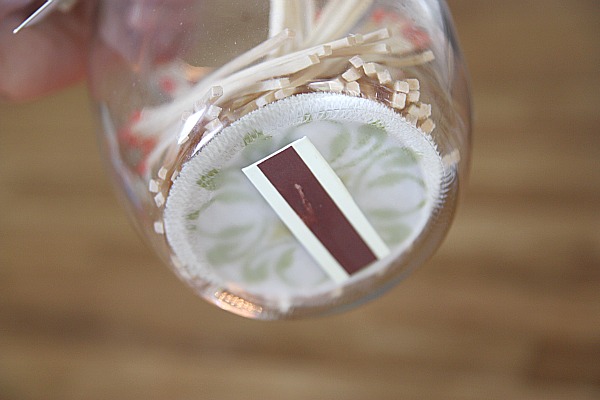
They come in a set of three.  They were expensive for matches, but I planned on making two more of these matchstick bottles {for Mom and MIL for Mother’s Day} if the first one turned out okay so I figured ‘what the heck?’ and ordered ’em.  One matchstick bottle for myself and two Mother’s Day gifts for less than $20 total is actually a steal, right?  I tried etching the bottom of the glass vase like my House Beautiful inspiration had on it, but the etching turned out not to be coarse enough for lighting the matches.  Scratch Plan A and onto Plan B which consisted of me cutting out the lighting strip from the matchbox, cutting it down to size, and adhering it to the exterior bottom of the vase with scrapbooking mounting squares.

I didn’t like the way the lighting strip showed through the glass when the vase was upright.

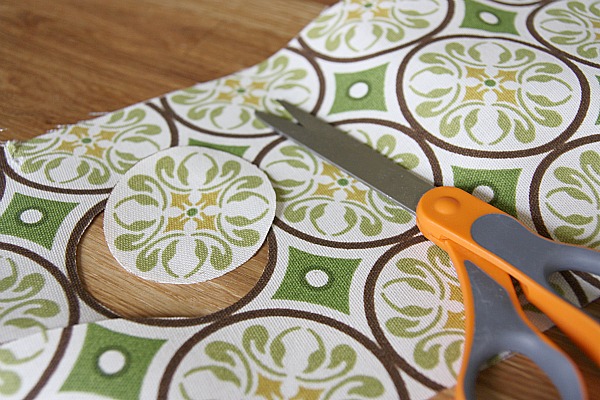
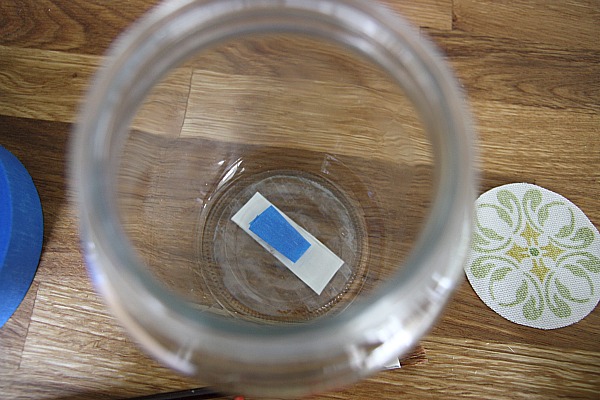
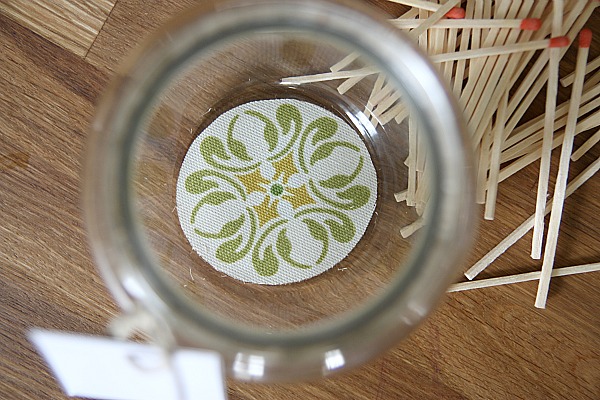
I cut out a circle of scrap fabric {from some leftover kitchen curtain material} and placed a folded piece of painter’s tape to hold it in place into the bottom of the vase.  {I wanted to be able to remove the fabric easily if I ever need to clean out the vase.}

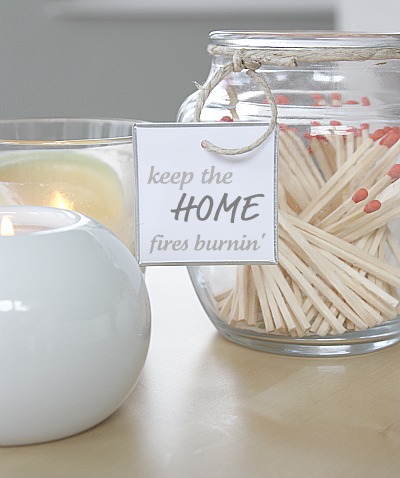
I filled the vase with matchsticks and tied a small tag {another scrapbooking product that I already hand on hand} around the lip of the vase with twine.

Yes, that’s computer text added to the tag.  I didn’t want to write something on it just yet since I plan on gifting two matchstick holders to my mom and MIL for Mother’s Day.  I don’t have the other two vases {which I plan on buying at Goodwill} yet and want to make ’em personal after I decide which one stays with me, which goes to my mom, and which goes to MIL.  I might even switch up the phrasing to something else but I like this one for my own home.

The lighting strip really works, too!  You just grab a match, hold the open mouth of the vase with one hand, and swipe the match across the bottom with your other hand.  Oh, and it doesn’t budge at all with those super sticky mounting squares holding it in place.  Just remember to keep it out of reach of little ones!

With the vase full of matches, you can’t see the fabric-covered bottom.  But as the match supply begins to dwindle, it will be revealed…instead of the lighting strip’s ugly backside.

I’ll have to keep you posted on how I tweak this DIY project into a Mother’s Day gift when that time approaches.  Wouldn’t it be nice to gift it along with a yummy-smelling candle? And to think that I’ll get 3 matchstick holders for the same price {$20!!} as the one in House Beautiful is pretty sweet. Nothing like taking inspiration from high-end products and dumbing it down into something affordable!

images:  all Dana Miller for House*Tweaking

34 Comments

29.March.2011

What great inspiration! I love it – what a clever Mother’s Day gift.

29.March.2011

Interesting…never seen one of those before. I think it would be great to get the long ones for lighting fireplaces and do a tall vase to gift at Christmastime…or a nice hostess gift. The boxes your matches originally came in are cute too! You could even cut that out to use as a gift tag!

29.March.2011

So cute! On my list of projects to try now. Thanks!

29.March.2011

Cute idea! I think I might have to copy this.

Couldn’t you just use long matches & cut them own? :)

29.March.2011

Love this! What a cute and cost effective gift idea! Looking forward to seeing how you tweak it! Too bad the etching of the glass didn’t work out, that would’ve been perfect! Did you use glass etching medium?

29.March.2011

I love that! Very creative. I would never think to put matches on display like that. Hm… we have those large matches for the gas fireplace…A large vase would work… and then we could store them on the mantle. You have the wheels in my head turning Dana!. :)

I have seen this project before too, but was concerned with the etching issue, great alternative!

29.March.2011

So adorable, what a great gift! You could also attach a circle of low grit sand paper to the bottom of the jar, instead of the strip. Love this!

I absolutely LOVE this idea! Great tutorial, too — Can’t wait to try it!

29.March.2011

I too saw that and thought it’d be something to DIY. Glad to see you did. Good gift idea. Thanks for sharing.

29.March.2011

Another idea for the bottom, instead of using the matchbook bit, would be to use a piece of fine sandpaper cut in a circle…still love the fabric in the bottom, though. I’d do both.

29.March.2011

that is a really cute idea! i love it!!!

This is such a great idea! My mother-in-law loves candles and this would be a perfect gift for her as well–thanks so much for sharing :)

29.March.2011

Suggestion – rather than buying the expensive 4″ matches – could you not use the less expensive fireplace matches and cut them down? Great idea – BTW. I wonder if a small Ball jar with lid would work for a more water resistant version – put the strike strip under the lid?

29.March.2011

This is such a cute and thoughtful gift! I really love how the entire thing turned out. Perfect for those with a real wood fireplace and candles. :)

29.March.2011

I LOVE this!! What a great idea!

29.March.2011

I think the reason they wouldn’t strike on the bottom is because those aren’t self striking matches (I think that’s what they’re called). There are 2 kinds of matches, the ones like you have with one chemical on the match and the other on the strike strip, when you strike they mix and flame up. The self striking ones have 2 different colors on the tip because both chemicals are layered on the match stick and the friction from striking them on any rough surface mixes the 2. They aren’t as safe, so they are harder to find.

29.March.2011

So Lovely! Love it as a DIY wedding favor in a smaller version too! “The Perfect Match!”

29.March.2011

Kelly – A circle of sandpaper is a great idea!!! I knew one of you readers would come up with something better!

29.March.2011

Mindy – Yep, I used glass etching medium…applied it very thickly and even left it on triple the time that was recommended to no avail.

29.March.2011

Everybody – Okay, you all are sooo smart! Love the ideas about adhering a circle of sandpaper to the bottom of the vase…pure genius. I just might have to do that when the lighting strip wears out. Also, the frugal idea to cut down fireplace matches is awesome although it would take some extra time. You could even use regular {smaller} matches and place them in a votive holder, using the same concept. I do agree that making something similar with a Ball jar would be adorable {I even plopped a few matches into an empty jelly jar while attempting this project and they looked effortlessly casual}. And, finally, “The Perfect Match” wedding favor idea is pretty darn cute.

Good lookin’ out, peeps! If you make your own version, send a pic my way…I’d love to see it!

30.March.2011

Could also ‘scuff’ the bottom of the jar with a Dremel or rotary tool. You’d have to be careful just to work the surface lightly, so you didn’t break the glass… but I think it would work!

30.March.2011

This is a cute idea for a home and for a gift. I will have to try and see how it all turns out.

30.March.2011

So smart. I love it.
Cheers!!

30.March.2011

Wow, your are so ultra crafty! thinking about trying this one myself, but I would like a jar that has a lid so I can leave it on my patio for summer time! thanks for sharing!

30.March.2011

Wow – perfect and easy. i am totally going to be trying that this weekend! Thanks

30.March.2011

Very nice! I’ll have to keep that in mind. I have tons of vintage glassware just sitting around the house needing purpose in life …

Love this idea. Very cute. Might have to try this one. Thanks for sharing. :D

30.March.2011

Nice! Long matches are so much more aesthetically pleasing than those aim-and-flame lighters.

30.March.2011

Handy Hubby – Are you giving me permission to use a power tool when you’re not at home???

16.April.2011

Great idea
I can combine my love of Goodwill shopping (for jars) with my love of candles. I’m thinking of giving tweaked project of your idea for housewarming presents (matches, jars, candles) or Christmas presents.
Thanks for the idea and tutorial.
Carolleegail

10.May.2011

When I was at Home Depot the other day, I thought of this project when I saw a box of 50 11″ matches for $1.98. They could always be cut down to fit whatever container you want to put them in… although, yes, that would be more work. :)

[…] doesn’t mean I didn’t DIY the shit out of one of these babies. My gratitude goes out to House Tweaking for posting this idea. Directions […]

28.March.2013

Just wanted to let you know I tried this at home with a vintage ink bottle I had laying around- and it turned out PERFECT! I’m so thrilled. and it cost me NOTHING! Thank you so much for posting this. so simple, yet looks chic and makes a great gift! Thank YOU!

xx,
tw