...because home doesn't happen overnight.

Besides adding storage to the mudroom, Handy Hubby was also busy this past weekend prepping the walnut slab for installation.

If you’ll remember from the recent purchases post, we bought an unfinished walnut slab choosing to finish and install it ourselves to save >$800. We ordered a clear walnut butcher block slab measuring 1.5″ x 105″ x 42″. We shelled out $1,250 for the island countertop and that price included shipping. It definitely wasn’t cheap but we were willing to spend the money on a high quality slab that we knew would ‘make’ the room and get tons of daily use as well. After tons of research and price comparisons, we discovered that the $1,250 was actually a great price for a large slab of walnut {the island is 9′ long!}. In fact, we received more than one quote that came back in the $4,000-$5,000 range! So, we placed our order with Hardwood Lumber Company.

Well, the slab arrived last week with detailed instructions. The manufacturer recommended that the butcher block be installed within 7 days of arrival to avoid warping and bowing, so here’s what quickly followed to ensure a timely installation…

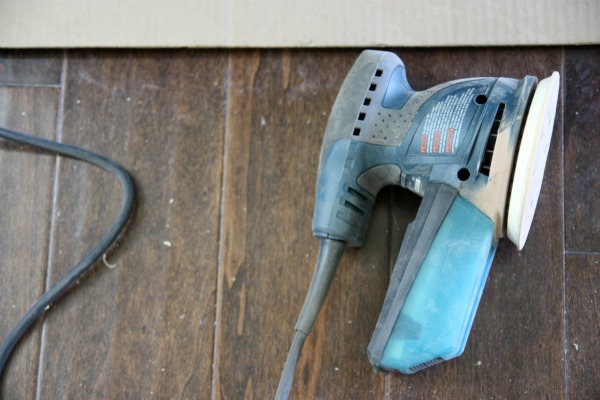
HH sanded the top and edges with a Bosch random orbital sander. First, he used 280 grit sandpaper and wiped the wood down with tack cloth. Next, he used 320 grit sandpaper for a smooth finish and cleaned up the slab with tack cloth once again.

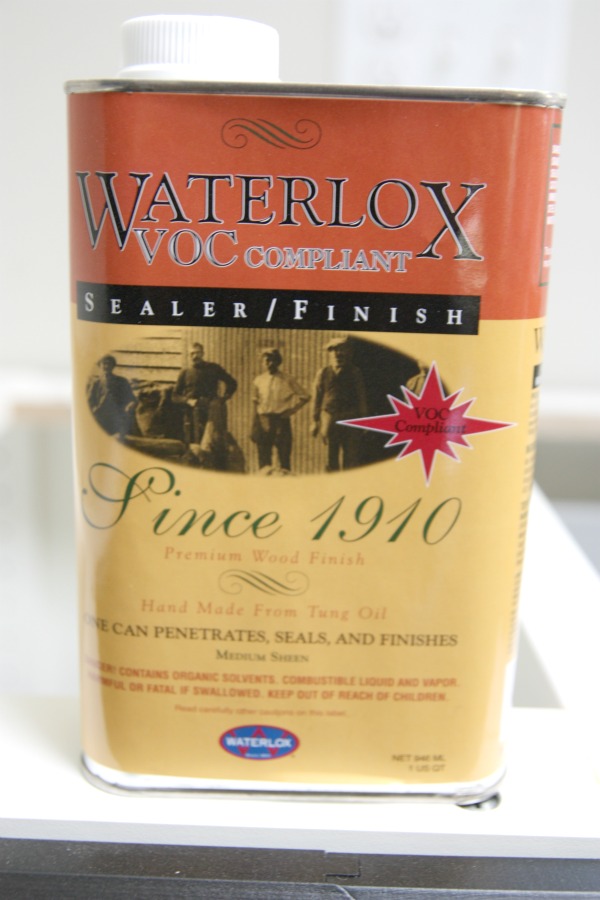
HH used a 4″ Purdy natural bristle brush to apply the sealer. We chose Waterlox sealer in a medium sheen. {According to the sales rep at Woodcraft, the medium sheen is a glossier finish than satin but not as glossy as their high gloss version.} The bottom of the butcher block received two coats of sealer while the top and edges got four coats. Waterlox recommends waiting 24 hours between each coat.

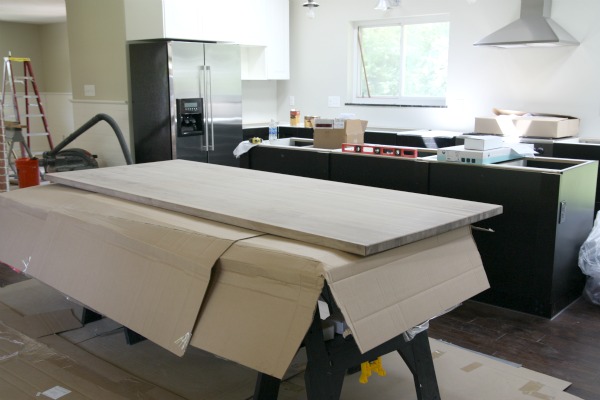
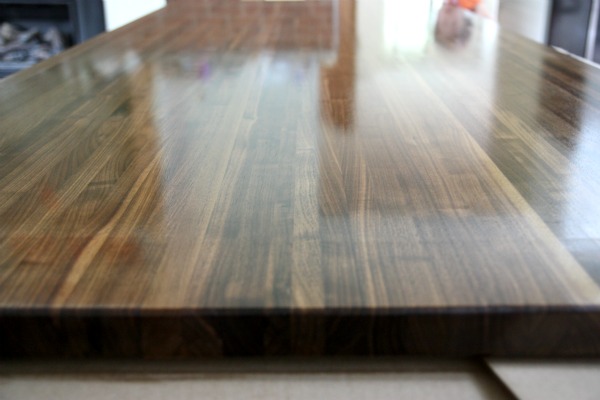
Here’s the unfinished, sanded walnut slab before Waterlox…

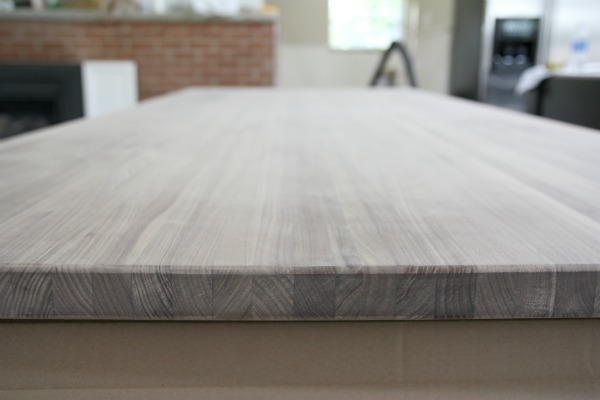
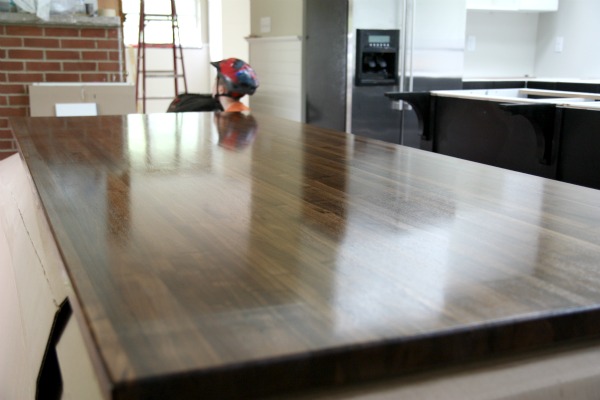
And here it is after a few coats of Waterlox…

Pretty amazing, right?! See how the sealer brings out the wood grain and gives it a nice sheen? So rich.

Yes, that’s Everett in his Spiderman helmet reflecting off the butcher block.

I will say one thing about Waterlox – it stanks!! Be warned. It’s worse than any polyurethane I’ve smelled. I know it has that VOC compliant badge of approval on it but I wouldn’t have wanted to use this stuff in the house while we were living there.

HH opened the windows and ran a floor fan all week to help air out the house. If you’re thinking of using Waterlox in your home, I’d highly recommend shacking up elsewhere for several days. Better yet, apply it outside or in the garage.

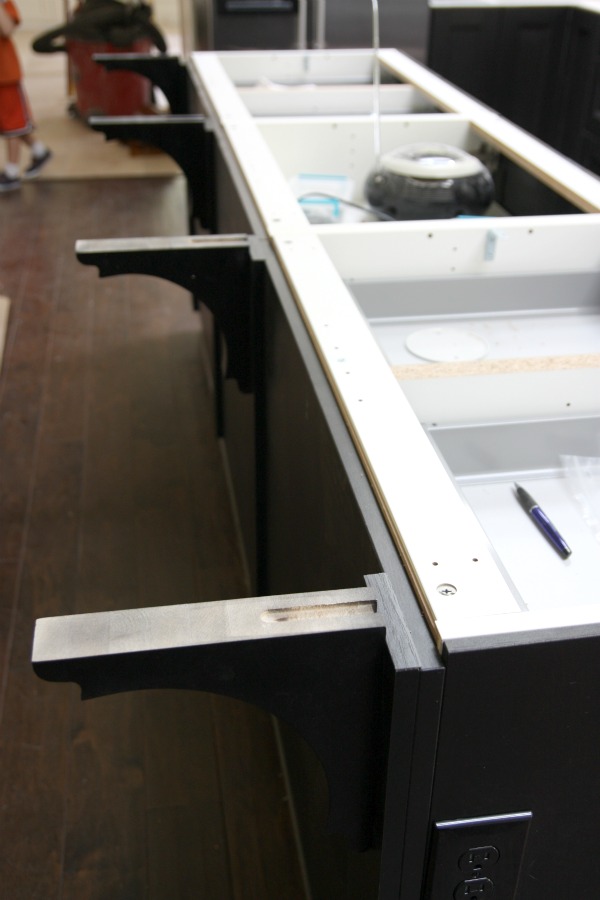
While waiting in between coats of sealer, HH set to work prepping the island for installation. I’ll delve into the details of that in another post shortly. For now, here’s a quick sneak peek.

Stay tuned…

Good news = we’re making loads of progress! Bad news = I’m having a hard time keeping progress posts up to speed!

FYI – We were awarded a 10% discount for documenting the finishing and installation of our walnut butcher block on House*Tweaking. Regardless, we would have chosen to work with the same company and purchase the same walnut butcher block after researching our options and receiving several quotes from other businesses.

images: Dana Miller for House*Tweaking

38 Comments

23.May.2012

Sooooo pretty! And I think it is awesome they gave you a 10% discount. I can’t wait to see the finished kitchen! It looks amazing already!

23.May.2012

We did waterlox on our butcher block too. It holds up really well, but if you accidentally leave a sticky glass on it and pull it off, it will pull up a nice circular chunk of the finish. If you aren’t a slob like me you’ll be fine. Haha. If something gets stuck, don’t pull, pour a little water on the edge and let it sit a few minutes. It’s just as water resistant as they claim, it just beads right off. I even had a plant next to my sink that I’d been watering for weeks without thinking. I picked it up and there was a big wet white circle. It dried within hours and you can’t tell anything was there. Love waterlox!

23.May.2012

Gorgeous hunk of wood! So nice to see things moving along and getting your family closer to Move-In Day–though so much sweat equity has to be involved in every milestone you pass. And don’t worry about keeping up with the posts. Your readers understand that you have your hands full with 2 active young lads and a newborn baby girl and the time-consuming ordinary stuff of *life.* With all the good sense and style emerging in your updates, pretty darn soon, you’ll have to rename the Underdog. :)

23.May.2012

how does the color of the butcherblock compare to your wood floors?

23.May.2012

The butcher block countertop looks amazing! I can’t wait to see your finished kitchen. I am sure you can’t wait either :)

23.May.2012

Love how it is coming together! Wood looks so rich, gorgeous finish:)

23.May.2012

Dana, it’s gorgeous!!! I’d almost be afraid to use it!

23.May.2012

I’d love to know why you chose to seal it rather than do mineral oil. We need to replace a 3 ft bit of cabinetry and countertop and were thinking of doing butcher block there. I had been leaning towards oiling it, but I want to hear why you chose otherwise!

23.May.2012

Beautiful. It is just incredible how staining reveals the inner beauty of the wood, she’s like a demure bride with her veil pulled down in that first picture and then, voila, the stain lifts the veil and there she is in all her breathtaking glory! I’m with Gillianne, the Underdog needs a new name – blog competition?

23.May.2012

The butcher block looks beautiful!! Can’t wait to see the installation!

Looks amazing! I love how the wood grain just pops. What a great touch.

Dana, that looks amazing!! Nice work!

stunning! even in the before shot the walnut looks to-die-for!

i’m kinda freaked out, though, b/c we’re building the same kitchen a few hundred miles away…

no lie…check out my board!! http://thesalvagecollection.blogspot.com/2012/05/decor-nc-appliancetile-update.html

23.May.2012

That counter top looks as beautiful as a fancy dining room table! Awesome.

23.May.2012

Dana, that is one gorgeous counter top. I love the finish and how it brought out
the beauty in the wood. I wonder how waterlox woukd work with other wood types?

23.May.2012

O-M G! Absolutely gorgeous! I am loving your blog.

23.May.2012

Daaang that’s purty! I am from the South and I really don’t sound that way, it’s just that everything you post is beautiful. Thought I would try to be a bit more creative with my compliment
this time.;)
Seriously, it is beautiful!

24.May.2012

In our previous home, we used mineral oil for our butcher block island top. We mainly used the island as a place for food prep and eating snacks so sealing with mineral oil was perfect. Since the island in the Underdog will act as our everyday dining table and be the hub of the house, we wanted a finish that would be more like a tabletop. So, we chose to seal it like one. To me, it has the finish of a high-end bar top. It should be more durable and require less maintenance than the mineral oil.

24.May.2012

Oh, I’m sure there will be a scratch, ding or dent the first time we sit down to eat at it. But I won’t mind. I’d like for it to wear and patina over time.

24.May.2012

Good question! HH and I actually disagreed at first on which butcher block to get – clear walnut {which you see in the post} or character walnut. HH liked the variation of the character walnut. It has more of a striped effect with strips of blonder walnut in the mix. I liked it; it’s beautiful! But I thought it might be a little busy for our smaller open living space. I thought the clear walnut would be a simpler look. Eventually, HH agreed.

The clear walnut is similar in tone to the wood floors but not an exact match. We purposefully chose something that wasn’t an exact match. We wanted to steer clear of a matchy-matchy look. But they do mix well together. Once I get the floors cleaned up, I’ll take pictures of them together so you can see what I’m talking about.

24.May.2012

Thanks for the tip about carefully removing sticky items from the butcher block!

So pretty! Can’t wait to see it all together!

Wow! That butcher block looks amazing. The grain is so beautiful. :) You must be thrilled with all of the progress you two have been making.

We used Waterlox on our floors and, oh.my.goodness, the fumes were horrendous. I used a respirator while applying it but the house reeked for a week afterwards even with windows open, fans running, etc. I dread re-finishing our dining room because I was in migraine hell the first time around with Waterlox. :|

So friggin’ pretty!! I’m a sucker for wood counters. We had Bubinga in our first house and they were so pretty: http://ourhumbleabowed.wordpress.com/2012/03/13/stick-a-fork-in-it/ We used Watco’s Teak Oil and it worked wonderfully. And we used Waterlox on our master bedroom floors. Between the two, Teak Oil isn’t nearly as stinky and still holes up really well. I can’t wait to see how the kitchen looks now with that baby in place!

24.May.2012

Gorgeous, and well worth the splurge!

21.February.2013

I’m about to purchase some raw black walnut lumber to have our cabinet maker make us an island counter. The size is the same as yours and you have me thinking about corbels and such but I’m curious how the walnut is holding up as an eating and food prep surface? The walnut is so rich with tight grain, it’s amazing to look at.

21.February.2013

With the Waterlox topcoat that we used to finish it, the walnut-topped island is holding up great! There are a few scratches in the Waterlox {not the actual wood} from our kids but those are just signs of life as far as I’m concerned. If they become bothersome, they could be sanded out and resealed. We don’t cut directly on the surface so that helps but we definitely don’t “baby” it either.

Looking back would you have done anything different with this (more coats of Waterlox)? We are getting ready to seal our Ikea bb counters and I’m still nervous. Our kitchen is small so all of our counter space is likely to be heavily used, no cutting directly on it though. My husband and his ability to ruin things has me scared…

25.May.2013

you could have used lacquer and it would have been done in 1 day and less smell and stronger than
waterlock.

06.January.2014

Lovely counter:))). We are in process of doing exact same:)
Just wondering if you sanded in between coats?

06.January.2014

Yes!

10.January.2014

This is such a helpful tutorial.
Does the walnut have any red in it? ( I am trying to avoid red undertones in my remodel)
…and double checking: you didn’t need to stain the wood to get this color?

11.January.2014

We didn’t use any stain. The walnut is so rich on its own. There is a little bit of red in it in some places but it’s not obnoxious.

10.July.2014

[…] *https://www.housetweaking.com/2012/05/22/finishing-the-walnut-butcher-block/ […]

04.February.2015

Very beautiful! We are in the middle of a renovation as well and ordering a walnut butcher block island top. In my research, it seems that any top deeper than 36″ requires the jointing of two pieces together. As yours was 42″, can you notice any seam where the pieces were biscuit jointed? That has been my main concern moving forward with the butcher block top! Also, since you’ve had your top, have you noticed any warping?

04.February.2015

We don’t notice any seam or warping whatsoever.

02.November.2015

I’m so excited to finally be moving forward on our kitchen remodel and your kitchen has been an inspiration for me for years. I’ve searched the archives, so I apologize if I missed where someone asked this. It appears in current pics that the walnut is holding up well? My kids use our island A LOT…think crayons and markers not always just on the paper. I’m wondering how it cleans up? I know you mention homework and playdoh…and it seems like it wears well, but just want to verify. Thanks! Also, have you noticed any heat issues or are you okay as long as you use trivets? Meaning a hot cup of coffee isn’t going to mare it, right? Thanks for any advice here.

04.November.2015

With the Waterlox application we used, the island top is holding up great! There are scratches in the finish from the kids’ homework and artwork but the scratches don’t penetrate the wood…if that makes sense. We could easily sand down the topcoat and reapply for a perfect finish but I know that it wouldn’t last long as the island gets daily abuse from our family. Plus, I kind of like seeing snippets of their handwriting. It’s a bit sentimental. And you can only see it from a certain angle at close range when the lighting is right. Crayons wipe off; permanent markers do not.

There is one deeper scratch that DOES penetrate the wood and we can’t even blame it on the kids! My husband was wrangling the microwave right before installation and set it on the island top. My dad (who was helping at the time) asked him if he wanted to set it on a piece of cardboard to protect the walnut but Steve didn’t think it was necessary. Well, one thing led to another and a corner the microwave scratched the walnut. I was actually happy to have the first scratch done and over with so soon so I didn’t feel like I needed to baby it. The scratch is still there and we retell the story of its creation often :) Again, the scratch could be sanded down and refinished but it seems like a lost effort with little kids in the house right now.

We don’t really use the island for super hot serving dishes / pots. They usually end up on the granite next to the stovetop. I will use a trivet on the island for those rare things that come right off the stove or straight from the oven. But hot dishes (plates, bowls, mugs) don’t bother the wood top at all. I put my hot coffee mug right on the wood top with no coaster. Likewise, we don’t use coasters for sweaty glasses either. The wood top is surprisingly durable. I would choose it all over again in a heartbeat!