...because home doesn't happen overnight.

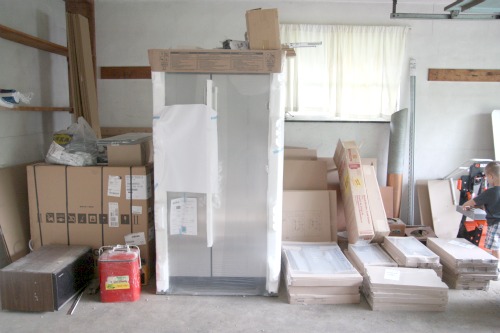
After designing and purchasing our IKEA kitchen, the mound of boxes and appliances sat in the garage for about 6 months.

Of course, storing the unassembled cabinetry in an environment where the climate isn’t controlled {for example, a garage} is not recommended as the wood and MDF pieces could absorb moisture. That being said, once we got around to installation, we had no problem with any of the pieces being warped, bent or buckled. Whew.

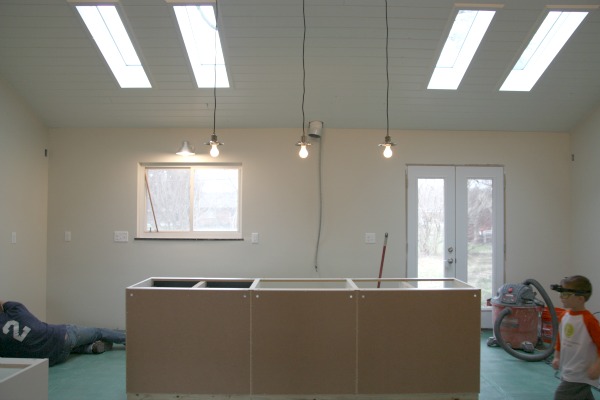
Why did it take us so long to get around to installation? Well, we first had to remove interior walls, vault the ceiling, install skylights and French doors, upgrade the electrical {which included running electricity to the island for two outlets required by code}, run a new gas line {since we were changing the location of the range}, run a water line for the new fridge, improve insulation, hang drywall and paint. Handy Hubby started installing the kitchen cabinets in the midst of our DIY flooring install.

Typically, upper cabinetry is hung first then base cabinets are installed. This makes it easier to hold upper cabinets in place while they’re being installed. However, we chose to assemble and install the base cabinets first because we wanted to finish the flooring install around the base cabinets and under the appliances {i.e. refrigerator, dishwasher, range}. Plus, HH predicted the upper cabinets wouldn’t be that difficult to install over set base cabinets because IKEA uses a rail system to hang upper cabinetry.

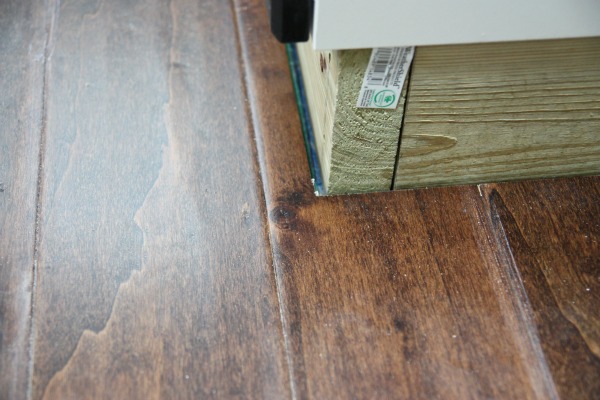
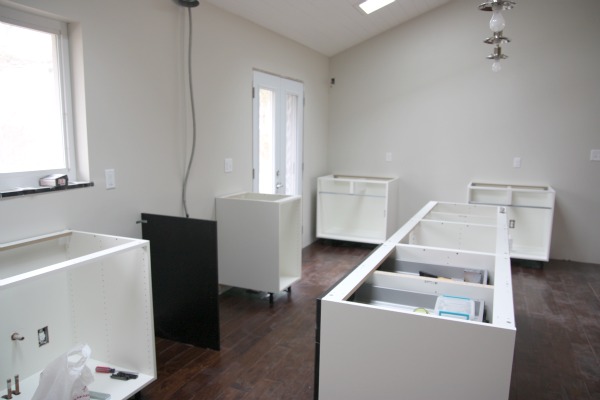
HH started with the island. He built a wood base from treated 2×4’s for the three base cabinets that make up the island. The base is secured to the concrete slab. We decided to run the flooring right up to  – but not underneath – the island and base cabinets since the floating engineered hardwoods could shift over time due to temperature and moisture changes. Shifting of the floor under cabinets could cause the cabinets to shift as well and we didn’t want that.

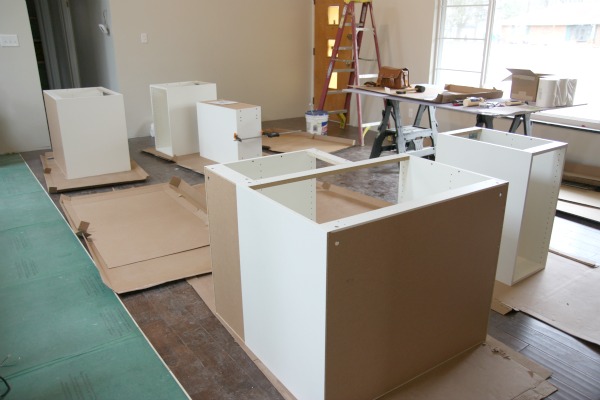
Once the three base cabinets of the island were assembled and installed, HH set to work on the rest of the base cabinets. He set up shop in the adjacent living room assembling cabinet-by-cabinet. Here would be a good place to note that HH said the frames were simple enough for one person to assemble alone. Once he made a few, the process was quite self-explanatory although he would flip through the IKEA instructions for each cabinet to check for any different steps. HH glued the joints and used clamps to hold them which he later admitted was probably overkill. But, he’s an engineer, so overkill is a normal part of any project.

To make the task of leveling the perimeter base cabinets as easy as possible, HH secured level 1×3’s near the bottom of the kitchen walls for the backs of the cabinets to rest on. That way, once a cabinet was in place, all HH had to do was tweak the front two legs of the cabinet to get it level since the back would already be level. {IKEA base cabinets come standard with legs that twist up and down.}

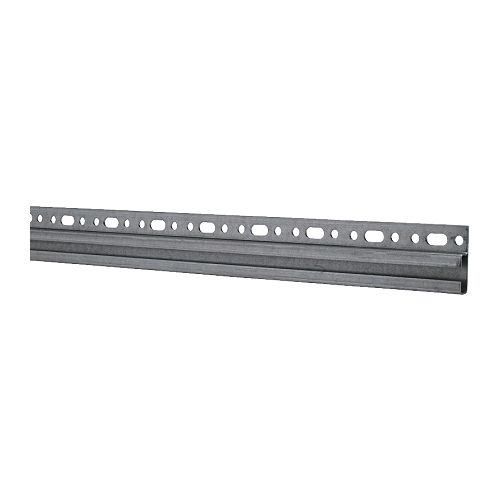
With the base cabinets in place, HH finished the flooring install then turned his attention to the upper cabinetry. Using the coordinating suspension rail, he was able to assemble {in the same way as the base cabinets} and hang the wall cabinets single-handedly.

HH LOVED the rail system. Usually, the task of installing wall cabinetry requires two people but, with the rails, HH alone could hang an assembled wall cabinet, slide it into place, then attach it to the wall and/or neighboring cabinet. The rails were also why he had no problem hanging the upper cabinetry above already installed base cabinets. There was no need for someone to stand directly below the wall cabinet.

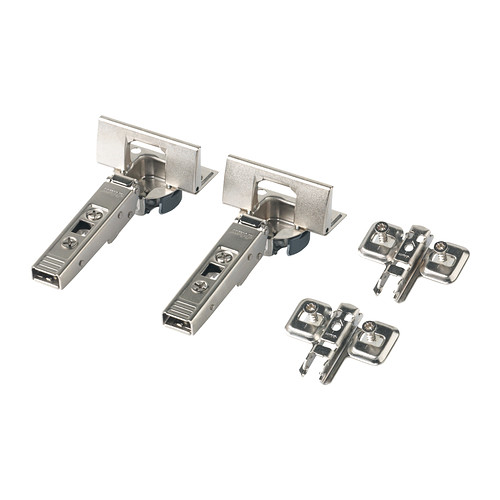
After all of the cabinets were installed, HH built the drawers and added them along with the door fronts. Of note: We were shorted one drawer in our order but since we had signed off on the delivery and it had been nearly six months since we bought our kitchen, we just spent the $40 to buy another drawer instead of messing with customer service. He was especially happy with the hinge hardware for the upper cabinets. They have a snap-on function that allows you to add/remove the doors without screws. Again, this was a great feature that allowed HH to hang the cabinets single-handedly. The snap-on hinges also allow you to easily remove the doors for cleaning – or for showing off your fancy hinges which is the only thing we’ve used them for so far.

The only thing left to do was add black-brown plinth to the naked sides of some base cabinets {the cabinet frames are white even if installing the black-brown fronts} and around the base legs. Installing plinth around the legs isn’t essential. In fact, forgoing this step would lend a freestanding look. The only ‘legs’ showing in our kitchen are the range legs and bottom of the refrigerator. The plinth around the legs pops on and off for easy access under the base cabinets.

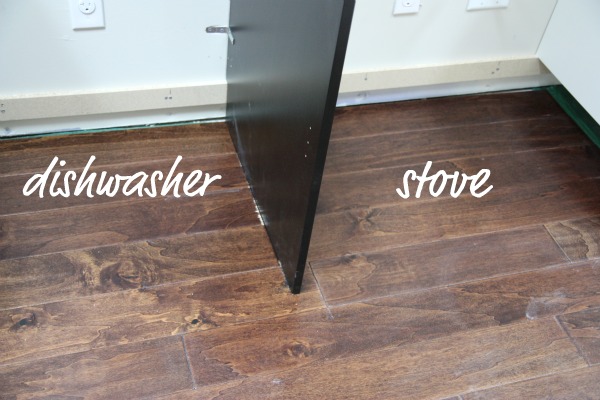
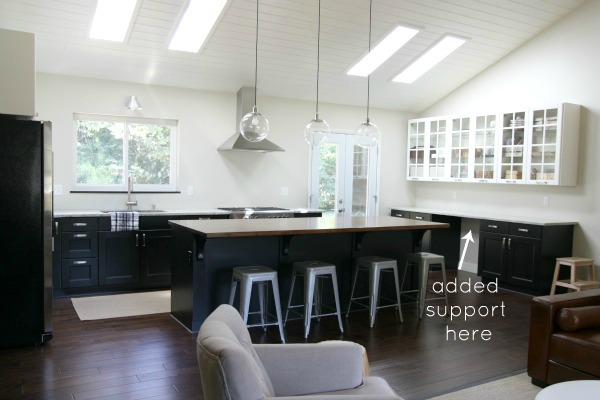
Several readers have asked about reinforcing the base cabinets for granite countertop installation. {HH installed the island’s walnut countertop and we had a professional stone company install the granite.} The only additional support we added were: 1) custom cut plinth between the dishwasher and range {above} since neither of these appliances actually support countertop material 2) 1×3 support along the wall where the open desk is 3) corbels for the island countertop overhang.

Your IKEA kitchen specialist can help you determine if/what additional support is necessary for heavier countertop materials. After all, many of the display kitchens use solid surface countertops including granite. So, it is possible.

If you’ll be installing an IKEA kitchen yourself, here are a few things to keep in mind:

*Double, heck, triple check your order before you take it home/upon delivery.

*A level wood support near the bottom of the walls makes leveling base cabinets a cinch.

*The suspension rail system and snap-on hinges make one-person wall cabinet installation possible.

*Check with an IKEA kitchen specialist to see if additional countertop support is needed.

IKEA also offers professional installation services if DIY isn’t your thing.

We’ve been living with our IKEA kitchen for about two months now and even with all the unforeseen issues {IKEA server being down during the design phase, items on backorder, missing drawer, etc.}, we would do it over again. I’ll be writing up a review of our kitchen cabinets next week that will hit on the pros and cons of living with them. All in all, we love them.

Click here to see who won the Jilly Bean Craft giveaway! Even if you didn’t win, Jill is offering an exclusive 25% off discount to H*T readers now through Sunday, July 22nd. Use the code HTB25 at checkout.

images: 1-5 & 8-9) Dana Miller for House*Tweaking 6 & 7) IKEA

38 Comments

20.July.2012

Dana, the kitchen is so gorgeous! I’m dying to see the living room and other parts of the house. Can’t wait!

20.July.2012

Would it be possible to run a dehumidifier in the garage to stop warping? Just wondering… hmmm

Beautiful job on the kitchen. I love the colour and look of the dark base cabinets…beautiful and so open.

21.July.2012

It wouldn’t be a bad idea.

22.July.2012

How exciting. I wish I married a handy husband. But I got a computer geek which is good too. I love the contrast black and white and the sky lights.

Good post. I like the use of the rail system for the upper cabinets. I’ve used a 2×4 nailed to the wall before for the same idea. I’m sure the metal rail is way better though. Sure beats holding the cabinet up for 5-10 mins while someone else levels, shims and screws it into the wall.

23.July.2012

We loved IKEA’s rail system too! What a genius approach. It didn’t stop us from dropping one of the uppers during installation, but it was just the one luckily… ;)

24.July.2012

My only concern would be safety, if I think about it. A house down the street from my mom burned down because of a heater left on in the garage. But that was a heater, and there are lots of non-electrical de-humidifiers!

(dont worry, no one was hurt!)

24.July.2012

Dana – I sent you an email about the installation of doors. If you got it and aren’t interested, that’s cool but would appreciate your letting me know that. I hate to write-off your advice if it is merely that you didn’t receive the correspondence. Thanks, Terri

24.July.2012

Sorry, Terri! I’m so behind on my inbox! HH actually started installing the doors this past weekend with little problem, so I think we’re good. But any advice you’d like to post for readers to see would be great. As far as blog advice, maybe I can address that in a future post. There’s not really a short answer. YHL wrote a great post about this topic here.

30.July.2012

Hey Dana,

Love your kitchen. I’m sure you’ve answered this question a million times, but where did you get those bar stools? They are just what I’m looking for.

31.July.2012

I will be posting about those bar stools this week. Your question is a frequently asked one. Stay tuned…

07.August.2012

I just found your blog when looking for ‘how to repaint oak cabinets white’ – and saw your transformation….now I find this page and I guess you have a black kitchen now! Well this just throws my indecision back to the start! You have a great eye for this, looks great!

11.February.2013

My husband and I recently purchased IKEA cabinets for our laundry nook, but after we assembled one I realized we will be able see the cams on the bottoms? Any suggestions?

11.February.2013

Are they lower or upper cabinets?

11.February.2013

Uppers. I assume they won’t really be visible once hung, but knowing they are visible will bug me!

06.June.2013

Is there a post about how you assembled the island? I’d love to give it a try!

10.November.2013

I just emailed you about your IKEA kitchen remodel. I love it. But was wondering – how do you feel about the “quality” of the cabinetry. My budget isn’t extravagant and I would like to use their cabinets. Do you feel they hold up to every-day use? Are worth it? A quick response would be much appreciated! Thanks!

11.November.2013

So far, so good! We still LOVE our IKEA kitchen. It is way better quality than the builder oak kitchen cabinetry in our previous house. The soft-closing drawers and doors are an everyday luxury. It still looks and functions like new even with three crazy kids in the house. If we ever have another kitchen gut job in a different house, we would definitely go the IKEA route again.

04.February.2014

Gorgeous kitchen! I was wondering how you got the island surround to match the Ramsjo cabinet fronts? Is it an Ikea panel? Did you paint to match? Thank you!!!

04.February.2014

Yes, they are Ikea panels. We hid the seams with Ikea plinth so it all matches.

12.April.2014

Looks great. Thank you for sharing. We are remodeling our new home, and the kitchen is an identical layout as yours. It’s great to see. We are excited to have the ikea cabinets going in. I’m doing the entire install. Would love to share photos of before and after.

25.June.2014

Looks awesome!

Quick question: The legs that came with the base cabinets, were they plastic? And do you feel that they’re sturdy enough to support the cabinets when full and with granite counter tops?

I just looked at them {assembling next week, but purchased the kitchen 3 months ago…doing returns before the expiration} and they seem kind of flimsy. Just wondering if I should exchange them for the metal ones.

10.July.2014

[…] *https://www.housetweaking.com/2012/07/20/installing-our-ikea-kitchen/ […]

06.August.2014

Finally! 4 1/2 years after moving in and about 2 years after starting following your blog, we’re about to start installing our IKEA kitchen. Thanks for the motivation these past two years. :)

07.August.2014

Congrats! Would love to see your kitchen reno!

15.August.2014

I’ve been stalking your IKEA kitchen for a while and I’m finally installing mine soon! Thank you so much for posting so much information – it’s SO helpful and appreciated.

Question about how you secured your island to the floor… I see that the pressure treated 2x4s are on the narrow side – did HH use L brackets to secure it to the slab?

We are in the middle of installing our ikea base cabinets right now actually. We just got done with assembly and are hoping to move on to installation tomorrow. I was just doing some research on the best way to go about it when I came across this post. I think we will use the wood support along the bottom, afterall, to make sure things are level…especially since we are dealing with an older house and Im pretty sure the walls are not so level anymore.

16.February.2015

Huge question to ask… how did you establish the back panel on th island? We are perplexed since it came with no brackets or instructions.
really was DH to finish this project!!

16.February.2015

We used three cut pieces of side panel. There are two seams masked by vertical plinth with two more plinths pieces at each end of the island. We painted and mounted corbels from a home improvement store onto each piece of vertical plinth to supper the countertop overhang. I think the placement of the plinth and corbels makes the (unnoticed) seams feel more intentional. Hope that helps!

17.February.2015

Hi Im so sorry I wrote that on my phone and it auto corrected!

How did you mount the cover panels to the back of the cabinets? L Brackets or rig something up? Did you run the panels to the floor? Our panels are the size of the back cabinets (there will be 1 seam down the center) so we would run the base (plinth as they call it?) around the entire island.

04.March.2015

Great post about Ikea cabinets, which is how I got here… We are planning to use Ikea cabinets for our kitchen remodel in the next few weeks and this post was one of the ones that encouraged me to go with it.

Most of our planning is done for the main part of the kitchen, but we have just been considering adding a built-in desk. I was struggling with how to make this work with the Ikea base cabinets since they are taller than regular desk height. But I just noticed that you’ve done something very similar to what we were thinking, and am wondering how you find the taller height both visually and for comfort. Thanks!

09.March.2015

The height isn’t an issue – for me, my husband or the kids! We just use a counter height stool with a footrest so our legs don’t fall asleep ;)

27.November.2016

Hello! Did you ever find out how to attach a panel to the back of a cabinet? We are on this very last dilemma, and are not sure how to attach, since the backs are flimsy. There doesn’t seem to be a good place to drill. Any help from either of you will be so appreciated!!!

10.April.2017

I’m getting ready to install my Ikea Sektion and realized my granite may be too heavy and it has a lip. Do you suggest we better hold up the bases and bypass the Ikea feet? My span in 7 1/2 ft with an undermount sink cutout in the center, dishwasher next to that, I was thinking of using a 3/4 plywood on top of the bases to support and distribute the granite weight. Do you think this will be sufficient, or even needed?

27.June.2017

Awesome remodel! What is your square footage minus the “everything room” and garage?

25.February.2020

Hello! I am currently redoing my kitchen and am curious how you got the range hood to be flush against the vaulted ceiling? Any advice would help!

05.April.2020

My dad, a retired sheet metal worker, custom made an extension piece for a seamless look to the ceiling.