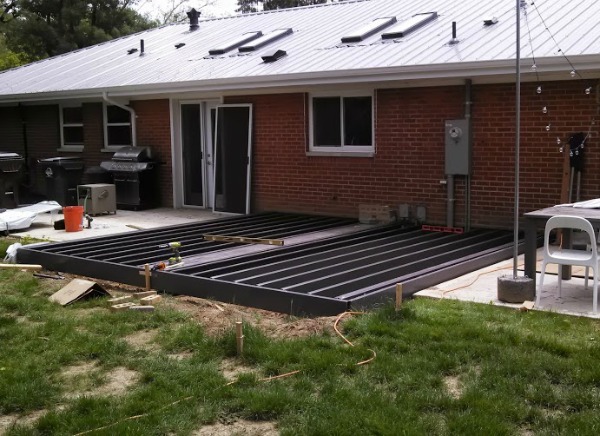
Ah, the deck. We left off with the steel frame and joists in place and ready for deck boards. This is where things finally started resembling a deck and we got very excited. FYI: after setting the joists but before installing the deck boards, we put down landscaping fabric to keep weeds/grass from growing but still allow water to drain below the deck.
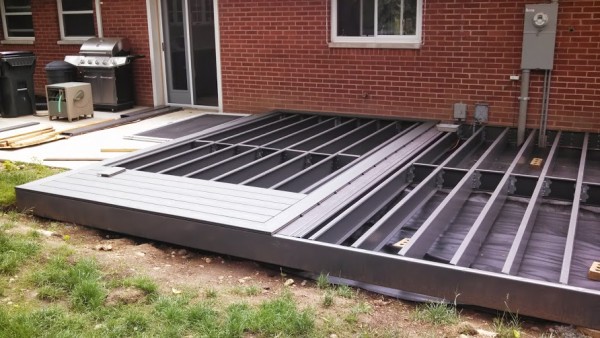
HH started off by cutting and installing the left side of the double picture frame. {You can see our original plans for the deck here.} Then he set to work filling it in with deck boards working his way from the yard towards the house. That way if any measurements went awry the oops would end up nearest the house where we plan on putting some furniture anyway. But do you think HH, a mechanical engineer by trade and a perfectionist by nature, wound up with an oops? Nope.
HH says the gap on the last board {closest to the house} is off by 1/8″. I say that’s pretty darn perfect. It probably helped that HH measured and planned the depth of the deck waaaaaay before this step. Even before digging any holes, HH designed the deck so that the boards running width-wise within each picture frame would all be full-width boards. No ripping allowed.

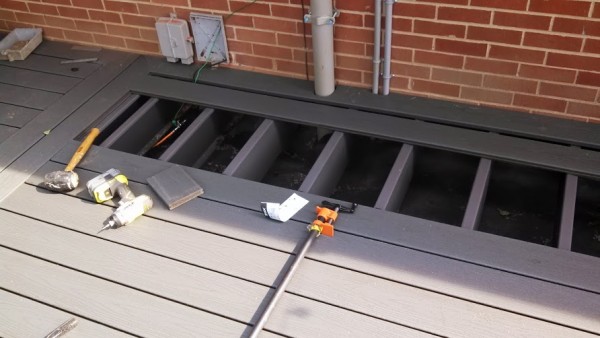
When we were first approached by Trex, we were drawn to the steel framing {that meant we could build close to the ground – ideal for the platform design we had in mind} and Hideaway hidden fasteners. The hidden fasteners secure the deck boards to joists without having to screw through the top of the boards. This gives the end product a clean, consistent surface uninterrupted by screw heads.
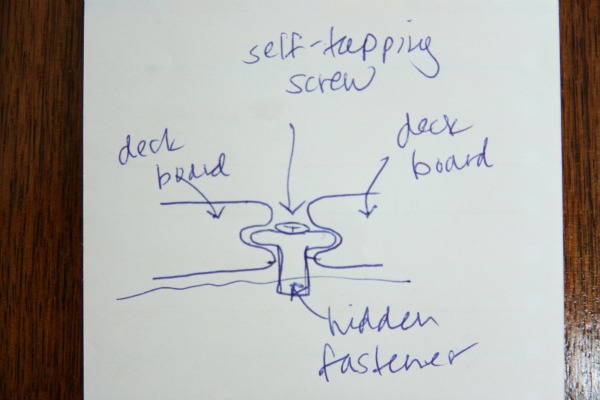
As for how the hidden fasteners work, HH quickly sketched up the diagram above for me. I labeled it and thought it might be helpful to share here. The long sides of each deck board are grooved. The hidden fastener is “T”-shaped and fits into the grooves of two adjacent deck boards. There is a self-tapping screw that screws into the joists. Obviously, you can’t place two boards parallel to each other and just screw the hidden fastener in. You have to place one board, screw in the hidden fastener then continue with the next board making sure the “T” of the hidden fastener catches the grooved edge of each board. When screwing in the first couple of fasteners, HH noticed that the “T” was prone to pulling towards the already set {first} board making it difficult to place the next board properly.
Being the clever guy he is, HH started using a small scrap piece of deck board to act as a placeholder while he screwed in the hidden fasteners. It worked like a charm! If you scroll up to the second image in this post, you can see the handy little deck scrap laying on top of the last placed board.
From there, HH slowly worked his way towards the house. Determined not to rip any boards, HH kept the spacing between the deck boards as accurate as possible with the help of two pipe clamps. This gave the boards a snug fit and ensured precise spacing.
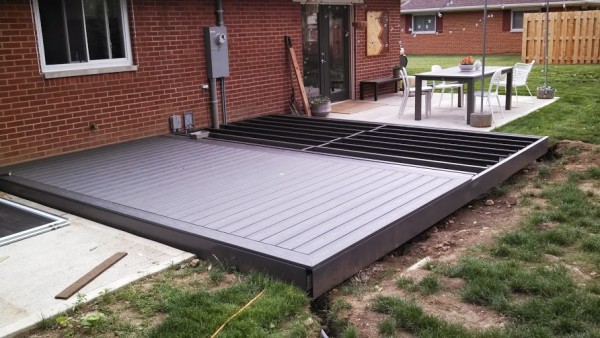
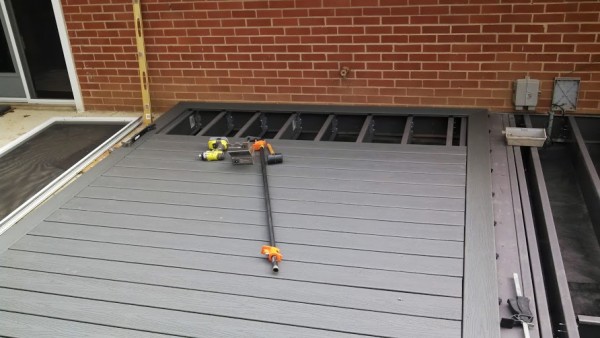
With the left side of the double picture frame complete, it was time to tackle the right side. It was pretty much just like laying the left side until…
…HH ran out of hidden fasteners and grooved deck boards! Boo. It was the day before we were to leave for our vacation and we had both envisioned coming home to a completely finished deck. Long story short: it didn’t happen.
Why did HH run out of grooved deck boards and hidden fasteners? Well, apparently HH was supposed to use non-grooved deck boards and screws for the center pieces of the double picture frame. But he didn’t want to see any screws in the middle of the deck so he decided to use grooved boards and hidden fasteners instead. Our order was so exact that we didn’t have extra grooved deck boards or hidden fasteners to finish the last few rows of the righthand picture frame. So…we went on vacation. Ha!
When we returned, we tried to hunt down one box of hidden fasteners and HH brainstormed a way to make the leftover non-grooved deck boards we had on hand work. After no luck at any of the local home improvement stores and with the help of Trex, we were able to track down a box of hidden fasteners – 45 minutes away. Ugh. For the deck boards, HH borrowed a biscuit joiner from a contractor friend and added grooves to the non-grooved deck boards just where a hidden fastener was needed. He considered buying a special router bit to groove the entire length of the boards but it was like $50 so he decided against it. The biscuit joiner worked fine for the few boards he had left to install.
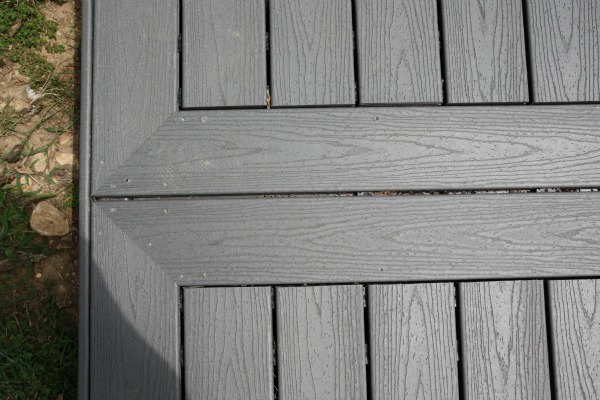
With the deck boards in place, all that was left to do was cut and screw on the fascia around the sides of the framing. The fascia is composite and matches the deck boards so the entire deck is consistent in appearance. Special self-tapping screws were provided to tie into the framing. These self-recessing screws are nice because they are color-matched to the deck boards and, once in place, their heads sit well below the deck’s surface. Thus, they blend in seamlessly and there are no worries about someone stepping on a popped screw head. HH did run into trouble with some of the screws breaking. His best guess is that they’re meant to tie into a wood frame – not a steel frame. But he made do and it worked out.
HH also used some of these self-recessing screws to screw down the ends of the longer picture frame boards. Throughout this project, we had our decking materials laid out over three horses in the backyard. Needless to say, some of the longest boards developed a bow. It took a few extra screws to get them to lay flat. Our mistake = your lesson. Store your decking materials on a flat surface!
Running out of hidden fasteners and grooved deck boards is the reason for my premature instagram pic above which I captioned “Nothing like finishing up a big project to get us in the mood for vacation.” It took us four more weeks to finish the deck.
Finished results {just a plain deck – no furniture or anything} tomorrow!
We have partnered with Trex to build our deck. They have provided us with some of the materials for the build but all other materials, designs, labor, injuries, flubs, four-letter exclamations, opinions and reaping of benefits {i.e. chillaxing with beverages on our new deck} are our responsibility.
images: Dana Miller for House*Tweaking


DIY