
Sarah (a graphic designer), Kalyn (a finance guy) and Finn (a peppy schnauzer) live in a small Ohio town in their 1,100 sq. ft. starter home. I’ve been following Sarah’s blog for years and our offline lives finally collided when I started renting a studio space downtown. (Sarah works part-time for an interior designer in the same warehouse.) I’ve long admired Sarah’s creativity, DIY skills and knack for styling so I was crazy excited when she welcomed me into her home for a tour. Get a peek inside and read Sarah’s thoughts on everything from buying a foreclosure to hanging wallpaper to living in a small town…

On buying a fixer-upper: It was never our intention to purchase a fixer-upper. We looked at multiple homes with our realtor and this was the only house that required a renovation. I fell in love with the original character of the home and loved the fact that it was built in the early 1900s. It had obviously been neglected and sat empty and overgrown for more than two years. The stench upon walking in the front door was enough to avert even a serious buyer. I suppose we were the lucky crazy ones who decided to tackle this project. It just made sense for us financially (we bought it for less than the price of a brand new car) and we were capable of completing the majority of the construction ourselves. I also jumped at the opportunity to really make a house our home. Many of the properties we viewed just didn’t feel like us and were priced higher, meaning we had no additional room in the budget to make adjustments…so we settled on the foreclosure.
It was an insane amount of work and took over a year to complete but I’m so proud of what we’ve created and, more importantly, that we built this space together. Our first Thanksgiving in the home (two years ago with no heat), we skipped a warm and cozy dinner with our families, opting to stay in the house instead, reworking the plumbing and electrical. I remember setting up our camping table and chairs, eating fast food, shivering in our Carhartt overalls and laughing about our terrible Thanksgiving meal in our new home. We couldn’t envision ever having a completed or furnished dining room. I also remember my embarrassment the day Kalyn had a port john delivered, which sat in our driveway next to a dumpster during most of the renovation. Later, I was thankful to have a “restroom” while working on the home but even more grateful we didn’t live in the house during the chaos of construction and days without plumbing. Before my blog, Room for Tuesday, was up and running, I started a personal Tumblr to share with family, solely devoted to the transformation of our house. The before and after images are unrecognizable (luckily) but it’s fun to look back at where it began.

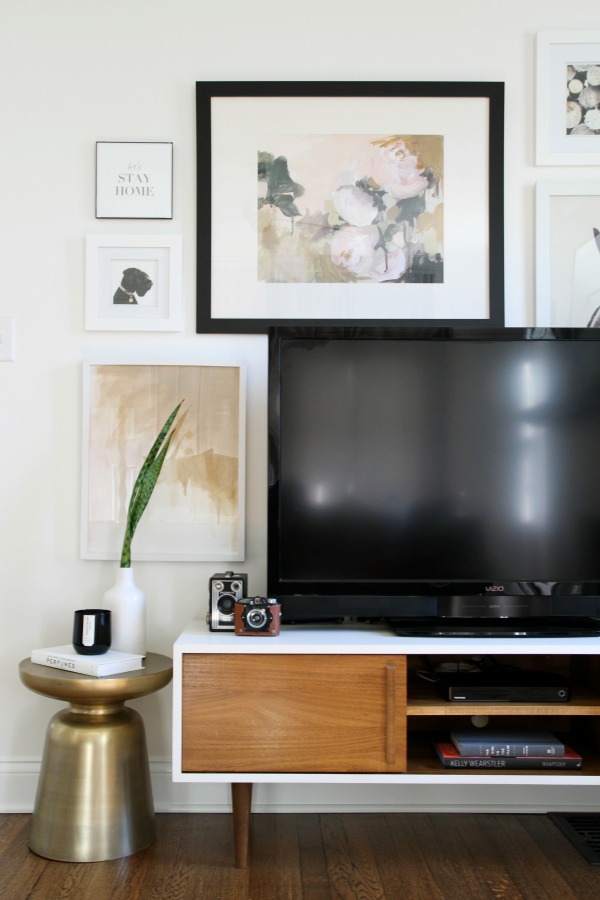
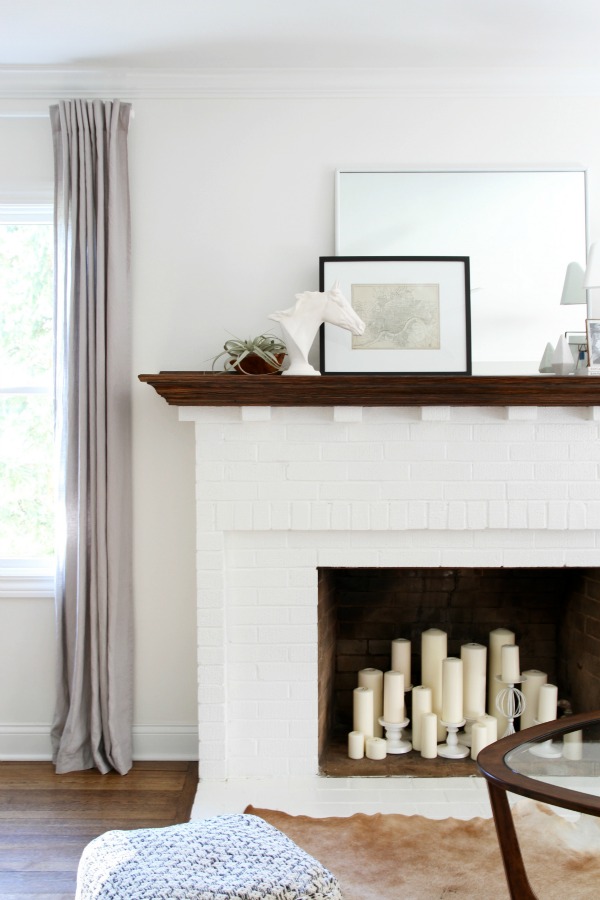
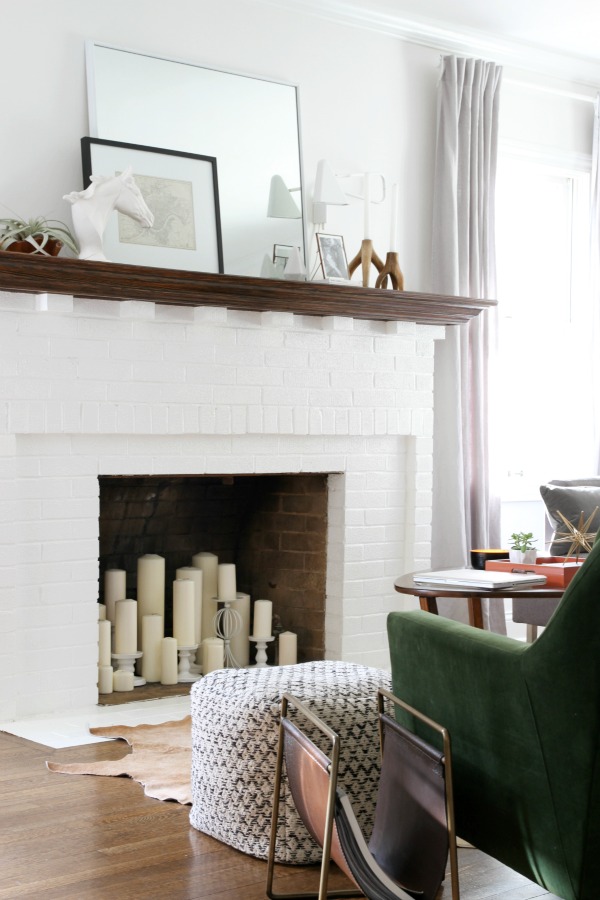
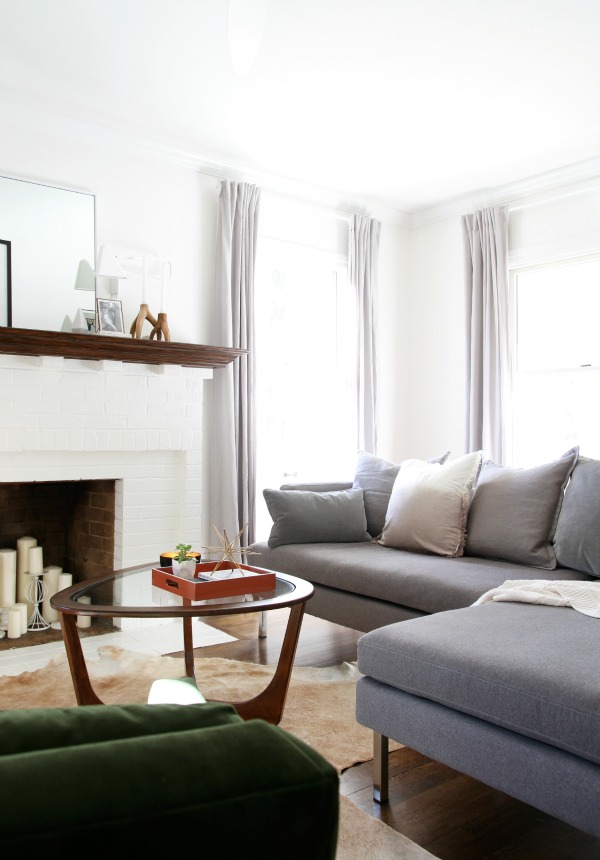
On compromising with your husband: Aside from hanging wallpaper together (which I would not recommend doing with your significant other), the living room floor plan has been our biggest challenge. Of course being the typical guy, he wants a huge TV. Normally, I would be cool with that but our living room is tiny. There is a giant fireplace and three windows, leaving only one viable wall for the TV. Long story short, we have two focal points: the TV and the fireplace. This does not sit well with me but it’s something I live with because I know that ugly eyesore of a TV makes him happy.
I will say, I am super thankful he allows me to get my way 90% of the time because he trusts my interior instincts. He’s also pretty creative himself and many fantastic ideas have manifested in his brain rather than my own (hallway wainscoting, landscaping, and bathroom expansion, to name a few).
On living with a rambunctious puppy: A week before our shoot, Finn decided to destroy the tufted back cushions on our sofa. Kalyn walked into a house filled with fluff and I immediately began to panic. My quick fix and cost-effective solution was to buy a variety of down throw pillows to line the sofa back. It’s definitely less expensive than a new sofa but I think it’s a sign we should upgrade. Kalyn has complained about our sofa being uncomfortable since the day it arrived so maybe it’s a happy accident.
Living with a large, high-energy dog can be challenging. Our windows are never clean and always have nose prints. Our freshly painted walls are now a little scuffed up, and our newly refinished floor is scratched but we wouldn’t have it any other way. It didn’t take long to achieve that “lived in” look, ha! The one thing he has going for him: no shedding.
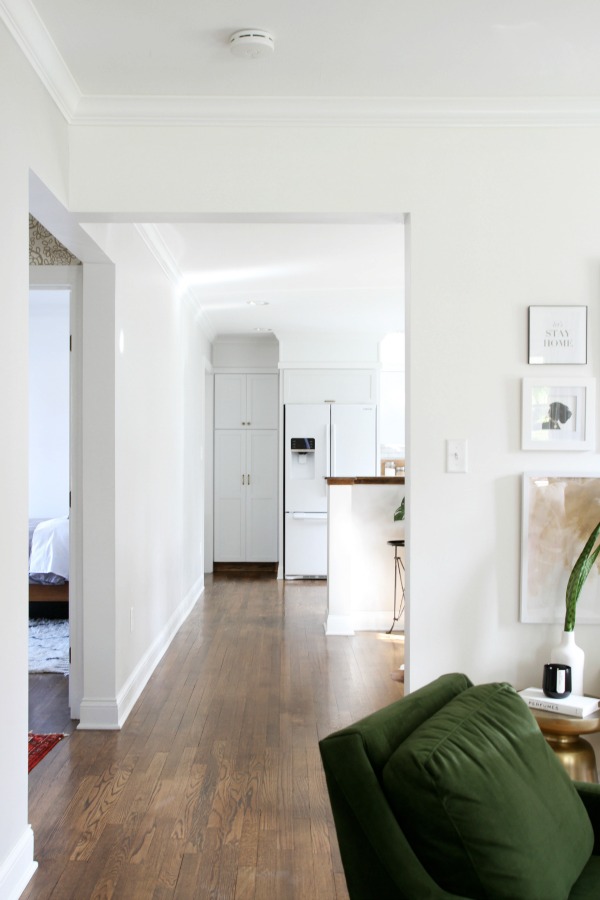
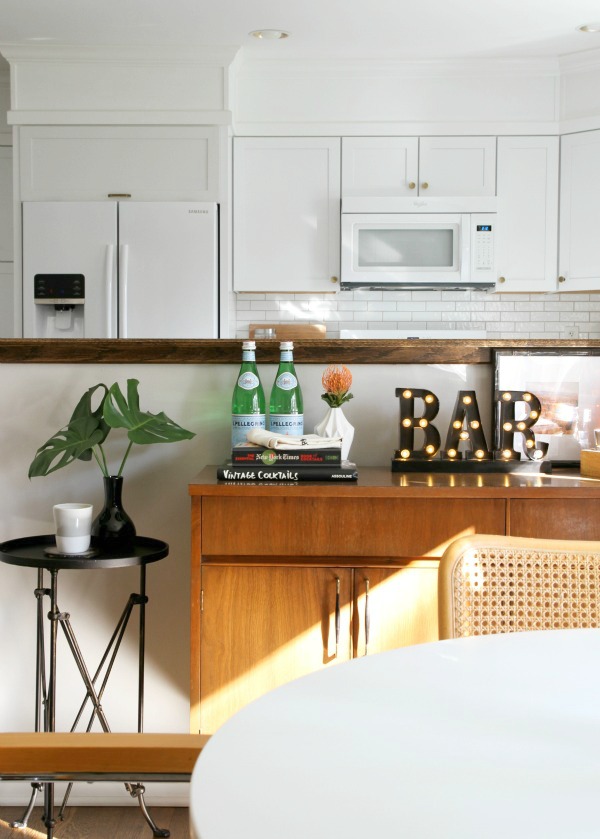

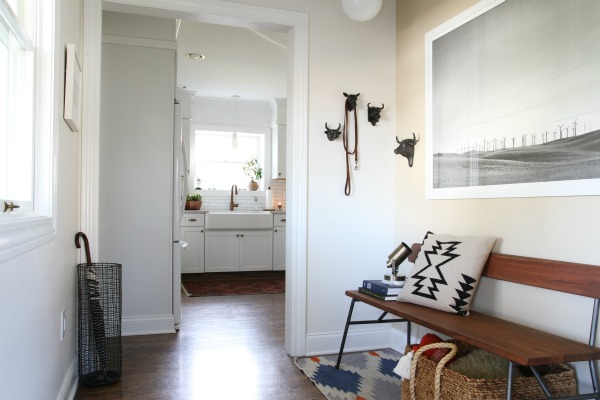
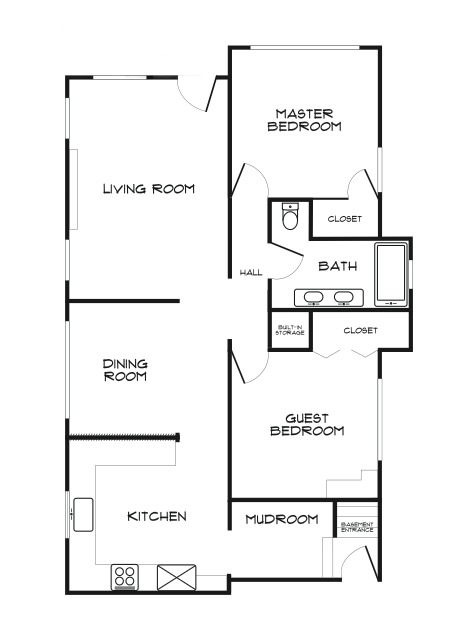
On creating flow: This has been one of our greatest construction challenges. The home originally was very closed in but we love open concept layouts. After determining which walls were load-bearing, we wanted to open up as much as we could. We increased the traffic area between our dining room, hallway and living room (it’s the weird center intersection you see in the photos). We also knocked out a wall between the kitchen and dining room but then rebuilt a pony wall. It made the kitchen larger, dining room smaller and helped to designate an area for the dining table and bar credenza. I like the functionality. It hides anything on the countertop so guests in the dining room aren’t looking at a mess. It also provides a bit of separation, without feeling closed off.
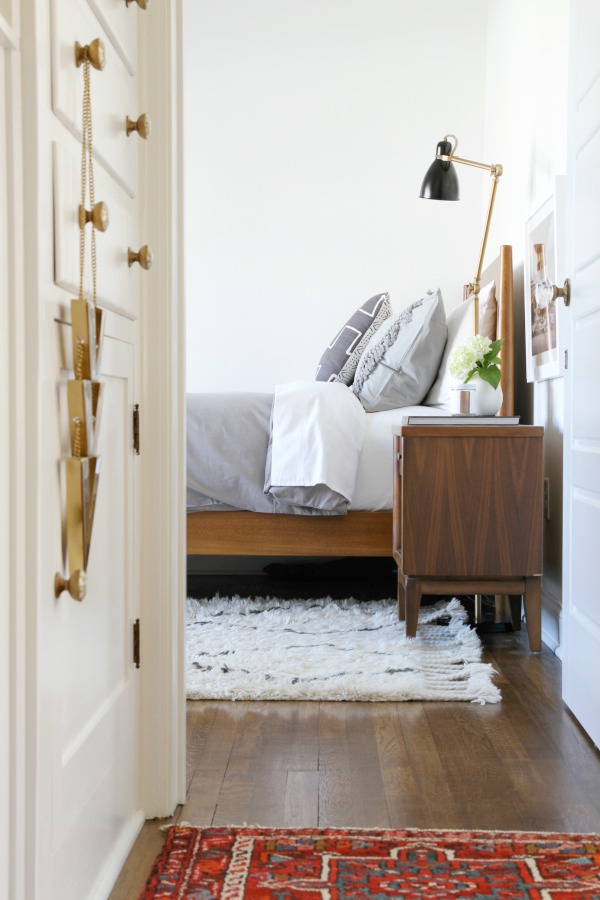
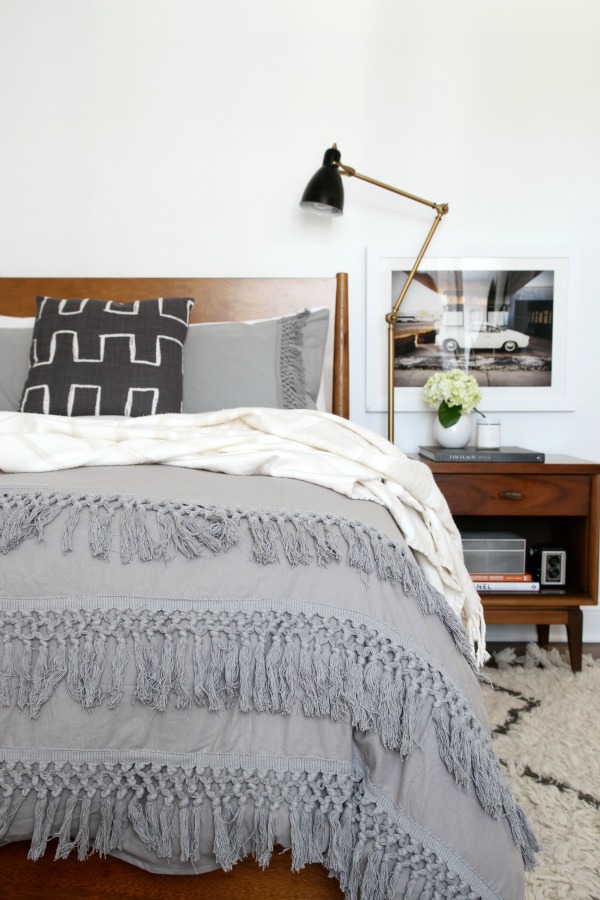
Floor planning and furniture just fell into place, for better or worse. Most key pieces could only fit into one configuration. That’s the trouble with small houses. For instance, the master bed had to be placed in front of a large window; it wouldn’t fit elsewhere. The guest bed had to be positioned in its current space because of an architectural built-in that hides the pitch of our basement stairs. Perhaps the living room has been the most challenging because of the TV.
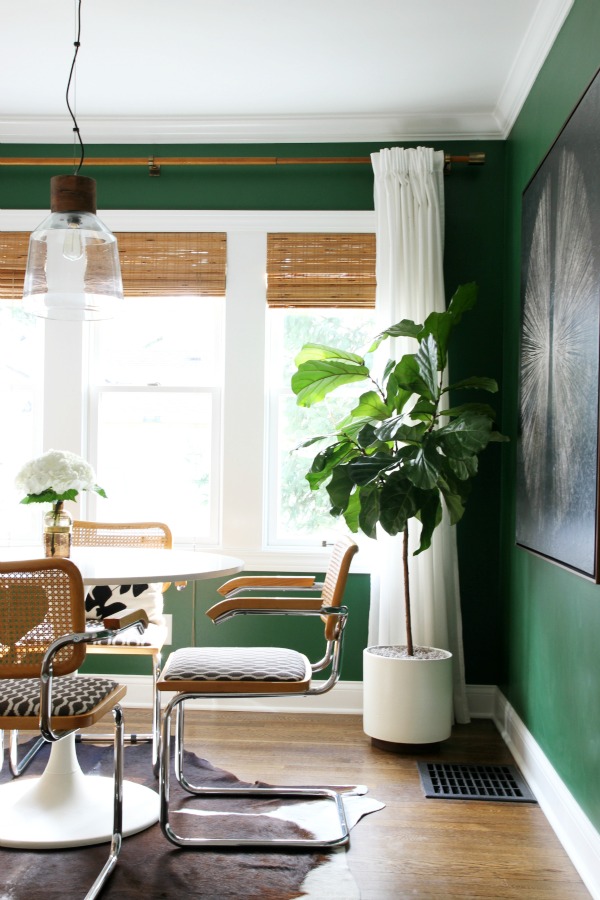
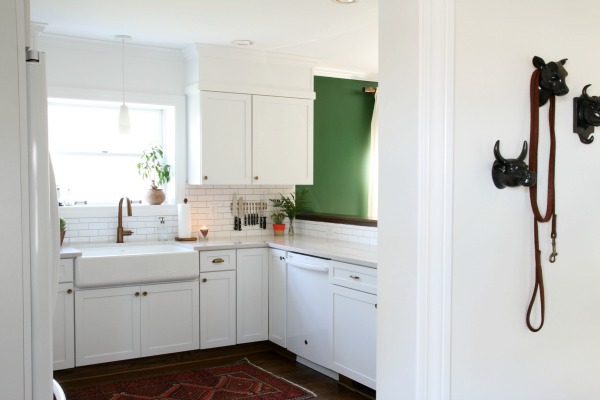
On those gutsy green walls in the dining room: Green tones have always been in my comfort zone. I know many people favor navy and calming blues but it’s always been green for me. I treat it like a neutral. It was the first paint color I selected for the house. I try to sprinkle it throughout our home with houseplants and accessories so it feels cohesive and acts as a common thread of color.
To this day, the Breuer dining chairs are my best find! I can’t even believed I snagged them for so cheap. This is the before, after and tutorial on reupholstering. They’re some of my favorite vintage items in our home!
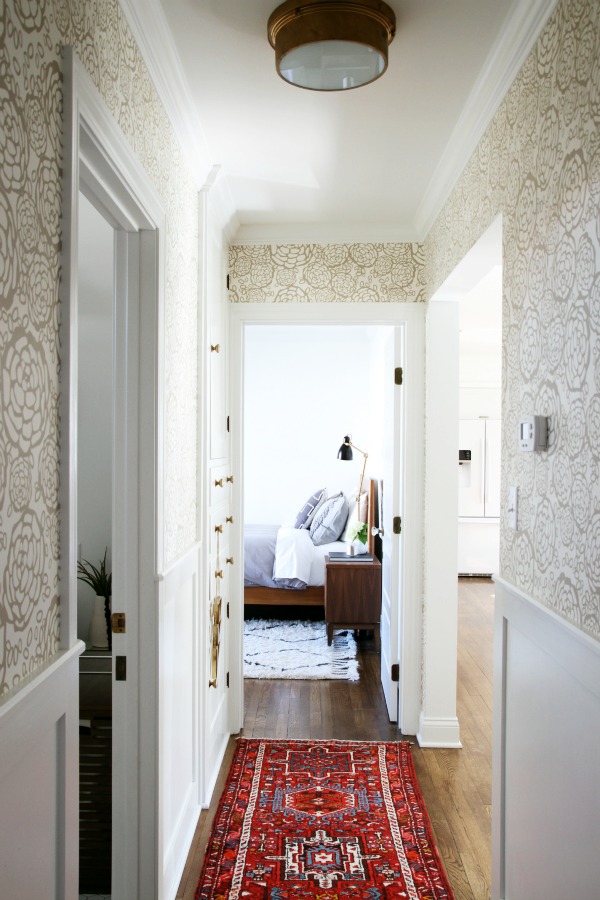
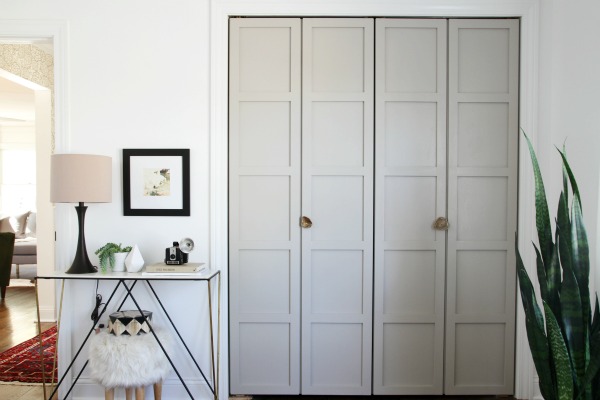
On dressing up the mundane: I recently took a seminar on millwork and the importance of scale, proportion and keeping trim historically accurate. Moulding is supposed to make you feel safe. It sounds insane but that is its purpose! It looks as though it’s helping to hold things up and in place structurally. I tried to be sensitive to keeping the base and crown accurate to the original trim, as well as adding woodwork in places that could be enhanced (wainscoting in the hallway and bi-fold closet doors in the guest room).
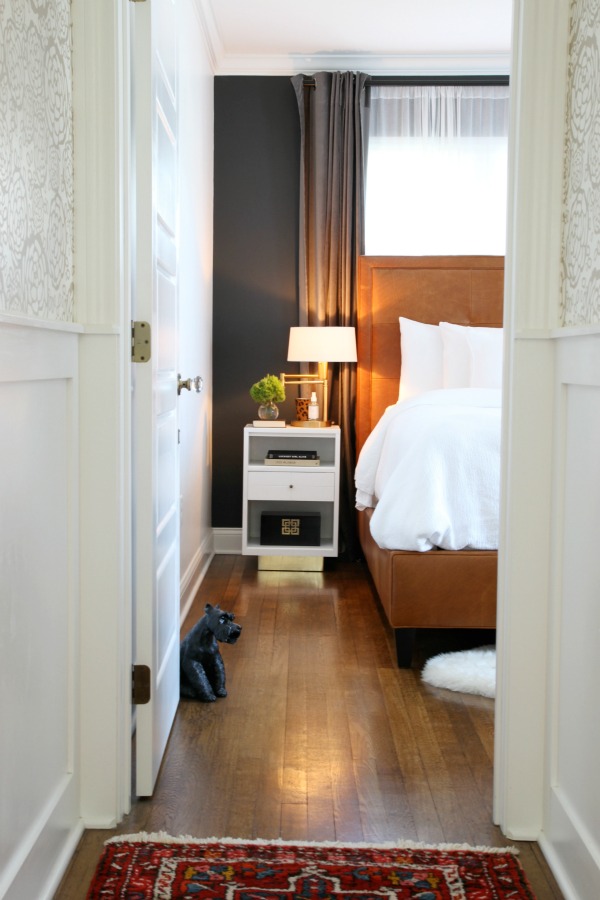
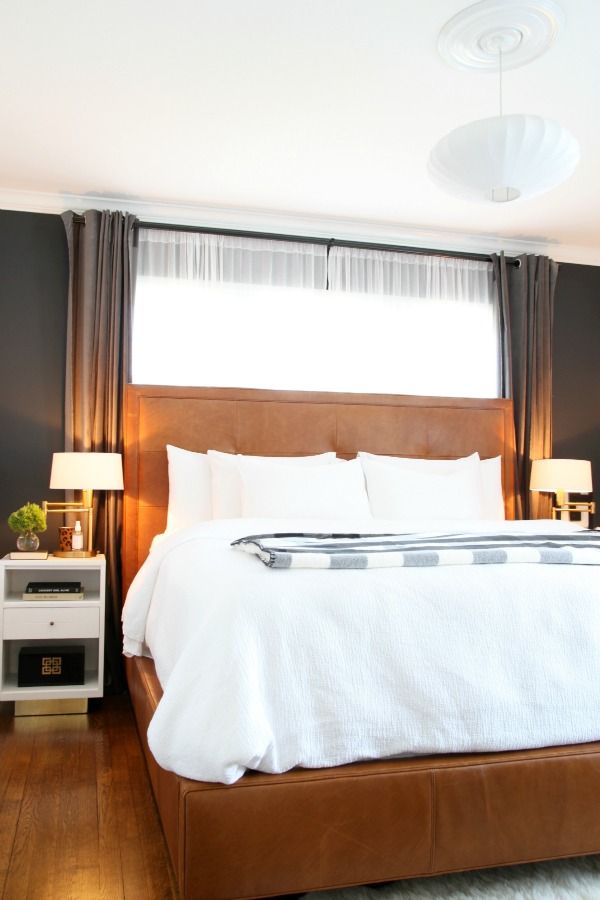
On splurging: My favorite splurge would definitely be the bed in our master bedroom. I custom designed the piece, from sketching the waffle tufting, scale, specifying my favorite cognac leather and even the charcoal wood tone on the tapered legs. It’s perfect and we’re so glad we upgraded to a king, even though it’s a little tight in the room.
On living with two closets: I’m not going to lie. Living with two closets is the worst. Without our basement, this house wouldn’t work for us; it’s definitely been our saving grace for storage. We’re big outdoor enthusiasts and with that comes a lot of gear. We love camping, skiing, hiking, kayaking, etc… so our equipment is divided between our basement and garage. I’ve also learned to shop smarter. We try to spend our money on quality, key pieces, rather than quantity… simply because we have limited space.
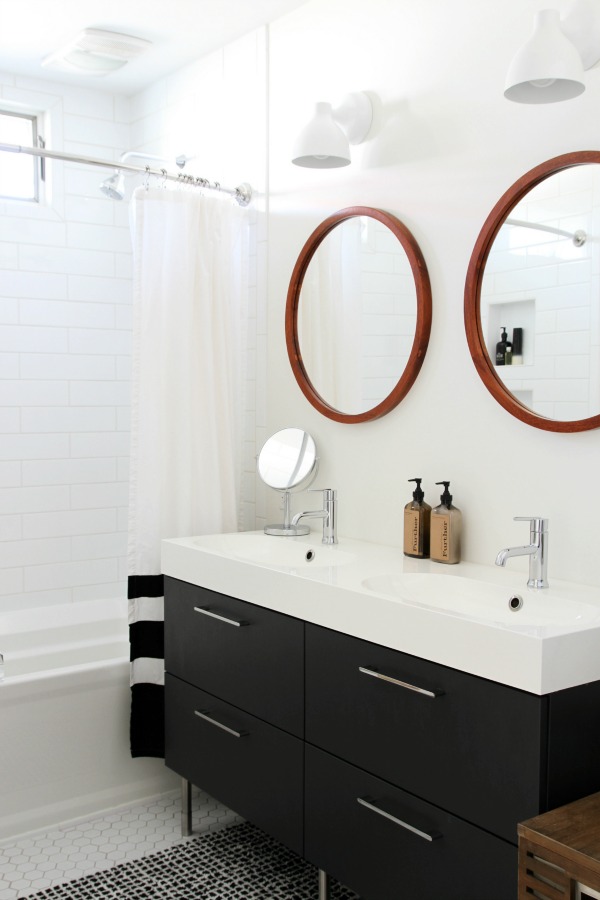
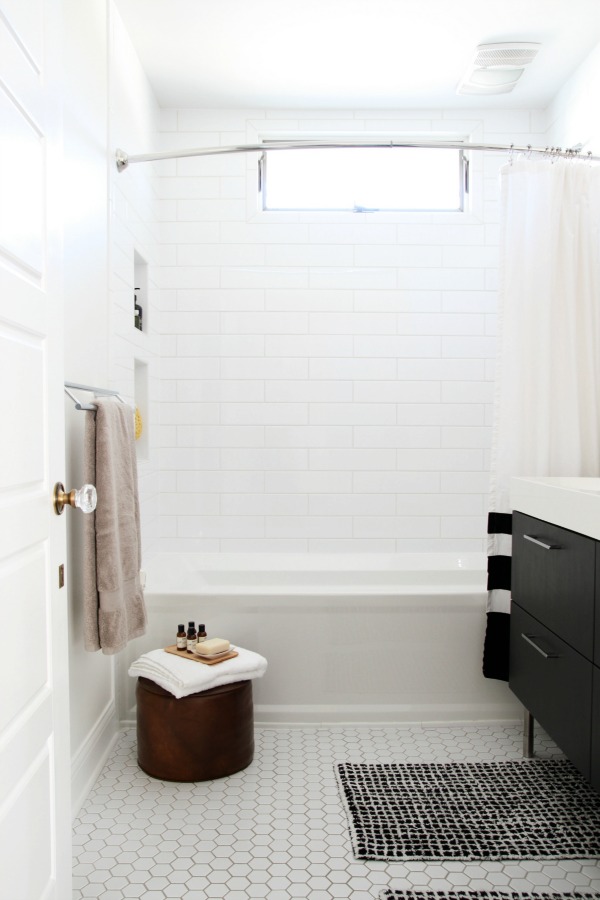
Originally, the house had three closets. We sacrificed a small linen closet in the hallway to expand the bathroom. The toilet now sits where the closet used to be. It was a tough decision but I’m confident we made the right one.
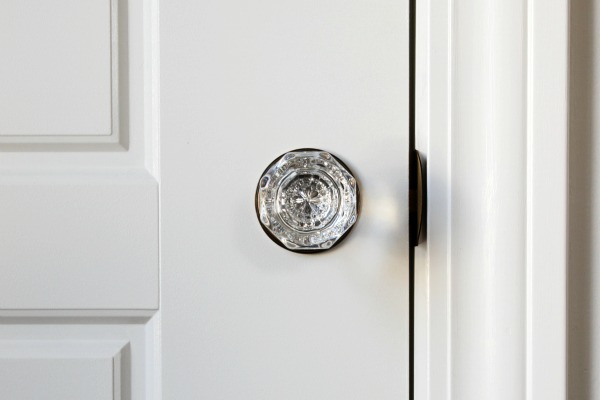
On minding the details: I’m such a detailed-oriented person! The original doors in the home had beautiful glass knobs. I tried to restore them but they were cracked, foggy and too far gone. I wanted to keep the hardware details and moulding as close to the original as possible. Kalyn sourced the glass doorknobs online and demanded to have skeleton keys (his grandpa used to collect them) so I rolled with his idea and they turned out great. Although, guests sometimes are confused and lock themselves in the bathroom :)
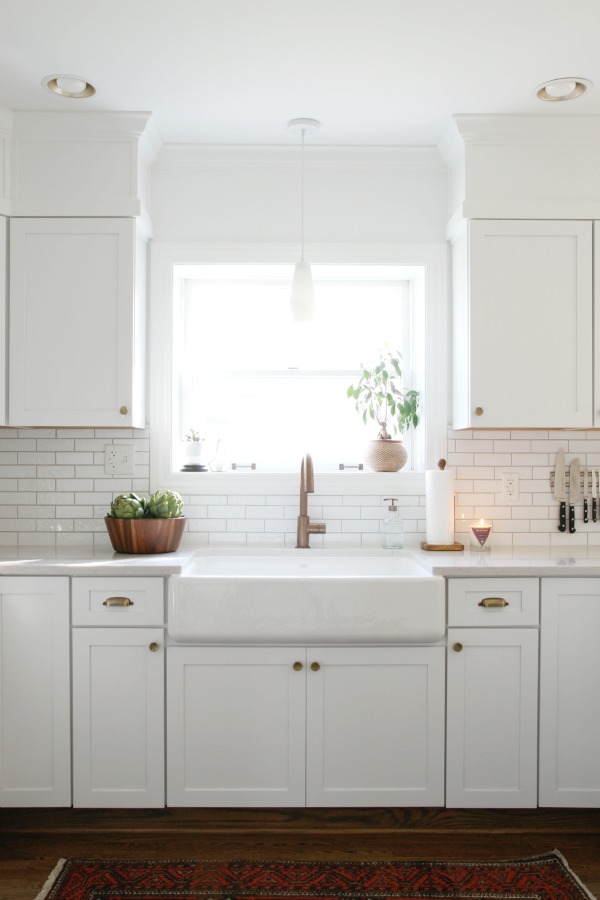
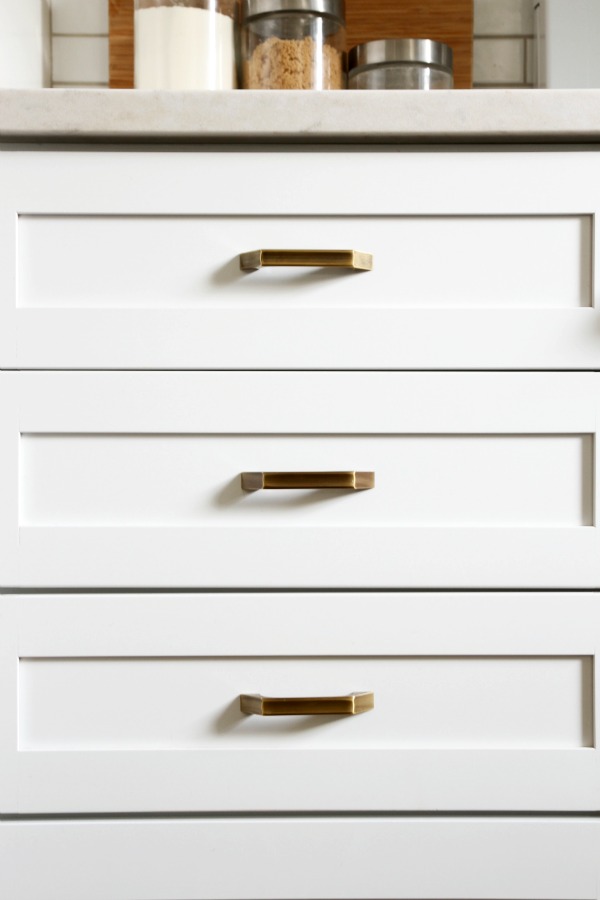
The kitchen cabinetry hardware is from a small, family-owned business in Connecticut. Each piece is handmade and special. I wanted a variety of hardware (knobs, handles, cup pulls, etc.) in the same finish.
On living in a small town: Our town is so small that it isn’t even considered a “town.” We live in a village and don’t have a mailman! That’s right, Finn and I walk to the post office everyday to retrieve our mail and packages. Kalyn and I both grew up on farms and, let me tell you, this is larger than where we come from. Ha! We love having a yard that backs up to a cornfield, the freedom to have campfires and enough space for a garden. Someday we’d love to be closer to the city but, for now, this location makes sense for us. It’s quaint!
Thank you for sharing your lovely home, Sarah!
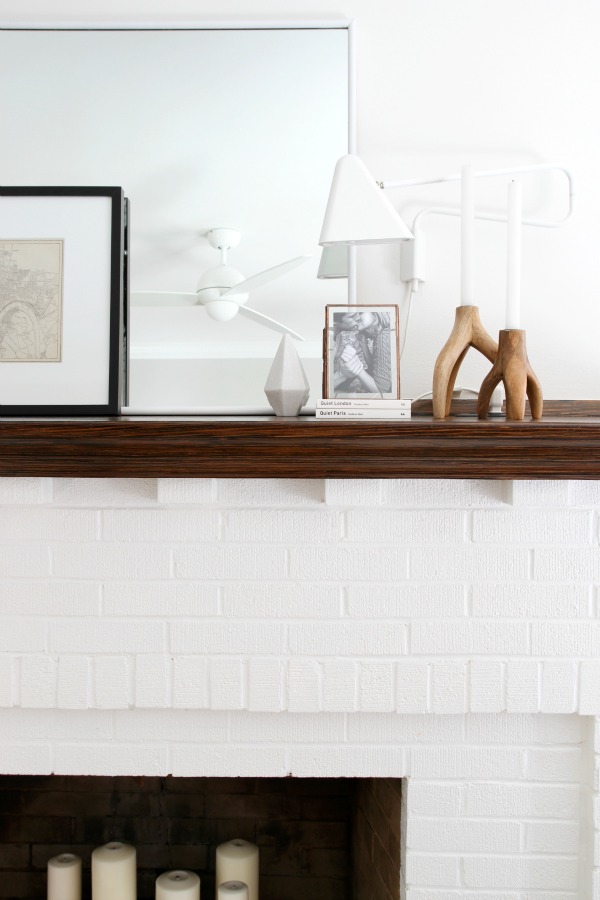
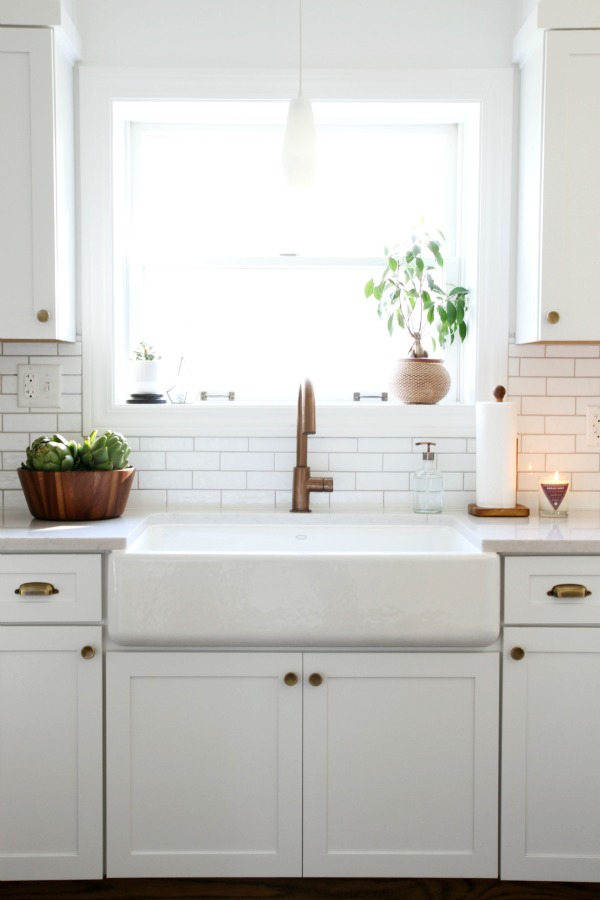
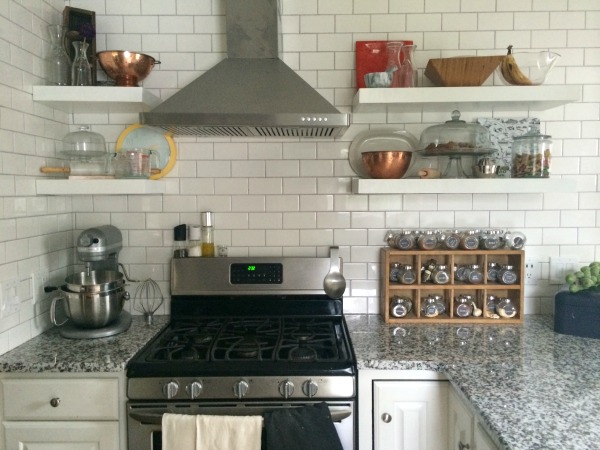
Isn’t this space amazing?! Obviously, I love the overall renovation but what I noticed most in person were all the little details like the crown moulding, beefy baseboards, wainscoting, trimmed out bulkhead (in the kitchen), hardware, light fixtures, carefully curated vignettes and artwork on display. Every time I spotted a vintage camera or schnauzer paraphernalia it made me smile. What caught your eye? Did you happen to spy the rose gold recessed lighting in the kitchen? Such a pretty and understated surprise!
Resources of note:
LIVING ROOM
wall paint – Benjamin Moore super white
flooring – red oak, stained with Minwax’s dark walnut
curtains – Ikea
sofa – West Elm with Restoration Hardware pillows
coffee table – West Elm
armchair – West Elm
magazine holder – Crate & Barrel
ceiling fan – YLighting
horse sculpture – etsy
wall sconce – Ikea
wood candleholders – West Elm
media console – STOR New York
peony art – local artist Katie Stratton
horse photograph – F2IMAGES
KITCHEN
cabinets – Kraftmaid
hardware – Colonial Bronze Company
sink – Kohler
faucet – Brizo
countertops – Silestone
backsplash – The Tile Shop
pendant – vintage
rug – vintage
DINING ROOM
wall color – Sherwin Williams evergreens
table – Ikea
chairs – vintage, reupholstered
pendant – CB2
art – Leftbank
sideboard – vintage
HALLWAY
wallpaper – Hygge & West
light – DIY, Home Depot
rug – vintage
hardware – Anthropologie
brass chevron hanger – Target
GUEST BEDROOM
bed – West Elm
nightstand – vintage
bedding – Urban Outfitters
automobile photograph – Minted
closet knobs – Anthropologie
MASTER BEDROOM
accent wall paint – Benjamin Moore black panther
bed – custom, Lee Industries
nightstands – vintage, DIY
bedside lamps – Ralph Lauren
pendant – YLighting
BATHROOM
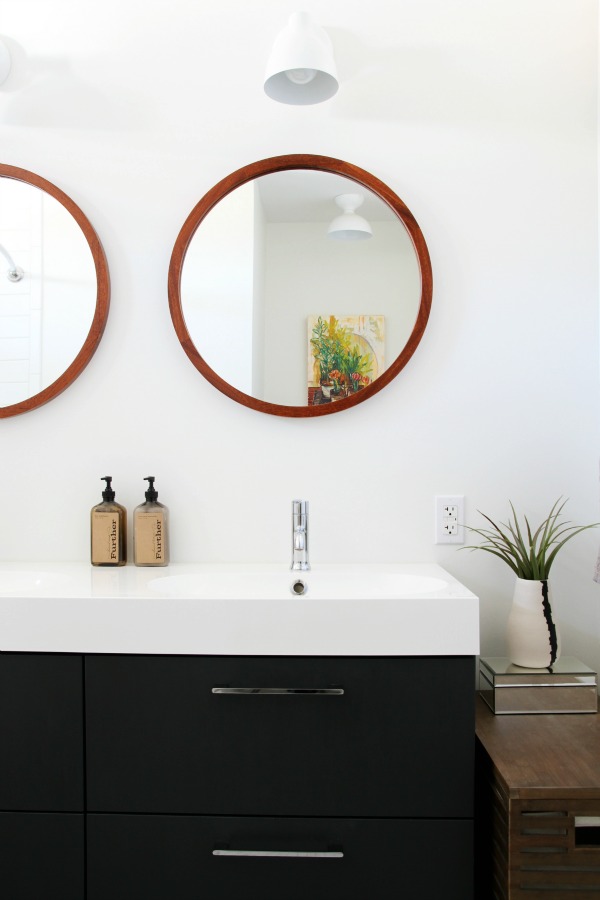
vanity – Ikea
mirrors – Miles & May
wall sconces – West Elm
subway tile – The Tile Shop
hexagon floor tile – The Tile Shop
art – Lauren Stern
glass doorknobs – Look in the Attic & Co.
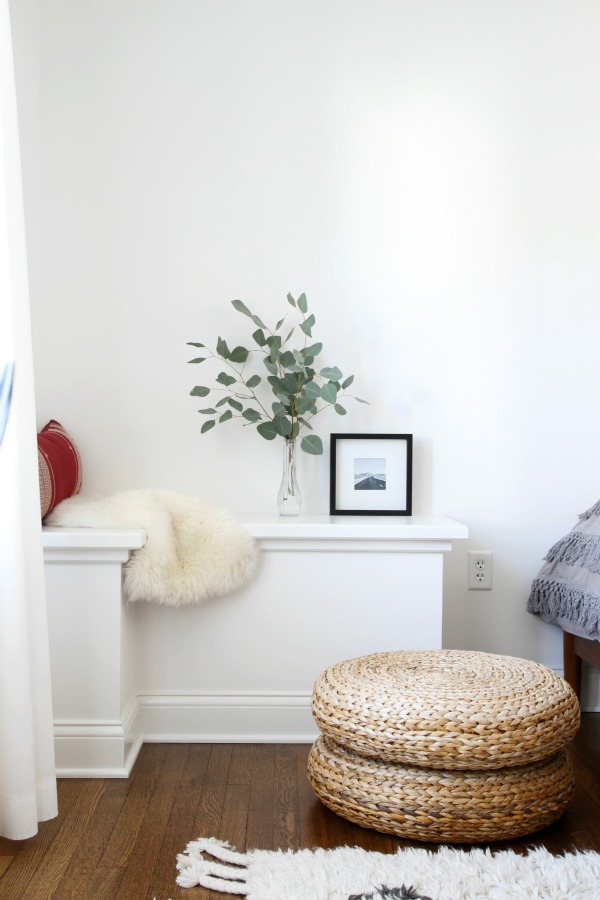
MUDROOM
bench – CB2
animalia hooks – vintage, CB2, HomeGoods
engineer print & frame – DIY
pendant – Schoolhouse Electric & Supply Co.
images: Dana Miller for House*Tweaking
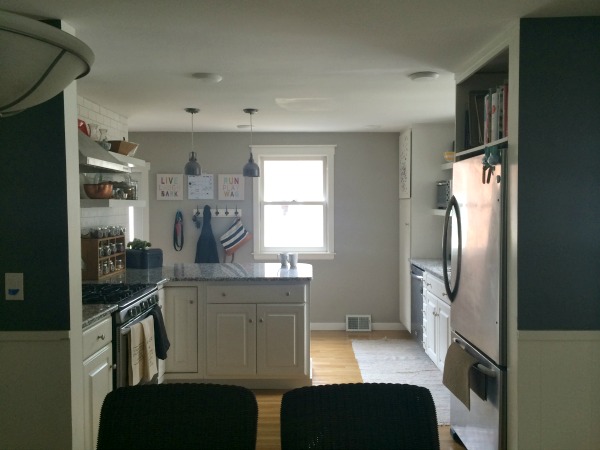
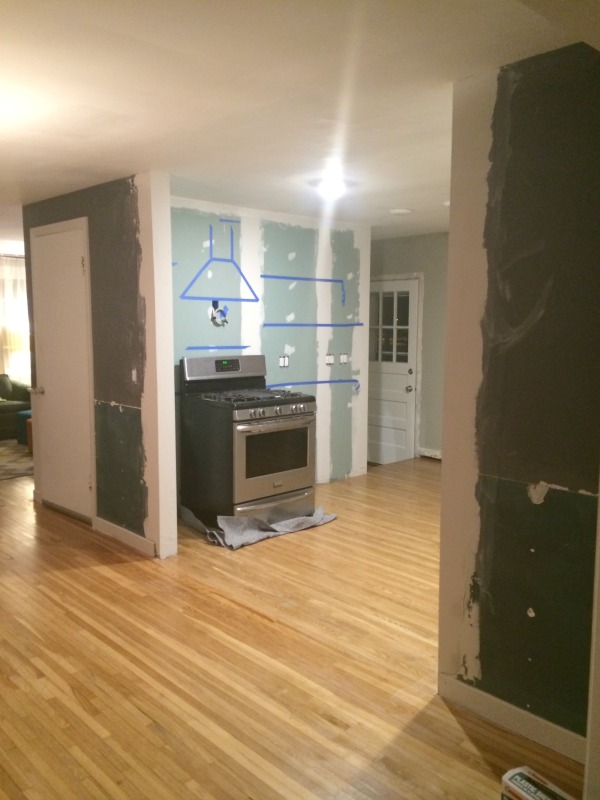
Brittany and Greg bought their first home in 2012. It wasn’t the house of their dreams but it fit their budget and had potential. One of the biggest pitfalls was the kitchen situated between the dining room and a side entry.

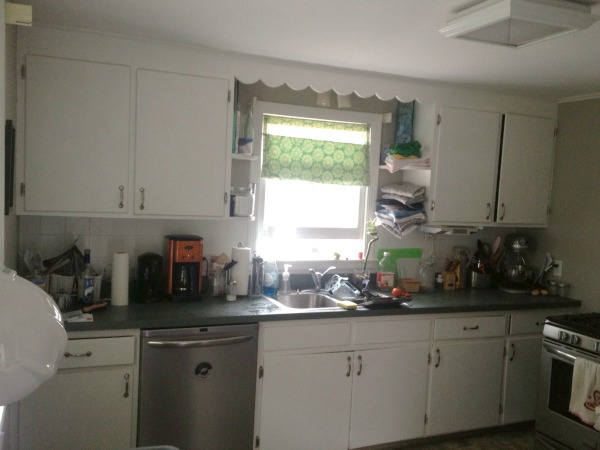
What little cabinetry there was was outdated and in disrepair. Doors and drawers didn’t open and close properly. The (emerald green laminate) countertops were perpetually cluttered due to lack of storage. An undercabinet radio hogged one of the rare outlets. Too few overhead lights didn’t provide enough lighting at night.
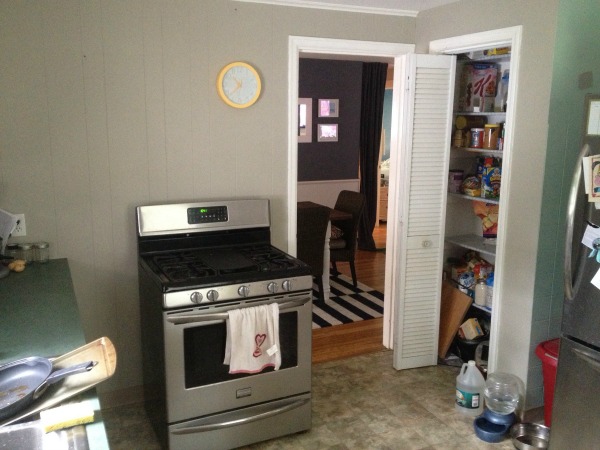
A freestanding stove blocked access to a nearby base cabinet and countertop. There was no exhaust fan. A shallow pantry was inadequate.

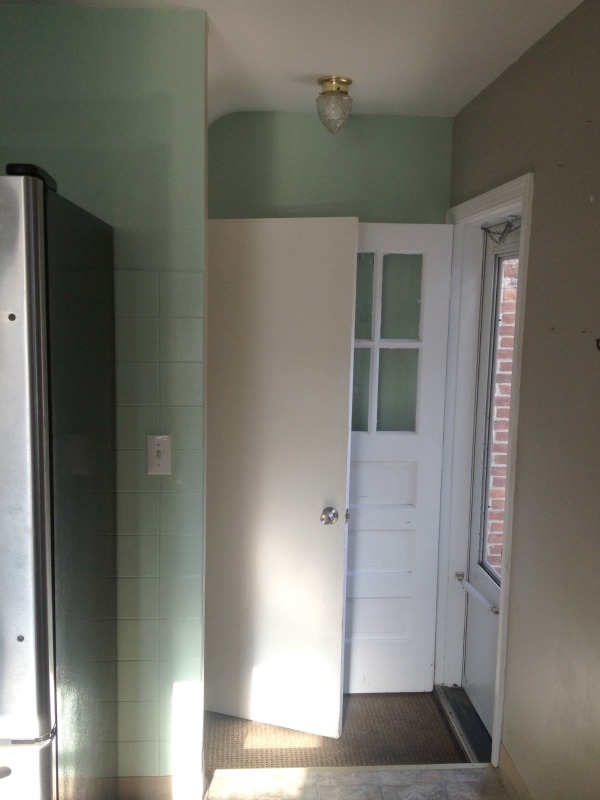
The location of the refrigerator was such that it jutted out into the already cramped room and impeded traffic flow to / from a side entrance.
However, the kitchen did boast good natural lighting and new stainless steel appliances which Brittany and Greg took full advantage of when they overhauled the kitchen after living with it as-is for over a year.
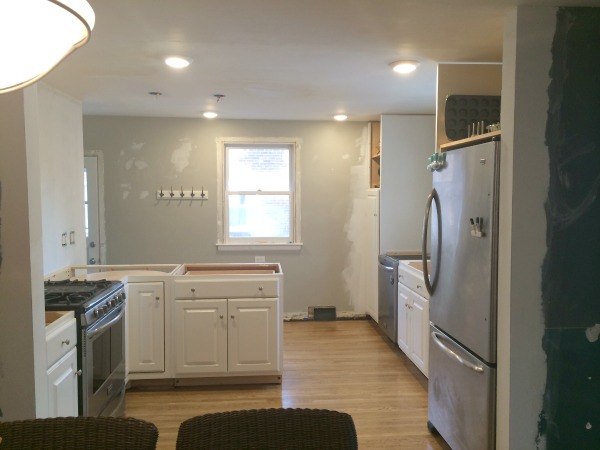
Working on a tight budget, the couple scored a set of custom cabinets via craigslist. The top of the line cabinetry typically sells for >$1,500 PER CABINET! Brittany and Greg negotiated a price of $1,000 for the entire set, including molding and side panels. Armed with mad math skills (they’re both engineers by trade), google Sketch-Up, a little imagination and a lot of DIY ambition, they created an open, functional kitchen that better suits their casual lifestyle. Spoiler alert: a game-changing wall was demo’d. I asked Brittany several questions about the remodel. Find her answers and the “afters” below!
What were the limitations of your original kitchen?
The biggest limitations included lack of storage and countertop space. With the limited counter space on each side of the sink and an awkward last minute spot for the stove, it was impossible to use the bottom cupboard. Having >2 people in the kitchen utilizing all of the appliances was next to impossible.
Aesthetically and functionally speaking, the biggest source of pain was cooking and entertaining. Anyone cooking was completely segregated from the rest of the house. Too many people standing in the way wasn’t helpful for preparing food either.
How long did you live with the original kitchen? Did you make any short-term improvements?
We lived with the kitchen for a year and a half, through our wedding planning and actual wedding. We were very lucky that the last owners installed new appliances about a year and a half before we moved in, so we did inherit three new beautiful and functional stainless steel appliances which helped aid any limited short-term improvements and allowed us to focus attention on other rooms in the house.

What were your goals for the remodel?
Our original goals for the kitchen remodel focused mainly on practicalities: <$5k, add resale value to our house, improve functionality. As our first home, we understood it may not be our forever home but it very well could be. Therefore, we tried to ensure it not only met our tastes now, but our needs in the future as well as others’.
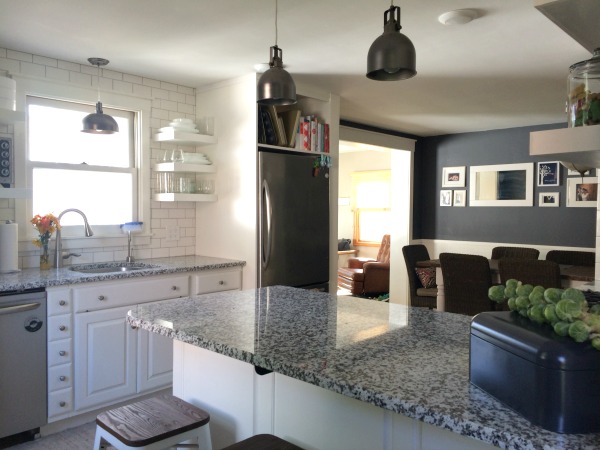
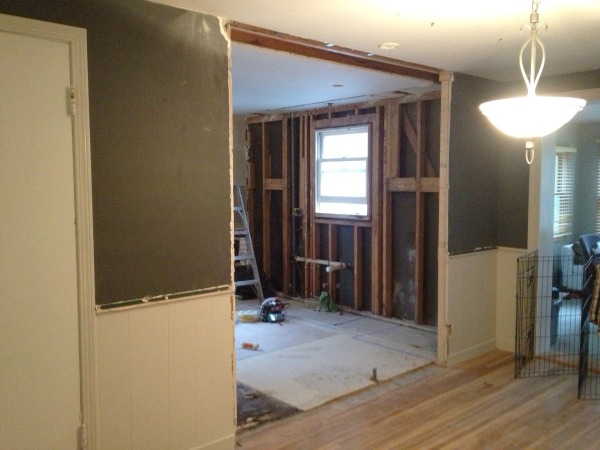
We also knew that we wanted to get rid of the wall between the kitchen and dining room, leaving no header and no ledge on the floor. The consistent opening of the space would improve natural light and daily traffic flow throughout our house. Any perks of additional storage, counter space and efficiency would also be required seeing that we’re both engineers and functionality is our #1 priority by trade.
Where did you find inspiration for the remodel?
Inspiration for the kitchen really came from everywhere: blogs, Ikea, pinterest, Houzz, real life kitchens in our friends’ and neighbors’ homes. My husband needed visual pictures before he’d commit to something, so we’d share a photo stream just for our crazy ideas with notes on what we loved and where they would and wouldn’t work.
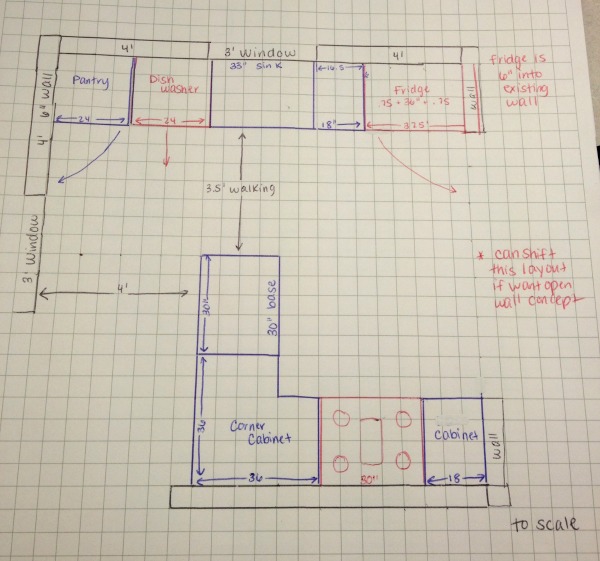
The ultimate layout of the cabinets was determined after many hours on google Sketch-Up and ultimately on graph paper. My husband was impressed by the fact that in a roughly 12′ x 12′ space we could fit in 40 sq.ft. of countertop, an eat-in bar, a pantry and a wide open space around the stove to prepare food. We were aiming for a flare of modern paired with a classic / vintage-y vibe.
Which came first: the design or the cabinets? And how in the world did you score those cabinets?!
Cabinets! After we put our offer in on the house we knew the kitchen wouldn’t last forever and that we’d have to remodel at some point. As we were putting in our offer, a co-worker recommended, if we weren’t in a hurry, to keep our eyes out on craigslist. Thinking that was a next to impossible feat, I did some quick searches and spotted the listing for the cabinets. The homeowners were remodeling and anxious to get their two Mercedes back in the 3-car garage where the “old” cabinets were camping out. Their contractor suggested they put the cabinets up for sale on craigslist as they were in great shape.
We ended up getting their entire kitchen worth of cabinets for $1,000. They also provided images and each cabinet’s size / layout attached from when they were originally installed by Wood Mode.
While we were happy to stumble upon them, the biggest challenges were storing them for a year and a half and coming up with a functional design that incorporated them. We have <8′ ceilings and the uppers we acquired were 44″ tall. That left <12″ between the countertop and upper cabinetry. Standard work height is at least 18″. Therefore, we ended up having to modify some of the cabinets and, once we learned additional uppers would be ~$1,200 each, we agreed open shelving was the best option for us. In addition, one window is on a brick exterior wall and is not counter height. It posed a challenge when coming up with a layout.
FYI – We’re deciding whether to retrofit the upper cabinets, extra base cabinets & pantry into a hutch for the sunroom or use them for custom built-ins in the basement family room.
Did you do all the work yourselves? What help, if any, did you hire out? What was the most difficult project you tackled?
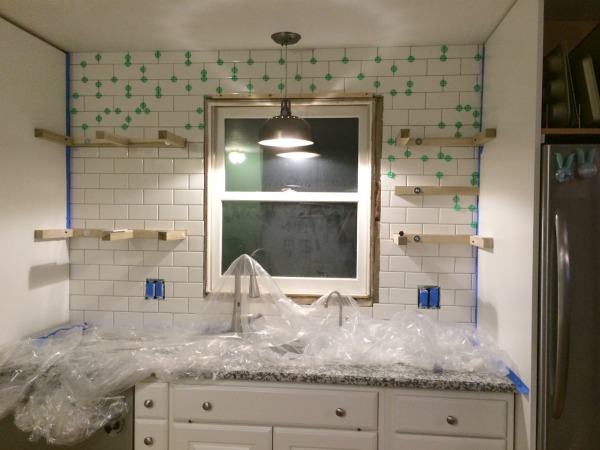
We conquered almost every project ourselves with help from volunteer family & friends. From demo to electrical, to drywall, to support beam, to 1.5″ wood floor installation, to cabinet install, tile work, plumbing and sink hook-up, cabinet modifications & shelving and paint and aesthetic styling. Youtube and DIY blogs were definitely our friends during that time…and necessary!
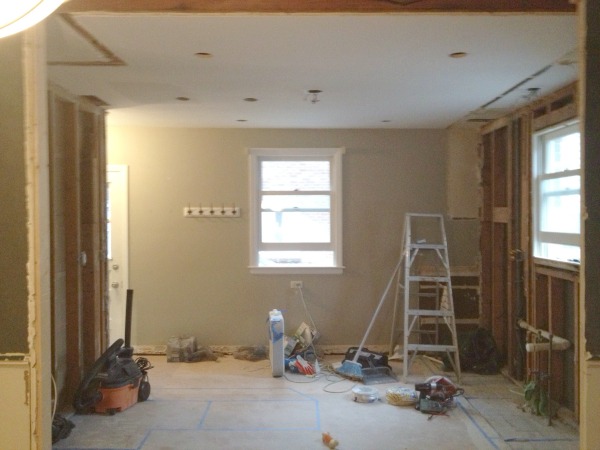
As first-time home buyers of a 1950’s house and learning DIYers, it seemed each task came with its own set of challenges. For example, deciding on flooring left me mailing off a sample of our VCT floor for asbestos testing just in case. And the electrical wiring that we thought would take two weeks actually took 4-6 weeks due to two wires being cut during demo that provided power to the rest of the house. It’s worth noting while we were generous with our original schedule, we forgot we’d occasionally want a project-free night or day of rest.
We hired out:
*ceiling plaster repair – We had attempted this before and got a great recommendation of what I would call a plaster “artist” who seamlessly patched all of our damaged spots. After ceiling paint, no one is the wiser as to where the holes or wall used to be. I would hire this out again anytime in the future! Worth. every. penny.
*gas line moving – I hired this out thinking it would be a more complex task to move 4′ of piping for the stove. However, after seeing them run to the store and move it with flexible pipe, we wish we would have saved our money and done it ourselves.
*load bearing calculations & approval – Despite my husband & I both being mechanical engineers, we brought in a PE (professional engineer) just to confirm our thoughts and calculations on the load bearing aspect of our wall removal. Nothing surprising, but worth the extra insurance.
How long did it take from design to completion?
We started Labor Day 2013, used the long weekend for demo, and worked mainly on weekends and weeknights when necessary. The final project as it looks today was probably completed Labor Day 2014. We are both working engineering & management professionals with long weekday business hours and frequent weeks of business travel. A majority of the work was left for the remaining weekends.
However, we had cabinets installed by Christmas 2013. Countertops arrived a month later in early January. The finishing touches were completed somewhere between then and Labor day. Once the kitchen was functional in January, we tried to return to a normal life and complete smaller tasks each weekend to bring it up to its new identity as seen today.
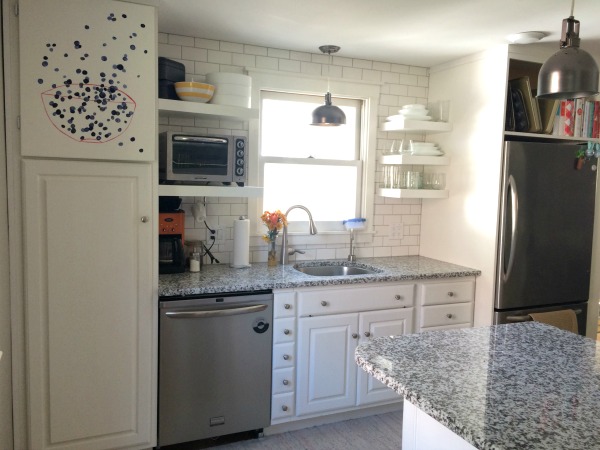
What is your favorite aspect of your new kitchen? Least favorite?
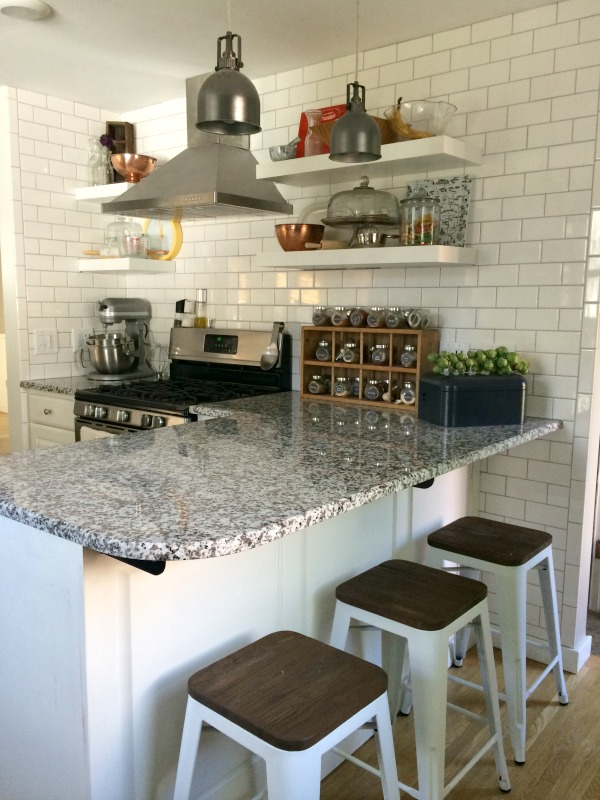
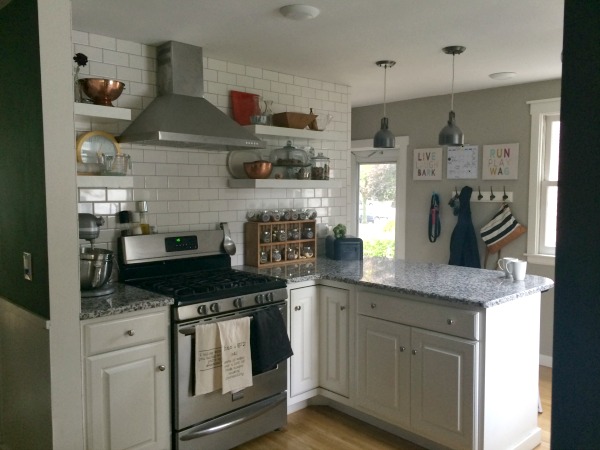
Overall, we both love the improved flow and functionality. Separately, I think we both love some of the smaller and finer details as our blood, sweat and tears are in almost every corner. For example, I love the open shelves for ease of cooking and cleaning, in addition to having the ability to display all of our wonderful wedding gifts. And my husband loves the USB outlets for charging devices, the instant hot water heater (makes oatmeal and tea in the morning super easy), and the tiled wall and the wood floors (where most of his tears were shed).
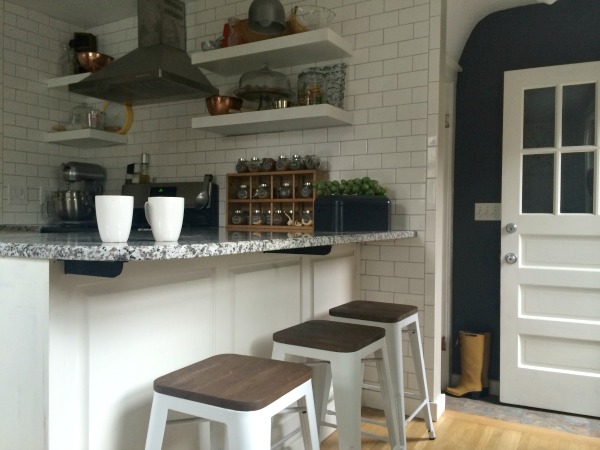
On the flip slide, we each have small flaws that bug us. Mine being the missing topcoat of paint on the end of the peninsula, and his being a few imperfect marks on the open shelves. But we’re the only ones who notice, and we have to remind ourselves of that every now and then. My least favorite thing (but not my husband’s – ha!) is that I didn’t take the half wall opening near the stove all the way back to the stove hood wall. *I think* the extra 2′ would have opened up the space even more and resulted in better sight lines while adding an extra few inches of counterspace. But, by the time I thought about it, the electrical and drywall were done. My husband just laughed because there was absolutely no turning back.
Resources of note:
cabinets – Wood Mode hallmark cabinetry in winter white oak
wall paint – Benjamin Moore northern cliffs mixed in Behr Ultra
trim paint – Benjamin Moore simply white mixed in Behr Ultra
flooring – 1.5″ solid oak from a local supplier called National Lumber. It was finished in Golden Oak to match the original flooring throughout the house. (We LOVE the seamless transition.)
backsplash tile – American Olean (1/16″ spacers), Lowe’s
grout – dove gray, The Tile Shop
side entry floor tile – clearances porcelain with charcoal gray grout, The Tile Shop
EZ mount cabinet levelers – My husband thought these were amazing.
granite countertops, sink – a local supply store called Shell Fab (They actually cut the stones and do the installation for the local big box stores, which allowed us to save $$ and shop direct from the local supplier.) We LOVE the deep sink and granite.*
appliances – Frigidaire, c/o the previous homeowners
charcoal vent hood – eBay
open shelves – DIY, inspired by Young House Love / Ana White
spice rack – wine bin from flea market
spice jars – Ikea
faucet – Moen motion sense in spot-resistant stainless
hot water heater – Amazon*
garbage disposal – Amazon*
hanging pendant lights – Hampton Bay, Home Depot / ebay
pod lights – LED Sylvania 6″ retro fit to standard j-box, Lowe’s
knobs – satin nickel, Home Depot
motion lights – Lutron dimmable LED 3-way*
USB outlets – Leviton*
cake domes – Amazon, Macy’s
bread boxes – Ikea
clock – Target
glass jars – Amazon
copper bowls & colander – ebay
marble rolling pin – Amazon
mortar & pestle – Amazon
dishes – white Corelle (no worries about breaking them!)
dish towels – Etsy
apron – Ikea
*Denotes items / features we’re especially fond of and highly recommend.

Thank you so much, Brittany and Greg, for sharing your space!
I love the ingenuity and hard work that went into this budget-friendly remodel. $1,000 for those cabinets? Are you kidding me?! And, of course, I love the open shelving and subway tile. Bringing down the wall between the kitchen and dining room solved two problems. It opened up the kitchen AND allowed more light to shine into the windowless dining room. This kitchen a far cry from the jumbled, dysfunctional space it once was. You can read more about this project on Brittany’s blog.
Have you ever thought of sourcing kitchen cabinets from craigslist? It seems like a cost-effective option if you aren’t pressed for time and are willing to be imaginative with your design.
images: Brittany Semrau


budget decor, DIY, family life, inspiration, interior design, renovation