Before we get into this hidden litter box business, can we talk about how “helpful” toddlers are? Mabrey is a BIG “helper.” If you had / have / know a toddler, you know what I mean. In their lil’ minds they are busy doing something important (like washing dishes, dusting, cooking, mopping, vacuuming, feeding the family pet, etc.) but in reality they are making an even bigger mess.
After Mabrey washes dishes, the dishes are still dirty and everything in sight is soaked. When Mabrey dusts, one square foot area is dripping wet and she’s still spraying it because (to her) it’s just not wet enough. When Mabrey cooks, she uses all of the things: pots, pans, spoons, spatulas, toothbrush (?!), measuring cups, Hot Wheels (?), bowls, whisk, baster, timer. All of the things. When Mabrey vacuums, everything is fair game: her braid, Legos, Cheetah’s tail, shoelaces, jewelry, rocks, Hot Wheels, crayons. Don’t want to pick it up? Sweep it up! When Mabrey feeds Cheetah, there’s no telling how much food she’ll put out or where the food will be. Two days’ worth of food in the water bowl? Two pellets in the food bowl strategically placed in the dollhouse? A perfect scoopful in the litter box? Yeesh.
Of course, after I clean up her helping messes and relay the day’s events to Steve in the evening, it’s comical. Sweet even. So she keeps “helping” and I keep reminding myself that she’ll want nothing to do with helping in a few short years.
But when it came to the litter box, something had to be done. Every time I turned around Mabrey was trying to clean it or throwing random stuff in it. Originally, I placed the litter box on the floor next to the dryer but that spot was a little too accessible for a two-year-old. I googled a bunch of hidden litter box ideas but it seemed like everything I found required a new, separate piece of furniture: a solid bench, an end table, a freestanding wood box, etc. I really wanted to keep the litter box in the mudroom and I wasn’t willing to give up precious real estate for another furniture item no matter how small.
So I started looking around at what we already had. That’s when the a-ha! moment struck.
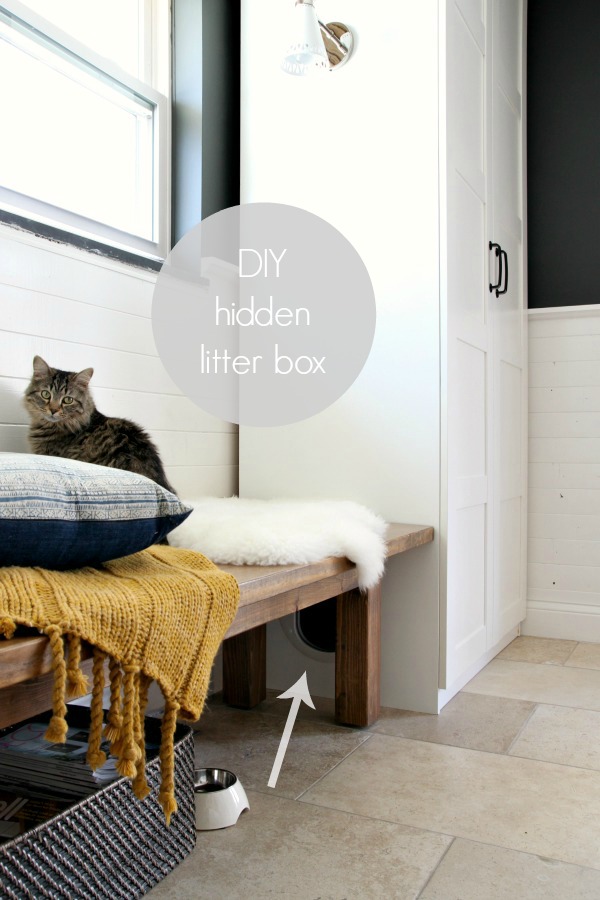
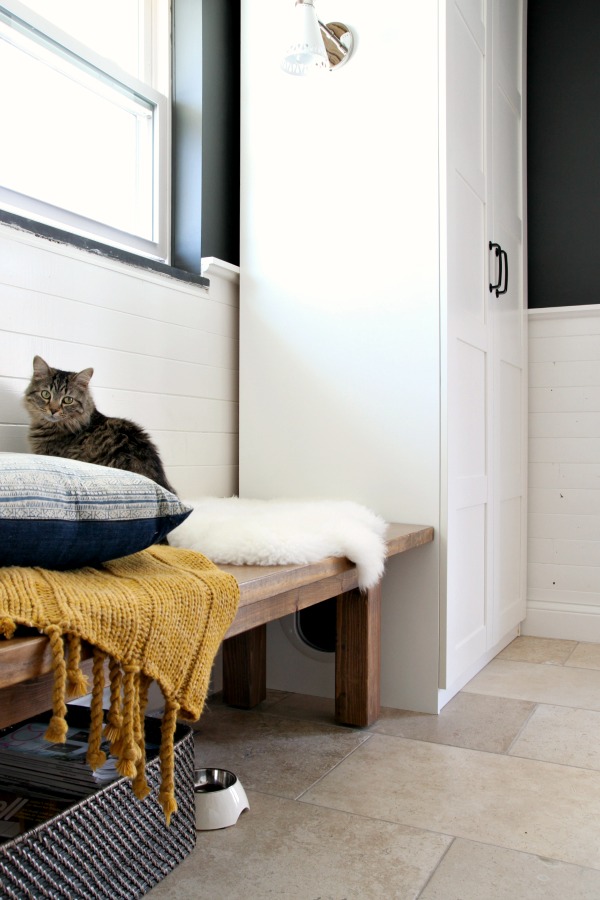
PAX wardrobe + cat door = hidden litter box. Boom. Done.
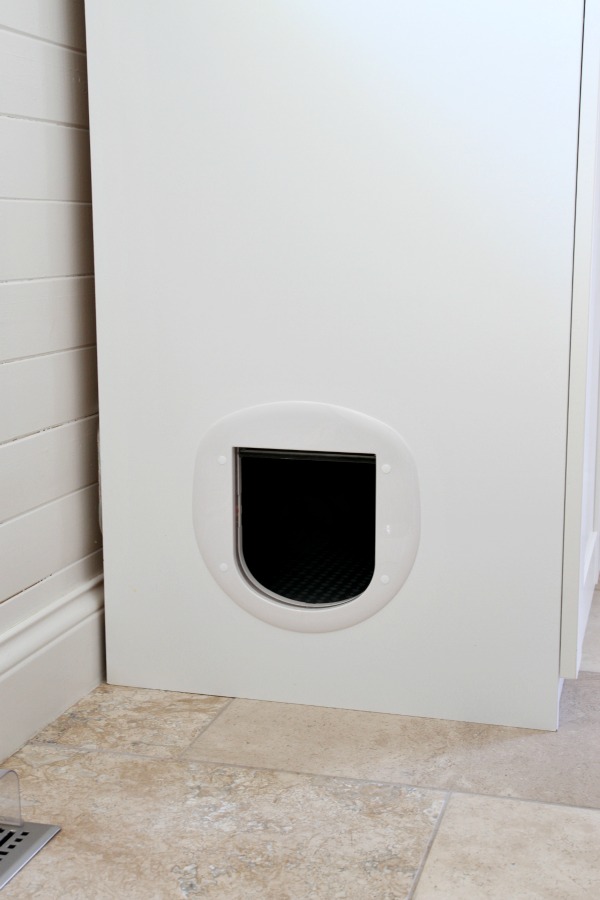
We purchased a cat door for big cats (the vet guesses Cheetah is at least part Maine Coon which means we could end up with a pretty large cat when she’s full grown) that would accommodate the thin side panel of the PAX. If you’re curious, it’s this one. It doesn’t have the best reviews but it looks like they mostly pertain to indoor-outdoor use on an exterior door. Since we were going to be installing the door inside, we weren’t too concerned with the actual door function. We simply needed the large opening and the ability to install it into a thin panel.
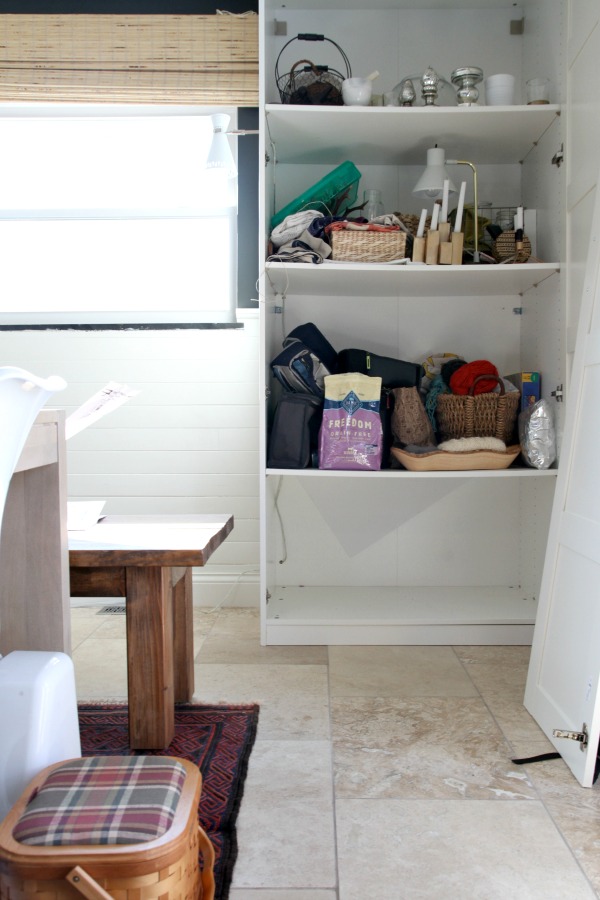
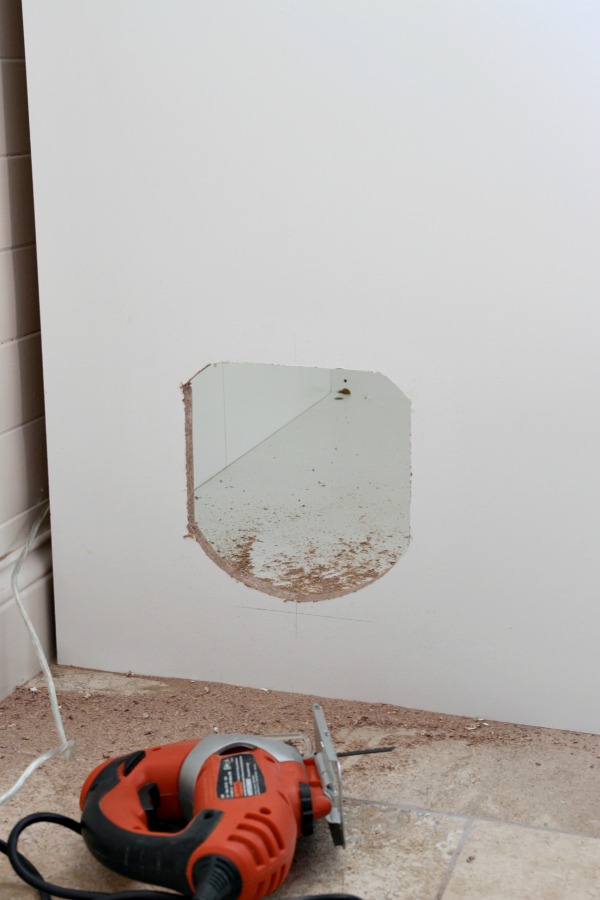
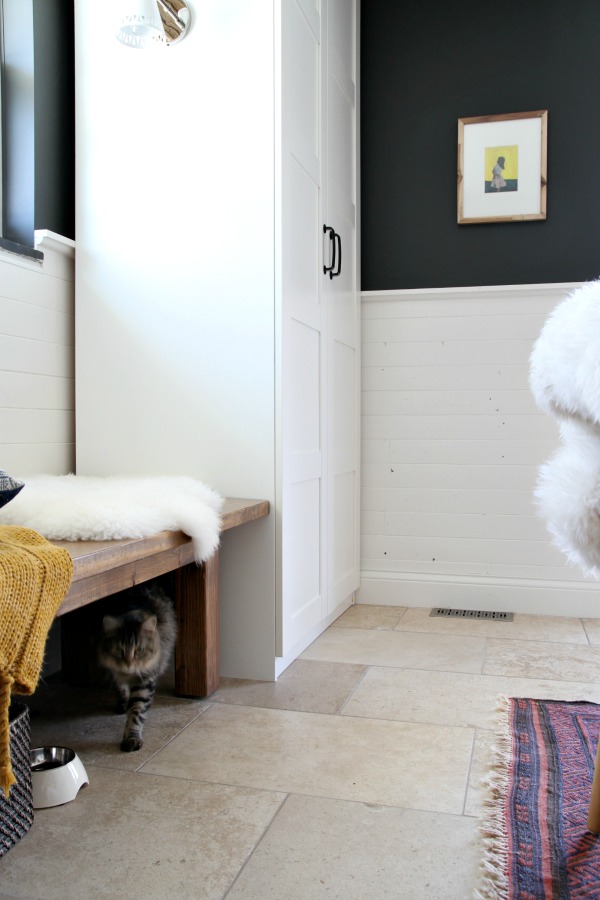
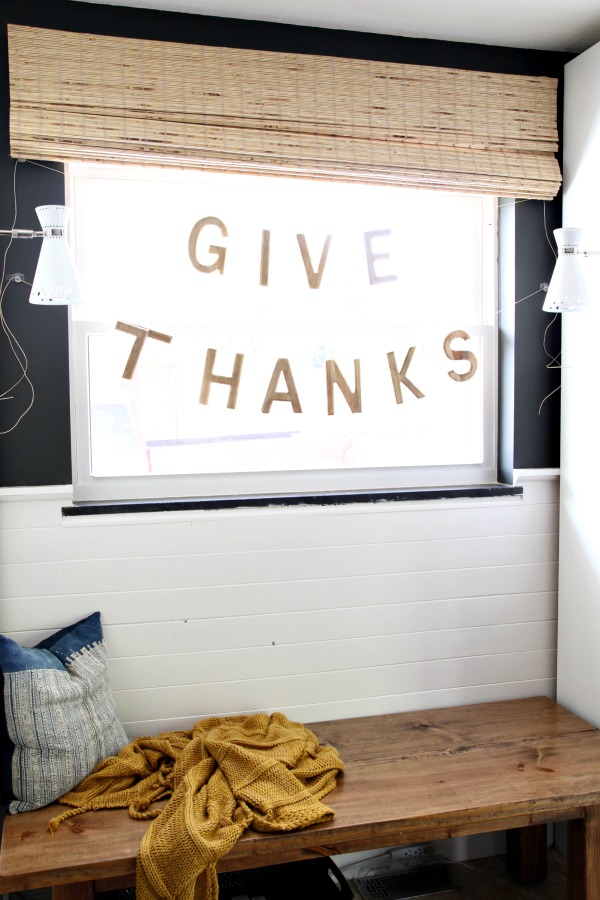
We removed the PAX doors and all contents (cat paraphernalia, sewing machine, sewing basket) from the bottom shelf. Using the included template, we cut a hole in the side of the PAX where Cheetah would be able to access it when the wood bench was in place (see first image of this post).
Installing the door wasn’t difficult but it did require an extra pair of hands to hold everything in place while another person screwed everything together. Because we installed the door on a thin panel (as opposed to an actual door) we did have to trim the screws to get a perfect fit. Again, not difficult but an added step.
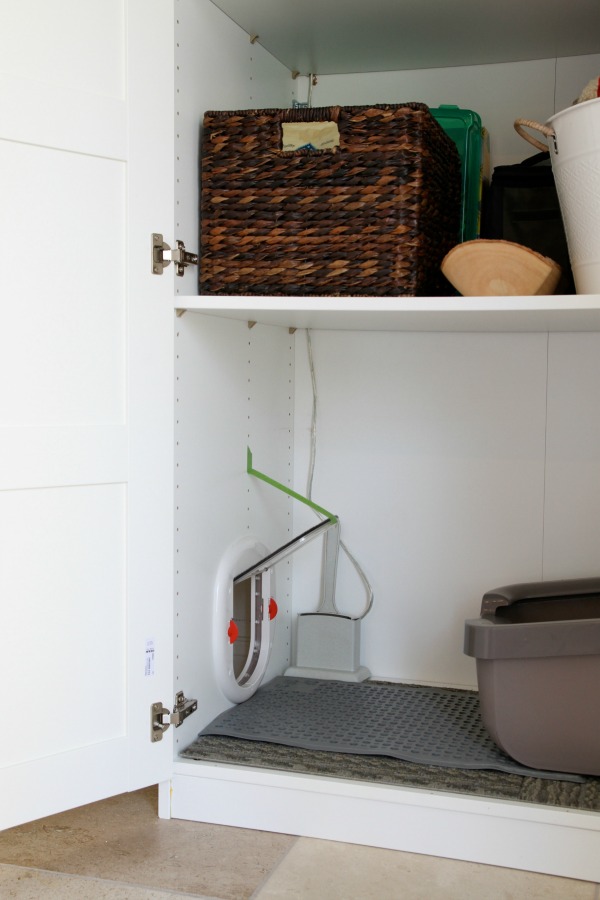
I made the executive decision to install the door with the red locks facing the interior of the wardrobe. I didn’t want them visible from the exterior. (The 4-way locks allow access only in / only out / both in & out / both locked.) We could have done away with the flap door all together and just used the opening, but we decided to keep the door in case we ever need to put Cheetah up for some reason. That way, she still has access to the litter box.
We taped the door to hold it in the up position. We want Cheetah to get acquainted with the new location of her litter box before we introduce the door. I lined the bottom of the wardrobe with two Flor squares leftover from the boys’ room. I had to trim one for a perfect fit. I plan on hosing them off outside when necessary, probably each month when I empty and clean the litter box. A rubber mat, a scoop and the litter box sit on top of the rug squares.
To accommodate the litter box, I raised the lowest shelf and reorganized all of the shelves. I moved my sewing machine and sewing basket to a different closet but, eventually, they will end up in the studio along with most of the other items in this wardrobe. The dark brown woven basket on the shelf above the litter box holds cat food, overstock litter, cat nail clippers and Cheetah’s brush. So I guess this is the cat closet now? Never thought I’d be typing that.
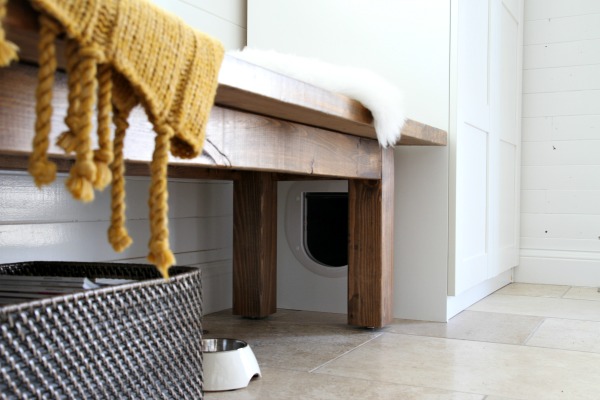
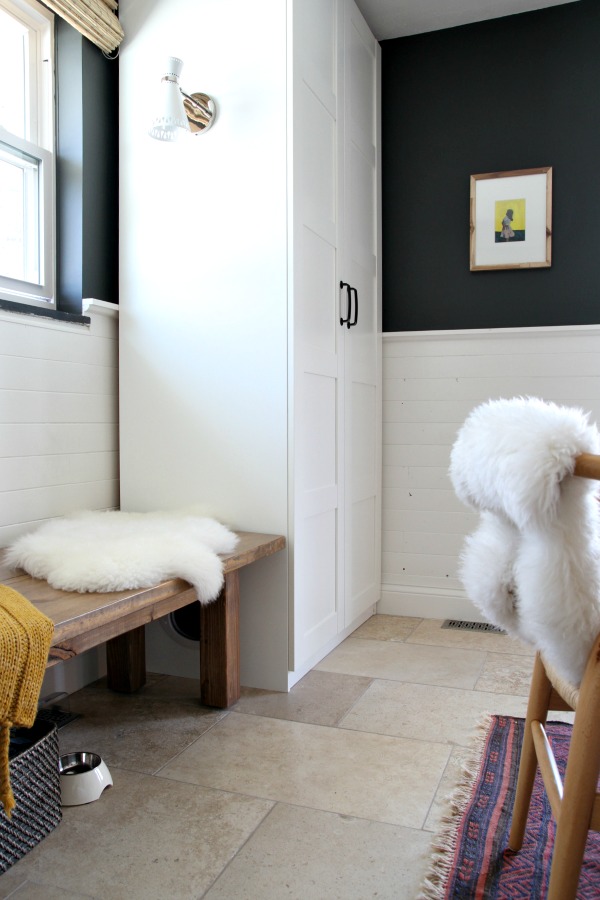
I like that the cat door is easily accessible for Cheetah but completely inconspicuous. Mabrey’s interest in the litter box has waned. For now. The other great thing about this setup is that the litter is better contained. I’m not finding as many stray bits as I was when the litter box was on the floor next to the dryer. I also have my rolling cart back next to the dryer which is another plus.
Luckily, Cheetah has adjusted to the change swimmingly. She took to it right away and hasn’t missed a beat. I actually think she prefers this setup over the previous one. It’s her contained space away from toddler “help.”
After we installed the door and put everything back together, I got to thinking that if someone really wanted to they could totally go wild with a DIY cat house design that takes up the entire PAX. THE ULTIMATE IKEA CAT HOUSE HACK! You know, cutting holes in shelves, adding scratching / climbing posts to allow access to vertical space, etc. It was just a thought. I’m not THAT crazy ;)
images: Dana Miller for House*Tweaking


budget decor, DIY, family life, housekeeping, organization