A cinder block wall in the mudroom and sleeping munchkins in their beds forced us to give 3M Command hanging strips a try. I’m not gonna lie. I was leery. But it’s been nearly two months since we hung our original gallery wall and nothing has come crashing down. Consider me a nail-to-adhesive-strip convert. Today I’m sharing how I use the strips to hang frames.
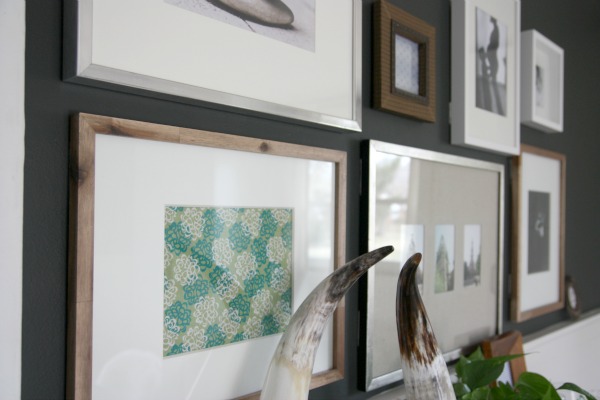
The mini gallery wall that I created above is actually on drywall – not cinder block – and I could have used nails in the wall. But I am so smitten with the adhesive strips that I decided to use them here too. I like that they don’t put holes in the walls {since I tend to tweak things around for a bit until I settle on a more permanent arrangement}, require NO measuring {hallelujah} and can be easily removed {great for renters or dorm residents}.
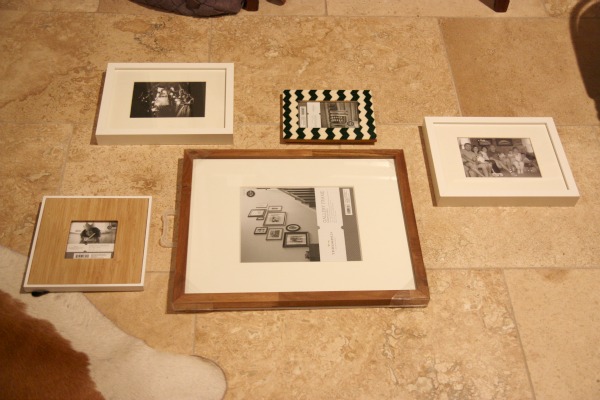
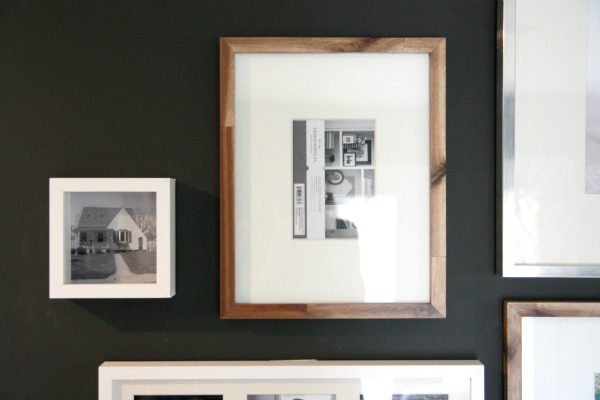
To start a gallery wall, I play around with an arrangement on the floor in front of the wall until I get the look I’m after. I like asymmetrical but balanced. I glance at the floor arrangement then at the wall, back and forth, picturing the arrangement on the wall while HH worries that his wife has gone mad staring at frames on the floor and a blank wall. Once I’m happy with the layout, I take a picture with my phone or camera for reference. {see above} This helps when it comes to eyeballing placement on the wall without measuring a single thing. I choose one frame near the center of the arrangement to hang first. {I hung the large wood frame in this layout first.} Then I reference my picture for hanging all the other frames around the first. Hanging stuff on the walls doesn’t have to be an exact science. In the end, I added one more frame to this layout after I hung my original layout on the wall.

For the adhesive strips, I wipe the areas of my frame and wall where the strips will touch with rubbing alcohol. This assures a clean surface to adhere the strips to. On most frames, I use three pairs of strips. On larger, heavier frames I use four pairs of strips. The label does recommend against using 3M strips above beds and for very heavy items or antique items that you don’t want to fall. I say use common sense.

I take two strips and sandwich them together adhesive sides out. {You should hear a nice crunching sound which tells you that the strips are catching one another.} I remove the adhesive backing from one strip and adhere it to my frame making sure I line it up with the edge of the frame so that there’s no hangover that might peek out from behind the frame on the wall.
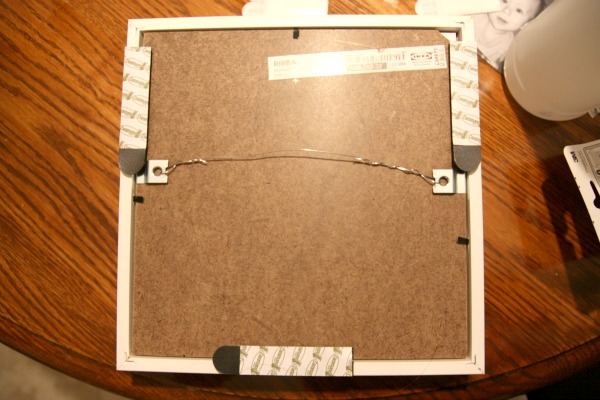
I repeat until I have all my strips on my frame. On narrower frames, an overlap can make changing out the frame’s contents difficult but not impossible. The strips could be cut in half lengthwise but I am lazy.

Then I remove the adhesive backing from the wall strips and press my frame to the wall, applying constant pressure for 30 seconds.
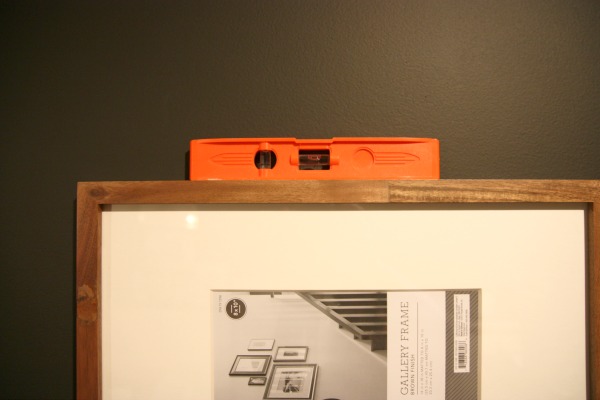
When I’m hanging a completely new arrangement, I’ll use a little level on top of the frame before I press it to the wall. Otherwise, if I’m adding to an existing arrangement, I visually level the frame by lining it up with other frames already on the wall. If you aren’t confident in your eyeball-leveling abilities, then by all means, use a level every time.
Here’s where I would like to point out that once you apply pressure to the frame, it ain’t movin’. Be sure the frame is where you want it before you push. The 3M label says to remove the picture frame from the wall once the wall strips are placed and allow them to fully “set” for one hour. I never do this. I just leave the frame on the wall. I’m such a rebel. But you should do what the label says – even though I’ve never had a problem skipping this step.
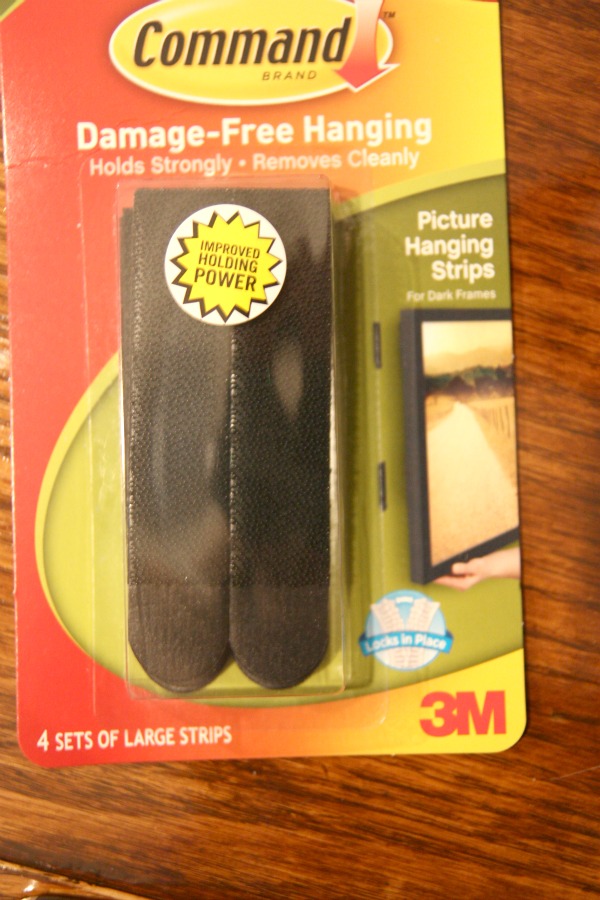
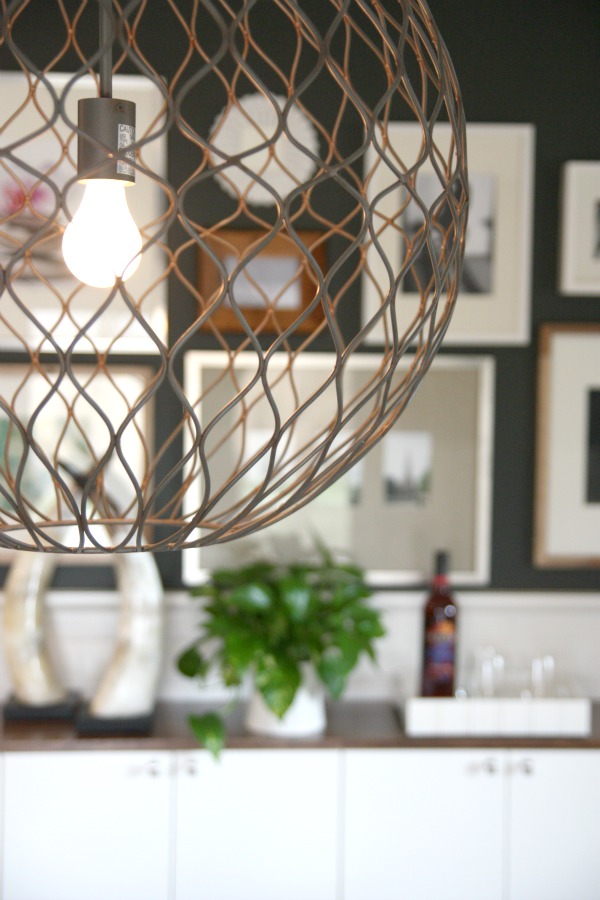
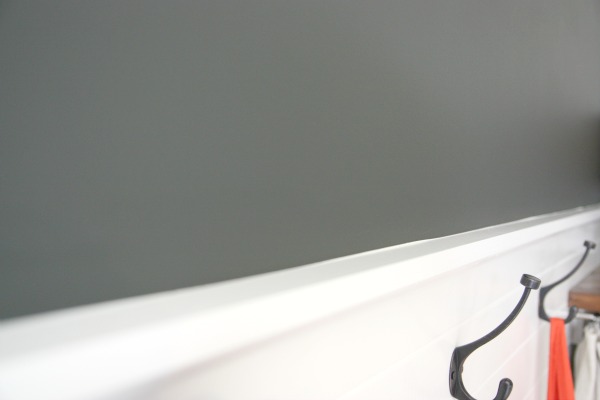
Something else I discovered this week…the strips come in white or black. Since our newly moody walls are nearly black, I bought all black strips for the mini gallery and to tweak the existing gallery above the fauxdenza.
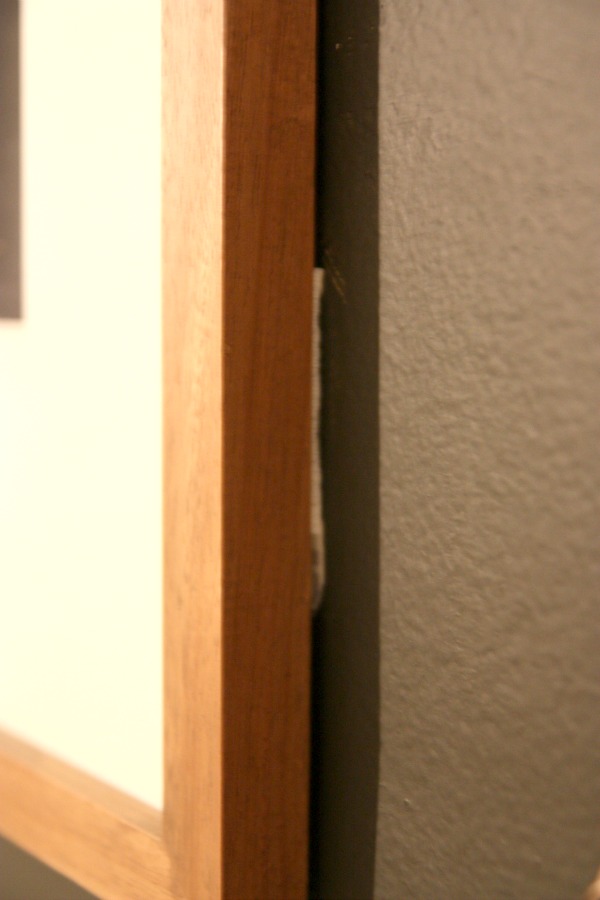
Using the white strips on dark paint isn’t the end of the world but when you look at the frames from the side, you can see the white strips more readily than the black ones. Use white strips for light walls and black strips for dark walls for a seamless look.
And that’s it!! No nails. No tape measure. No problem.
I will say, from my short-lived experience with the adhesive strips so far, I would not recommend using the strips on uneven, rough or bumpy walls. The strips need a really good flat surface to adhere to. The same goes for your picture frames.
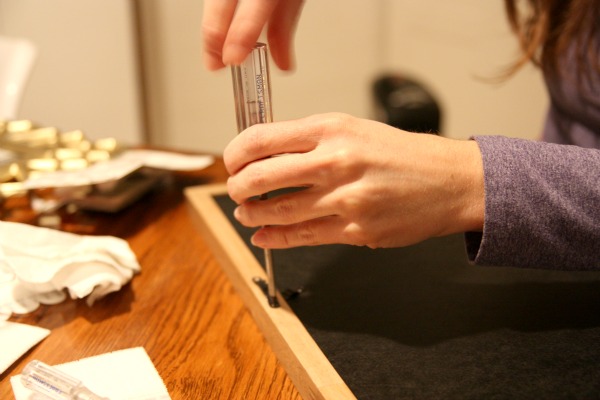
I remove all picture hangers from the backs of the frames when I’m working with adhesive strips. This gives me a nice smooth frame surface. And don’t think table frames are out of the question. They can totally work!
I bought this table frame wanting to use it as a wall frame.
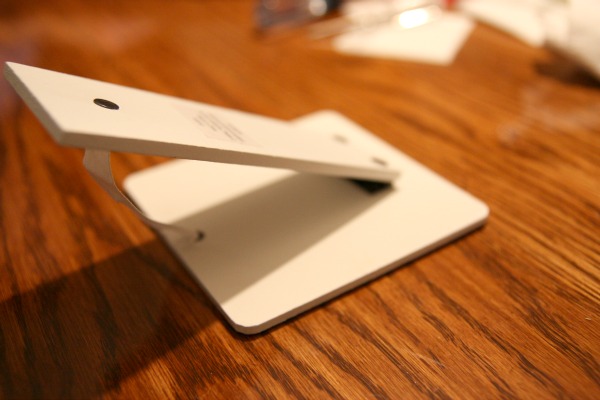
So I removed the table prop insert from the back so the frame would mount flush against the wall.
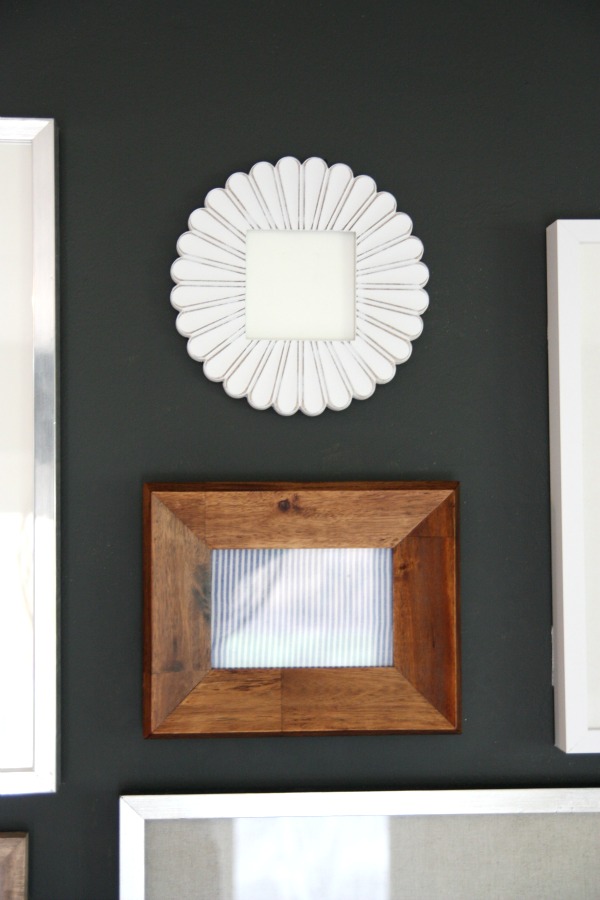
I’ll use tape to secure a picture in the frame. So feel free to get creative with your picture hanging! Don’t think you only have to use wall frames. In fact, the wood frame under the white fan frame was once a table frame too. Which brings me to this…
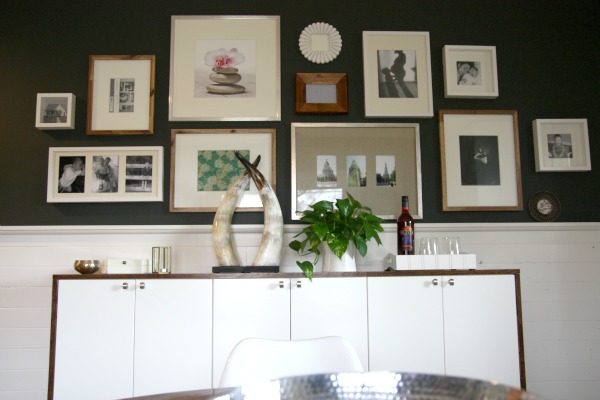
I tweaked the gallery wall above the fauxdenza. Some of the frames are empty but I wanted to share my progress in real time. Stuff happens so slowly and gradually here.
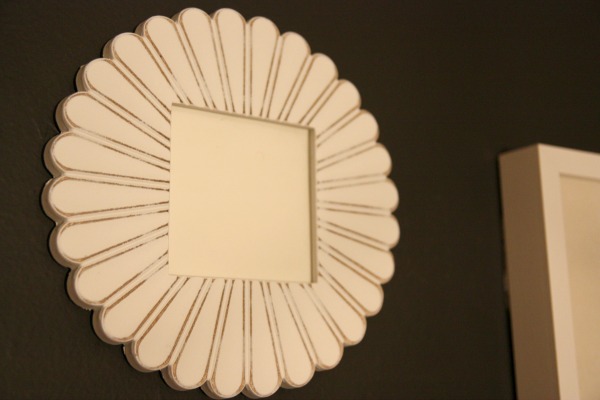
I removed the canvas art and two frames from the left side of the layout. They felt off. In their place, I hung a few more IKEA RIBBA frames and one more of those distressed wood frames from Target that I can’t get enough of.
Seriously, guys. These are my new favorite frames…and this post is not sponsored whatsoever. I bought several of these frames back in January for the photo shoot and I’ve since added two more to the mudroom.
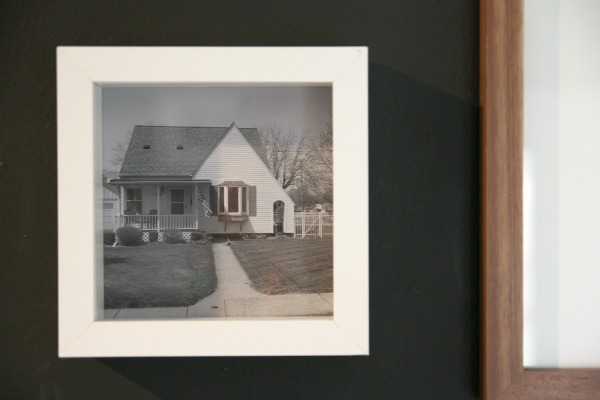
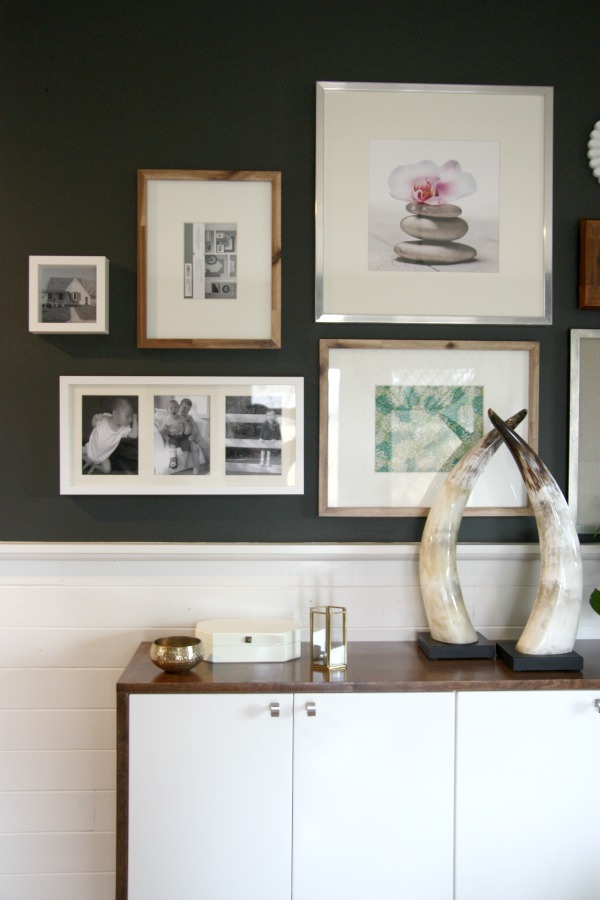
There’s a picture of our very first house in Illinois. Lots of memories {and DIY!} in that house. We brought Layne home from the hospital to that house.
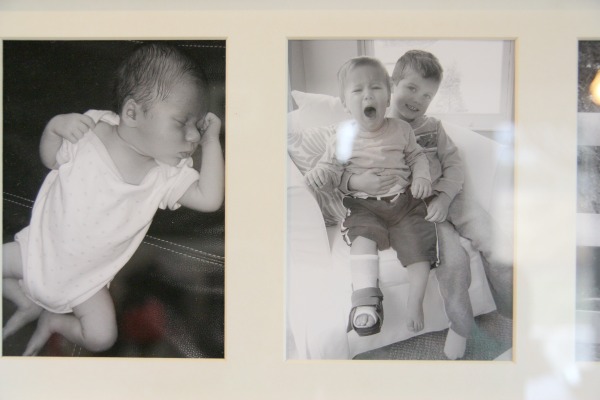
I have to show you a closeup of this one. On the left is Everett as a newborn. I took the picture on the right after Everett had his leg casted. Yes, he broke his leg when he was 16 months old. He’s that kid. If you’re thinking Layne looks happy about it, you would be correct.
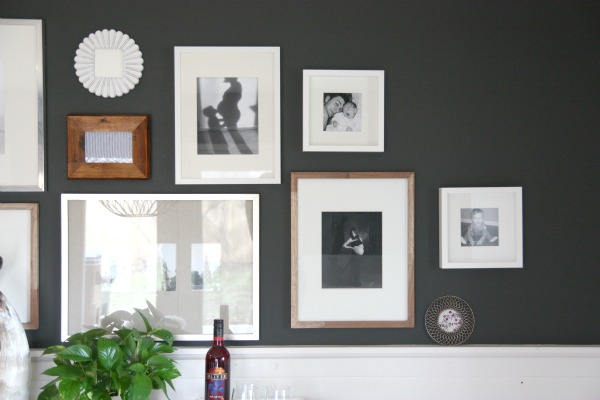
On the opposite side of the gallery wall I switched out a few frames for the two table frames I mentioned already and added another square RIBBA on the far right.
Things are feeling more balanced with these tweaks. And now a bunch of pictures of pictures to take you into the weekend.
Everett asked me, “Mom, why are you taking pictures of pictures?”
Because your mom is crazy, Everett. Cray-cray mommy. That’s why.

Happy weekend!
FYI – If you’ve ever wondered how downsizing and moving with kids goes…here’s a little interview all about our experience.
images: Dana Miller for House*Tweaking
This post is brought to you by Ace Hardware. I was given a gallon of paint from the Clark + Kensington line to use and review at my leisure. Clark + Kensington recently outperformed other big name paint brands in a Consumer Reports evaluation. All labor and opinions are my own.
After a few teaser shots, here’s the real deal. A fully detailed post entirely dedicated to recent events in the mudroom/dining room/laundry nook {i.e., the Everything Room which a reader creatively suggested we call the “mudding nook” – I like it!} that involved a paint brush, paint rollers, Frog Tape and a gallon of goodness. I repainted the Everything Room for the THIRD time. In a little over a year. Sure, it would have been easier, quicker and cheaper to have gotten it right the first time but sometimes I need to make flubs. Finding out what doesn’t work is just as helpful as figuring out what does work. In the end, victory is that much sweeter. At least, that’s what I’m telling myself to keep from feeling like a complete failure.
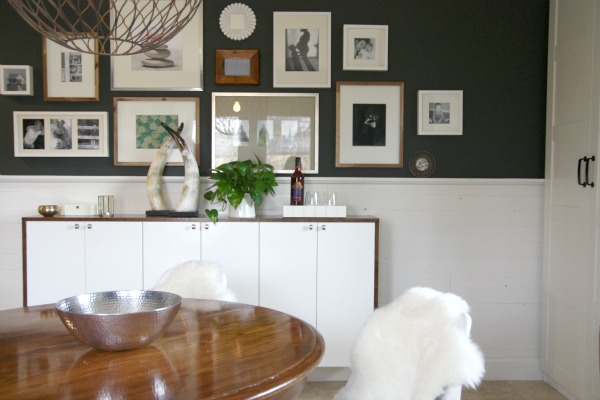
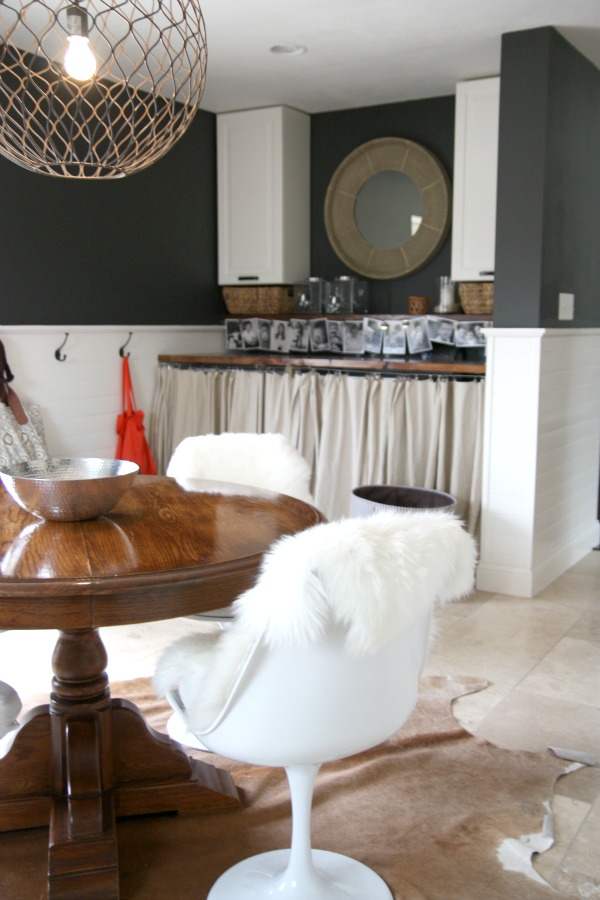
First, a quick 360° around the room to help you get your bearings. {FYI – I took these pics on an overcast winter morning so the lighting isn’t the best but I didn’t have the patience to wait for a sunny day which, realistically, might not happen here in Ohio for weeks. Boo gray days.}

Sweet, sweet victory.
The color is Besalt by Ace Paint, color-matched in Clark + Kensington primer + paint in one. {Ironic, I would have named it Bepepper.} I chose a flat finish for a deep, flawless look. On the walls, it’s deep and dramatic. When I look at it, I feel like I’m looking into outer space. It tricks me into thinking I can extend my arm and magically reach beyond the wall. I can’t.
With three kids nipping at my heels and HH working overtime, it took me an entire day to paint out the room. Many of you ask how I get projects like this done with kids in the house. I don’t have a babysitter. I don’t have a nanny. I don’t have a magic answer.
I have to psych myself up for DIY when my kids are present and my HH is not. I put on my inside-out painting clothes and tell myself I’m not getting out of them until I’m done. Usually, the hardest part for me is getting started.
I prepared as much as possible in the early morning while Mabrey was awake and Layne and Everett weren’t getting on each other’s nerves yet. I taped off the chair rail, removed items from the walls, moved decor and furniture to the center of the room and got all of my painting supplies ready. That way, when I put Mabrey down for her morning nap and turned on a movie for the boys {Kung Fu Panda in case you’re wondering} all I had to do was get my paint on.
After Mabrey woke up from her morning nap and the boys’ movie was over, I took a lunch break to feed the kids and myself. I wrapped my paint brush and roller in plastic wrap to keep them from drying out while I was sidetracked. After lunchtime and playtime was over – about 2 hours later – it was time for Mabrey’s afternoon nap. I laid her down and turned on another movie for the boys. {The Incredibles this time} It bought me enough time to finish one coat on the walls. I had to touchup and cleanup with all three kids whining for dinner which was pretty stressful but I was in the home stretch and just wanted to get it done. We ate dinner at 7:30 p.m. Typically, I don’t let my kids watch 4+ hours of TV in one week – let alone one day – so when I do resort to it on special DIY occasions, I try to sequester the mommy guilt. I don’t always succeed. And that’s how painting with three kids and no babysitter goes at my house.
This primer + paint in one means business. Usually you’re looking at 2+ coats when you paint a color this dark over a really light color. I only needed one full coat and a little touching up. That saved me precious time and kept my kids from starving – hehe. I’ve used all different brands of paint and this stuff claims a spot at the top of my list. It has a great consistency {not too thick, not too thin}, outstanding coverage, virtually no odor and is less expensive than other big brands that boast similar properties. Awesome.
But enough talk of kids, mommy guilt and good paint. Let’s get back to the room.
Some of you worried that I had dismantled the gallery wall.
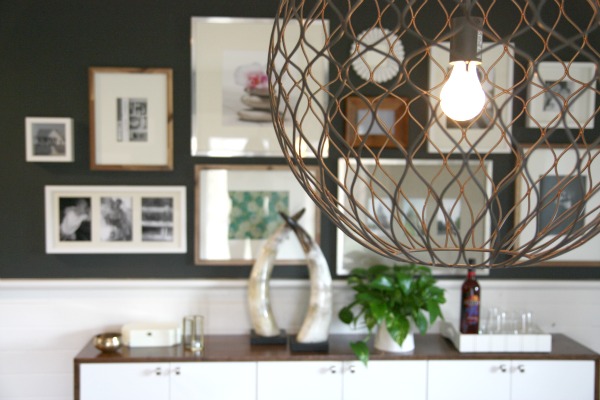
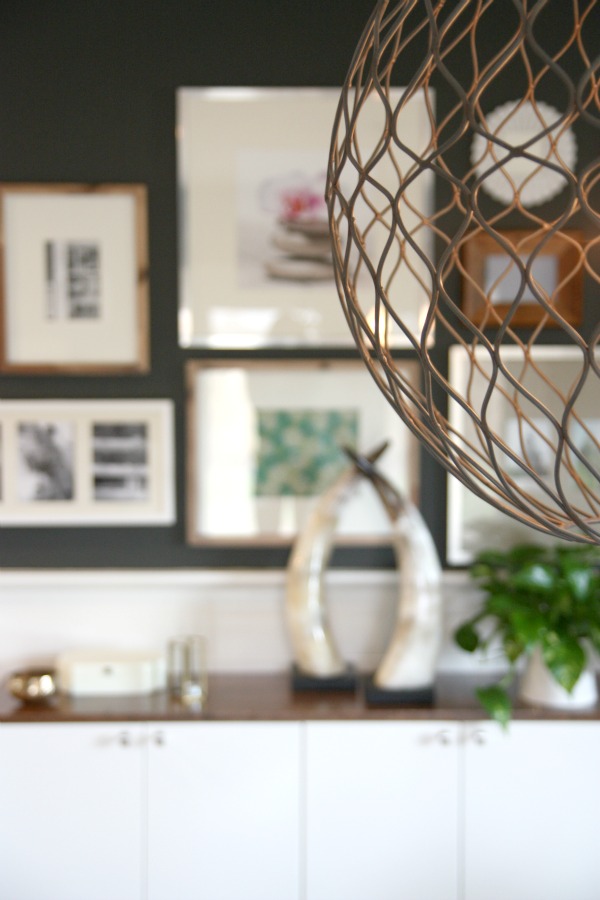
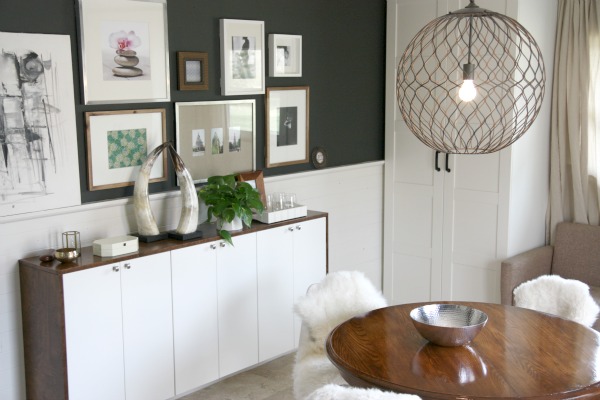
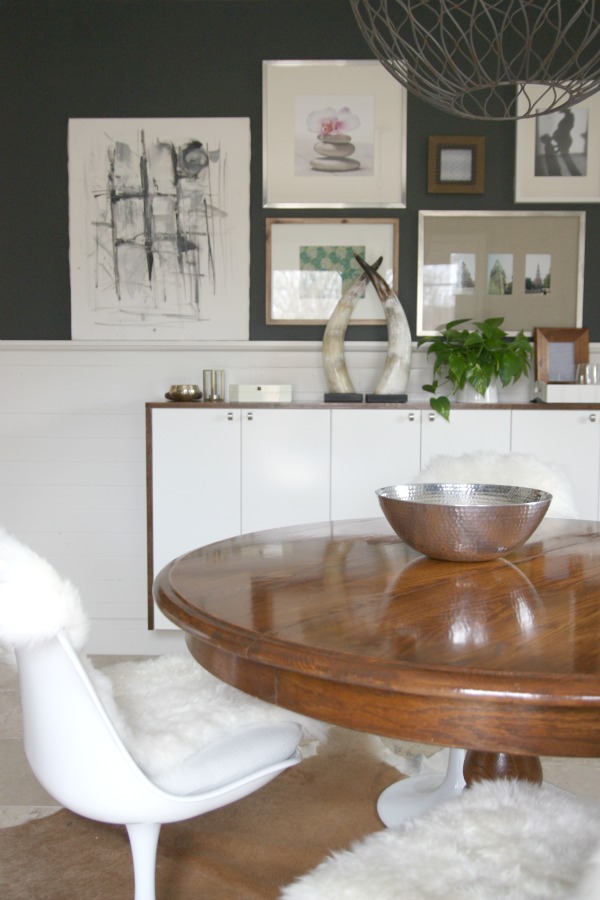
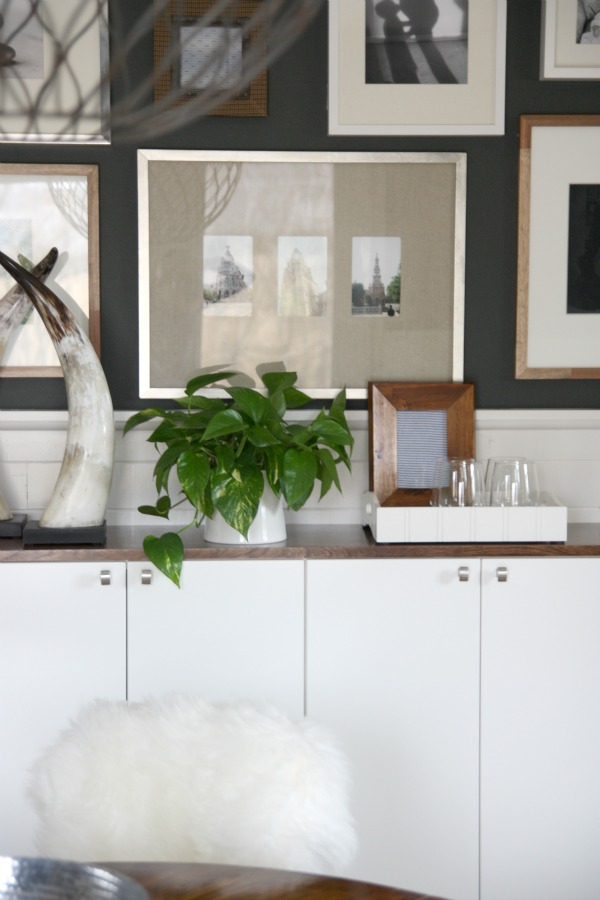
I assure you. It’s still kicking. I was smart lazy and painted around the 3M adhesive strips that are stuck to the wall. With the frames in place, you can’t even tell.
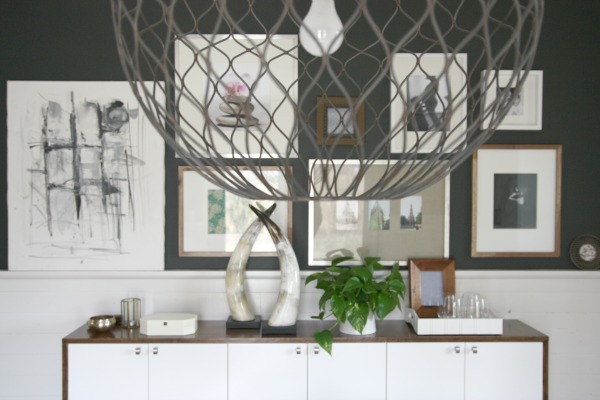
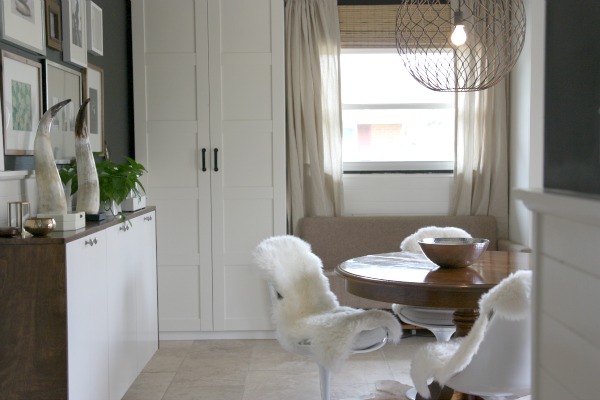
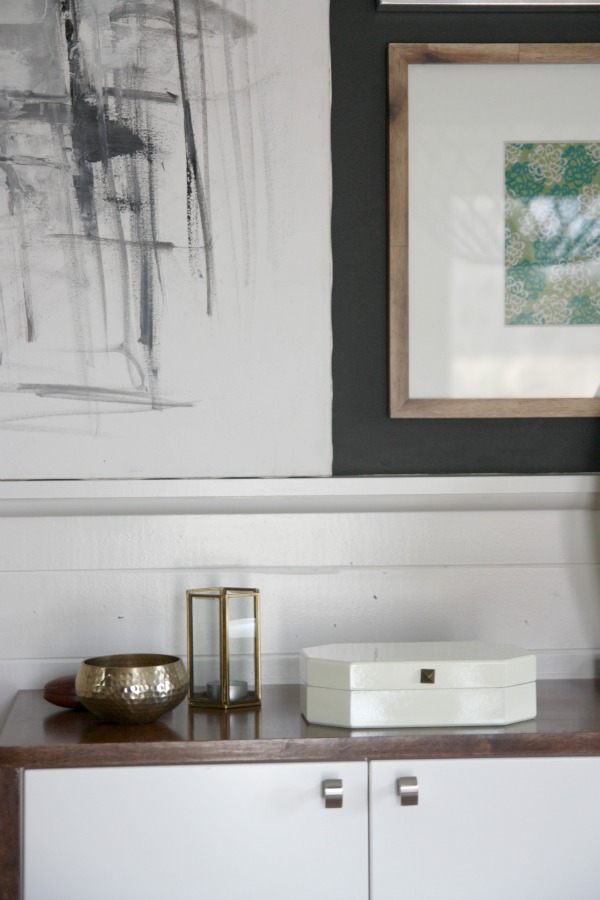
I did take down the abstract art {see it leaning on the chair rail?} and remove the two smaller frames that were above it. That section was feeling a little top heavy. The abstract art is staying and I’ll be adding some new frames to the wall.
When the walls were lighter in color, I wasn’t feeling some of the prints and fabric scraps that I added to the frames last minute for The Tile Shop shoot. But with this new deep charcoal, almost black, I actually don’t mind them.
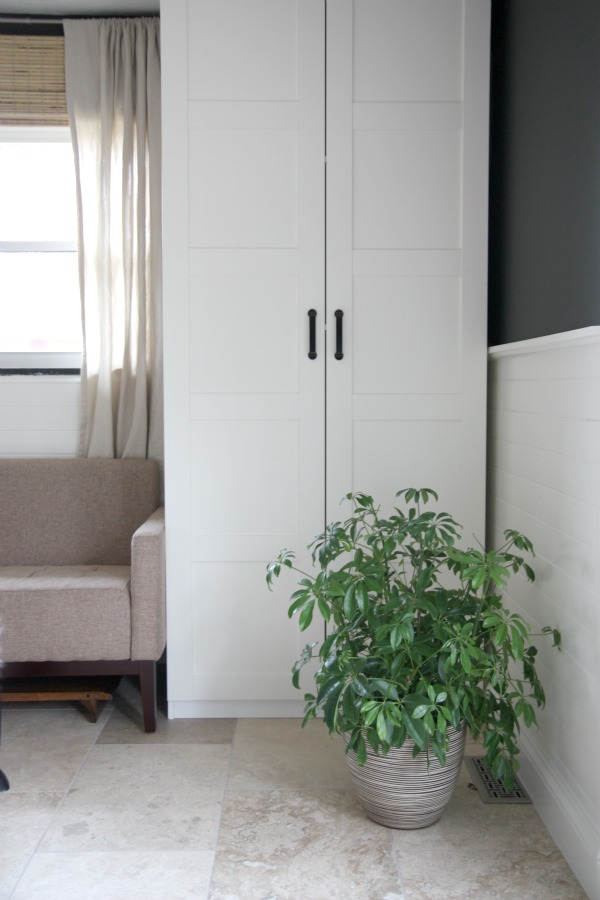
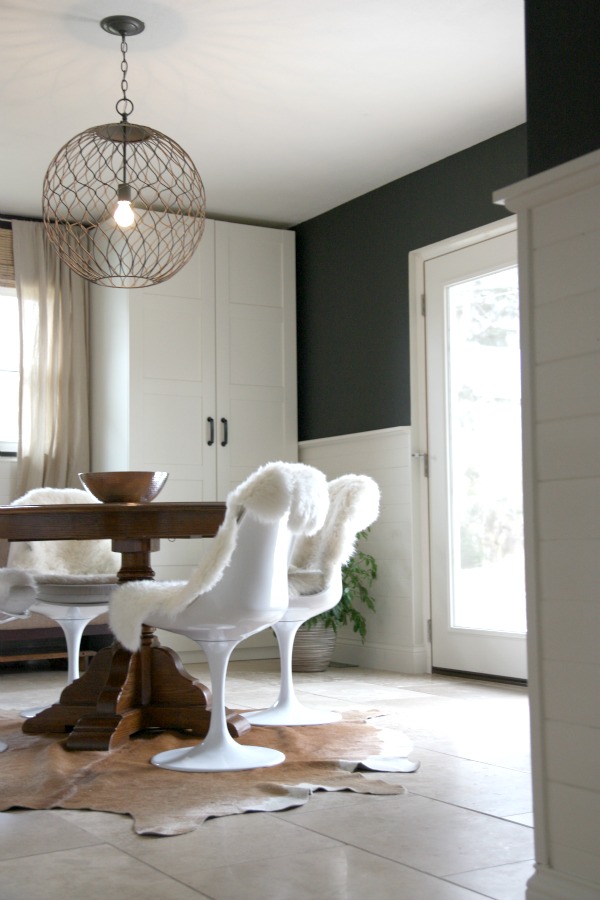
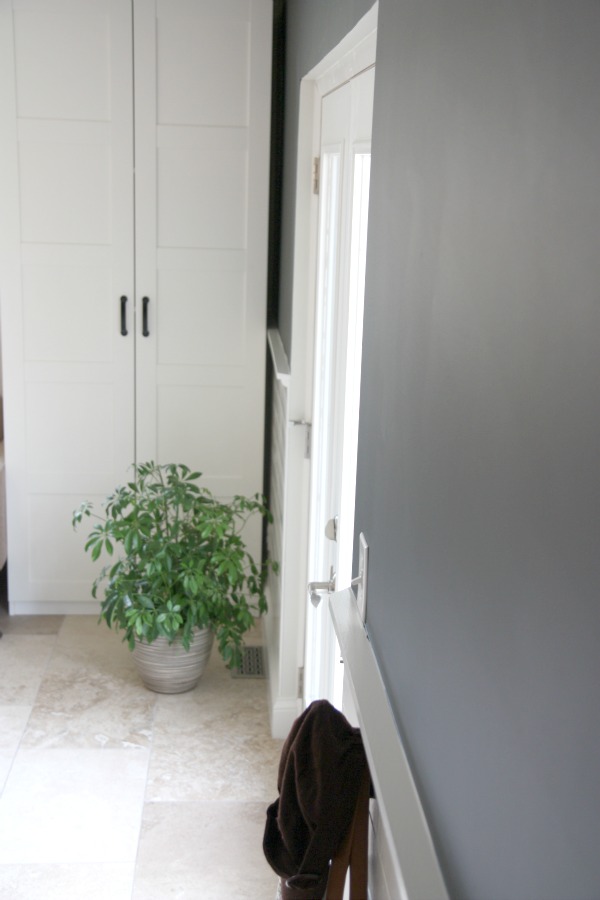
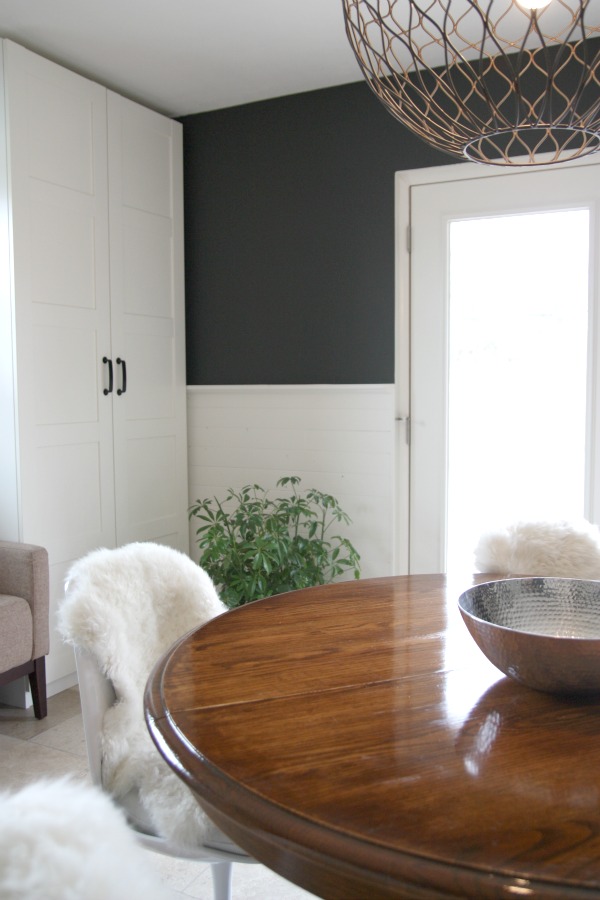
I also cheated around the wardrobes and window. The wardrobes are secured to the wall with anti-toppling hardware. I had no time/patience/muscles to remove them. I painted around them with a 1.5″ angled trim brush and small foam roller. You’d never know unless I told you. Wait a minute.
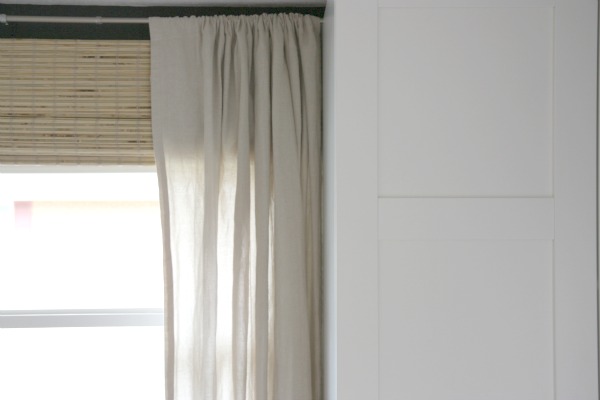
I did remove the curtains to cut in around the window but I didn’t take down the woven blinds. Unless you came to my house and took the blinds down yourself, you would never know there’s a light bald spot behind them. Along with scheduled naps and screen time, I also cut corners whilst painting a room with three kids in the house. I never said I was perfect.
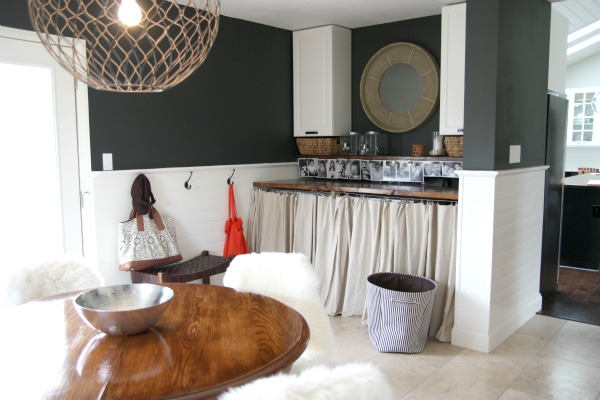
I can’t talk about the Everything Room without mentioning the laundry nook. Before I painted this time around, the nook wall was an accent wall the same color as Mabrey’s room. I liked the dark contrast and that’s what made me decide to continue a dark color around the entire room. But I thought a grayer, blacker color would work better because the Everything Room is fairly open to our black and white kitchen. {The paint in Mabrey’s room has more of a navy, green undertone.} There’s a short wide hall that connects the two spaces.

I owe you a big post all about the nook. It’s coming. I promise.

For now, just know that the nook fits into the room better with the rest of the walls painted dark too. It feels more like a part of the room – as it should.
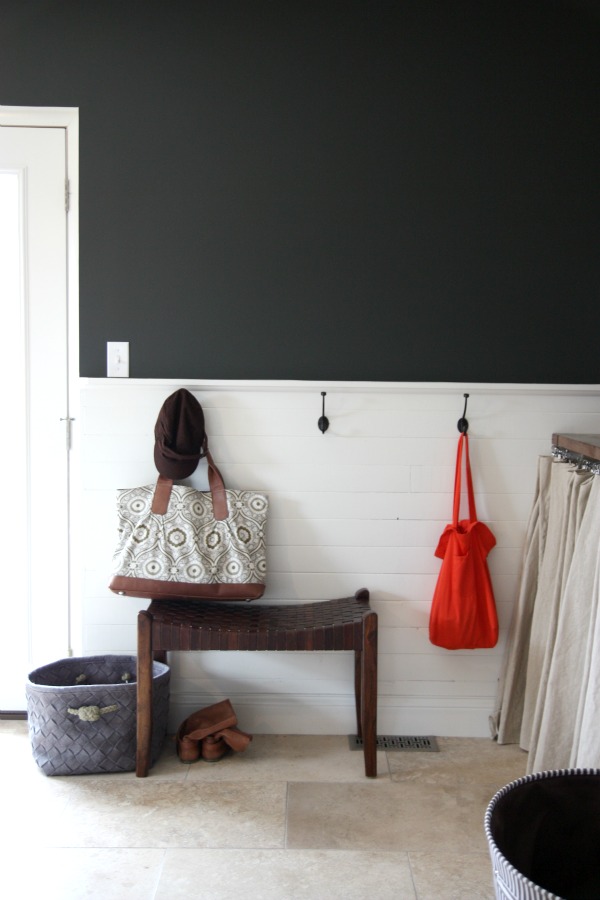
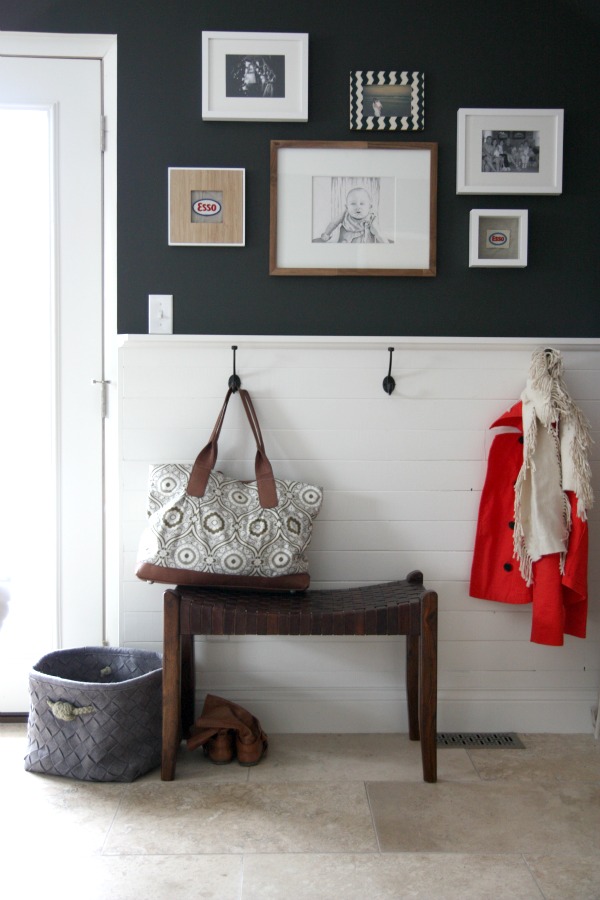
Next to the nook is where the kids hang their outerwear and bags. I added a modest bench for putting on and taking off shoes. Normally, this area is chock full of stuff but at the time these pics were taken, the boys were at school so imagine more pint-sized coats and backpacks. This image does a good job of showing the true color of the new paint.
We painted the french doors Benjamin Moore White Dove {same as the wainscoting and all the trim in our house} back before The Tile Shop shoot. I like how they contrast with the new moody paint but could see a bright poppy red working too. I think I used up all my big girl cajones painting the room dark so I may need to grow another pair before I brave colorful doors.
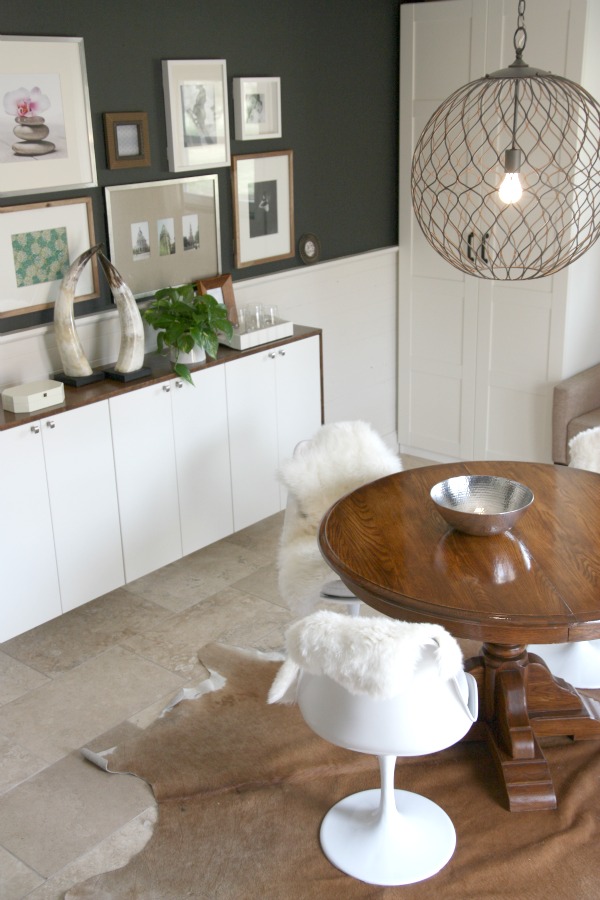
So, yeah, this new color is “the one.” It makes the white horizontal planking on the walls look crisp. It complements the travertine tile. It brings out the black hardware in the room. It plays nice with our adjoining black and white kitchen. It’s masculine and dramatic.
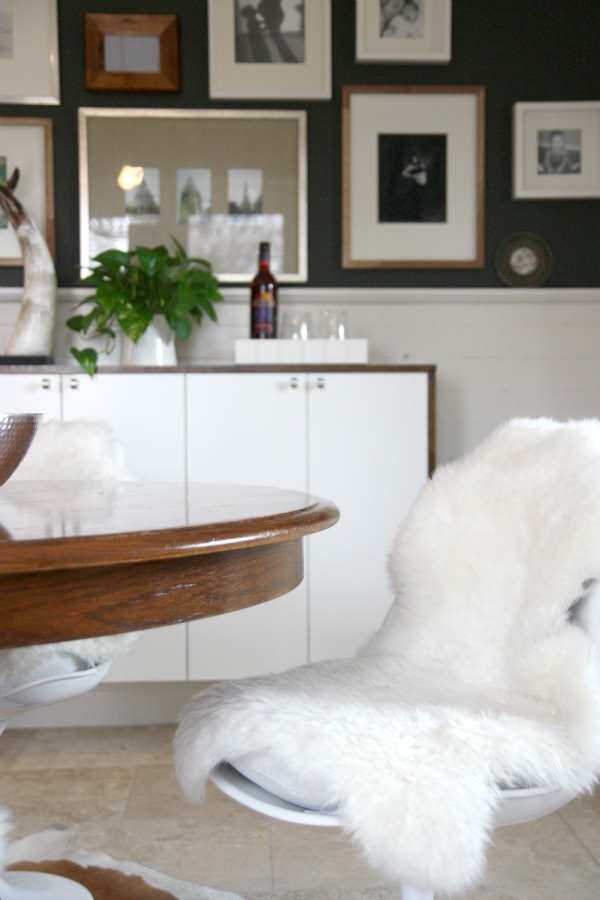
With the right wall color in place, I’m excited to step it up a notch in here. You may have noticed that I brought in a cowhide rug. It’s from IKEA and I bought it almost two years ago. It was hanging out in the boys’ bedroom but it wasn’t working. I think it’s found its new home. I picked up four sheepskin throws to toss on the dining chairs. They’re also from IKEA. We remove them when we eat. They’re working out really well. They hide messes on the removable seat cushions in between washings.
I wouldn’t consider these images “afters” by any means. Things left to do:
*expand and tweak the gallery wall
*possibly add curtains that fall to one side of the french doors
*do something about the space between the two wardrobes. Currently, there’s a petite sofa living there. I DIYed a slipcover for it but it was a disaster. Turns out I can sew pillows, curtains, clothing – NOT slipcovers. For the photo shoot, I pinned and ironed the heck out of it to make it presentable but as soon as the shoot was over, I removed it. That’s how bad it was. Not sure if a built-in bench is my style. I’m kind of leaning towards a free-standing chaise or shelling out to have the little sofa reupholstered. Thoughts?
*work on styling. There’s nothing in that silver bowl on the table for crying out loud! I didn’t style anything for these pictures. This is how the rooms looks right now. I can’t wait to have fun decorating. And this room needs a little pattern wouldn’t you say?
*find a lamp for the fauxdenza
How do you feel about the new wall color? Love it? Hate it? At least tell me you’ve repainted a room three times in less than two years.
images: Dana Miller for House*Tweaking


budget decor, DIY