Things are moving right along in the boys’ bedroom.

Currently, this lil’ corner of their room is a new family favorite. Layne requested the reading chair. I added a vintage ottoman and dresser (off to the side) for added comfort and storage, respectively. With the major furniture pieces in place, I’ve turned my attention to accessories and art. Ever since Apartment Therapy featured this home tour, I’ve been itching to DIY some bullseye art and this corner seemed like the perfect place for it.

With the help of Glidden® paint, I was able to pull it off. Here’s what I did:
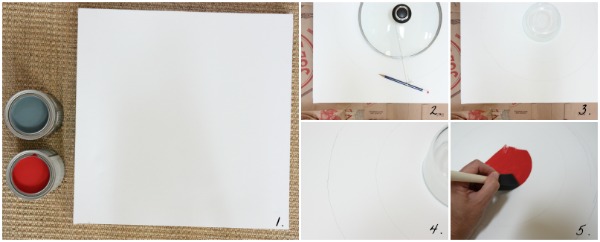
1 – I used a square canvas (found in my attic) and two quarts of Glidden paint in blue-grey and fire engine red. First, I painted the entire canvas a warm white that I already had on had. This step is the secret to achieving nice smooth curves in the final product so don’t skip it! (You can easily touch up stray brushstrokes with the white paint later on.) I let the white paint dry completely.
2 – I found the center of the canvas then used a pencil to trace a large pot lid right in the center. This would later become the inner curve of the outermost bullseye ring. I determined how thick I wanted my outer ring then cut a length of string accordingly and tied one end to my pencil and the other end to the handle of the pot lid. Holding the lid in place, I carefully drew a larger circle around the pot lid. I had my outer bullseye ring.
3 – For the inner bullseye, I traced around a small glass container in the center of the canvas.
4 – My pencil lines were faint which made them easy to edit and also easy to paint over.
5 – Working from the center out, I painted the canvas using foam brushes and a steady hand. I gave the center bullseye and outer ring two coats of paint each. After the paint dried for 30-60 minutes, I went back with the white paint used in step #1 to touch up any brushstrokes that inevitably made their way out of the lines.

I decided to frame the canvas with inexpensive wood trim. I left the wood unfinished for a casual look. I think the thin frame is the perfect touch!
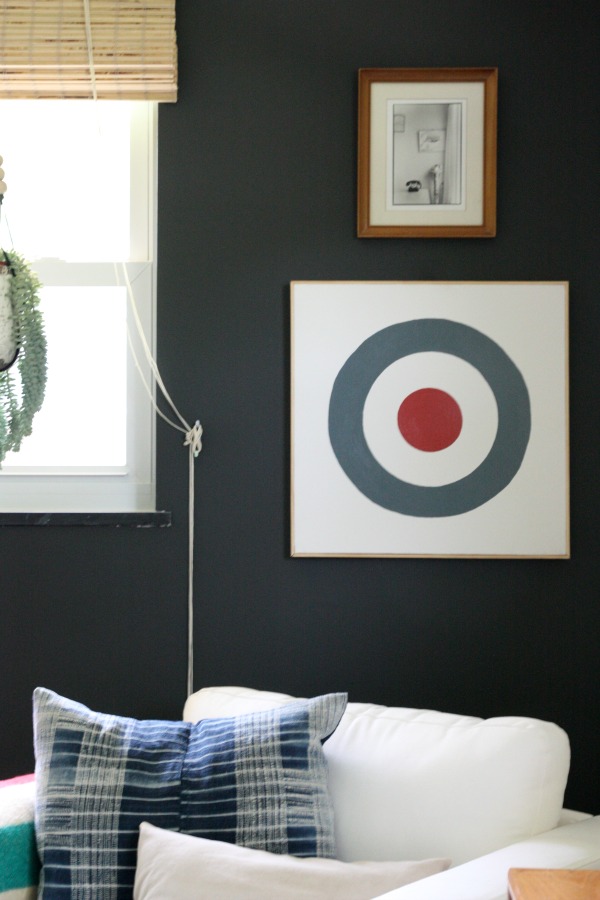
Glidden paint made it easy to finally turn my inspiration into reality. The boys LOVE the bullseye art! They keep telling me how cool it is. I think the bullseye is a great symbol to use in a boy’s room without feeling too theme-y. What do you think?

FYI – Disclosure: This post was sponsored by Glidden paint through their partnership with POPSUGAR Select. While I was compensated to write about Glidden paint, all opinions are my own. Thank you for supporting the brands that support this blog!
images: Dana Miller for House*Tweaking
It’s been over two months since Mr. Fig came into my life. From the get-go I made a promise to myself to share whatever became of him – good or bad. I’ve read a bunch of stories of homeowners bringing home fiddle leaf figs but can’t find as much in the way of follow-ups. What’s going well? What went wrong? Rather than reading a list of care tips from a gardening website, I think it’s more helpful to see how real people care (properly or improperly) for their fiddle leaf figs.

So when new growth appeared at the top of my fig several weeks ago, I thought it might help to share how I’ve been caring for it. I am no expert. It used to be that everything green I touched turned brown but lately I’ve been able to keep all of my houseplants alive. What’s going on?! Many of things I’m doing aren’t secrets. In fact, many of the tips I’m utilizing were kindly offered up in the comments section of this post. Thank you!! (Mr. Fig thanks you as well.)
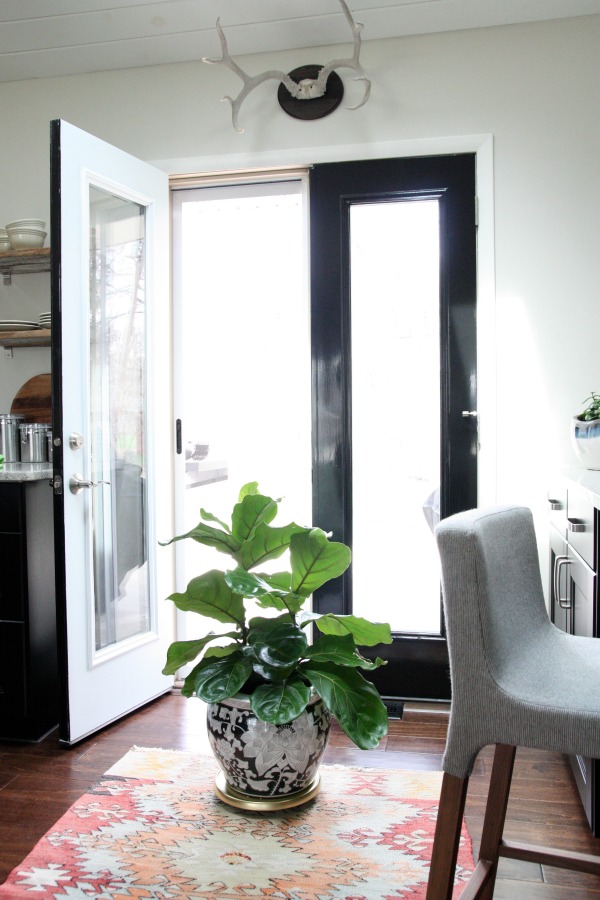
First up is location. Fiddle leaf figs love bright indirect light. My tree sits just inside a set of french doors and below two skylights on the north side of my house. This area is always bright but the sun’s rays never hit the plant directly.
The planter sits on a stand with casters so I can roll it out of the way to open the doors. The doors lead to a grilling patio which has seen absolutely zero action over the last six months. Now that the weather is getting warmer, we’ll probably be scooting the tree out of the way more often. I’ve thought about relocating it to the living room but it seems to really like this spot and I’m nervous about switching things up. More than likely, I’ll roll the tree outside when the weather is nice. While the tree is small, this setup will work but when / if this guy grows much, much larger I may have to rethink the location. I don’t rotate the tree regularly but it probably wouldn’t be a bad idea.
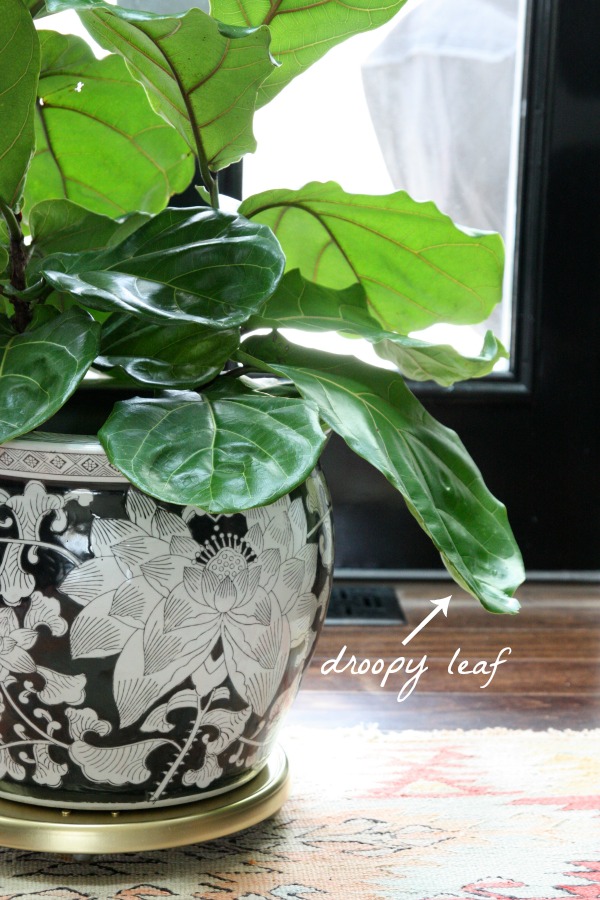
The other big thing about fiddle leaf figs is watering without over- or under-watering. When I first brought the tree home, I was giving it a splash of water every 3-5 days but then someone mentioned that I should be flooding it then letting it dry out in between waterings. So that’s what I’m doing now. I pay attention to how the leaves are oriented and when things start looking droopy I wait another day or so to water. I also implement the lift test. When the leaves are droopy I lift the plastic planter out of the ceramic one. If the tree feels relatively light, then it’s time to water. That equates to watering every 7-14 days. From what I’ve heard, it’s better to under-water than over-water so when in doubt I err on the side of waiting it out a little longer in between waterings.
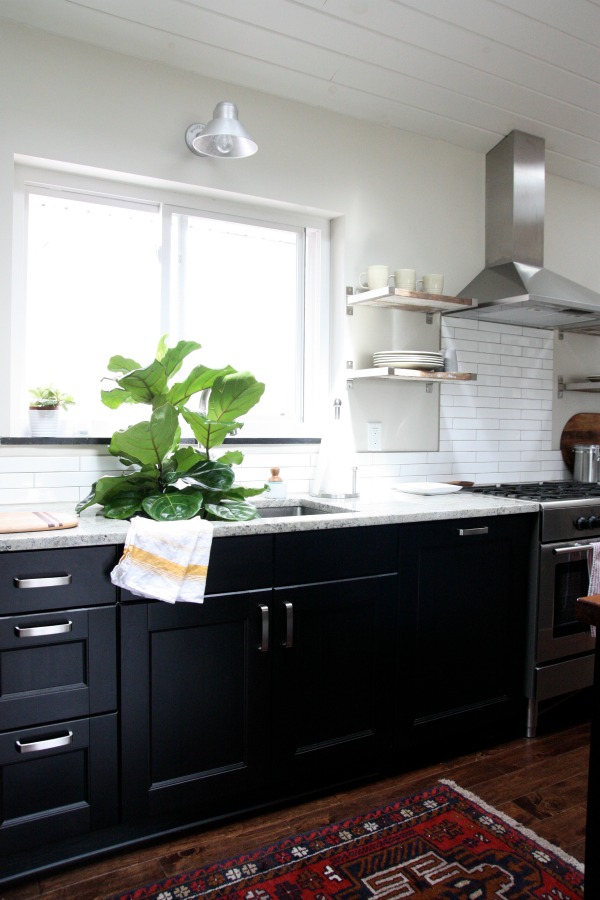
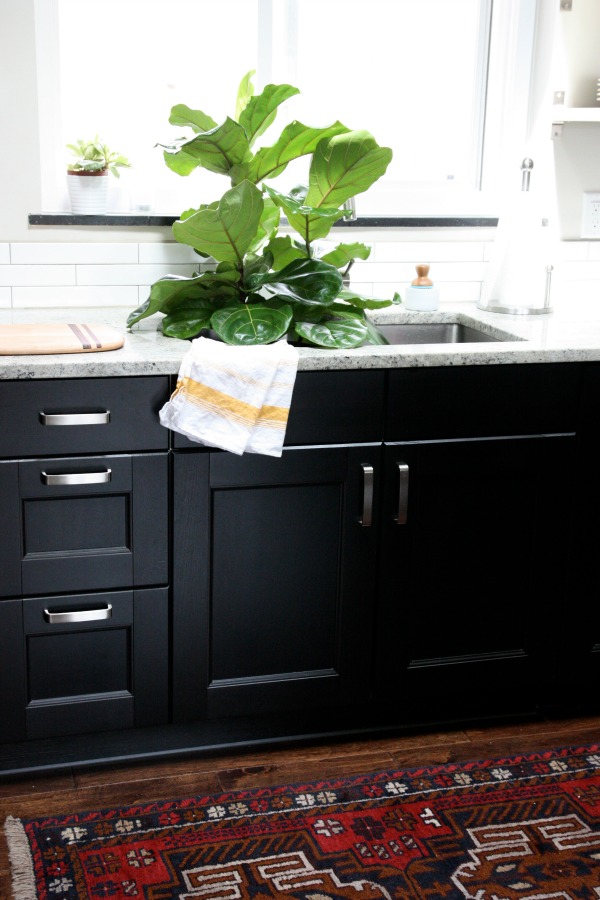
To water, I carry the tree over to the kitchen sink and set it inside. (Reason #99 why I love a single basin sink.) If the dirt seems extra dry, hard or compacted, I use a pencil and stab it into the dirt over and over to break things up and allow the water to reach the roots. I use the pull-down faucet to flood the planter with lukewarm water. I add water until I see it running through the bottom of the planter.
Then I let the tree sit in the sink while the water drains until it’s no longer dripping. I think it was a reader who told me not to immediately place the tree back in the ceramic (non-draining) planter. Apparently, letting the tree sit in a pool of water can cause root rot.
I fully realize that if the tree continues to grow (grow, grow little tree!) this method of watering isn’t going to work forever. I guess that’s when I start rolling the tree to the bathroom and giving it a shower? Forget finishing the second bathroom for the kids. It’s going to be the fiddle leaf fig bathroom. Hee-hee.

About once a month I wipe the leaves with a soft, damp cloth to remove dust and images of photosynthesis diagrams flash in my brain. Oh Calvin cycle, how I love thee.
I recently spray painted the rolling stand gold. (Yay for spray painting weather!) Not sure how this impacts the health of the tree but I’ve heard plants like to be courted. Singing to them, talking to them, displaying them on gold thrones…it can’t hurt.
And that’s how I’m not killing my beloved Mr. Fig. He isn’t the lowest maintenance guy but I don’t mind. I’m so happy he seems to like it here! I plan on fertilizing him this summer. And eventually I’m going to have to repot. I’ll keep you posted. Literally.
Do you have a fiddle leaf fig? How’s it going? Do you want a fiddle leaf fig? I would have bet money on the demise of any fig tree in my house knowing my reputation with houseplants. But trying out a small, inexpensive one has been successful! I hope I can keep it up.
I’ll be back later today with a regular Made Me Smile post. TGIF!
images: Dana Miller for House*Tweaking


budget decor, DIY, inspiration, interior design, kid-friendly