...because home doesn't happen overnight.

Hallelujah. I made something.

It’s amazing what happens when I prioritize instead of fussing about how many blog posts I should get up in X number of days. You guys are awesome. Thanks for all of the comments, support, compliments and criticism on Monday’s post. I hope I didn’t sound too whiny. I really am thankful to be staying home with my kids.

So now onto something fun – a mobile I made for Mabrey’s room.

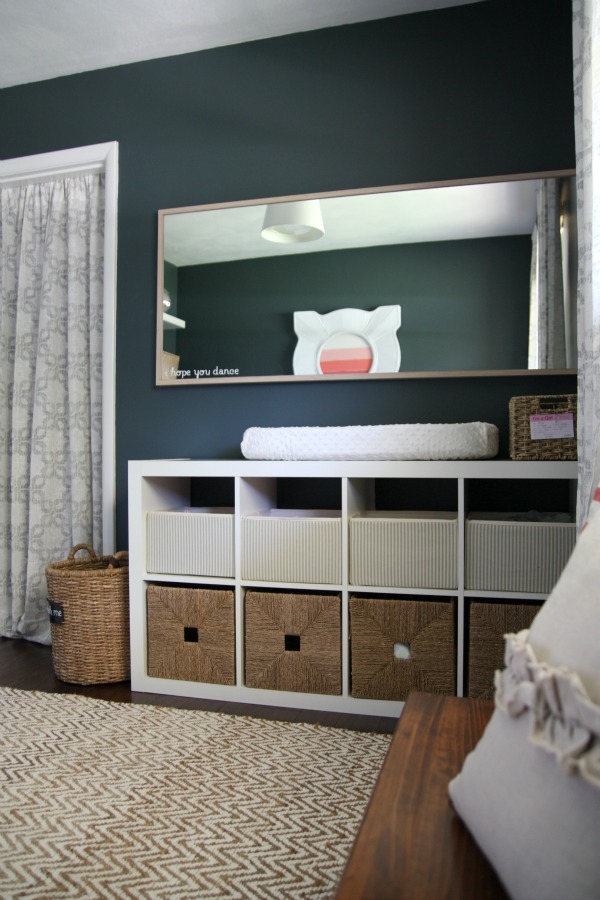
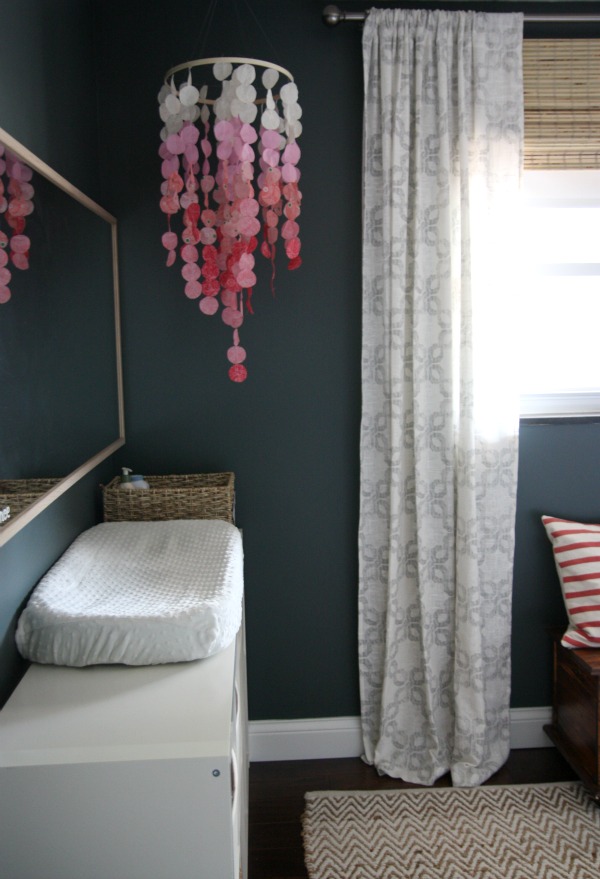
After I ‘finished’ Mabrey’s room, I thought it was missing a little something. The changing table side of the room needed a pop of color and I thought mimicking the ombre wall art would be a nice touch. I envisioned a colorful ombre fabric chandy.

I bought four fabric quarters from JoAnn’s for $2 each and an embroidery hoop from Michael’s for 25 cents. Actually it was only half of an embroidery hoop. The part with the tightening screws was missing but I didn’t need it, so I kindly asked the manager if there was anyway she could come down on the price. She asked if 25 cents would work and I almost hugged her. Seriously? What can you buy for 25 cents nowadays?

In all, I had less than $10 wrapped up in this chandelish mobile.

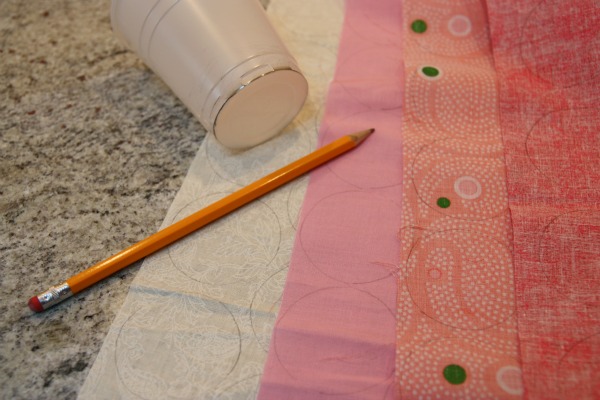
I chose off white, pink, coral and raspberry fabric quarters. All but the pink had subtle patterns. I used the bottom of a plastic cup to trace circles onto the reverse side of my fabric with a pencil.

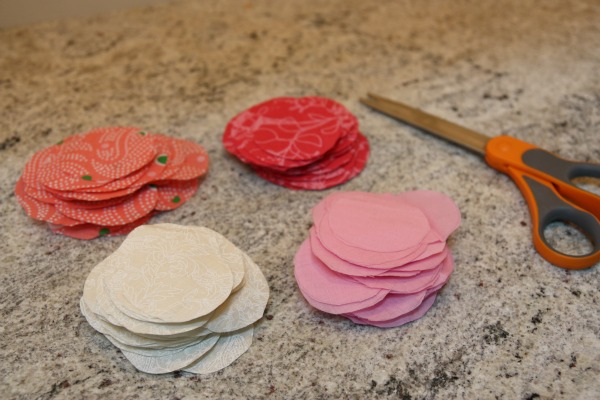
Then I cut out the circles with fabric scissors. I don’t know how many there were but it took me a while. It was quite therapeutic. You could probably DIY an easier version with paper circles but I wanted something soft and fluttery.

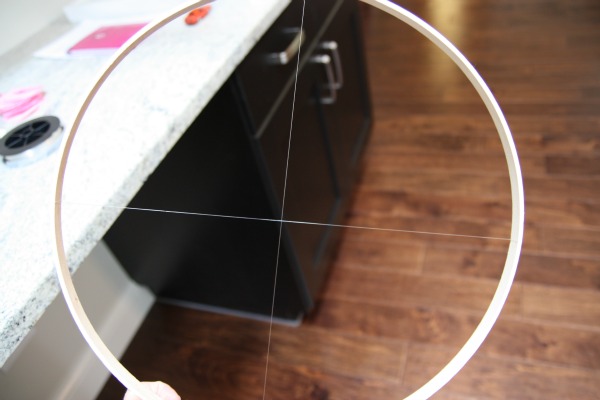
I tied two pieces of fishing line perpendicular to each other across the embroidery hoop so I would have something in the middle of the hoop to tie my center circle strands onto.

Then I used my sewing machine and white thread to sew the circles into various length ombre strands. FYI – This would be a great project for someone just learning to sew on a machine.

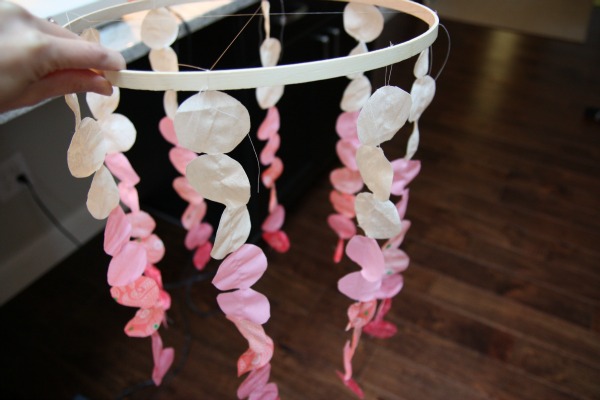
I started on the outside of my mobile, sewing and hanging the shortest strands first. I wanted the center of my chandy to be the longest. To hang the strands, I tied the long lead thread at the top of the strand {near the white} around the hoop. Easy.

I would make a few strands, tie them onto the hoop then hold it up to see how things were looking. It was very spontaneous.

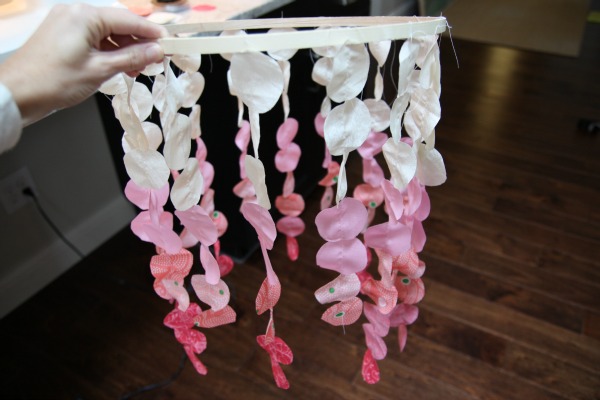
Once I liked how the outer layer was looking, I began adding longer strands to the center of the hoop via the aforementioned fishing lines.

This is where it started to fill in nicely and I could see it taking shape.

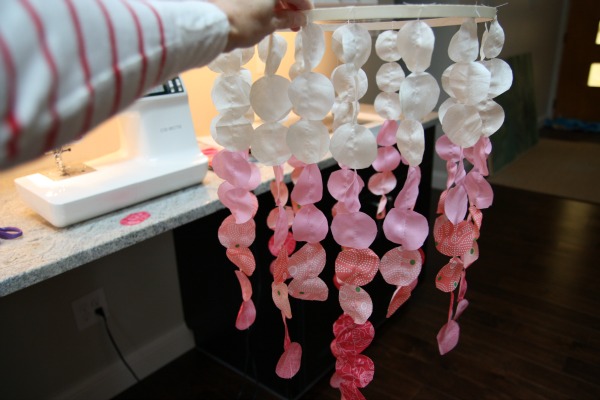
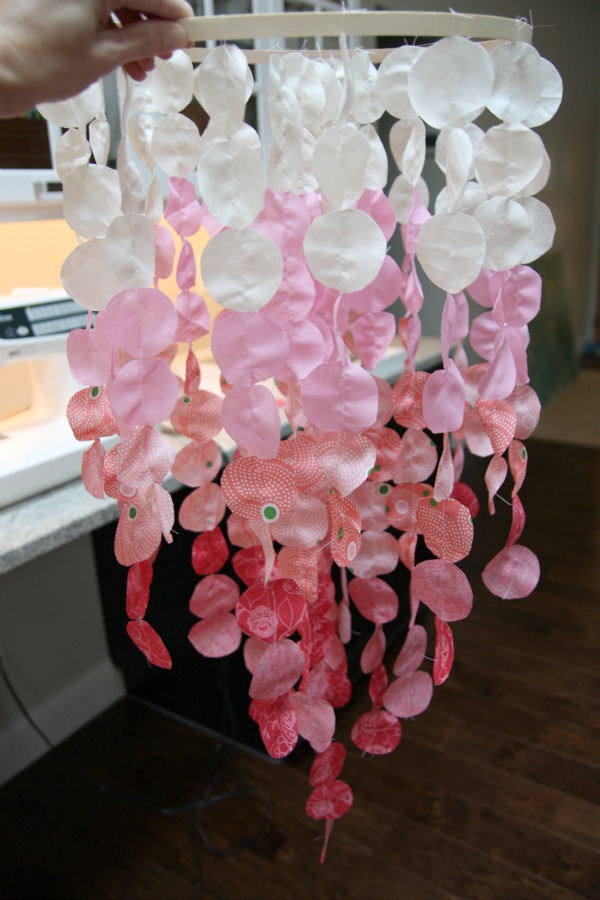
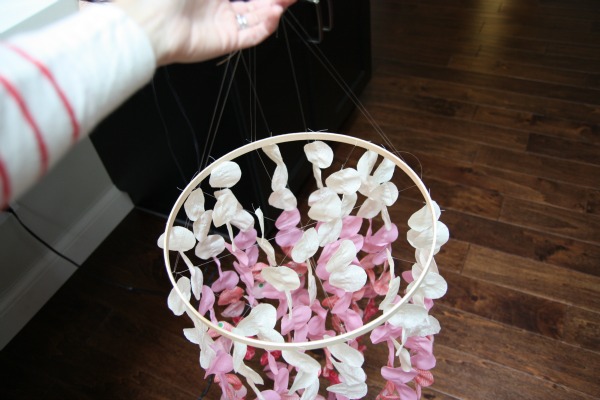
I kept going until it was nice and full. {Notice the center strand is the longest.} Then I tied more fishing line onto the finished hoop to hang it.

This is what it looked like from above. I trimmed up the stray threads and fishing line to clean it up a bit.

I had a few fabric circles leftover and saved them for another little project. TBA.

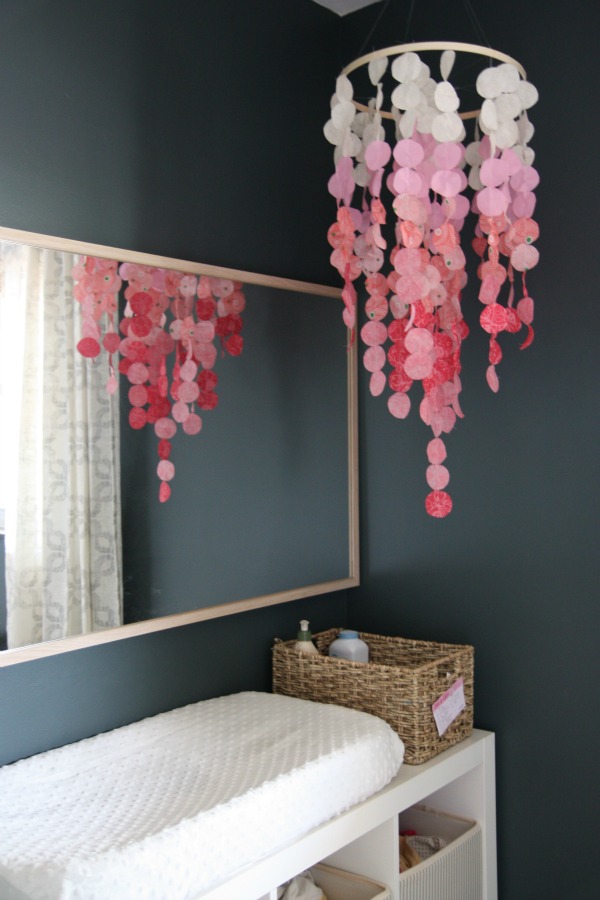
Mabrey was napping when I finished. I hung the mobile on the wall sconce above the sink to make sure I liked it. I LOVED it.

When Mabrey woke up, I hung the mobile from the ceiling in her room with a piece of double-sided 3M adhesive tape. That stuff is sticky! It’s white and blends right into the ceiling.

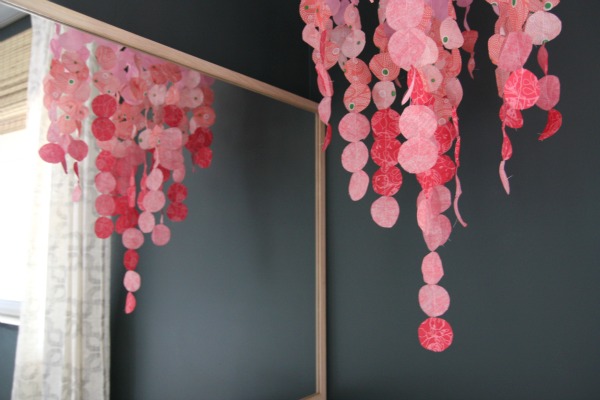
It’s the perfect pop of fun color for the dark corner. I love how the reverse sides of all the different fabrics give the chandy an added dynamic. Instead of four defined tiers of color, there’s a more random and soft ombre effect. I left the hoop natural and like the way it picks up on the mirror’s oak frame and woven basket. You could easily paint it or wrap it in ribbon for a more polished look.

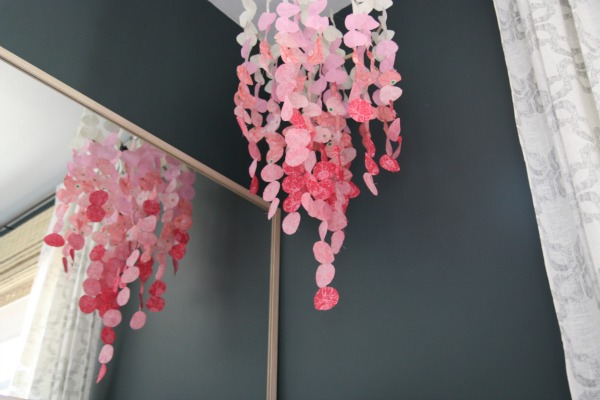
Mabrey noticed it right away during her next diaper change. I imagine this is what it looks like to her from below.

It reminds me of confetti. But bigger. And less messy.

It feels good to be DIYing again. Hopefully, there’s more where that came from.

images: Dana Miller for House*Tweaking

67 Comments

03.October.2012

LOVE THIS! I will need to do this in my house! I love the pop of color against the dark walls!

03.October.2012

I LOVE this!!! Just perfect!

And I loved your last blog post. I could relate too well. Thanks so much for sharing! :)

This is very sweet, and seems so easy. Thanks for sharing it with us! Might have to make one for myself… even though I have no kids!

03.October.2012

BEAUTIFUL!! They look like shells. I can’t believe you made this out of fabric. Thanks for sharing. I love your blog :)

-Sarah Burnes Heiner

03.October.2012

Very cute and perfect for the little corner above the changing pad ! Lucky Mabrey :) Take care.

03.October.2012

It’s beautiful! The perfect addition to this beautiful girl’s room.
Jule from inside 9B

Oh my goodness – I love this! It looks like a gorgeous, cotton candy jellyfish. Well done! And good for you taking the time to step back and work on things you love instead of obsessing about getting blog posts up. I could take a page from your book. xoxo

That is adorable and I love it in the nursery!

03.October.2012

I love how the colors pop off the grey walls. I miss my grey walls from my old house. I am going with the light, bright, white walls in the new house.

03.October.2012

◄-l-o-v-e-►

03.October.2012

so cute!! great job! i will be going home after work to search from some fabric scraps to make this for my daughters room!

03.October.2012

Very nice, Dana! I’ve seen something similar made out of paper, but I love how the fabric crinkles and gives it extra texture.

03.October.2012

You nailed it! It’s exactly what that corner needed. Looks great.

It looks stunning in Mabrey’s room! It’s the perfect color. I especially love the texture of it. I’m sure it’s something that her little eyes are drawn to.

03.October.2012

It’s pretty. Very soft and fluttery.

03.October.2012

Love this! I wish I was this talented!

03.October.2012

This is a great project, and I love that it’s made with fabric instead of paper. I will definitely be doing this someday when we decide to have another child.

03.October.2012

That looks great! I just finished something similar for my daughter’s nursery, but used paint chips, ribbon, and a wire photo mobile instead of fabric and embroidery hoop. Cutting out the circles was tedious, but so worth the effort!

03.October.2012

That is the sweetest thing!

03.October.2012

That. Is. Gorgeous.

03.October.2012

any suggestions to get the circles to stick if I don’t sew??
also, can you further explain how you hung it to the cieling? did you attach a hook at the top? I was confused by the sticky tape.

Thanks!!!

03.October.2012

LOVE THIS so much!! As another SAHM, I look forward to reading your blog. I will miss the more frequent posts, but FULLY understand why you are cutting back. And look what your first project is when you did! AMAZING! I will be pinning this for sure!

03.October.2012

Lovely, Dana ! I so know the hallelujah feeling and I have only one 3-month old baby and no blog to maintain (although loads to read !) and making anything is HARD. But today I’ve managed to send and wax a tray ! Wooo !
Anyway, I’m impressed by all you do and I love your blog.

03.October.2012

Nope, no hook. I had a random piece of 3M double-sided tape laying around. I revealed one sticky side of the tape and placed the fishing line on it at the height I wanted to hang it from the ceiling. Then I stuck it – tape + fishing line – to the ceiling. The ceiling is slightly textured and that stuff still sticks like magic!! It is super strong. The other side of the tape is still covered with the non-sticky paper, unused.

03.October.2012

Pretty! Now where do I get a baby to make something like this for them?

sooo pretty….I swoon :)

03.October.2012

Wow, I love it!!!!!! You are so crafty and talented!

03.October.2012

Love this! So glad you are taking time to do projects that make you happiest, and (surprise, surprise) I feel it is one of my favorite posts :) Cant wait to make one for my little man’s nursery!!

03.October.2012

LOVE THIS! I don’t have a child so I’m wondering if I can come up with a reason to make one for my house!

03.October.2012

Love your blog! Where did you get the drapes and rug?

love it! =) i’m trying to diy a bunch of things for christmas this year and this just might make my list! =)

03.October.2012

I’m totally in awe of all the work you and your husband have done rebuilding the entire inside of your house. The fact that you have several rooms finished/nearly finished in terms of decorating is amazing. Add in 3 kids (one of which is a baby) and you were definitely operating in superhero mode most of the time. I think even superheroes need vacations. Take a break. Enjoy your kids. If you want to write on the blog then don’t stress about whether you have a project to share or not. . just talk about your life, or how often you grocery shop, or how many clothes your kids have. Not everything has to be an amazing DIY or before/after. People honestly enjoy reading mundane things about a person’s life and it helps your readers connect to you more (YHL does this all the time in case you haven’t noticed). :)

03.October.2012

This is beautiful!
Thank you for sharing it, and for taking the time to make it!
Don’t worry about having to get enough blogs up to “please others”, your family always comes first and we, as your readers, completely understand that! <3

I LOVE this idea. So cute and fun. Maybe one of these days I’ll get around to buying myself a sewing machine and can work on projects like this. Mabrey’s room is looking so cute. Can’t wait to see what you do with the boys room (well, and the rest of the house).

And to comment about your Monday post. I will come back and read whether you post once a day, week, month or year. Love your blog!! :)

03.October.2012

SUPER cute! Even though I just had a baby (#3) and we already have a great mobile above her crib (origami butterflies that my brother-in-law made) I am dying to make one of these either for my own nursery, or for someone else. Seems fairly simple and inexpensive – which is all I have time and money for right now anyway =). Thanks for sharing!

03.October.2012

Love it! I’d love to make one for my 3 month old boy. Did the circles tend to fray at all?

03.October.2012

Love it! And great shout out on Apartment Therapy! You are on a roll!

03.October.2012

I didn’t finish the edges of the circles. I like the imperfect look. I guess if you were to hang it in a place that caught drafts from ventilation or if you let the baby pull on it, it would fray. I haven’t had any problems with it though.

03.October.2012

Well, when a man and a woman love each other very much…

03.October.2012

Catch the source list for Mabrey’s nursery at the end of this post. https://www.housetweaking.com/2012/08/28/mabreys-room/

03.October.2012

That is simply adorable! Great job finding time for yourself to make something that both you and your littlest one enjoy. Now, if I just had a darling baby girl….

03.October.2012

KEEP IT UP Dana! I love it when you share your creative side. I am still longing for a the master bedroom plan!!

03.October.2012

That is gorgeous, Dana! It looks amazing in Mabrey’s room.

03.October.2012

Love it!!! thanks for the tutorial!

03.October.2012

Looks great! This is totally off subject, but did you here that John and Sherry’s first book signing is in Cincinnati?! Maybe I will see you there.:)

03.October.2012

Ooh, I like it! I could totally see myself making this.

03.October.2012

Thank you so much for addressing this question. hahahahaha (P.S. Love the chandy! May have to try that one for my girls’ room.)

03.October.2012

I’ll be there!

03.October.2012

Hi Dana,
I am currently remodeling our own “under dog” and I come very often to your blog for inspiration, so I wanted to ask you about the size of the french doors in your kitchen because I love the look and i think the widht of your doors is what I need in my kitchen.
Thank you,

Ps. I love Mabrey’s new mobile.

04.October.2012

How awesome is this!! Love it!

04.October.2012

Love it!!!! Trying to think where I can put one. I already have paper lanterns over the crib but I’m tempted to switch them out,lol. Or maybe for someone else’s nursery someday. Great job!!! Would love to see more of these types of projects (when you have time ;D)

04.October.2012

I love this! So pretty. Honestly I’ve been wanting to get a similar type chandy for me and my hubbys room. Do you think if it encompassed the “boob light” thats above our bed and if it were in a different color besides pink that it would be adult enough? Regardless, I will find a place to put one! :)

04.October.2012

Beautiful! Love it!

04.October.2012

Beautiful!!! I especially love it against the dark walls — it looks so bright and happy!

04.October.2012

The french doors in the kitchen live where an original window once was. We didn’t want to do any more demo than necessary, so decided to keep the 4′ wide opening the same for the doors. The doors had to be custom made due to their narrower size.

When we first bought the Underdog, replacing the window with a set of doors was on the ‘do it down the road’ list. But once we had the kitchen demo’d we realized it would be a whole lot easier to just add the doors now. We’re so glad we did! Once we have a patio outside the doors, I see us using them quite frequently.

05.October.2012

It’s beautiful. I’m glad you’re getting back into the swing of things!

07.October.2012

I love how that turned out and how great it looks against the dark wall color! I voted for you too. Your room is definitely my favorite :)

07.October.2012

I think even I could do this! I’m off to the fabric store tomorrow…I’m going to make one for my little gal!

08.October.2012

Thanks for taking the time to vote!

08.October.2012

I love it! I may have to make one of these for my daughter!

29.October.2012

This is great! I did something very similar with paper and wire a while back. Your method looks much easier!!

09.April.2013

This is super cute. I am going to make it for my sister’s baby shower. One question…did you pin the circles together before you sewed them together??

09.April.2013

Nope! Just lined ’em up and held them together with Scotch tape as I sewed them.

04.May.2013

Love this! I was planning to make one from paper circles, but the fabric is so much more ethereal. Question, is the changing table set up an Ikea Expedit?

05.May.2013

Yes! That Expedit has lived many lives in our previous and present homes. Such a versatile piece.

20.August.2014

[…] fabric toy bins – Target resin deer head – White Faux Taxidermy fabric garland – DIY wall mirror – Ikea table lamp – Morten table lamp from West Elm extra long, contoured […]

04.November.2015

Any thoughts on how this could work without sewing? Would threading string through the circles be enough, do you think?