A quick backstory: Lowe’s invited me to their headquarters a few months ago. I’ve never really been a fan of blogger conventions / events. I guess that’s the introvert in me. But I was suffering from a major case of cabin fever and Steve was encouraging me to go so I accepted the invite. I got a behind-the-scenes peek at the company’s thought process and was asked to give honest feedback on everything from products to advertising to store layouts. I was nothing but honest. Maybe even a little brutal? Let’s just say I didn’t hold back. But they took it all in stride, asking more questions. They really want to be better – even different – at what they do.
On the last day of my visit, I was paired with another blogger and we were given creative freedom to create a room of our choice using Lowe’s products. We designed a bathroom and it was so much fun! I really appreciated the fact that we were not pressured to create a certain look. Honestly, that bathroom was a space I would want in my own house. Before I left to return home, they told me to contact them if I was ever in need of help with a project. That offer came to mind when I started making plans for the studio so I reached out. I can’t thank Lowe’s enough for the drywall and paint. And they didn’t ask me to say that either. In fact, they didn’t ask me to say anything.
Remember what the studio looked like a month ago? It’s well on its way to becoming a blank canvas.
Steve and I briefly discussed hanging new drywall and painting the room ourselves but, when we looked at our busy calendar, considered the scope of the project (the ceiling is 18′ high!) and couldn’t come up with a good solution for childcare, I decided to hire out. As DIYers, that was a hard pill to swallow. But since I’m renting the space, time is money. It helped that Lowe’s stepped in to cover the cost of materials. For that, I am so grateful.
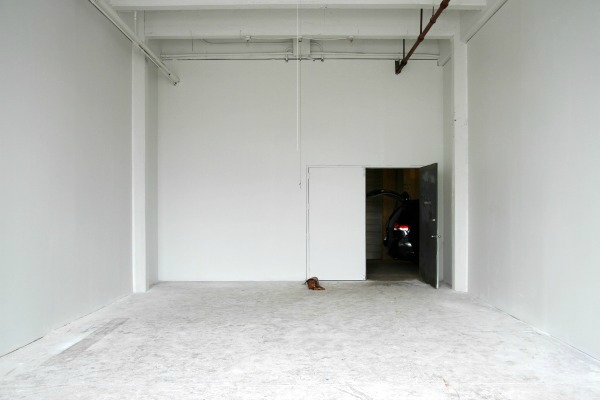
One of the best things about this space is that it doesn’t have to be perfect. We aren’t going to be living here, just making messes and being creative. Instead of ripping out the original drywall, the drywall guys simply hung ½” drywall panels over the existing walls. This kept demo, waste and cost to a minimum. They ran into an issue with the studs…or lack thereof. The “studs” are aluminum and not spaced properly so there was some guesswork involved. The room is located in an old warehouse so it isn’t surprising that there are dubious things going on behind the walls. The walls aren’t going to fall down or anything like that, but it does make hanging things a little tedious. It took a team of three guys one week to hang, tape, mud and sand the walls. (It probably would have taken Steve and me all summer.) It isn’t the most impeccable finish work I’ve seen but it will do.
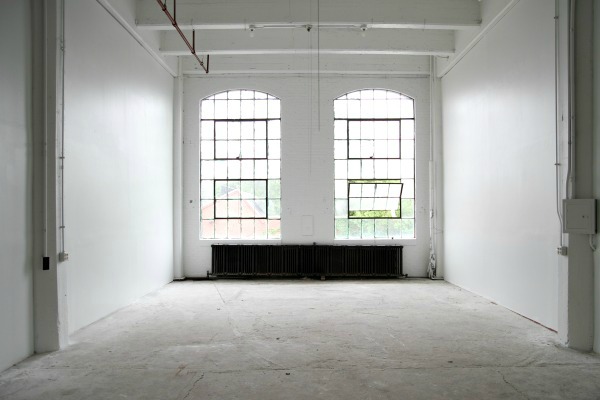
A painter sprayed the walls and ceiling. We went with Kilz latex primer, followed by two coats of HGTV Home by Sherwin-Williams primer + paint in one. The paint color is pure white (SW 7005). Using two different primers might have been overkill but there was quite a bit of staining on the ceiling and brick (window) wall that had to be blocked. Per code, the sprinkler system remains red. The exposed conduit, various pipes and old fuse boxes are now all white and not nearly as noticeable. White paint is magical!
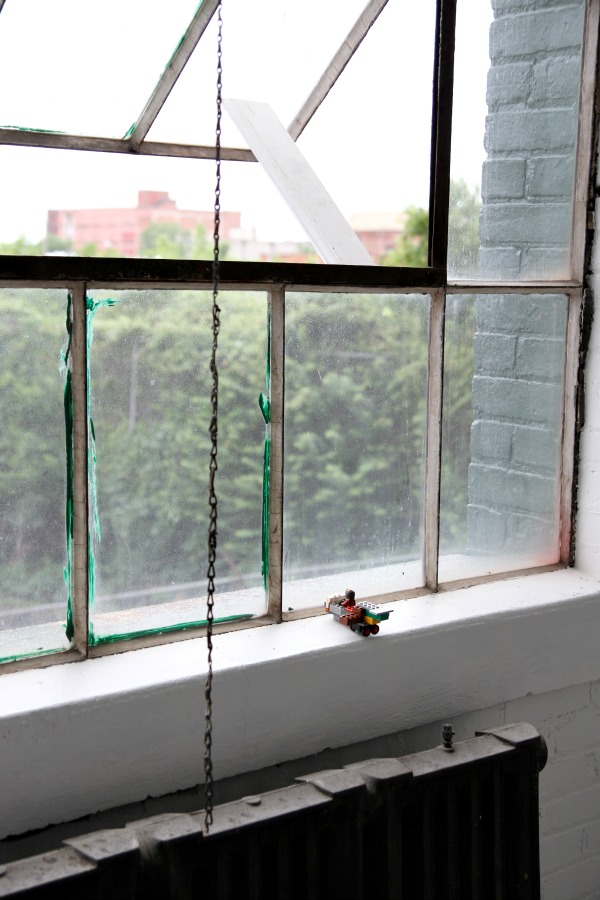
From afar, the metal window frames look black but, in reality, they’re mostly corroded. I will probably end up painting them (black or white?) but I don’t mind them as-is for now. Cleaning the dirty panes is a higher priority, I think. The green paint is on the outside of the windows. All of the windows at the warehouse are green on the exterior.
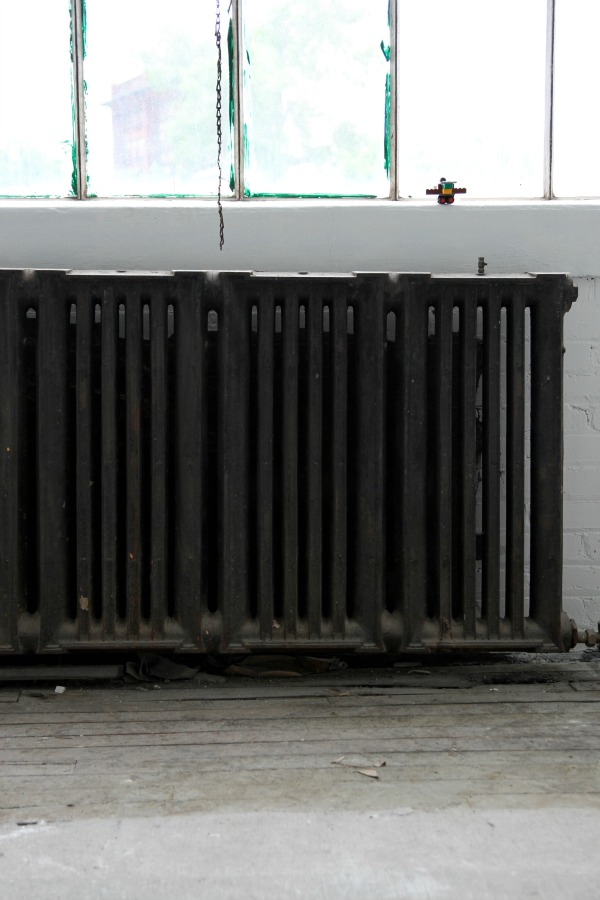
I’m going to paint the radiator white…after I clean it. I don’t think it has ever been cleaned. Ever. It looks like it’s covered in soot but I’m assuming it’s just charred dust and dirt. As much as I love the look of painted white floors in a studio space, they aren’t practical here. The space is accessed via a loading dock so grime is constantly being tracked in. The concrete is in poor condition so I think painting the floors a dirty gray is the way to go. The concrete gives way to wood right in front of the radiator. (Not sure what that’s all about?) Some of the boards need replaced.
I took these photos several days ago and the space is already looking so much better. I’ve spent all of my spare chunks of time at the studio cleaning this week. It’s been difficult finding the time with end-of-school activities taking top priority, but I did manage to log 5 hours of quality time with my shop-vac the other day. Between the original gritty condition of the space and the new layers of drywall dust, it was pretty gross. Today Everett and Mabrey “helped” me scrub down the radiator. We had to change our clothes when we got home.
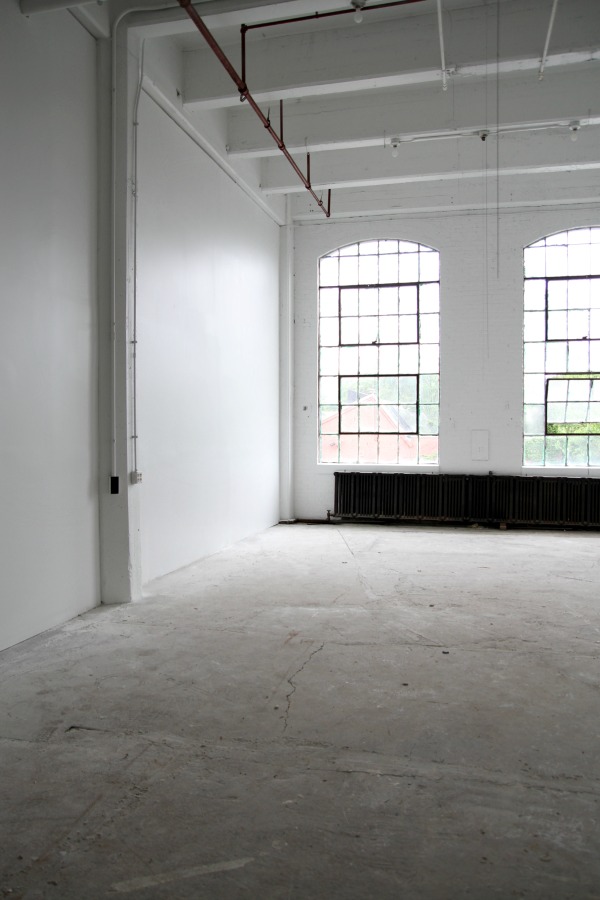
The shell of the room is coming along! I took precise measurements and drew up a floor plan today so I can start space planning. The landlord claims the room is 1,000 square feet but it’s closer to 870. I’m more comfortable with that number. I’m excited to put my spin on the space and try some new things that aren’t necessarily practical, or even possible, in my own home.
images: Dana Miller for House*Tweaking
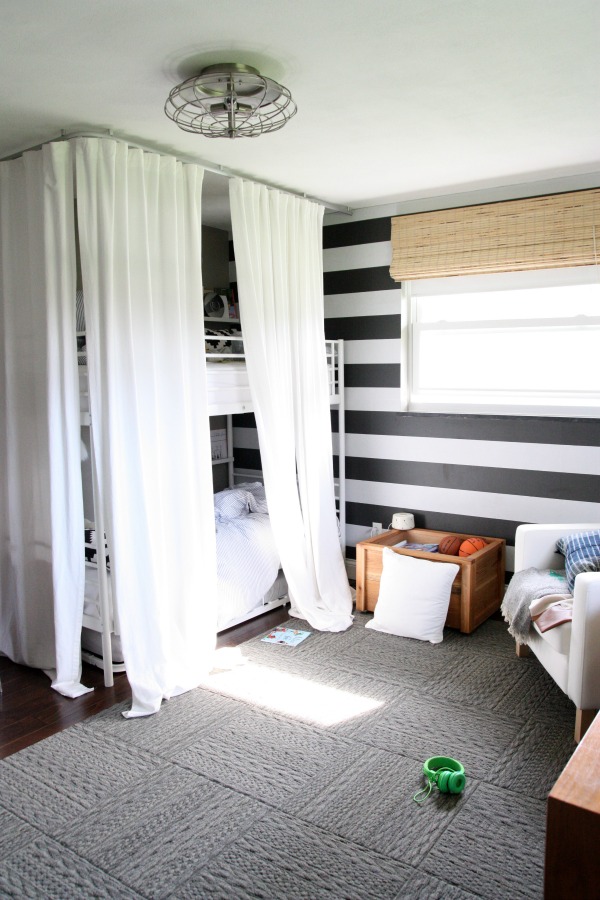
Remember when I put the boys’ room together last year? Well, take a look at what it looks like now. As in this morning. I didn’t even bother to pick up. Go ahead; pin away.
As I mentioned in last week’s post on the vintage dresser, this room has issues. Or more like I have issues with this room. Of all the room’s in our house, I find this one the most difficult to decorate. I’ve pinpointed two reasons why:
1) To optimize open floor space for play, all the furniture is pushed up against the walls. My natural instinct is to pull furniture into a room so it doesn’t feel like a bowling alley which is exactly what this room feels like to me.
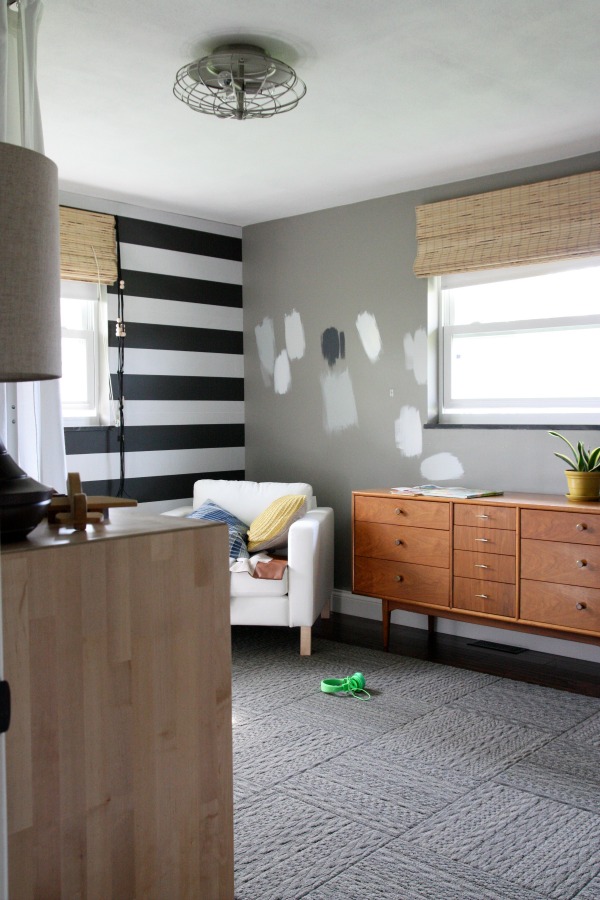
2) I’m trying to make it a “boy” room but I also want it to fit in with the rest of our home. It doesn’t have to look like every other room in our house (nor should it) but it should have a similar vibe. With the muddy gray walls (it’s Valspar Dry Riverbed and I actually love this color just not in this context) and gray Flor tiles, the room tends to feel drab in real life.
If you’re a frequent reader, you’ve probably noticed a few changes from last year. The open shelf bookcases are gone. That was such a horrible idea on my part. Why did I ever think two rowdy boys would keep those tidy? The boys would put their toys and costumes away in the baskets but there would be stuff hanging out of the baskets and the baskets were all crooked on the shelves. I sold the bookcases to one of the kids’ bus drivers. I lost money on them but the bus driver was so excited to use them that I didn’t feel too badly.
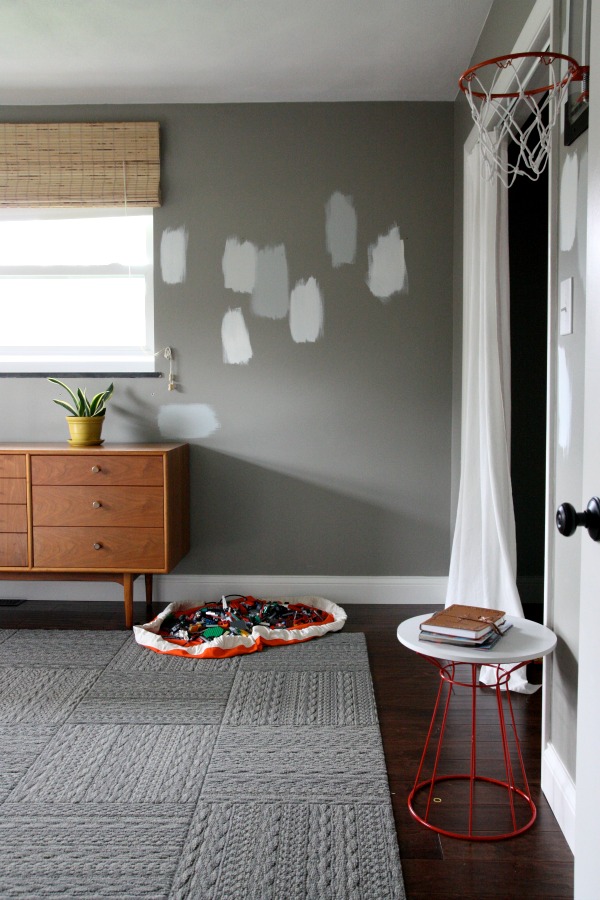
The Lego table is gone. My sister is giving it a spin as a coffee table in her apartment and the chairs are in the attic. If you’ll remember, my boys specifically requested a table for Lego building. Turns out, they loved the idea of a table but 99% of the time they sit on the floor to play Legos. Mabrey used the table more than anyone. If the table doesn’t work out for my sister, I’ll probably take it back and use it along with the chairs for a kids’ table during get-togethers with friends / family. I bought a Swoop bag and it’s perfect for my kids. They can carry it out to the living room to play or keep it in their room. I considered a Pinterest-worthy color-sorted setup but that’s just not realistic for us. My boys really enjoy sitting with a pile of Legos spread out in front of them and *BONUS* it keeps them occupied for longer periods of time because they have to look for pieces.
Doing away with the bookcases and Lego table allowed me to solve a bigger problem – not solely filter out items that weren’t working. There was some serious inadequate clothing storage going on. I don’t know when it happened but one day (I swear it happened in ONE DAY) my boys shot up and all of a sudden their clothes got bigger and didn’t fit in their 4-drawer dresser anymore. They literally could not close the drawers when all of their clothes were clean and in the dresser. I think I remember a reader predicting that would happen. She was right. Letting go of the bookcases, table and chairs made room for the 10-drawer dresser I shared last week. Now the boys have plenty of room for their clothes with empty drawers to spare.

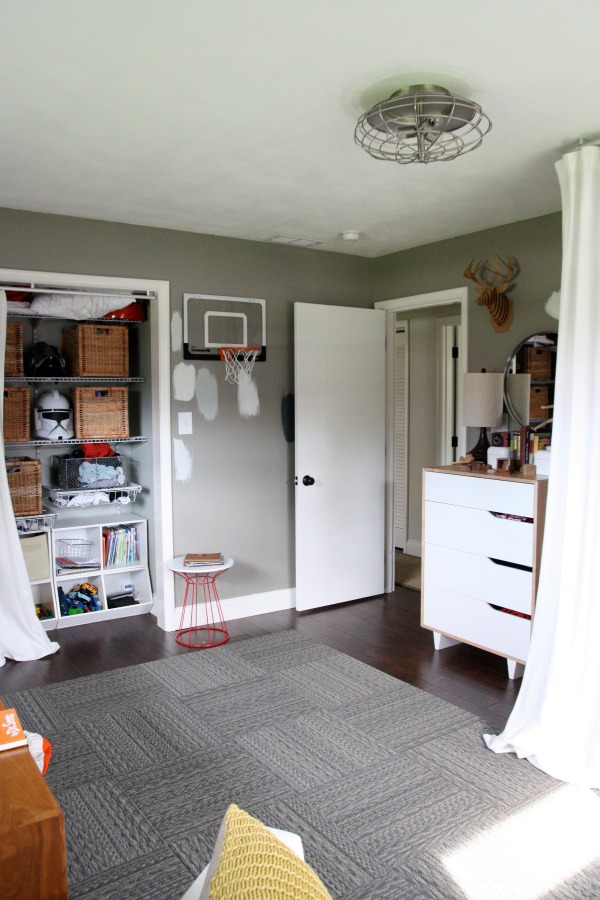
Luckily, the baskets that once lived on the bookcases work perfectly in the closet. I reconfigured the wire shelving so most of the toys are in the closet now. It gets messy from time to time but at least this way I can close the closet curtains and walk away. I have some of their playthings tucked away in other spots of our home but for the most part this is it. (Due to popular demand and even in response to some negative comments about how little toys my kids have, I’ll be writing a separate post on that. Stay tuned.)
Layne asked for a reading chair in the room for his birthday this past winter. (He’s an avid reader.) We got him Ikea’s KARLSTAD armchair and he loves it. Steve and I do, too. It’s much heavier than I expected! We sit in the chair to watch the kids play or to read them books before bedtime. The wood crate next to the chair was a gift to Everett from his grandfather. He wanted to make Everett a toy box of some kind and asked for ideas and dimensions. I asked if he could make an open book crate on wheels and gave him measurements. The design is his. It holds books and has casters on the bottom so it can be rolled out of the way when the trundle bed is pulled out. It’s so useful!
The basketball hoop was another gift to Everett. This time from Santa. It’s not my favorite addition to the room ;) but Everett enjoys it and it was a good energy burner during our long, cold winter.
Now that the room is functioning well for everyone, I need to address some other issues.
ISSUE #1: Drab wall color.
SOLUTION: Paint! I’m leaning towards something light and fresh. (See the paint samples on the walls.) This will be the third time I’ve painted this room. And, yes, Steve likes to remind me that the room started out light.
ISSUE #2: Hidden bed. The bunk bed hideout is awesome but most days it looks like the image above with the curtains closed.
SOLUTION: Add a system for tying back the curtains during the day.
ISSUE #3: Lifeless walls.
SOLUTION: Add interest with wall art and inexpensive shelving. Have fun with it!
ISSUE #4: No vibe.
SOLUTION: Bring in a few textiles, plants and accessories to make the room feel more like a part of our home but not too serious. It is a kids’ room after all.
You probably think I’m crazy for switching up the boys’ room so soon but when a room isn’t working for my family (whether for kids or adults or both) I’m all for making it right. Notice I didn’t say perfect. In hindsight, I was way too hasty in getting the room “done” last summer. Hindsight is 20/20. This isn’t a room do-over just for blog fodder. (Although, I will be blogging about it.) This is something I would be doing even if I didn’t have a blog.
As much as I like eye candy online, I also think it’s important to show a room’s evolution and to show when things don’t go as planned. Or when things do go as planned but the plan was all wrong. I guarantee behind every drool-worthy room there is a wrong paint color that had to be painted over or a wrong piece of furniture that had to be returned / sold or a wrong layout that had to be tweaked. Or a simple “I changed my mind.” And that’s okay!
But it doesn’t feel okay when no one talks about it. It’s like a big secret in the blogosphere. Here’s what the room looked like two years ago and here’s what it looks like now. Yay! They leave out the part about trying out three different lamps, ten different pillows or the massive DIY fail. But that stuff most definitely happens. Personally, I have so much respect for bloggers whom share when things go awry. I find them more relatable, more human. It makes their “afters” that much better because I know a real person is behind them.
Do you have a room that irks you? Are you feeling stupid or guilty about wanting to make it right? (Because, yes, there are bigger problems in the world.) I feel the same way but I’m trying not to let it hold me back from creating a space that my family wants to be in. I encourage you to do the same.
images: Dana Miller for House*Tweaking


inspiration, renovation