How ironic is it that my last post was entitled “Sometimes DIY Sucks” and this one contains “DIY” as a descriptive? You win some. You lose some. Thank you all so much for your words of encouragement! We’re feeling more hopeful about tackling the bathroom tile this weekend and will be sure to share what goes down. xo
I’ve already discussed my thoughts on surround sound here. In short, I don’t care for it. BUT my husband enjoys it and I do care for him so I’m dealing with it – boob speakers and all – the best way I know how. And that involves creative disguises…or squinting.
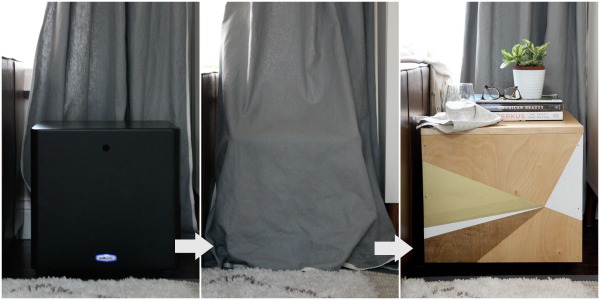
Take the subwoofer for instance. It’s basically this big black box that is responsible for low bass frequencies. (i.e., it’s the speaker that makes the floor shake when we watch movies…and we’re on a slab, soooooo yeah, I don’t get it.) We’ve had the thing for 10+ years. There’s probably some new sound technology that doesn’t require such an eyesore but we aren’t willing to invest any money into something like that when what we have works just fine. (i.e., it creates small earthquakes.)
In our first house, the subwoofer was in plain sight next to our media console. In our previous house, it sat behind an accent chair in the family room. I draped a floor-length curtain around it to disguise it even more.
In our current home, due to the placement of media components and audio wiring, the subwoofer sits between our sofa and media cabinet. The blue power light drives me bonkers. I tried concealing it behind the curtain but, at best, it looked like a small child hiding. I decided enough was enough and Steve and I came up with a plan for a DIY subwoofer cover. The cover doesn’t interfere with Steve’s audio experience and it keeps me from giving the subwoofer the stink eye so Steve and I are still married. Best of all, we made it from leftover supplies so it was “free.”
Steve created the basic box from premium grade plywood leftover from topping off the fauxdenza and building the living room shelves. It’s just four sides with a top and no bottom. The inside measures ¼” larger than the subwoofer on all sides to allow the box to slip over the speaker. There is a 2″ gap between the bottom of the box and the floor to let sound waves flow freely. (Apparently, sound waves come from the bottom of this subwoofer. I learned something new.) Wood glue and finish nails hold it together. Veneer edge banding was added to all visible cut edges except for the one on the back. #cheap #lazy
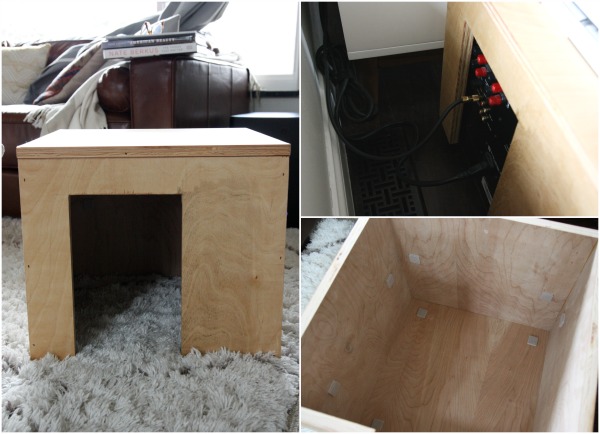
The back is cut out for wire access. (Can you see where I inconspicuously tested out some stain on the back?) We added felt pads inside to protect the subwoofer and achieve a snug fit.
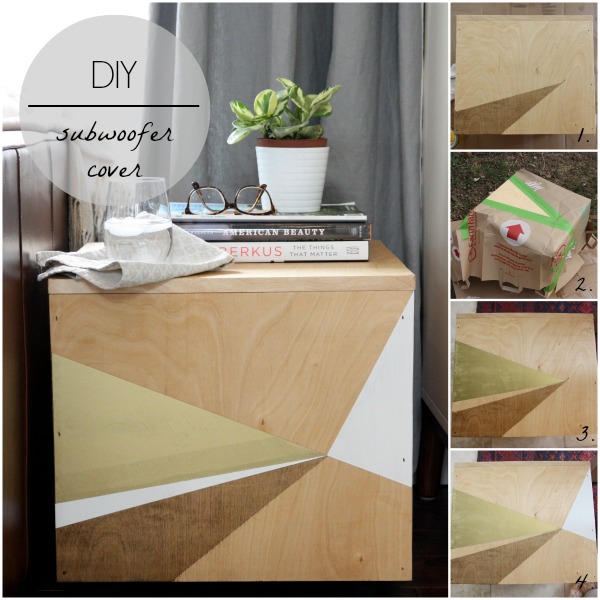
I applied Minwax wood conditioner and Minwax natural stain to the external surfaces. Then I set to work creating a design for the front panel. Basically, I drew up a bunch of ideas on paper and when I had a winner I transferred the design to the cover with a pencil.
1 // I wanted at least one section of the design to be a darker stain but I predicted the edges would bleed so I decided to tackle that triangle first. My thought was at least I could clean up one edge with a neighboring painted triangle. I taped off one section using Frog Tape and applied two coats of Minwax special walnut stain. I left the tape on until the stain was completely dry to avoid as much bleeding as possible. The stain did bleed a little but it wasn’t too bad.
2 // I taped off the second section and took the cover outside to apply two coats of Design Master Gold Medal spray paint. For crisp lines, I carefully removed the tape before the paint dried.
3 // I brought the cover back inside (looking good!) to hand paint the final two sections.
4 // One at a time, I taped off the sections and brushed on two coats of Benjamin Moore white dove primer + paint in satin. Again, I carefully removed the tape before the paint dried.
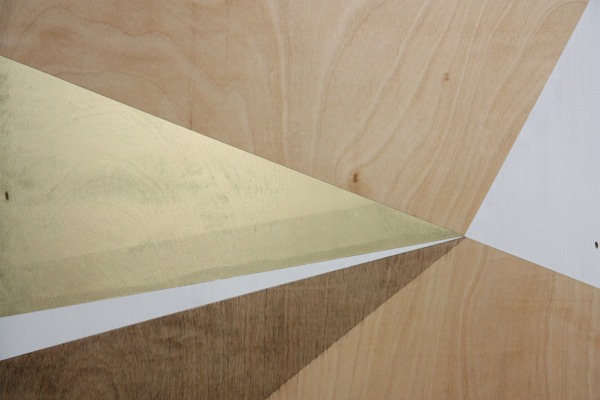
The Frog Tape marked up the gold section when I was taping and painting the last white triangle but it’s only noticeable when light shines on it in a certain way. For the most part, the edges are crisp (save for the one stained edge that has no neighboring paint) and the points meet up like I had envisioned. I especially like the texture of the wood grain in the gold section.
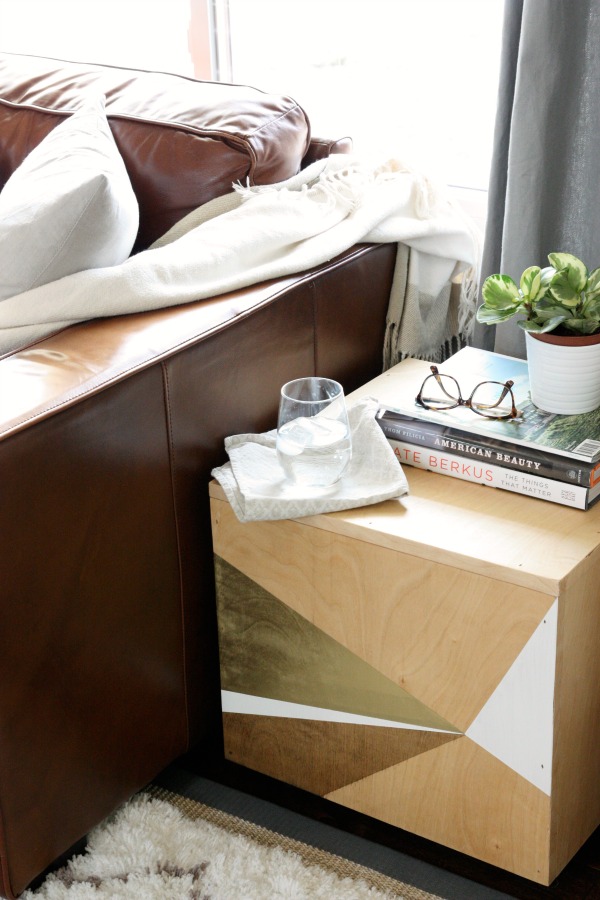
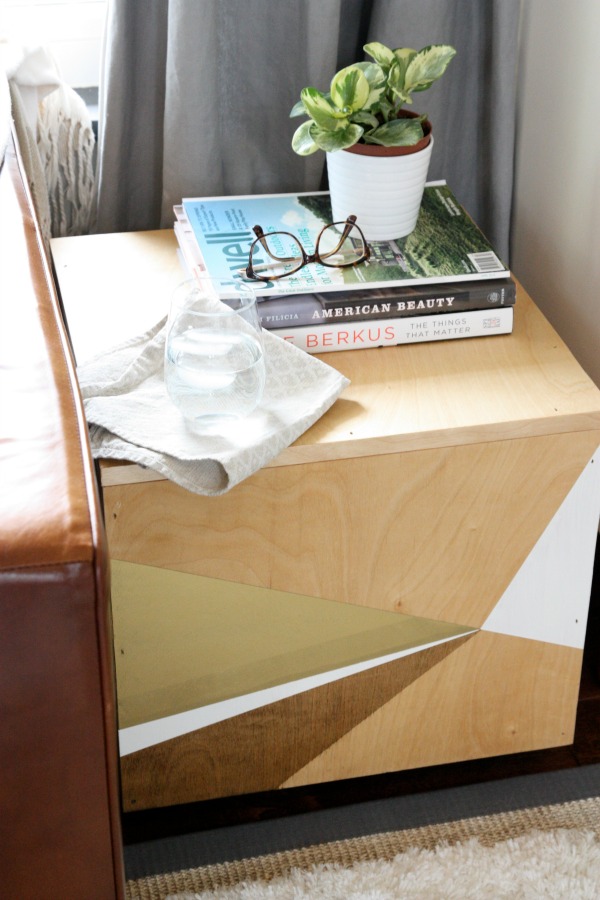
Subwoofer-turned-table, voilà!
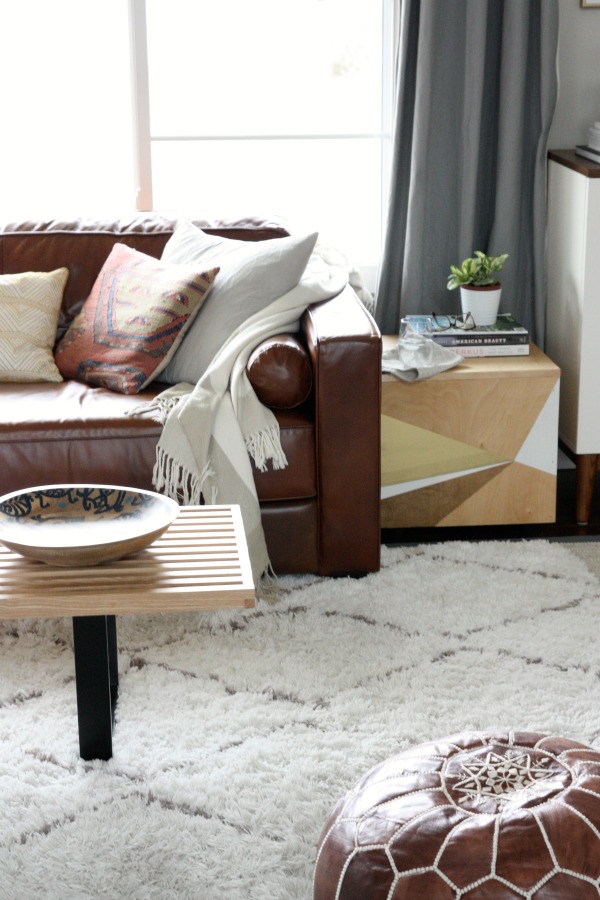
I opted out of a topcoat because I like the unsealed look so a cloth napkin or coaster under sweaty glasses is a must. In real life, Mabrey likes to climb on top of the subwoofer to catapult herself onto the sofa (!) so there’s usually just a magazine or book resting here. I shot this during nap time so I had fun styling without kids in mind.
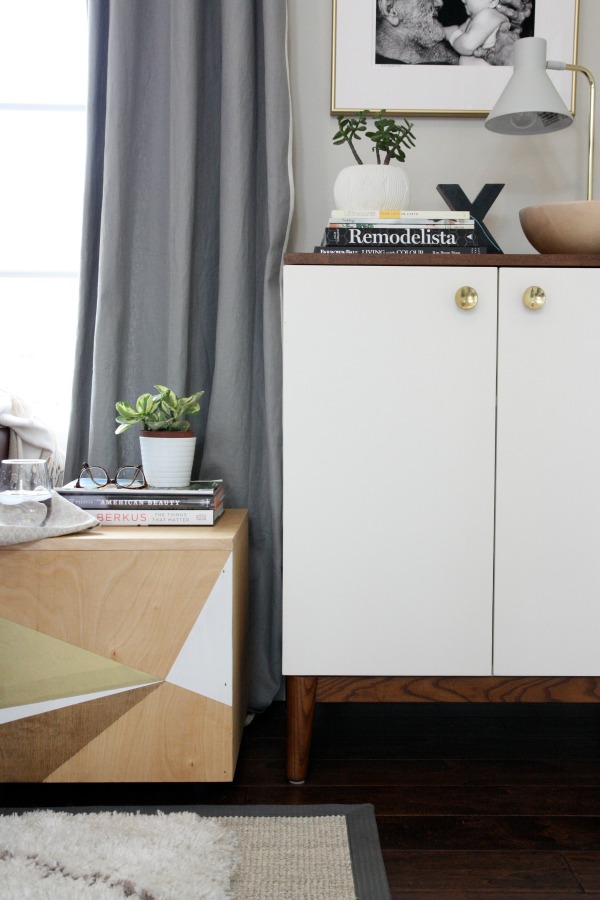
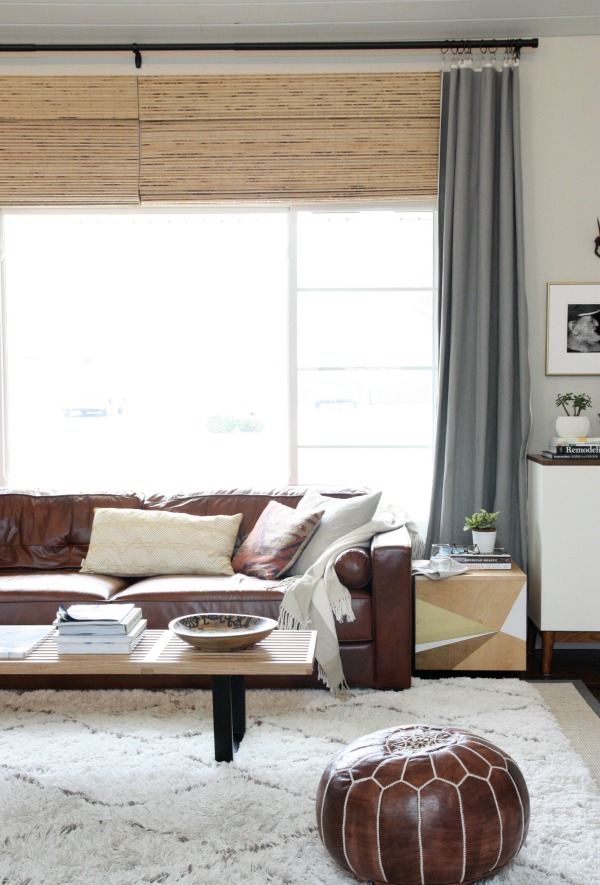
I’m happy I went with a natural stain on the majority of the cover. Anything darker would have been too brown next to the sofa. The natural stain picks up on lighter wood tones in the room: coffee table, woven shades, decorative bowl (on the media cabinet) and scalloped side table (not shown).
In case you’re wondering, I moved the lil’ red table to the boys’ room. Some changes are happening in there but that’s a whole ‘nother post.
Steve didn’t see the painted / stained front panel until after it was finished. He loves it! That makes me happy. Know what else makes me happy? No more big black box.
Good design can save marriages. It’s a fact.
images: Dana Miller for House*Tweaking
I seriously considered not writing this post. But it would have been dishonest. For me, this blog is all about sharing my ideas, passions and home with the hope that they will inspire others. It’s never my intention to show perfection or a glossed over view of DIY and renovating. (Although, I’ll be the first to admit to loving good eye candy.) It’s easy to leave out the bad stuff online but in real life it’s impossible. We’re human. We make mistakes. It happens.
And it happened to us this weekend.
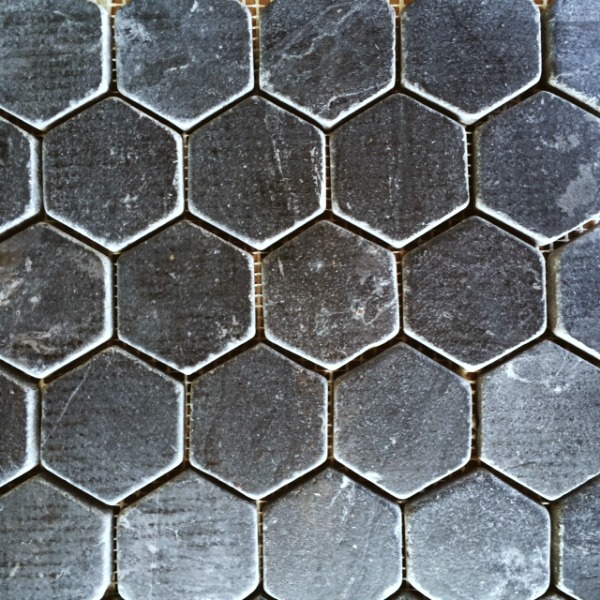
I picked up the noir hex tile for the bathroom floor last week and the plan was to lay it this past Saturday. An early morning phone call on Saturday skewed our plans. A family member was in the hospital (it turned out to be nothing serious, thank goodness) and our help was needed. Persons we love in the hospital trump DIY projects so Saturday was shot.
No big deal. Steve said he would lay it Sunday afternoon while I tended to the kids.
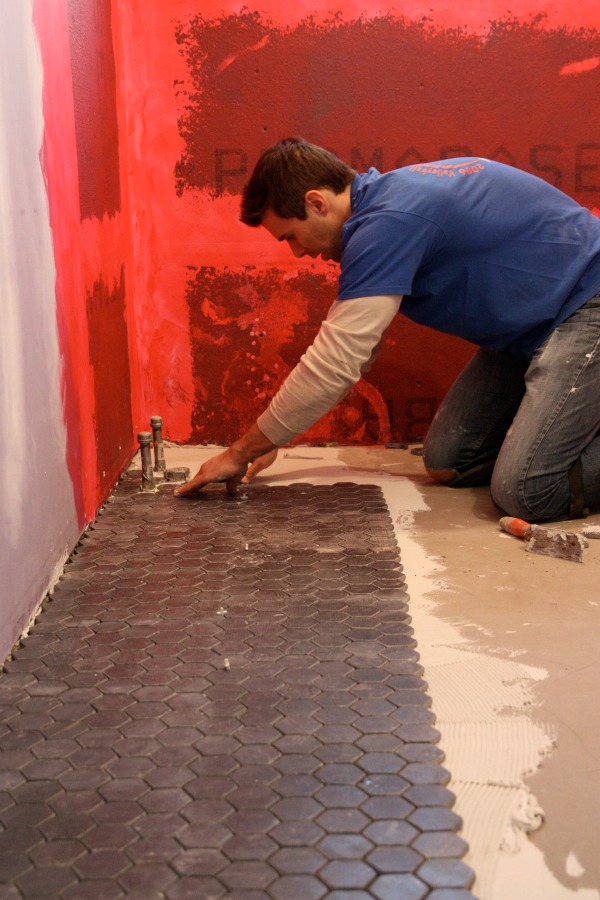
On Sunday, I helped Steve measure and snap a chalk line on the floor to get things started then I stepped aside to keep an eye on the kids since no one was volunteering to babysit. (Where are all the volunteer babysitters when you need them?!) When I checked in on him later, things were looking good. He was two rows in from the longest wall and working his way around the plumbing fixtures for the tub.
I took a few progress shots then Steve said, “Now’s not a good time.”
Oops. He was on the verge of pissed and I could tell. Everything seemed par for the course from my viewpoint. The tile reminded me of scaly reptilian skin and I loved it. But Steve said the tile mats weren’t lining up well. He was doing a lot of eyeballing, using spacers occasionally and removing individual “trouble” tiles and placing them by hand when necessary.
Now I should mention this wasn’t our first tiling rodeo. We’ve tiled several floors and walls over the course of 10+ years of homeownership. I should also mention that Steve is an engineer and a bit of a perfectionist. He would rather not do something at all than do it half-assed. What he considers mediocre work is probably more like meticulous to others. In this way, he is so much like my dad it isn’t funny. You know that line about women marrying their fathers? There might be some truth to it.
A while later I was making dinner when Steve started unloading buckets of tile in the front yard. Loud scraping noises were coming from the bathroom. I knew something was up and I knew it was bad. I also knew that asking questions wasn’t going to make anything better so I waited until there was a break from the scraping before I peeked into the bathroom.
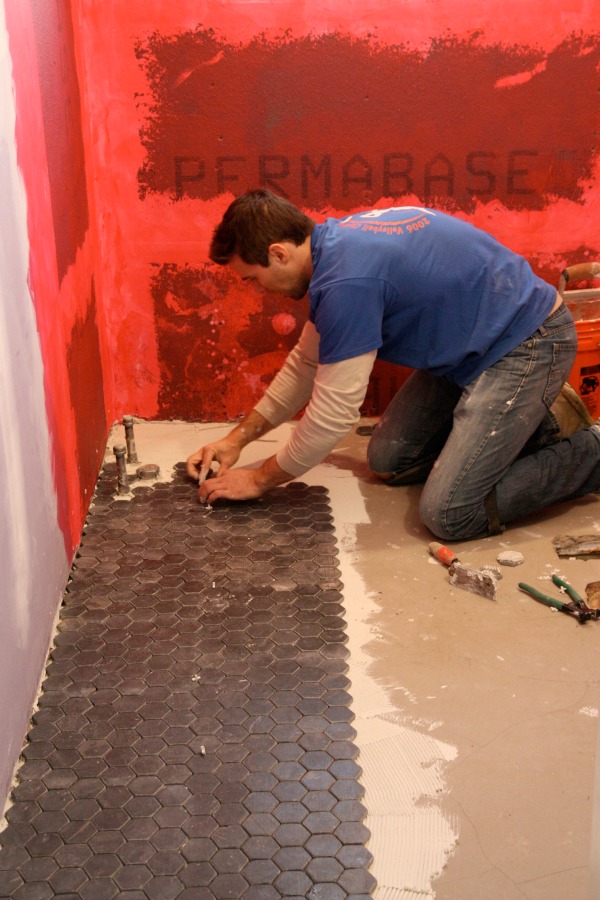
Five hours into laying the floor tile, this was our progress. One step forward. Two steps back. As I had guessed (I wanted to be sooooo wrong), Steve had pulled up all the tile and was scraping away the thin-set.
In response to my meek “what happened?” he replied, “I failed.”
I left it at that while he went outside to scrub and salvage the used tiles covered in thin-set. Later on when he was able to talk about the incident, I learned that something went awry in the third row of tiling and the 12″ x 12″ tile mats weren’t matching up properly. I never actually saw the third row so I have no idea if it was really that bad or just Steve’s version of bad. (Two very different definitions of bad, btw.)
At any rate, we were back to square one. I asked if I could help him work on it after the kids were in bed for the night and Steve pointedly stated, “I’m not stepping foot back in there today.” Um, okay. Me neither then.
For the rest of the night, Steve was so down. He was mad at himself more than anything. I reminded him it was just a bathroom we haven’t used for two years anyway but, I have to admit, I was a little disappointed, too. Not in him, but I had anticipated sharing a tiled bathroom floor on the blog Monday and that clearly wasn’t happening.
Feeling defeated (I know because he said it more than once), Steve called up our contractor friend – who’s just as meticulous as Steve – to ask for guidance. He was *sort of* happy to hear that something similar had happened to our pro friend. (Just to be clear, that’s pro as in professional contractor not as in professional friend.) And he was more than happy when our friend offered his hands-on help for this upcoming weekend.
So, yeah, many projects don’t go the way we plan – even projects we’ve done before. Like this one. Sometimes DIY sucks. But for some strange reason we keep coming back. We went to bed last night feeling like we wasted an entire day of our lives. I can think of a hundred other things we could have done yesterday that would have been way more fun than un-tiling a bathroom floor. Scraping my fingernails across a chalkboard comes to mind.
Have you experienced any failed projects that took the wind out of your DIY sails and left you feeling completely defeated? How did things shake out? Luckily, we were able to salvage the tile so we’re hopeful we can forge ahead with the help of our friend. But until next weekend, we’re shunning the bathroom and putting it in timeout. It probably won’t even notice. It’s been in a perpetual state of timeout for the last two years anyway. Grrrrrr…
P.S. – WOW!! You guys are really into laundry hampers! I wish I had accidentally received 2,000 of them to give away. Haha. Click here to see who won the one extra hamper I do have.
images: Dana Miller for House*Tweaking


budget decor, DIY, interior design