...because home doesn't happen overnight.

exterior entry 1

I’m so happy to share our front entry with you! To avoid a lengthy photo laden post, I’ll be sharing the entry’s exterior and interior in two separate posts. Look for a second post later today. Now, onto the exterior!

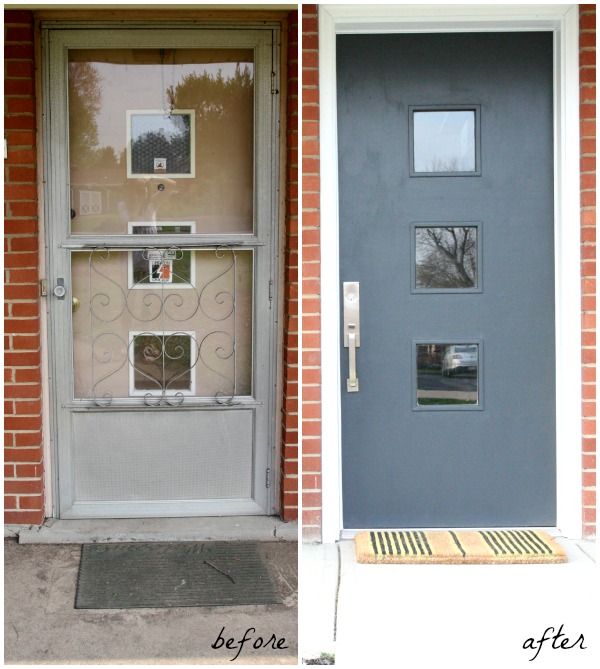
exterior entry b&a

The biggest undertaking in improving the entry was rehabbing the front door. When we moved in, using the front door was cumbersome. There was a heavy screen door that was so LOUD when opened and closed. The process of opening one door outward only to open another door inward didn’t make sense to us so we removed the screen door to reveal the original front door. We loved the midcentury vibe of the front door and decided to keep it.

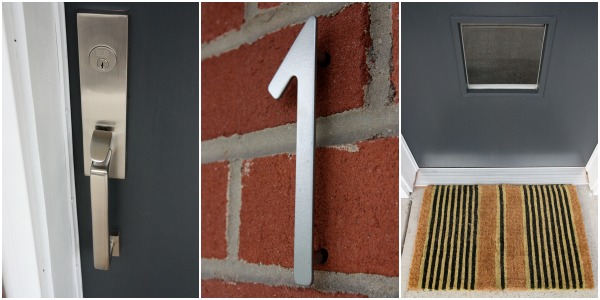
Steve rebuilt the jamb and added a new threshold so the door would open properly. (We rarely used the front door during the first year of living in the house because it was so difficult to open.) Once the door was working we focused on modernizing it with hardware and paint. Steve installed a sleek mortise handset. A mortise lock is one that requires a pocket to be cut into the door. Installation isn’t for the faint of heart but the handset comes with a template – whether you choose to DIY or hire out the installation. The new handset immediately brought a high-end quality to the door. Its simple design fit the midcentury door perfectly.

With the handset in place, Steve filled the holes left behind from the old deadbolt. I removed privacy screens and security stickers from the trio of windows then painted the exterior side of the door in a deep, moody blue-gray to contrast with the red brick. We also added new trim and painted it out in crisp white. Our old door looked brand new!

exterior entry 3

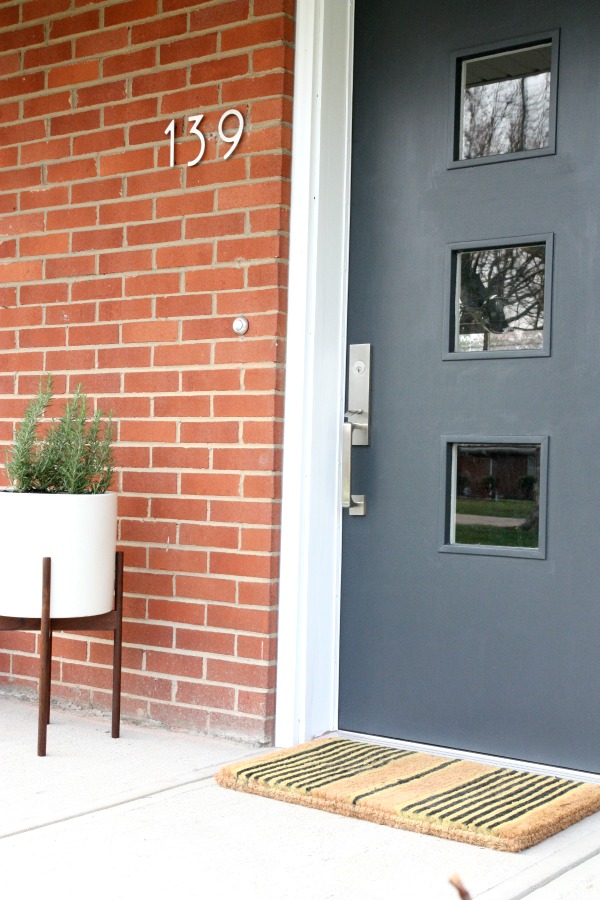
No longer embarrassed by the state of the front door, we were itching to bring in a few details to make the entry feel more welcoming and fit in with our simple modern style. The previous house numbers were so small and difficult to read from the road. We switched them out for  3″ stainless steel numbers with a standoff mount. A striped doormat made of natural fibers hints at what to expect from the decor inside. (I love stripes and natural textures.)

exterior entry 5

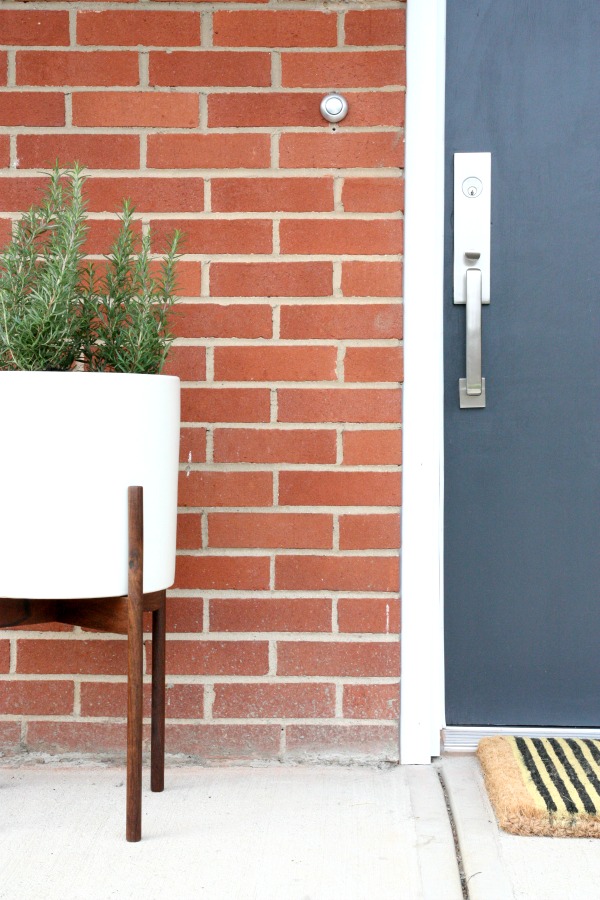
We also switched out a boring doorbell for a larger button-like one. The metal finish is similar to that of the handset and house numbers to keep things cohesive.

exterior entry 4

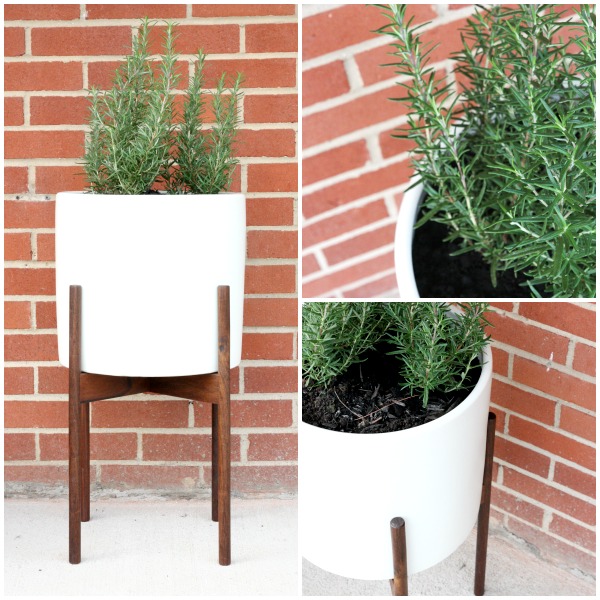
I brought in a modern plant stand to hold greenery. The planter fills an awkward bare spot next to the door and the height brings the eye up to the doorbell and house numbers. Our front door faces south so I wanted to choose foliage that thrives in the sun. I went with rosemary! I love the color, texture and fragrance that it adds to the space. The scent of rosemary is such a welcome surprise at the front door.

exterior entry 2

I hope you enjoyed the mini tour! We’ve received so many compliments on the improvements from visitors, neighbors, passersby and even the UPS man. (The futuristic doorbell is a hit with the neighborhood kids and the UPS man.) I used to be embarrassed by our front entry and was always apologizing to guests for it. But now I love it!

Our entry isn’t much. There are no steps leading to a covered porch, no double doors, nothing fancy. And we didn’t want to make it something it’s not. The goal was to respect the original entry but modernize it. A few tips to  keep in mind when making the most of a small exterior entry:

*Make a statement with the front door. Choose a style that suits your home’s exterior and paint it an unexpected color to contrast with the facade.

*Focus on quality hardware. Splurging on little details like an entry set, door knocker, house numbers or even a fun doorbell can make all the difference. For a cohesive look, stick to one finish for all hardware.

*Less is more. Use only a few favorite decorative items to avoid cluttering a small exterior entry. Accessories should hint at what to expect inside.

*Get creative with greenery. Consider color and texture when choosing greenery. Think outside the box. Fragrant herbs can be a fun and fragrant choice. *BONUS* You can cook with them!

Sources:

door – original, vintage
door paint – Behr Evening Hush
house numbers – Wayfair*
entryset – Emtek*
doorbell – Wayfair*
planter – Modernica
doormat – Wayfair*

*This post was sponsored in part by Wayfair and Emtek. Items marked with an asterisk were chosen by me and kindly donated by Wayfair and Emtek. All opinions and images are my own. Read more about my entry over on Wayfair.

Stay tuned for a look at the interior entry!

P.S. – I know showing house exteriors and house numbers online is a touchy subject. We have a security system and a neighborhood watch program so we’re comfortable with the decision to share images of our entry.

images: Dana Miller for House*Tweaking

Moving right along in the boys’ room

removable wallpaper 1

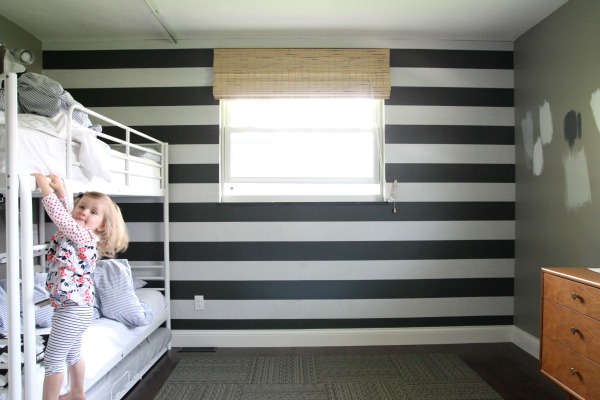
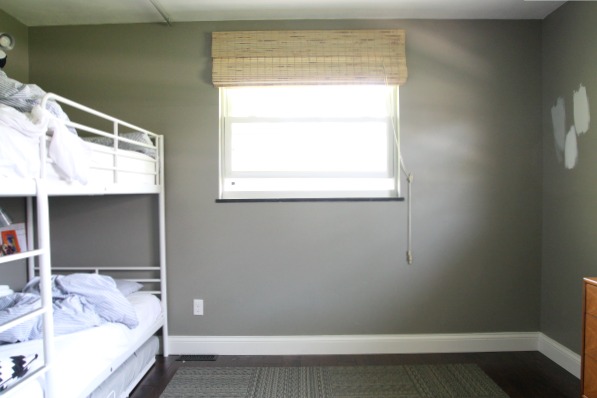
I decided to nix the striped wall. Like the wall color, I actually love the wallpaper (which is removable) just not in this context. I originally used it to widen the room visually and make it feel less like an alley. In that sense, it worked. But now that different pieces of furniture have made their way into the room, the layout is feeling less linear. In particular, the angled reading chair and book crate are cutting away at the alley-ness. I have a few more ideas for softening the rectangular shape of the space, too. I’m on a mission to brighten the mood of this room so I think painting this wall is the best way to go.

Removing the wallpaper was quick and painless. It is removable after all. But I didn’t want to be wasteful and ball it up in the trash. I’ve always wondered if anyone actually reuses removable, reusable wallpaper. I mean it’s marketed as such and it seems to grab the consumer’s attention but I can’t recall any reuse testimonials.

Anyhow, Everett’s school is always asking for any and all art supply donations. I thought this wallpaper would be a good fit whether the school decides to use it for an art project, as a theater prop or as wallpaper. (The school’s common areas have the cutest decor most of which hails from Ikea.) I came up with a method for removing and “packaging” the wallpaper so that it could be reused.

removable wallpaper 2

I bought a 10′ x 20′ plastic drop cloth from Home Depot. Did you know Home Depot has their own generic brand now on many items? It’s HDX. I’m impressed with the few HDX items I’ve bought so far. (That’s not a sponsored plug, btw.) This drop cloth being one of them. It was less than $3 and it was the only money I spent to remove and reuse the wallpaper. Mabrey was my assistant. She insisted on having her picture taken holding the drop cloth. At this rate, she’ll have her own HGTV show by the time she’s 10.

removable wallpaper 3

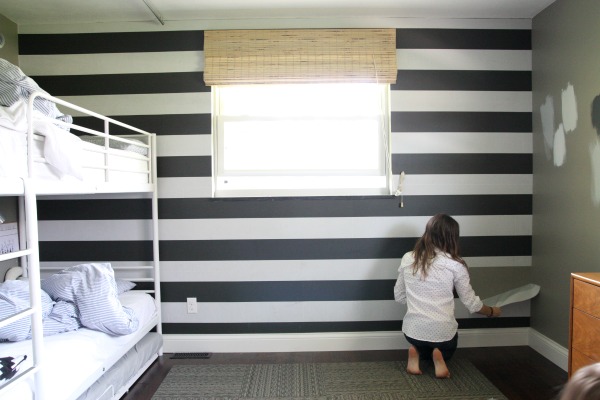
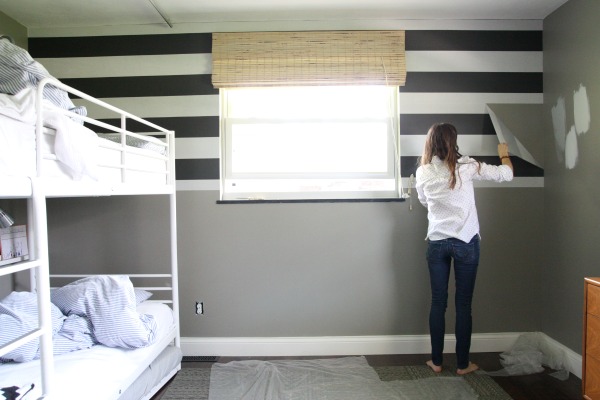
First, I wiped down the wallpaper. I figured it would be easier to clean while still on the wall. Then I removed the wallpaper in the reverse order in which it was installed. (You can read about the installation here.) This way I could remove each section individually even if there was some overlap on neighboring sections.

removable wallpaper 4

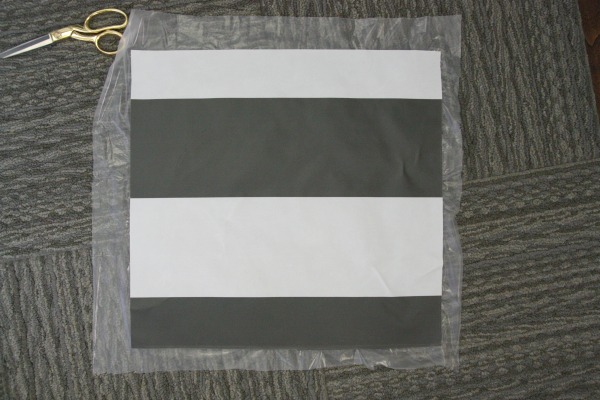
As I removed each section, I placed it sticky side down on the plastic drop cloth. I tried to keep the drop cloth and wallpaper as smooth as possible. I cut around the wallpaper, leaving a narrow frame of drop cloth.

If anyone is wondering about the adhesive quality of the wallpaper, it’s still great. It could definitely be rehung and would stay in place. In fact, there were a few times I wasn’t careful and the wallpaper folded over on itself. When that happened, I had to stick one end of the wallpaper on the bunk bed’s frame to hang it and pull it flat again.

removable wallpaper 5

I worked my way up the wall, section by section. I removed the outlet cover and tie-off for the window shade cord but left the shade itself in place. I simply scored the wallpaper around the brackets to remove it from above the window.

removable wallpaper 6

Even with a toddler in the room (which normally triples the time it takes to do anything), I had all of the wallpaper down in twenty minutes.

When we hung the wallpaper, I remember Steve asking what was the benefit of wallpapered stripes versus painted ones. Well, if the stripes had been painted I’m guessing I would have had to hit up the wall with some sandpaper to smooth things out before repainting. (Taped off stripes tend to have slightly raised edges.) The wallpaper didn’t damage the wall in any way so there’s one benefit over painted stripes.

removable wallpaper 7

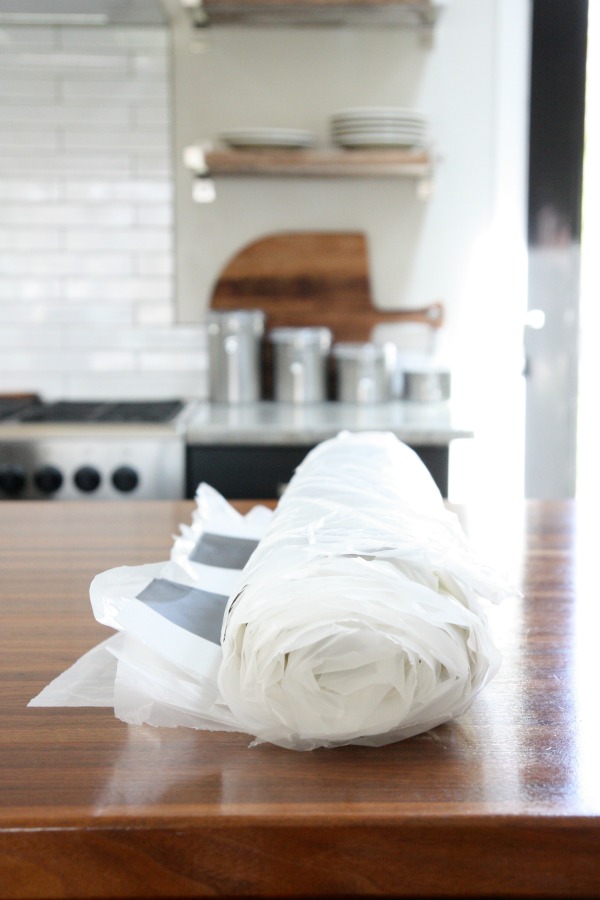
I stacked the wallpaper sections on top of one another and then rolled them up. I’ll be dropping them off at Everett’s school tomorrow and they should fit in my car easily. The one drawback is that the plastic drop cloth will end up in the trash at some point. But Everett’s school is really good about using everything (last year they made an art display from plastic “trash” and it was beautiful!) so I’m hoping the drop cloth will see a second life.

If I wanted to store the wallpaper for personal use, I would stick it in a plastic bin or bag to keep it from getting dirty. I’m not sure how the adhesive would fare at high temps so I’d probably stash it in a closet versus the attic or garage.

With the striped wall out of the picture, I’m off to pick a paint color…and I’m afraid I’m making it way more difficult than it should be.

Pssst…click here to see who won the Seed Furniture giveaway! Don’t fret if you didn’t win. You can score 40% off any piece until Monday, April 28th with the discount code “TWEAKING”.

images: Dana Miller