Let’s not beat around the bush and just get to it, shall we?
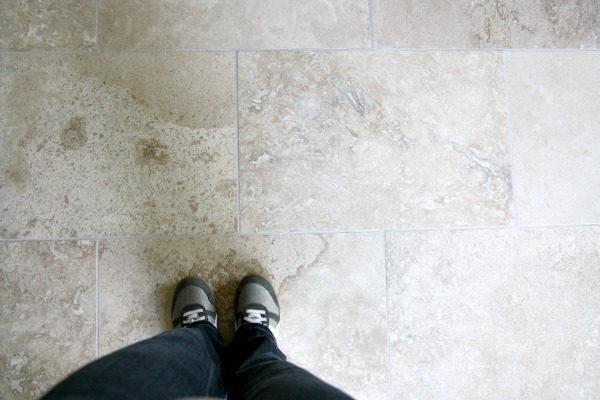
The travertine tile in the mudroom / dining room / laundry nook is down and done. {Thank you, Handy Hubby!} I can’t believe how much bigger the space feels with a light-colored floor! I’d post ‘during’ pics but I didn’t take any. That’s what a newborn and two other kiddos will do to you – keep you away from any renovation sites!
Once the grout cured and the tile was sealed, HH quickly moved onto the next mudroom project…one I’ve kept a secret until now. Can you say horizontal plank wainscoting? If you can, try saying it three times fast.
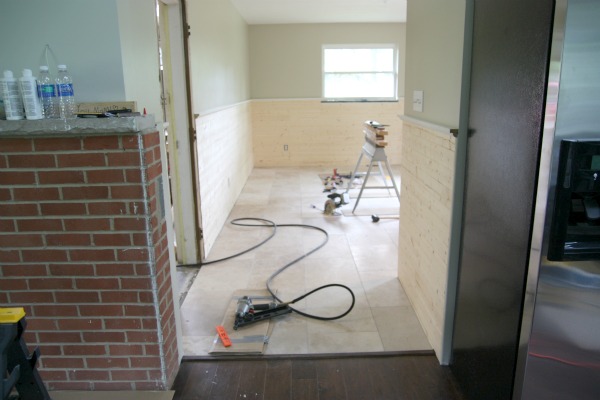
From the family room, there’s a clear view into the adjoining mudroom / dining room. The idea was to create some sort of wainscoting about the same height as the mantel in the family room to keep things feeling cohesive. My first thought was to DIY a traditional wainscoting using trim and molding. Something along the lines of this. But the more I turned the idea over and over in my head, the more it felt, well, traditional.
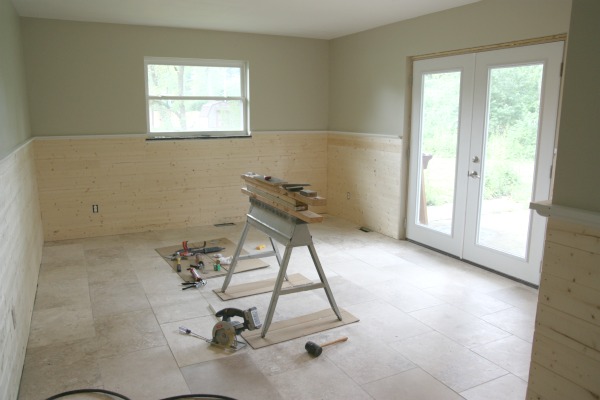
Then I found this image {the one at the top of the page} and knew that horizontal planks were the way to go.

So HH has been busy installing those.
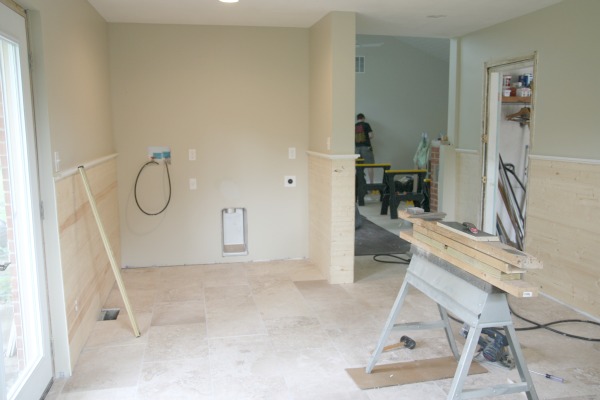
We left the laundry nook’s back wall bare since you wouldn’t see the planks anyway. They would have been hidden behind the washer and dryer. I have big plans for that little nook.
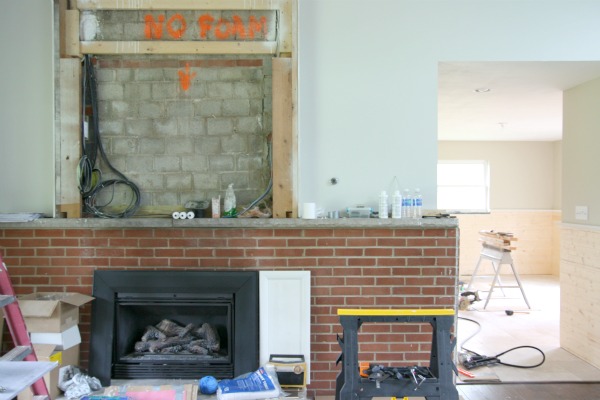
You can see how the planks mimic the mantel’s lines from the family room.
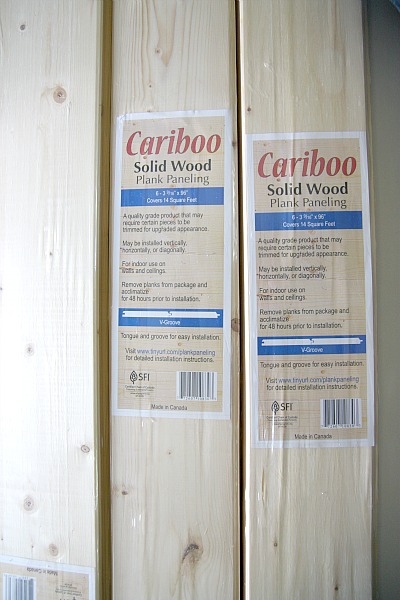
The 4″ tongue-and-groove plank paneling HH used came from Menard’s. That’s it above. Ideally, I would have preferred a 6″ plank {like the ones we used for the ceiling in the great room}, but the 4″ packs were on sale BOGO {buy one, get one free!!}. We couldn’t resist a good deal. It cost us $160 to get enough for the mudroom. That’s pretty amazing seeing as how the planks add a much needed architectural detail to the space.
I should mention that the planks are pretty thin so using them on a wall, like we did, works great. But I wouldn’t recommend them for a ceiling or other feature that doesn’t have a solid, continuous support for the planks to rest on. Things could get a little wavy.
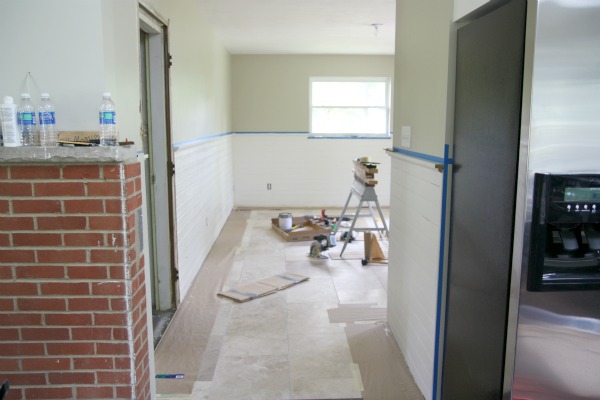
Of course, we’re painting the planks white to match the tongue-and-groove ceiling in the great room. No natural pine left untouched at the Underdog!
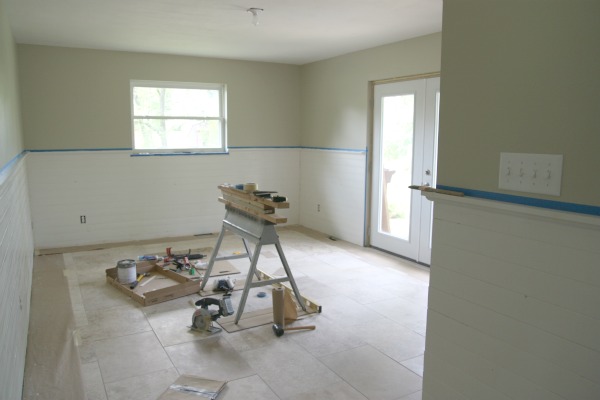
HH is using the same primer and paint that he used on the vaulted ceiling.


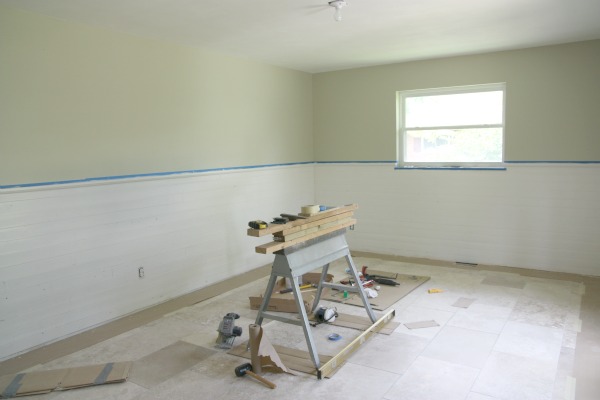
All of these images are showing two coats of primer – no paint yet. The paint will be the same as the trim…Benjamin Moore White Dove in semi-gloss.
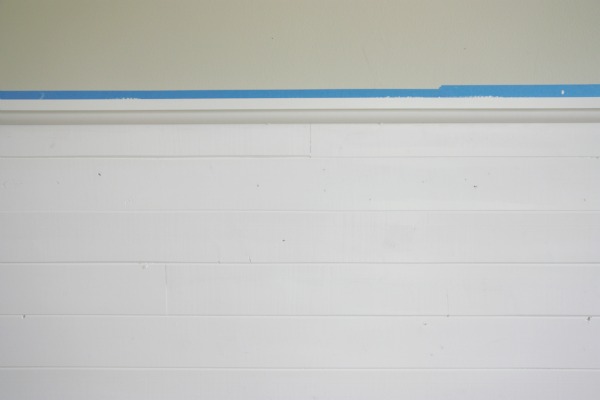
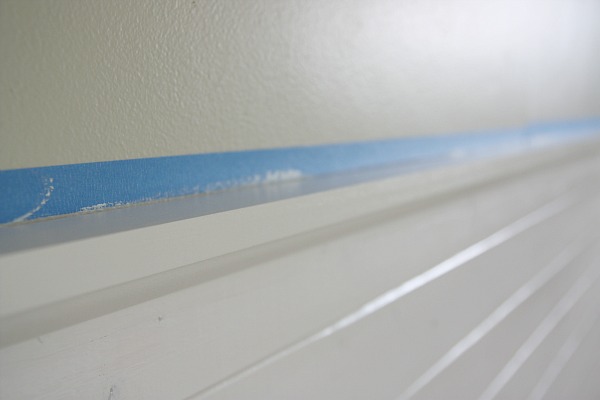
At the top HH added a 1″ x 2″ and quarter round.
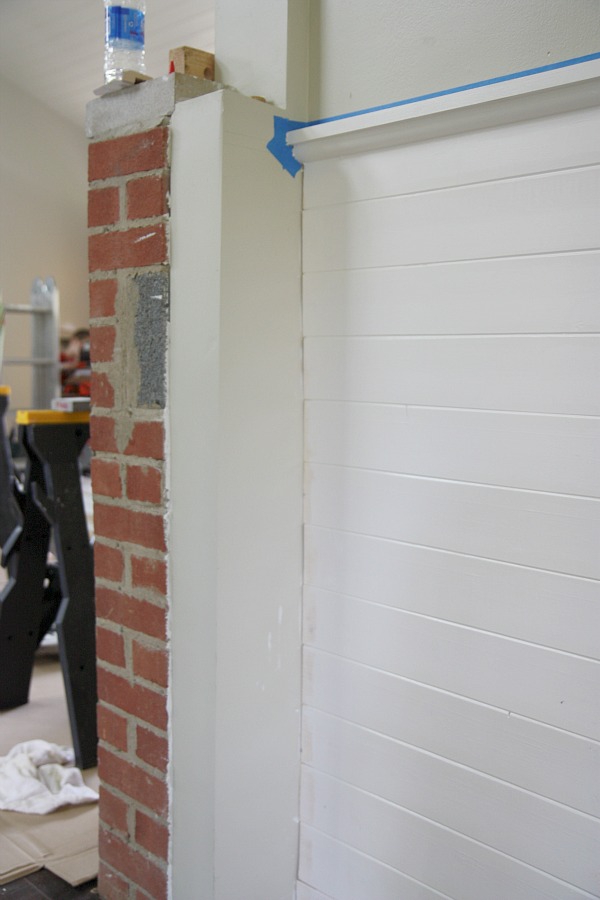
HH dead-ended the planks into the back of the mantel wall. Notice how the planks start a few inches down from the mantel’s height.
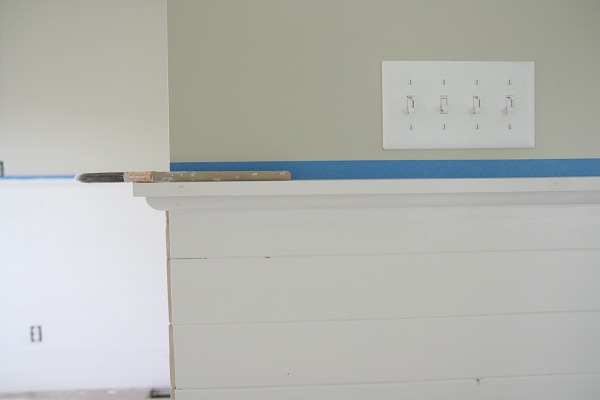
That’s because we were trying to avoid planking {not the Lying Down Game} around the light switches. We thought that would look strange. This way the plank wainscoting runs along nicely just below the switch plates.
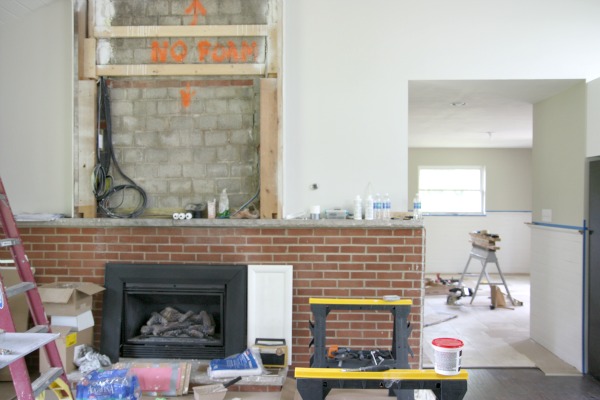
See how the horizontal line of the mantel is now continued into and around the mudroom / dining room? For consistency, we’ll also install tongue-and-groove planks over the bump-out above the mantel…and paint them white. {Right now, it’s where you can read ‘no foam’ spray painted in orange.} That won’t happen until after we move in since we’ll need to hang our flatscreen above the mantel first.
Speaking of moving in…doesn’t the Underdog look move-in ready?? NOT! We’ve got so much to do! I’ve been purging things at the apartment so I can start packing and moving some of our smaller things next week. I plan on taking a carload every day when I drive over to get Layne off the bus in the afternoons. I’m thinking of it as my postpartum workout.
Happy Mother’s Day to all the beautiful women out there who are busy raising kids, have raised kids and/or are preparing to raise kids! It’s a wild ride.
Click here to see who won this week’s Home Depot giveaway!
images: Dana Miller for House*Tweaking
Since I’m on a flooring kick…
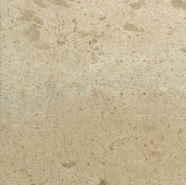
…here’s the tile I’ve chosen for the mudroom/dining room/laundry nook. This is the space I’m talking about if you need your memory jogged…
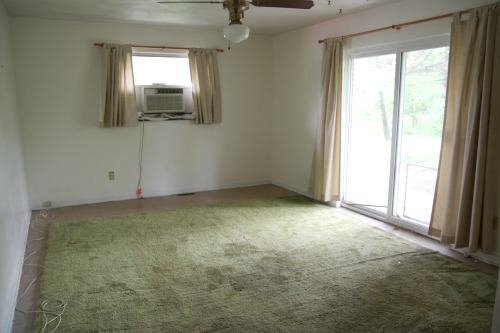
How could you forget the green carpet remnant, window A/C unit, hideous ceiling fan and dryer that vented directly into the attic? Ick.
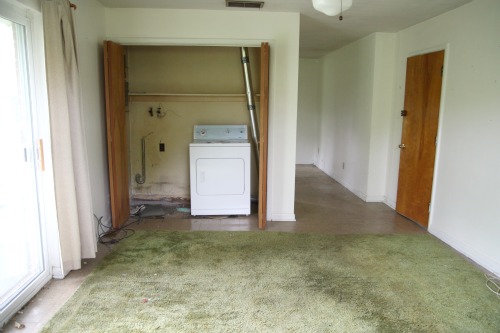
As I’ve mentioned already, this room has direct access to the backyard {through the sliders seen above} and to the garage {through the man door seen above} and thus will see a lot of traffic from dirty, muddy, wet shoes. Even though keeping flooring consistent throughout a small space is essential to achieving a cohesive look, I felt that a durable tile floor {versus engineered hardwood} would better suit our family and our daily activities in this area.
In essence, this space will serve as a mudroom, extra dining space, laundry room, storage room and craft room all in one. Whew.
So back to that tile I chose…

It’s a natural stone. Travertine to be exact. Also called limestone sometimes. When considering tile for the mudroom, I was immediately drawn to natural stone tile versus ceramic/porcelain tile. The subtle pattern and color variation of the natural stone felt and looked organic and, well, natural. Unlike all the other flooring I’ve had to choose {bathroom tile, engineered hardwood}, it took me about 20 seconds to find this tile and name it ‘the one.’ Quick, easy, painless. All I had to do was get Handy Hubby on board.
Guess what? He LOVED the travertine! Yippee. One easy, agreeable Underdog decision under our belts!
Travertine comes in several different finishes: tumbled {like what you may see as a kitchen backsplash with lots of grooves and pits}, chiseled & brushed {which has a natural but high end look}, and honed & filled {where the naturally occurring holes and pits are filled in and the tile is given a satin finish}. The tile I chose is honed and filled. Why?
Because it has more of a natural matte finish and looks a lot like concrete. Here’s an image I snapped with my phone in-store at The Tile Shop that shows a better real life perspective…

I love how each tile has its own individual color variations and patterns running throughout. Not one stone is the same as the next. The gray, mocha and tan tones go along with the rich Texas Brown birch {seen at bottom right in the image above} I chose for most of the rest of the house. Rocks, mud and dirt should hide on this tile nicely! I also like the large size of the tile.
The non-polished, satin finish gives it a rustic look. Much like concrete. HH and I really like this effect as we plan on DIYing concrete countertops in most of the kitchen. Having this concrete-esque finish in the adjoining mudroom will keep things flowing nicely and feeling cohesive even with the floor changing over to wood in the kitchen. At least, that’s how we see it.
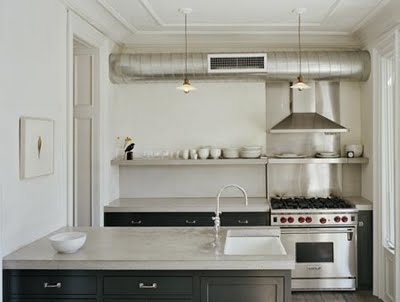
{kitchen of Jenna Lyons – complete with concrete countertops, black lower cabinets, light walls and hardwood floors – sound familiar?}
To warm things up in the mudroom/dining room {since tile alone can lend a sterile look}, I’d like to add a small area rug and a round/oval wood table. {I’ve secretly been hunting for a table and just found one yesterday in a surprising place! More on that next week…} Yes, you heard me right, a wood table. As in a wood tone table. No painting it white. I told you I was feeling a little more masculine this time around.
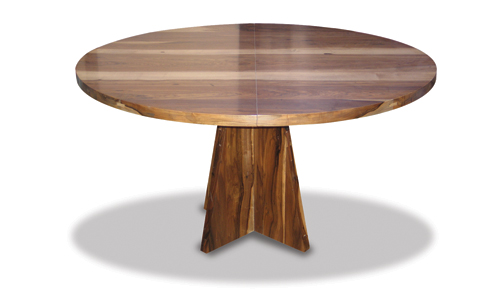
{sadly, that’s not the table I found but it’s great, isn’t it?!}
Although we’ll most likely eat regular family meals at the future island in the future kitchen, I’d like a small table in the mudroom to serve as a craft area, sewing table, family game night table, homework surface, laundry folding surface and extra dining space. I think a round one {that possibly extends to an oval} would be perfect for the modest room. It can’t be too big because we’ll need to fill one wall with tons of storage. Because a dining room that doubles as a mudroom needs storage, right?
Anyhow, it feels great to have flooring decisions made. As overwhelmed as I felt in the beginning, it was fun to consider all the options out there. There are soooo many!! Getting the floors nailed down {figuratively speaking} has helped me pin an aesthetic for the Underdog. Floors can have such an impact on a home’s style. Have you recently made a decision on new flooring? Do you have a favorite floor in your house already? Are you contemplating new floors? What’s your dream floor? Just keep talking floors since I’m already on the subject.
Happy weekend!
images: 1) The Tile Shop 2 & 3) Dana Miller for House*Tweaking 4) The Tile Shop 5) Dana Miller for House*Tweaking 6) Ken Levenson 7) Style Homes


DIY, renovation