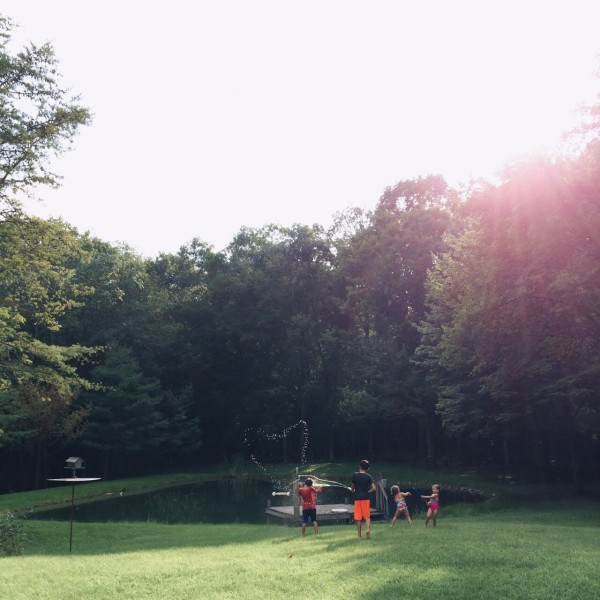
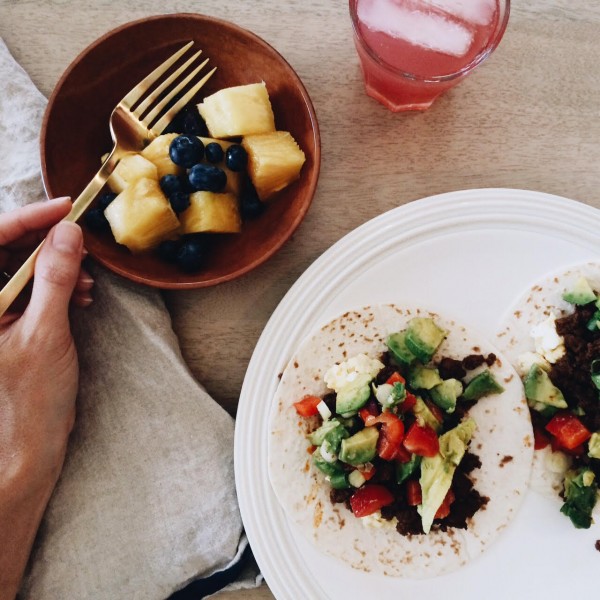

With only two weeks until school starts (?!), we’re trying to soak up what’s left of summer. Last week we cooled off at the pool, hosted a sleepover, met up with old friends, took slow family walks, slept in, lounged on the back deck, caught fireflies and harvested two cucumbers from our garden (if you can call it that). Our breakfasts and dinners have been later than usual. Breakfast tacos are on heavy rotation because they’re so easy and no one whines. On a whim, I had six inches of hot, sweaty hair lopped off. And after a year of teasing from my dad (oh, have you been painting stuff white again?), I had my grays colored. I’ve never really had a hairstyle per say. It’s been long – too long – for years. And I’ve never done more than subtle highlights every few years. So this new lob + root color + balayage combo is quite the change but I LOVE IT. I think I’ll actually keep it around for a while…and maybe even go shorter next time.
More things to love…
*A DIY garage door before-and-after. Yowsas!
*A 5-month renovation. The white cork flooring is a unique yet practical choice.
*This amazing family home. (Final reveal by Amber Interiors coming soon.)
*American-made warm LED work surface lighting.
*Please tell me you’ve already seen this.
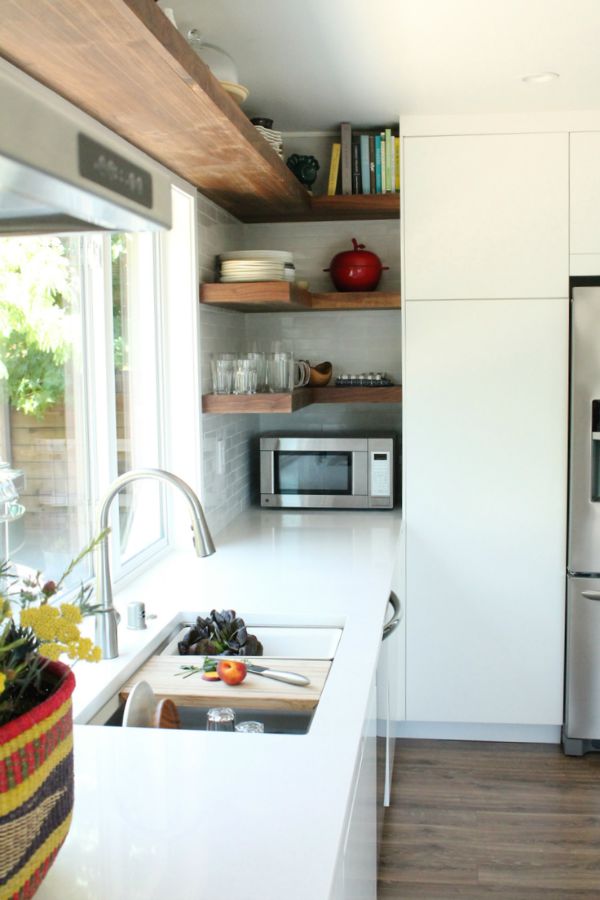
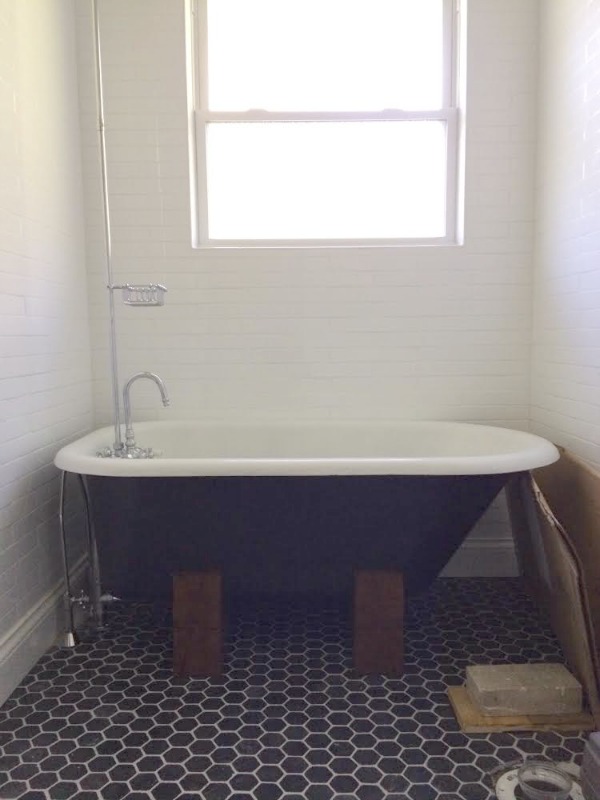
*I will never tire of small space renovations. (Note the top shelf extending above the sink window.)
*A hilarious account of taking your kids with you to the gynecologist. It’s been more than 4 years since I survived a very similar experience. One day I’ll share but I’m not there yet.
*The magic of not trying so hard is a very real kind of magic. (Psst…Holly is writing a new book!)
*This adorable book light is saving my marriage.
*My hair stylist recommended using this dry shampoo to stretch the time in between washings and preserve my new color. So far, so good.
I hope your week is off to a great start!
images: 1-3) Dana Miller for House*Tweaking 4 & 5) Heather Jennings for Make+Haus
A few things before I get into the nitty gritty details of the tub cradle base: 1) Our family vacation was wonderful! I’ll share more soon. 2) No pretty pictures in this post. These images were taken on the fly with our phones. Sometimes (a lot of times) convenience wins. 3) This is not a DIY tutorial. This is just us sharing what we did. We aren’t woodworkers. Feel free to improve upon our methods or forgo them all together. Good? M’kay.
When we started this tub escapade over two years ago (!), we were inspired by a similar cradle base created by none other than Jessica Helgerson and her handy husband. At the time, I shot Jessica an email asking about their tub base. I didn’t anticipate an answer but figured it couldn’t hurt to ask. I was so surprised when she replied! Turns out, Jessica’s husband scribed two wooden cradles out of Douglas fir to fit the contour of the tub’s bottom. The weight of the tub was enough to hold the setup in place. Adhesive wasn’t necessary.
Sounds easy enough, right? Sorta.
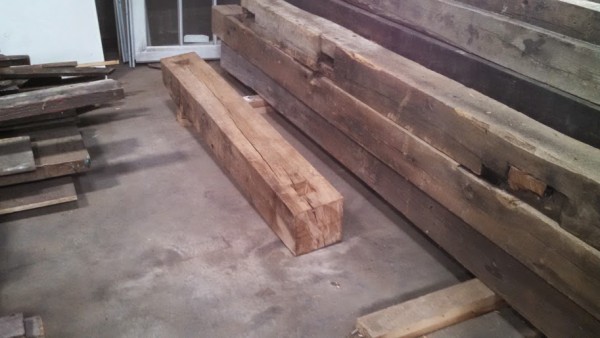
First, we had to find some wood. But before that, we had to figure out how big of a piece of wood we needed. Using the height of the original claw feet as a guide and browsing images of other cradle bases online, we decided on two scribed bases measuring 25″L x 4¾”W x 10″H. That meant we needed a sizable chunk of wood measuring at least 10″ thick. We searched all over and even considered driving a few hours north to scope out salvaged beams. But in the end, we found an inexpensive 10″ x 10″ x 8′ beam right under our noses at Dayton Reclamation and Restoration LLC. It set us back $40. Done.
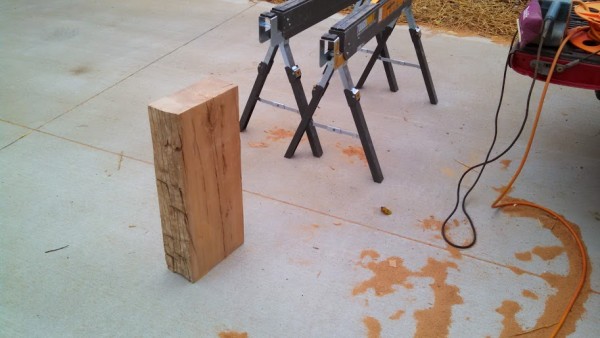
We had hoped to take the beam to a sawmill or woodworker to have it cut to size (into two smaller blocks). But after some difficulty locating a place / person to do the job (at one point, we were advised to call “a woodcutting man in the woods” – lumberjack? – but he never answered his phone) at a location and / or time that was convenient for us, Steve decided to go for it himself.
He discovered that the wood nearest the core of beam had less splits, and we wanted the sides of the bases to be finished (as opposed to rough hewn) so he focused on cutting out the innermost wood from the beam. (He didn’t cut the two blocks out side-by-side but, rather, end-to-end from the beam.) Using a circular saw set on the deepest setting, he cut a block of wood to length from the beam. He ran the circular saw around the perimeter of the beam then used a sawzall to cut it free. He repeated this for a second block.
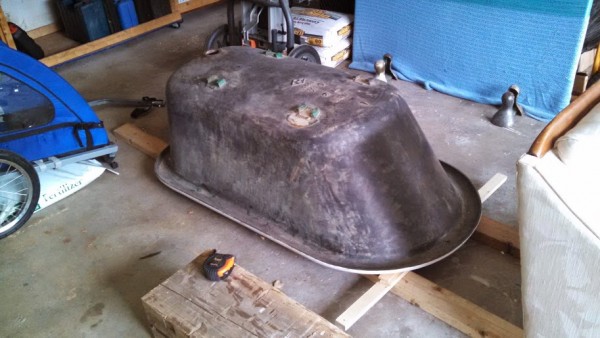
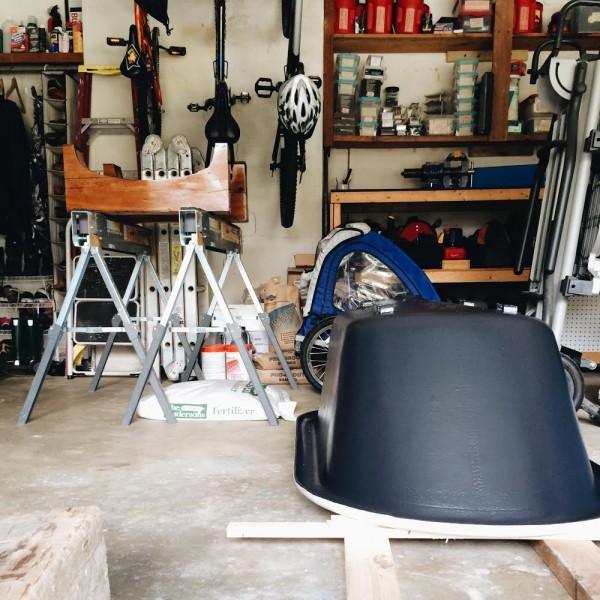
Once the two blocks were cut, we set the tub upside down on 2×4’s in the garage. We put the original claw feet in place (but didn’t attach them…seen above in the background) then shimmed and leveled the tub so that it was as if the tub was sitting upright and level on the floor, only upside down. Have I lost you yet? Basically, we were taking into account the fact that the tub slopes toward the drain – a good thing.
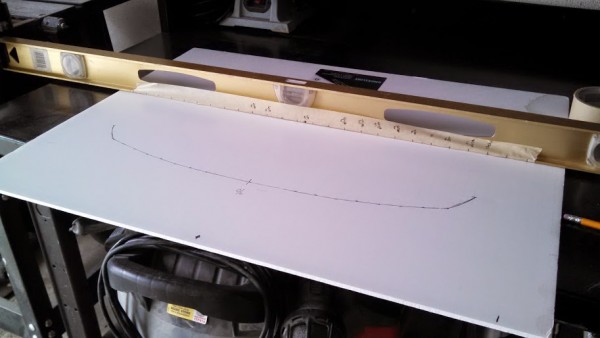
With the tub still upside down and the original claw feet in position (but not affixed to the tub), Steve carefully set a level across the two front feet. The level was lined with a strip of masking tape marked at the center point between the two feet and marked at 1″ increments out from the center. Using a tape measure, he measured the distance from the level to the contoured bottom of the tub at each 1″ mark and noted the measurements on the masking tape. Then he was able to transfer the curve onto a piece of foam board. He repeated the same process for the back legs. (The contour of the tub changes from the drain end to the non-drain end so we had to make two different templates.)
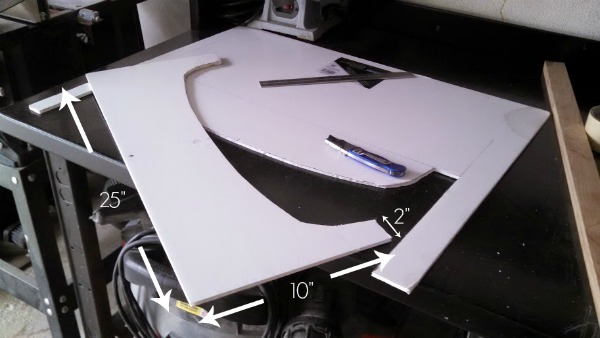
Knowing the overall desired height (10″) and length (25″) of the cradles, Steve cut out templates from the foam board. We guesstimated a roughly 2″ depth for the highest part of the base that would hug the tub. If you haven’t noticed by now, there was a lot of guessing and eyeballing involved in this project.
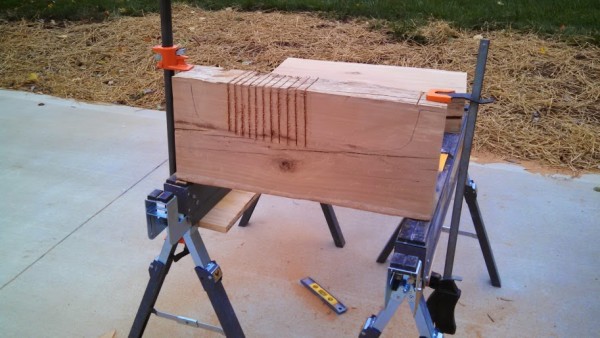
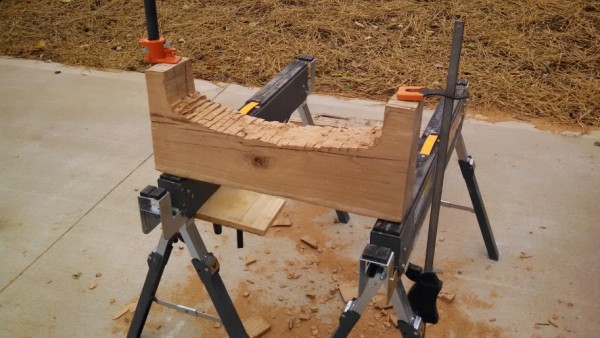
Using the custom foam board templates, Steve traced the curve onto the two wood blocks. (If you look closely you can see a pencil line on the wood in the image shown above.) He traced the curve onto both sides of the respective blocks to guide him during the cutting process. He made straight cuts down to the pencil line with a reciprocating saw, leaving an inch or so between cuts and keeping an eye on both sides of the block to make sure he wasn’t cutting one side deeper than the other.
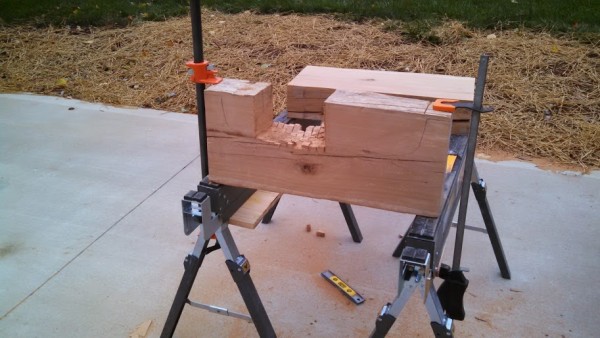
Working in sections, he tapped out the cut slivers with a hammer.
Eventually, the cradle started to take shape. With the contour roughly cut, he used a Lancelot blade on an angle grinder to further carve out the cradle. Then he went back in with a flap disc to smooth out the curve. He repeated the same process on the second block.
After that there was a lot of setting the cradles on the upside down tub in the garage and making adjustments. We used a wood bit to cut notches in the cradles for the claw foot mounts to rest in, recessed. (We decided early on to place the cradles in the same positions as the claw feet for proper support and balance.) This step of the project involved a lot of trial and error and was extremely tedious. But it was necessary for a snug fit.
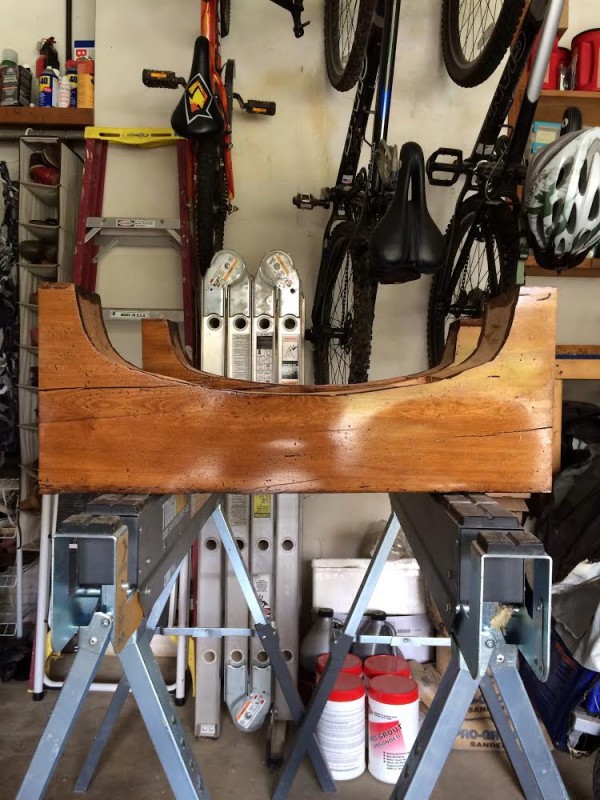
The cradles were sanded with an orbital sander a total of SIX TIMES! We worked our way from 80 to 320 grit sandpaper for a smooth-as-a-baby’s-butt finish. We conditioned the cradles with Minwax pre-stain wood conditioner then applied two coats of Minwax special walnut stain and two coats of Waterlox to protect the wood from future splashes.
FYI – The state of our garage is an embarrassment so don’t look too closely! The walls are *mostly* organized but the floor is cluttered with all the components of the main bath renovation and the entire space is dirty. We’ve had an entire bathroom (tub, toilet, vanity, lighting, etc.) sitting in our garage for over two years! Maybe after the bathroom is finished, we’ll actually park a car in here. FOR THE FIRST TIME EVER.
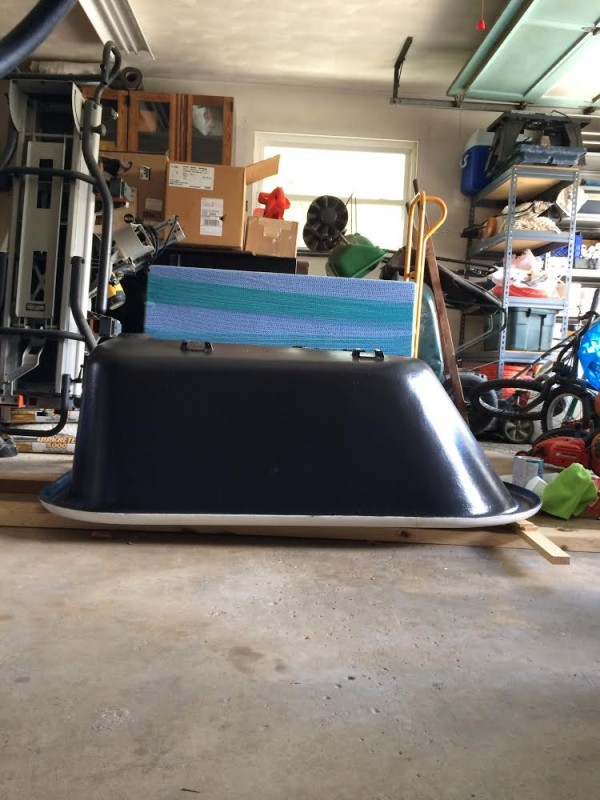
As for the tub exterior, I used Sherwin Williams products. (I had tested the tub for lead a few months prior and the results were negative.) We had good luck with their enamel latex when we painted the builder kitchen cabinets in our previous house so I decided to use it for the tub, too. The tub’s exterior had been stripped and sanded before we bought it via craigslist. Yay for someone else doing the prep work for me! I wiped it down then applied one coat of Sherwin Williams all surface enamel oil base primer tinted to a medium gray. I had anticipated needing two coats but the coverage was superb. I finished up with two coats of Sherwin Williams all surface enamel acrylic latex in satin, color-matched to Benjamin Moore black jack. The sleek, contrasting exterior was exactly what we had envisioned!
We were anxious to bring the new old tub into the house but completely forgot how long it takes for enamel paint to cure. We left the cradles and tub out in the garage for another 1-2 weeks to cure and off-gas. After a test run of placing the tub on the cradles in the garage, Steve had one of his *strong* buddies help him carry the tub in through the front door to the bathroom. The tub weighs 250-300lbs! We were leery of rolling that much weight on a furniture dolly across our wood floors. It would have been easier with a third pair of ripped arms but there wasn’t any room in the hallway / bathroom for another person.
We had built up “the moving of the tub” so much but, in reality, it was relatively anticlimactic. It fit through the bathroom doorway with the door off the hinges (whew!) and in minutes the tub was in place resting on the cradles. It was level, too! Because of the hex floor tiling fiasco, we were sure we’d need to shim or readjust things but we didn’t. Rarely are things easier than we expect so it was a nice surprise. The exterior suffered one small scratch but it only penetrated the top layers of paint – not the primer.
It probably wasn’t necessary but we did add a bead of silicone to secure the cradles. Due to the weight of the tub and a snug fit, the tub doesn’t wobble or tip at all. We’ve jumped up and down in the tub and tried to rock it. It’s solid! We’re also really happy with the tub interior. It’s in great shape for a vintage tub. We’re guessing it was reglazed at some point.
All in all, we spent $270 on Project Declawed Tub (excluding fixtures and plumbing): $200 for the tub, $40 for the beam, $30 for the Lancelot disc. The staining and sealing materials were leftover from previous projects. For the primer and paint, I used a Sherwin Williams gift card I had won two years ago in Apartment Therapy’s Room for Color contest.
In a perfect world, the cradles would be spaced more evenly. I think the one on the left would look better if it was moved further to the left. But that’s where the drain is so it’s not an option. It’s worth noting that if you desire a completely symmetrical setup, a freestanding tub with a center drain is a must. But we weren’t willing to move plumbing lines in the bathroom. In fact, the goal was to work with the original layout. I also think the cradles would look better if they were ~2″ shorter. However, I’m not sure they would function as well. We kept the distance between the floor and the bottom of the tub the same as it was with the original claw feet. At 2″ shorter, the tub might have felt too low? Maybe not. We needed the clearance for the drain line. Not to mention, a lower tub would have put more strain on the already strained water supply lines. Ah! So many little things to think about.
Overall, we’re extremely happy with how the tub turned out. Especially since it was a unique concept. We’ve blamed this bathroom’s non-existence on time, kids, blah, blah, blah, but honestly there was some fear involved, too. How’s this all going to work?! We like straying from the norm and sometimes it’s scary but it’s always worth it. We either love what we end up with or learn something new or, if we’re lucky, both.
images: Dana Miller for House*Tweaking


beauty, budget decor, DIY, family life, food, inspiration, renovation