Things are moving right along in the boys’ bedroom.

Currently, this lil’ corner of their room is a new family favorite. Layne requested the reading chair. I added a vintage ottoman and dresser (off to the side) for added comfort and storage, respectively. With the major furniture pieces in place, I’ve turned my attention to accessories and art. Ever since Apartment Therapy featured this home tour, I’ve been itching to DIY some bullseye art and this corner seemed like the perfect place for it.

With the help of Glidden® paint, I was able to pull it off. Here’s what I did:
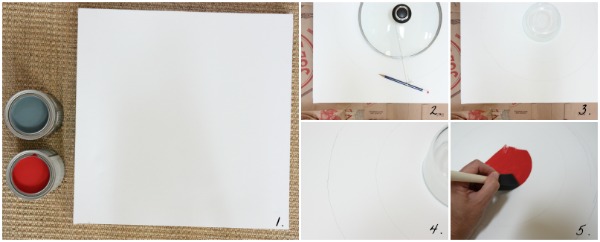
1 – I used a square canvas (found in my attic) and two quarts of Glidden paint in blue-grey and fire engine red. First, I painted the entire canvas a warm white that I already had on had. This step is the secret to achieving nice smooth curves in the final product so don’t skip it! (You can easily touch up stray brushstrokes with the white paint later on.) I let the white paint dry completely.
2 – I found the center of the canvas then used a pencil to trace a large pot lid right in the center. This would later become the inner curve of the outermost bullseye ring. I determined how thick I wanted my outer ring then cut a length of string accordingly and tied one end to my pencil and the other end to the handle of the pot lid. Holding the lid in place, I carefully drew a larger circle around the pot lid. I had my outer bullseye ring.
3 – For the inner bullseye, I traced around a small glass container in the center of the canvas.
4 – My pencil lines were faint which made them easy to edit and also easy to paint over.
5 – Working from the center out, I painted the canvas using foam brushes and a steady hand. I gave the center bullseye and outer ring two coats of paint each. After the paint dried for 30-60 minutes, I went back with the white paint used in step #1 to touch up any brushstrokes that inevitably made their way out of the lines.

I decided to frame the canvas with inexpensive wood trim. I left the wood unfinished for a casual look. I think the thin frame is the perfect touch!
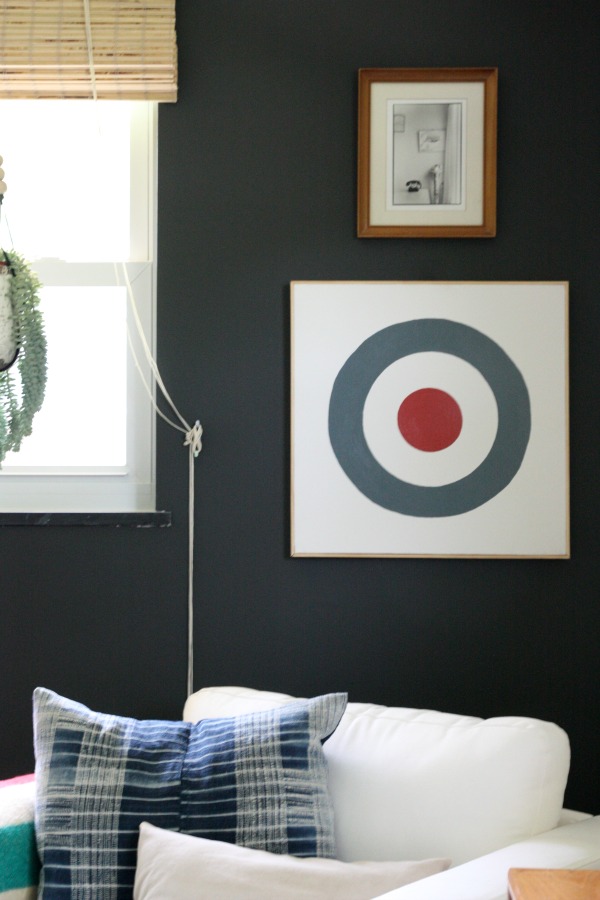
Glidden paint made it easy to finally turn my inspiration into reality. The boys LOVE the bullseye art! They keep telling me how cool it is. I think the bullseye is a great symbol to use in a boy’s room without feeling too theme-y. What do you think?

FYI – Disclosure: This post was sponsored by Glidden paint through their partnership with POPSUGAR Select. While I was compensated to write about Glidden paint, all opinions are my own. Thank you for supporting the brands that support this blog!
images: Dana Miller for House*Tweaking

Today I’m shooting the front entry for the reveal which will be featured later this month or early next. Over the weekend I had fun creating some hanging art for the entry. Wall hangings / fiber art / hanging art…whatever you prefer to call ’em…are super hot right now. I thought something on a smaller scale would dress up the non-existent entry. (It’s just a door that opens into the living room.) I didn’t follow any DIY’s but, instead, made things up as I went. As mentioned in a previous post, this was my inspiration. Here’s what went down.
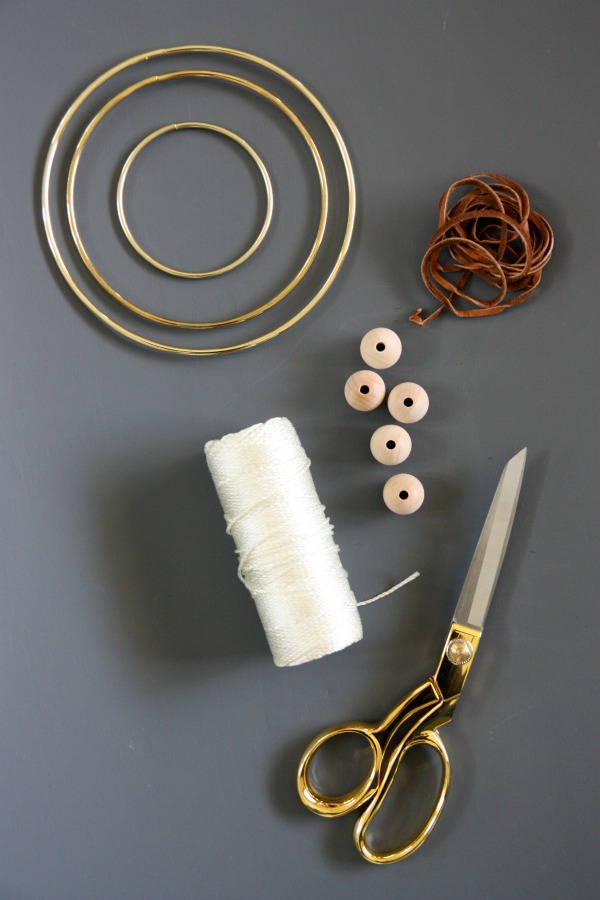
First, I gathered supplies. I picked up three gold rings (6″- 5″- 3″), leather lace and five wooden beads at JoAnn’s for less than $8. I had white string on hand which I found in the garage. (I think it’s for gardening?) The only tools required were my gold scissors and hands.
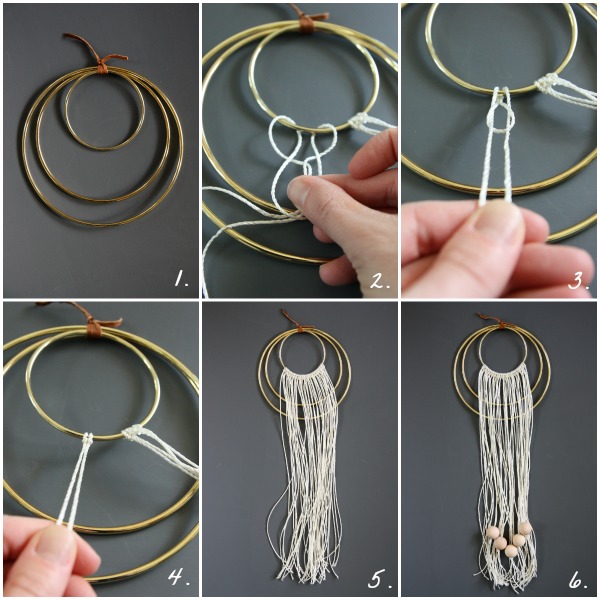
1 – I tied the gold rings together with a strip of leather lace.
2 – I cut twenty-two strands of 24″ long string. Then I folded one 24″ string in half and looped it around the smallest gold ring so the cut ends were furthest from the ring.
3 – I pulled the loose ends of the string through the loop…
4 – …and continued pulling until the string was tightly secured around the ring.
5 – One by one, I added all twenty-two strings to the 3″ ring.
6 – I threaded five wooden beads onto the strings and knotted them in place at varying heights to create a “V” shape. (Each bead is threaded onto to two loose string ends which are knotted.)
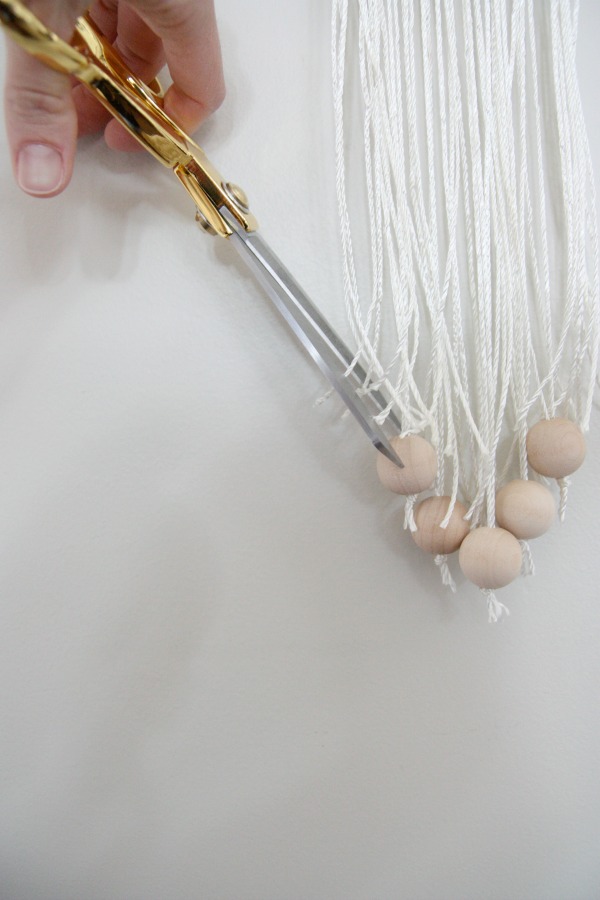
I hung the entire piece on a hook to trim the strings into a “V” shape that corresponded with the placement of the beads. (Be careful not to cut the strings holding beads above the beads!)
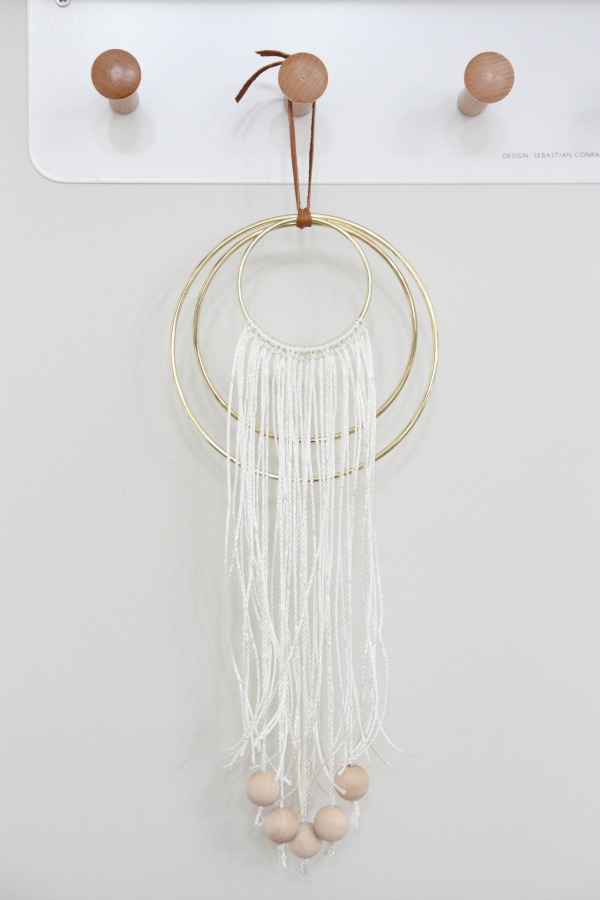
I added another loop of leather lace at the top to display the hanging art on some wood knobs near the front door. Ta-da! This project was super easy, super cheap.

I especially love the fact that this hanging art incorporates four of my favorite things: gold, white, leather and wood. I like to think of it as a modern day dream catcher and I associate the five wooden beads with my family of five. It’s a stretch and I’m nuts, I know.

Steve got a kick out of watching me DIY the hanging art.
“Are you making earrings?”
“It’s like bling for the entry.”
“I’ve got some ideas for post titles: DIY Dangly Balls, Hang Your Balls at the Door and (my personal favorite) Nothing Says Welcome Home Like My Balls.”
I could go on and on. We were both in tears by the time it was all said and done. Our sixteen-year-old sense of humor has saved our marriage more than once. Laughter is good.
Anyhow, there’s a snippet of the entry. I can’t wait to show you the rest! It’s nothing over the top but it’s functional and stylish which is really all I need it to be.
Now, tell me. What are your title ideas for this post? Have fun with it. My sixteen-year-old sense of humor won’t judge.
images: Dana Miller for House*Tweaking


budget decor, DIY, inspiration, interior design, kid-friendly