The nursery version of Mabrey’s room featured an IKEA EXPEDIT (now discontinued) which served as a dresser/changing table. A mix of woven baskets and fabric bins held everything from clothing to diapering essentials to random toys. I added an extra long contoured changing pad to the top to give it yet another purpose. It served the nursery well, but as Mabrey grew so did her clothes. Eventually, the baskets couldn’t contain her wardrobe. They were overflowing and, more often than not, I would find them pulled out from the shelving unit. It was not a tidy look, and it wasn’t working for our current situation. (Not to mention, Mabrey hasn’t needed a diaper change for more than two years.) It was clear that we had outgrown the EXPEDIT, but it lived with us for nearly a decade as a living room console, playroom storage and media stand in previous residences. It had a good, long, multipurpose life. We got our money’s worth and then some. It was time to pass it on to someone else.
When I started searching for an upgrade, I knew I wanted another versatile piece that would stand the test of time and maybe even a few moves. Actual drawers were absolutely necessary! On a trip to IKEA earlier this year, I spotted a NORDLI dresser on display and was impressed with the customization options, soft-closing drawers and affordable price. After taking some measurements, I settled on the four-drawer NORDLI dresser.
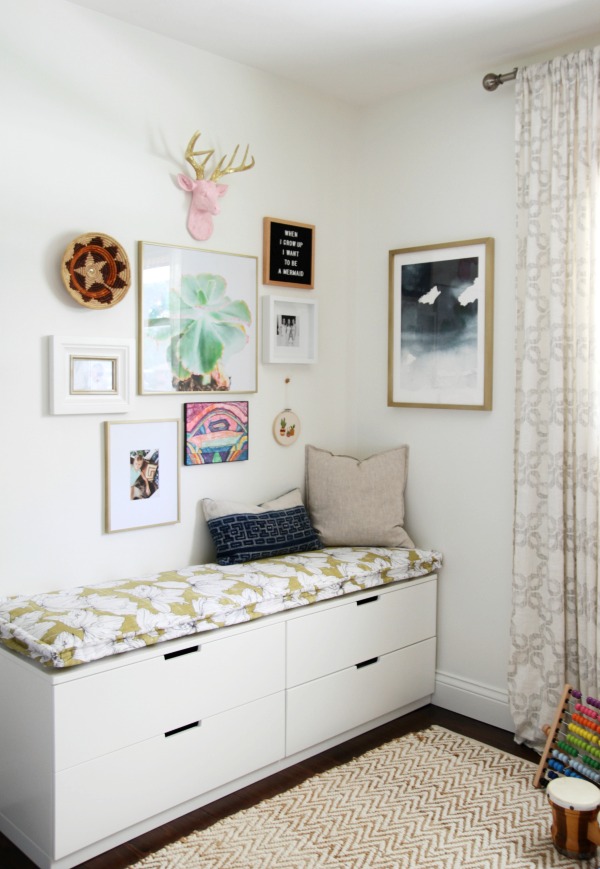
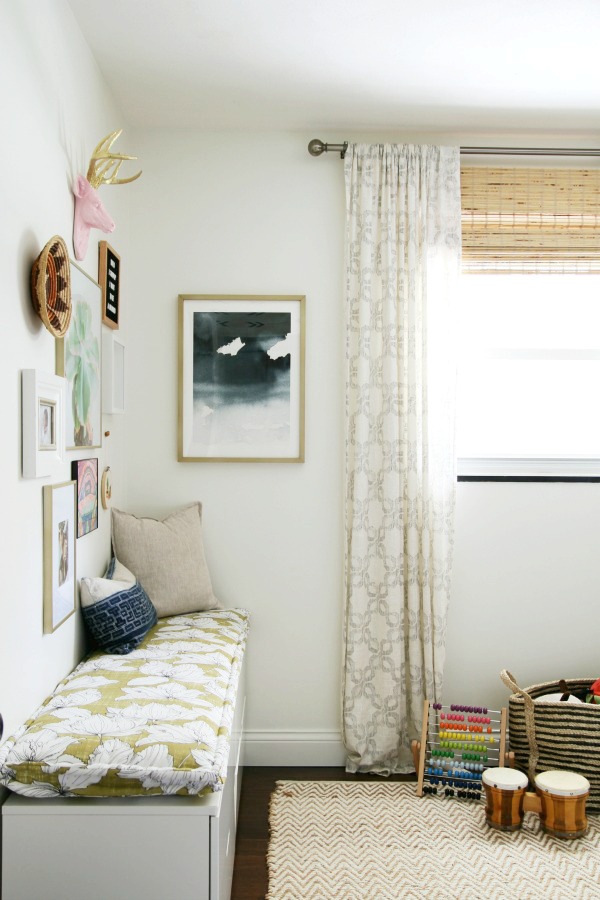
It was easy enough to assemble and anchor to the wall. I took me maybe an hour and a half? The scale is spot-on! The length fits the wall opposite Mabrey’s bed perfectly. The drawers are wide and roomy, yet the 17″ depth is shallow enough to keep the middle of the room open for play.

Real drawers that open and close! Such a novel idea. The drawer hardware runs smoothly and the soft-closing dampers are every parent’s dream. Three of the drawers hold clothing. The fourth holds puzzles and a magnetic doll dress-up set.
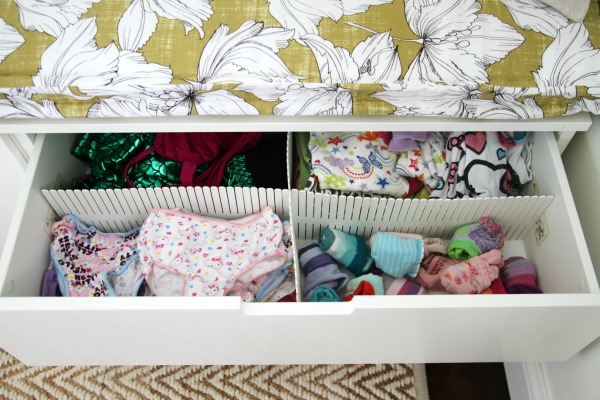
I love the HÖFTA drawer dividers! They’re super handy for divvying up drawer space and organizing smaller items like socks, underwear, pajamas and costume accessories. Mabrey knows where to find everything, and everything has a designated spot to return to after washing.
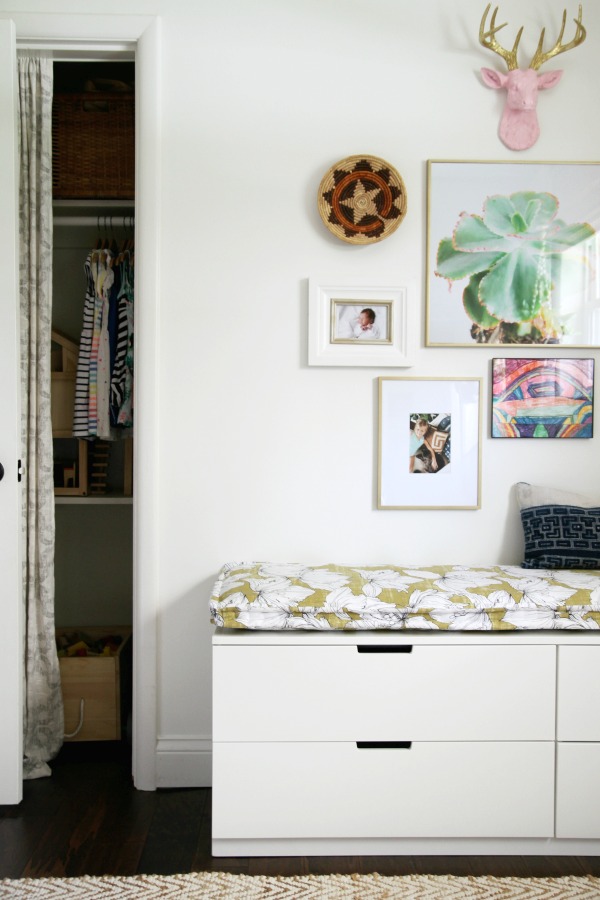
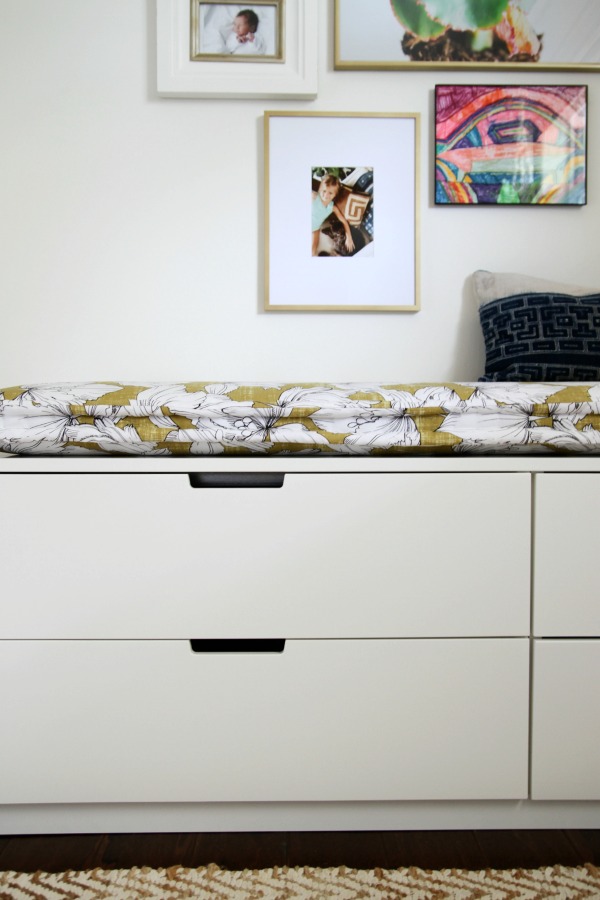
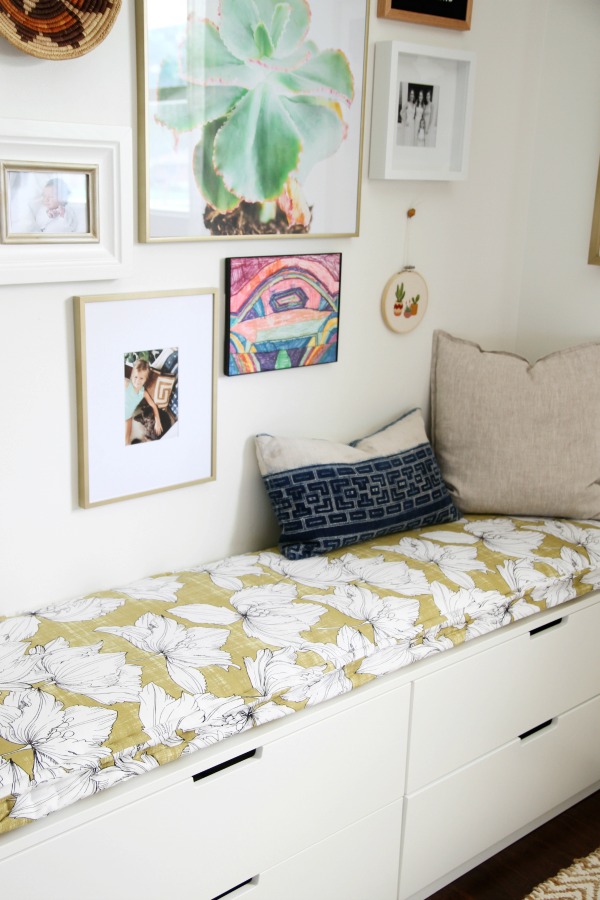
The low-slung design reminds me of a bench, so I made a custom cushion for the top. I loosely followed this tutorial to sew the cushion which features french mattress seams for added interest and a casual vibe. I decided not to add tufts to the top because the cushion is so narrow and I thought tufts + patterned fabric might be too busy/formal. (Also, I’m lazy.) It’s worth noting that this is NOT a removable cover. We don’t allow food, drinks or art supplies in the kids’ bedrooms, so it shouldn’t be an issue. Even so, I’m no stranger to a little spot cleaning.
Sewing a french mattress cover is definitely more time consuming than making a basic boxed cushion cover. This took me the good part of a day, and my fingertips were numb for another two days. But I’m so happy with the result! It felt good to bust out the ol’ sewing machine. We have somewhat of an on-again-off-again relationship.
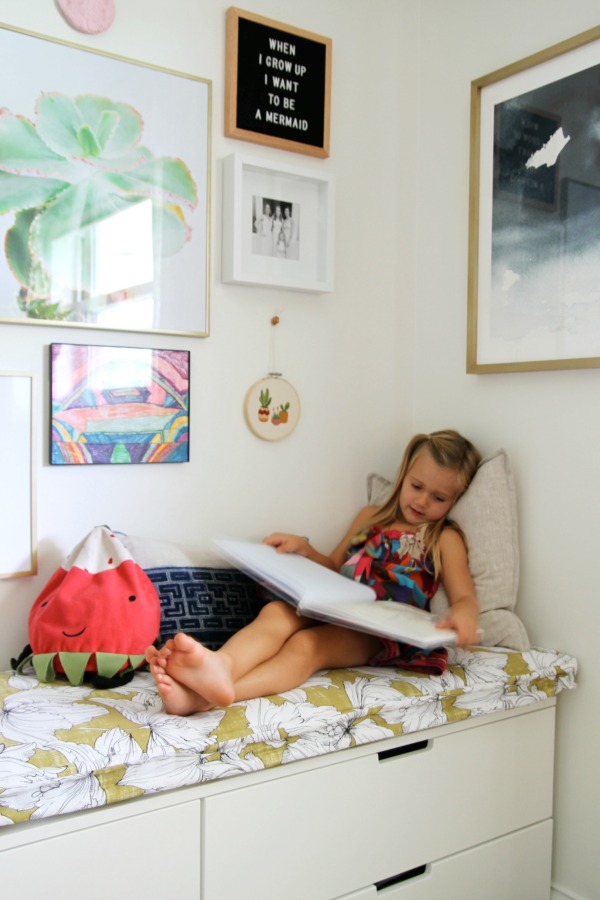
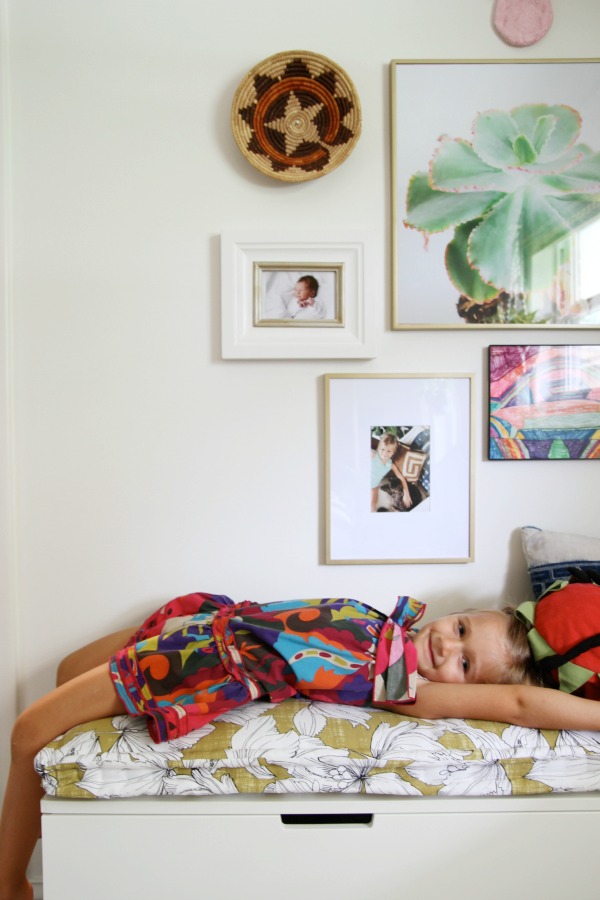
Adding the cushion added another function to the dresser. It makes for the coziest, pint-sized reading spot. (Cheetah loves curling up on it, too.) I love multipurpose pieces like this! Especially in tight spaces where square footage is at a premium. With a removable slipcover made from outdoor fabric, I could see this dresser-bench combo working just as well in an entry or mudroom – even a breakfast nook. With so many customization options available, the possibilities are endless.

I love finding affordable, quality pieces like this at IKEA. Too often, I think consumers wrongly equate quality with a big price tag only. When I think about quality, I consider design, materials, function, versatility, longevity and price. A piece that looks great, works well, serves multiple purposes for different rooms and/or different life stages doesn’t have to cost a fortune. Bonus points for possible customization and personalization! For instance, the BEKVÄM kitchen cart is solid, unfinished wood and begging for a DIY stain or paint job. I’d use it in a small kitchen as a bar cart or extra prep space, in a bathroom as added linen storage or in a craft room to corral art supplies. And it’s $60!
Do you have a favorite multipurpose IKEA piece?
P.S. – Stay tuned for a full tour of Mabrey’s big girl room along with a complete source list!
*I am a brand ambassadör for IKEA. This post sponsored in part by IKEA. I received product and payment for this collaboration. IKEA is a registered trademark of Inter IKEA Systems B.V. and is used with permission. The views, ideas and opinions expressed here are my own. Thank you for supporting the brands that support this blog!
images: Dana Miller for House*Tweaking


budget decor, DIY, inspiration, kid-friendly, organization