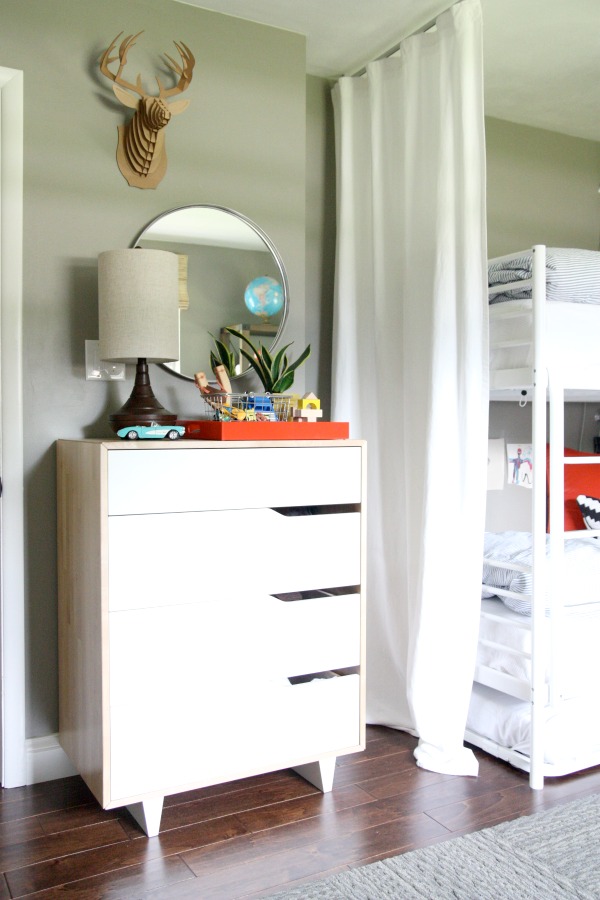
I’ve been having fun tidying up the boys’ room bit by bit. We added a dresser to their room last year. Each boy gets two drawers for clothes: one for tops, one for bottoms. Warm and cold weather clothes are all in there. PJ’s, underwear and socks are stored in the closet. Obviously, my kids don’t have a ton of clothes. They couldn’t care less. They have their favorites and as long as those are an option, they’re happy. Having less clothing {HH, Mabrey and I are in the same boat as the boys when it comes to clothes} in our house makes it easier to stay on top of laundry, keep closets/drawers tidy and get everyone dressed quickly in the mornings.

So, the inside of the dresser has never really been an issue. It’s plenty of space for our needs. The top is another story. The dresser sits just inside the bedroom door and it became a convenient dumping ground for whatever toy/book/sock the boys were supposed to be putting away. {Because, you know, taking five more steps into the room is just too much to ask sometimes.} It was a mess. This past weekend I decided to do something about it.

I added a tray that not only ties into the pillows on the bunk but also corrals all the stuff that inevitably winds up on the dresser. Even when it’s full, it looks better than crap spread out all over the top of the dresser. There’s a metal basket in the mix that acts as a car catchall.
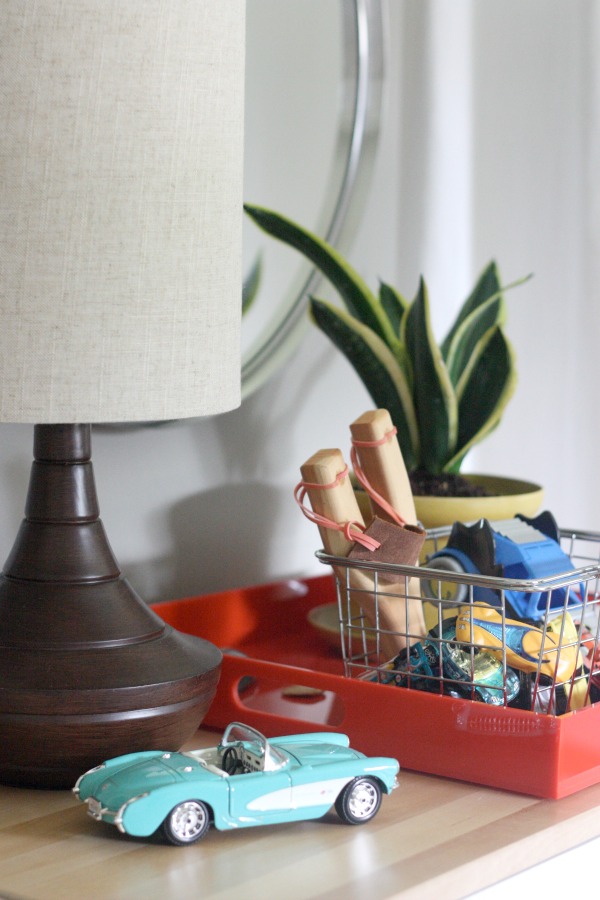
I purchased the lamp a few months ago. {It was only $30 but the price has skyrocketed since then. Yikes!} I love the midcentury style and petite size. It’s perfect for the dresser. The base is resin but looks like wood and has held up really well to bumps from the little people in our house.
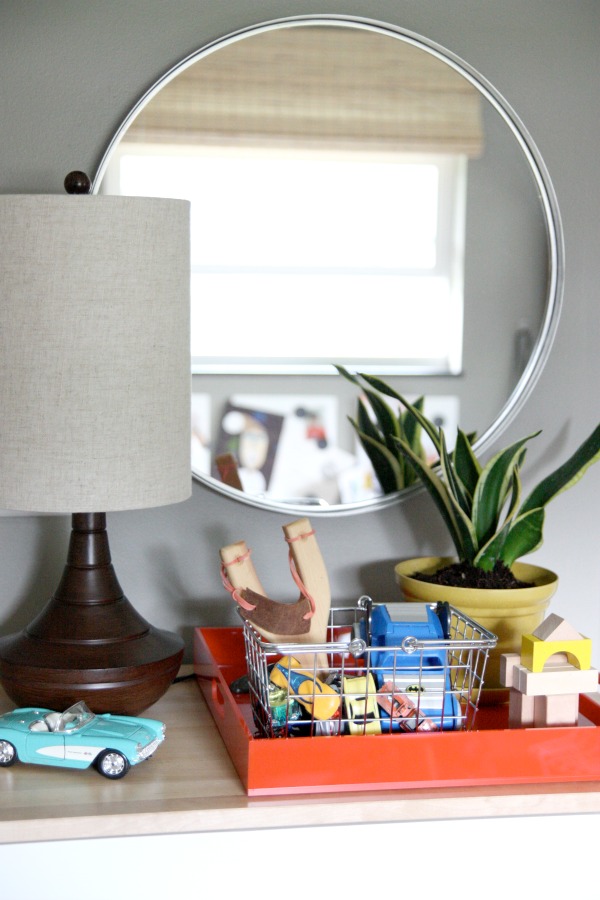
Layne has been begging for a plant in this room. I kept *forgetting* to pick one up because all I could think about was spilled dirt everywhere. But with the new tray in place, I thought we could give a plant a try. My hope is the tray will help catch the planter’s contents should it get knocked over which, in reality, is totally going to happen. I found the eco-friendly pot {it’s made from corn husks and is biodegradable} at JoAnn’s last week, on sale. Layne and I made a special mother-son shopping trip to pick up the snake plant. All-in-all, the plant setup was ~$10 so if it doesn’t work out, I won’t be too upset.
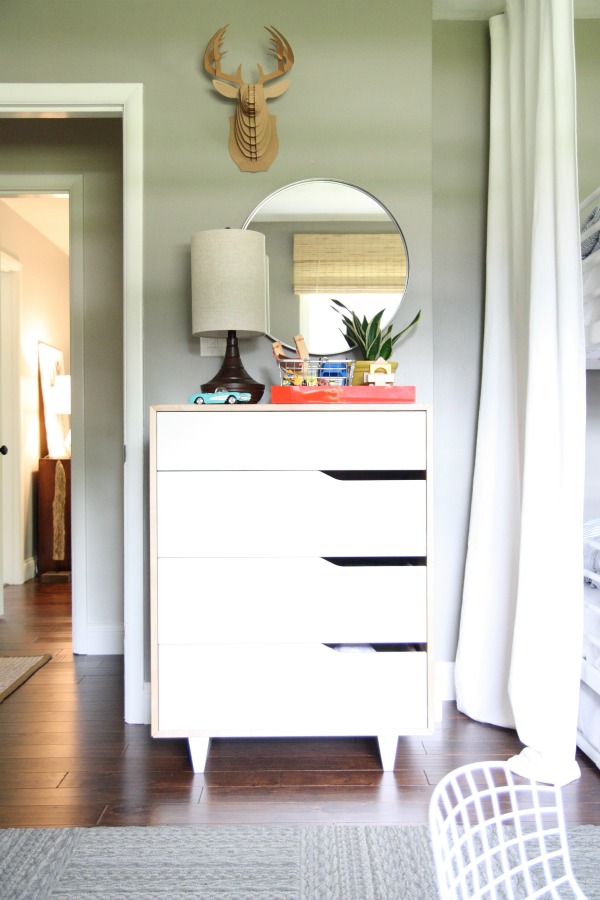
On the wall above the dresser I hung a round mirror {I’m a sucker for circles} to break up all the rectangular lines in the room {dresser, bunk bed, rug, bookcases, the room itself…}. It’s purposefully off-center to allow access to the light switch. I love that it reflects a view of the window across the room and bounces light around. The cardboard deer head was an attic find. So glad he’s on display now!
If you like what you see…
Sources: Flor sweater weather carpet squares // modern grooved table lamp // MANDAL dresser // orange tray // cardboard deer head // GRUNDTAL mirror
What did you learn today? Decorating with toys in a child’s room is practical and inexpensive. Using trays and baskets for easy display keeps things looking neat and tidy. Adding kid-friendly lighting and wall decor kicks things up a notch. Now you try!
Tomorrow I’ll be sharing a little behind-the-scenes video of a less obvious addition to this dresser vignette. It’s House*Tweaking’s very first video and – WARNING! – it’s rough but you will learn something. Like, how we DIY with three kids around. If anything, you should tune in just for the laugh.
images: Dana Miller for House*Tweaking
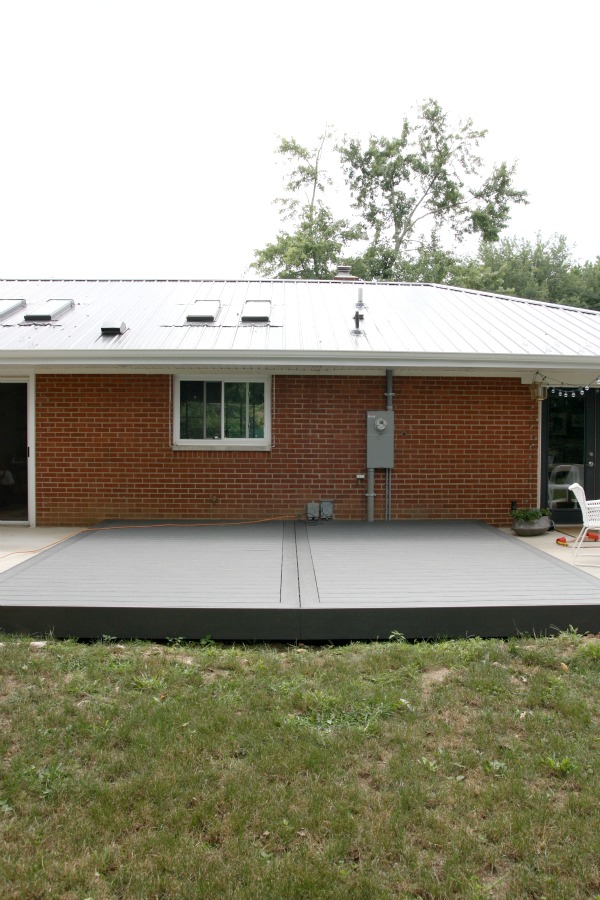
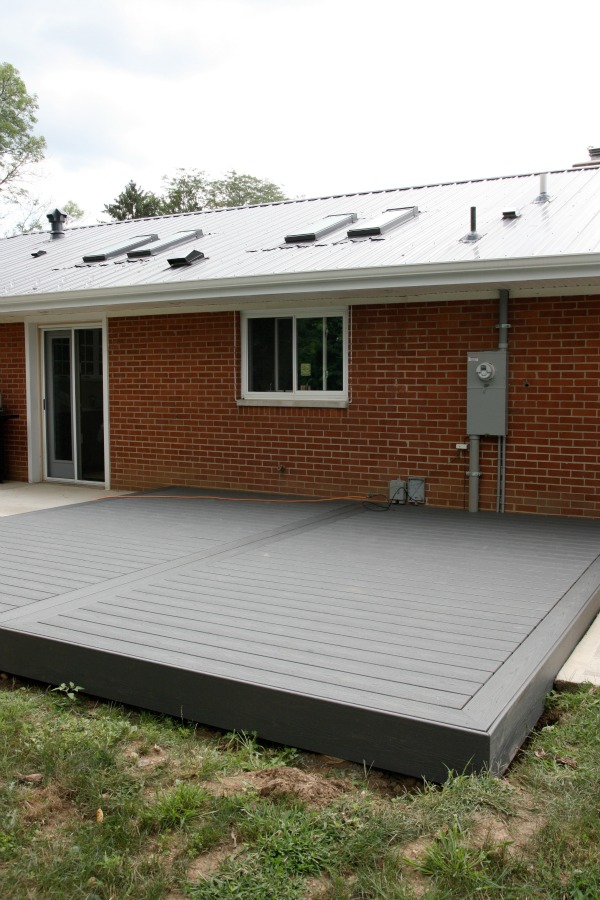
There she be. In all her composite glory. If you’re just tuning in, we partnered with Trex to build a deck off the back of our house, between two concrete patios. We live in a modest ranch and we wanted something low-lying and simple in design – no curves or fancy inlays. We opted for a 15′ x 17′ platform structure with a double picture frame detail. {See our original design plans here.}
The Trex Elevations framing was ideal for our situation because it consists of galvanized steel that won’t warp, rot or sag over time – even when in close contact with the ground. Whew. We chose the Trex Enhance decking in clam shell to tie in to the gray metal roof.
From breaking ground to screwing in the last Hideaway hidden fastener, it took us about three months to DIY the deck build. And by us I mean HH. Unless you consider steadying a level DIY. My main job during all of this was to keep the kids occupied and out of the way so HH could do his thing. Normally, a deck build wouldn’t take three months to complete but when you work close to 60 hours/week and frequently travel out of state for work, it takes three months. Honestly, I’m surprised it didn’t take longer. This deck is HH’s baby. He’s been nurturing it every spare second in the evenings and on weekends. HH put a lot of work and sweat into this deck but I think he secretly enjoyed it.
We are super happy with the results. I, for one, am a huge fan of the color. It’s a medium warm gray and looks great next to the red brick. I had always assumed composite decking was brown or tan and we almost didn’t do the Trex thing until I discovered the clam shell hue. If you look closely, you can see a faint faux wood grain. It’s a nice feature and feels good underfoot. Not slippery when wet.
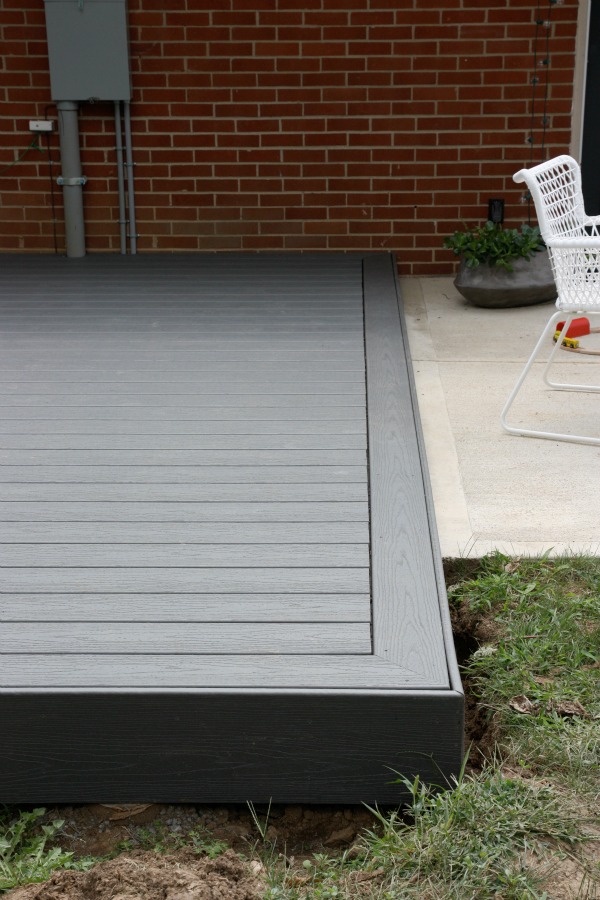
HH’s measurements were spot on. The deck fits like a glove in between the two concrete patios that we had poured last fall. I had dreams of gravel patios or even concrete paver patios with ornamental grasses growing between the pavers but with three kids who track everything indoors and an HH that isn’t keen on tedious yard work, we opted for the more practical concrete patios. Sometimes function trumps form in our house. Sometimes.

The hidden fasteners go a long way in keeping the look of the deck clean and consistent. Not to mention, the absence of nail heads feels pretty awesome to bare feet. We don’t have any furniture on the deck yet so we spend a lot of time just walking around on it and admiring it. {The kids like to pretend it’s a stage.} It’s really solid and sturdy. This deck isn’t going anywhere!
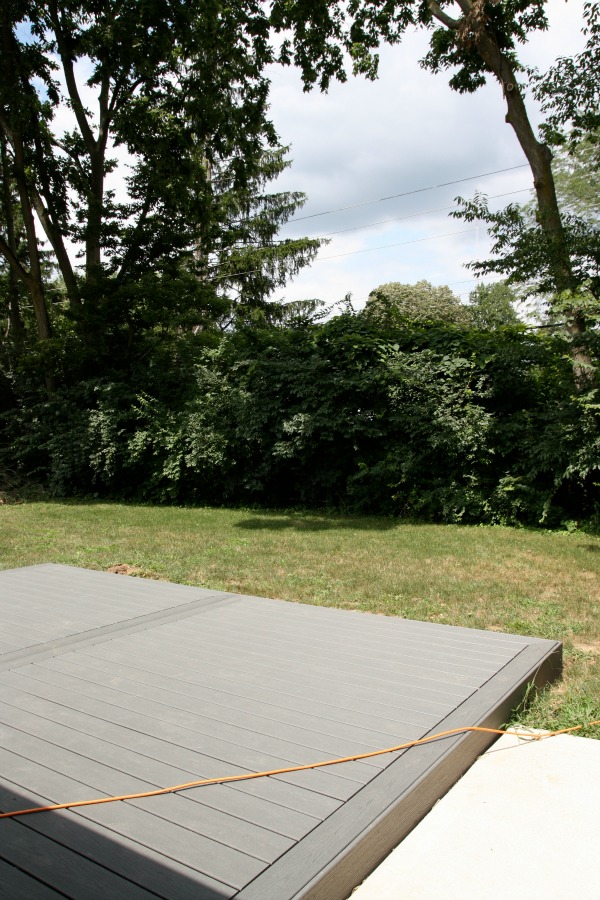
I was glad we were able to keep the deck only a small step up from the yard and patios. Low platform design = no railing required. No railing = unobstructed view of the backyard. But our favorite thing about this deck? NO MAINTENANCE. Knowing we will never have to stain, seal or reseal this bad boy makes victory that much sweeter.
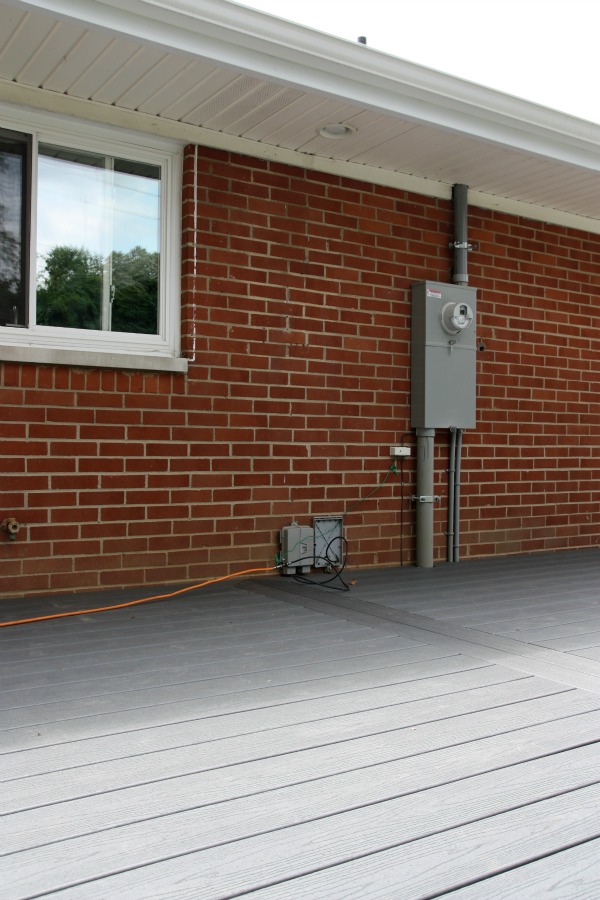
Obviously, we have more plans for our backyard {like burying that orange internet cable!} and these aren’t true “afters.” But the patios and deck are the basic building blocks for what will hopefully become a really great place to hang out and relax with friends and family. Working with the Trex company and its materials was a dream come true for us!
Because you might be curious {I’m always curious as to what other bloggers are planning!} here are a few things we’d like to add/tackle in the backyard:
*general cleanup {we’ve kinda neglected this space while the deck was under construction}
*backfill around the deck and reseed
*add comfy deck furniture {I have my heart set on a sectional}
*disguise the electric meter and cable boxes
*bury the orange internet cable
*add portable shade cover {we have no plans to build a permanent shade structure}
*DIY a kitchen garden {we are really stoked about this one!}
*wrangle the treeline
*add a rain barrel
*find/build an out-of-sight place for our garbage and recycling cans
*paint the second set of french doors {to the kitchen} to match the mudroom’s moody french doors
*landscape around the northeast corner of the house
*make the grilling patio more functional/appealing
*set aside a spot for composting
…and probably a bunch of other stuff that I can’t think of right now. Then WHEN THAT’S ALL DONE maybe we can relax. Ha!
We have partnered with Trex to build our deck. They have provided us with some of the materials for the build but all other materials, designs, labor, injuries, flubs, four-letter exclamations, opinions and reaping of benefits {i.e. chillaxing with beverages on our new deck} are our responsibility. A special thanks goes to Lauren and Nate at Trex! They were so helpful and patient while we floundered around with our first ever deck build.
images: Dana Miller for House*Tweaking


budget decor, DIY, interior design, kid-friendly