First of all, WE HAVE INTERNET ACCESS! Yay! Okay, carry on…
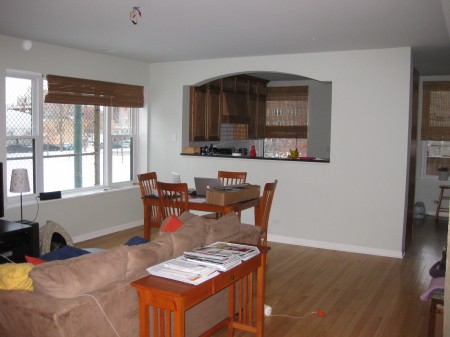
This is the ‘in progress’ view of our kitchen from the living area of our future great room. The oven and hood will be in the middle of the two windows. {For more details on the kitchen layout, look here.} If you look at the ceiling, you’ll notice three blue electrical boxes for light fixtures. Specifically, they are the electrical boxes for our kitchen island pendants. As you can see, there will be a trio of pendants centered above the kitchen island. I thought about one big pendant over the island but since the island is going to be over 8′ long, I think 3 smaller pendants will balance the length of the island better. I thought I’d share with you what pendant lights *I think* I’ve officially decided will go there. Not just for your benefit but for mine too. Handy Hubby says I have to start making some design element decisions and I’d be lying if I said I wasn’t a tad overwhelmed. So, I’m taking it one step at a time {while still trying to keep an overall aesthetic in mind} and starting with something relatively easy first. The kitchen island pendants seemed like a good place to start.
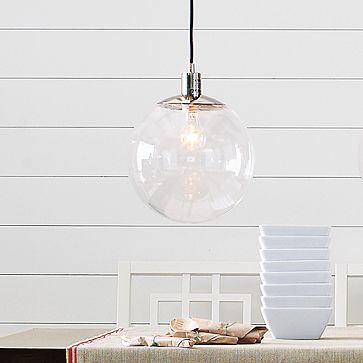
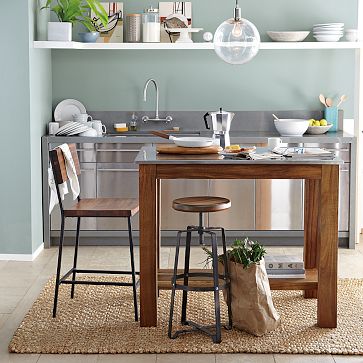
I’ve been stalking this minimal, industrial-like West Elm globe pendant for months now. {Maybe that’s why I’m somewhat fond of the globe lights in our apartment‘s kitchen.} I think a trio of them will work great above the island. I want something see-through so that, when you’re in the living area of the great room looking into the kitchen, your eye travels past the pendants to the wall that will eventually house a streamlined hood. A more solid pendant would stop your eye short at the island’s location and cut up the space taking away from that open, airy feel we love so much and are trying to achieve. But the pendants still have enough presence to define the island.
Like I said, I’ve been eyeing these globe lights for months. Mostly with the hope that they’ll go on sale and I can snag them up. {Currently, you can get one of these lights for $99 and a trio for $269.} But, alas, no price reduction has occurred and we’re getting down to the wire {bad pun} on picking ceiling fixtures for the Underdog. At least, that’s what HH is telling me. So, with thriftiness in mind, I bought $300 worth of West Elm gift cards from our local Kroger store while their quadruple fuel points special was running. That means I got $1/gallon off my last fill-up at the gas pump! {For those of you who don’t shop/have Kroger stores, they offer point rewards for gift card purchases. The points can be used to deduct money from your fuel purchases at Kroger fuel centers or participating Shell stations.} I plan to use the gift cards to purchase the pendants. Not exactly the clearance-priced globe lights I was hoping for but at least I got some savings elsewhere. It all adds up.
What do you think? Do you like the idea of minimal, non-view impending globe lights over the future kitchen island? I think they’ll look like fabulous little fish bowls lit up in the evening hours.
images: 1) Dana Miller for House*Tweaking 2&3) West Elm


DIY, inspiration