I’m a creative. I like change. I’m fickle when it comes to small, unimportant things like, say, the pillows on my sofa or the paint color on my bedroom walls. I get restless when there isn’t a project to work on. I’m happiest when I’m planning / doing / reading / making / learning / experiencing something new. I’m unhappiest when things are static.
That’s not to say I’m unappreciative of the things in my life. I am so grateful for all of it. Very much so. But appreciation is not the same as complacency. We can value all the things, people and experiences and still crave change. And that’s where I’ve been for the past few months.
We’ve touched nearly every inch of this house. To the point where it feels like home. We have a few projects left on the to-do list (coming to you later this week) and I will forever tweak little things here and there because it makes me happy. But there’s only so much we can (and want to) do to this house. For the most part, I love it the way it is and I don’t want to change stuff for the sake of change alone. So, I’ve been craving a change of scenery, a blank slate, a space that would give me full creative freedom. Buying a new (old) house is off the table at this point. We don’t want a big scale project consuming our family’s life right now. We’re finally enjoying the fruits of our labor. No more renovation messes! And we’re set to pay off our mortgage at the end of this year which was our goal at the beginning of this downsizing journey.
I don’t even remember how I concocted the idea but a few weeks ago I decided to at least look for a designated workspace outside of the house. It’s never been a dream of mine but it felt like a natural next step. My requirements? Not a ton of space but an open space, good lighting, freedom to change cosmetic finishes at will, kid-friendly and inexpensive.
Honestly, I didn’t expect to find much. The true office spaces had horrible lighting and lacked the flexibility I craved. Small work-live apartments were too big, too expensive. (I did come across a great contender by way of a lil’ old house with original hardwoods and a fireplace zoned as work-live asking for help with renovations in return for lower rent, but when I went to check it out, it had been demolished! My heart sank.)
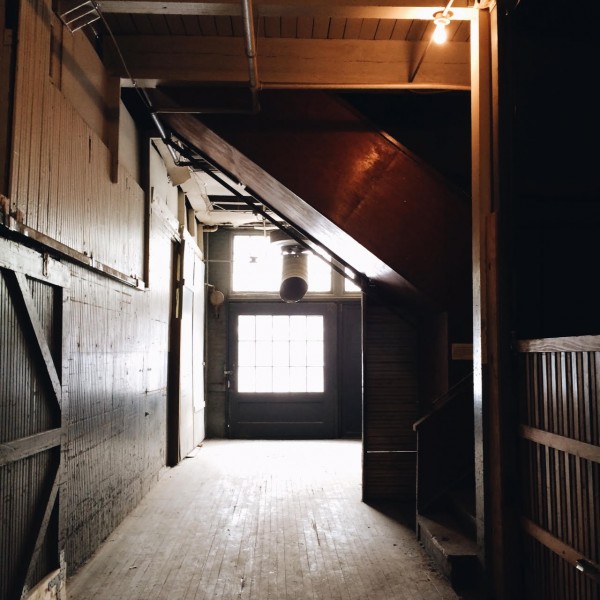
I discovered a warehouse downtown that rented space to creatives and small businesses and it sounded so appealing. I set up an appointment to check it out and fell in love with a spot on the second floor. It was the perfect size with big windows, inexpensive rent and the freedom to make it my own. However, as soon as the tenant next door heard someone was interested in the space, he snatched it up. (Current tenants get first dibs.) I was so, so bummed. I was shown another, larger space on the third floor of the same warehouse and it just didn’t feel right. It was dark, the roof leaked, and it had a really awkward layout. I was less than thrilled.
Then, THEN!, the maintenance guy gave me a lead on another warehouse in a nicer part of town that rented out space as well. I immediately called and emailed the owner. She asked what I was looking for and I told her.
me: I don’t need a ton of space but I do need an open space. Good natural lighting for photography.
owner: Hmmm…I think I have just the space. It’s not available until next month but you can come take a look at it if you want.
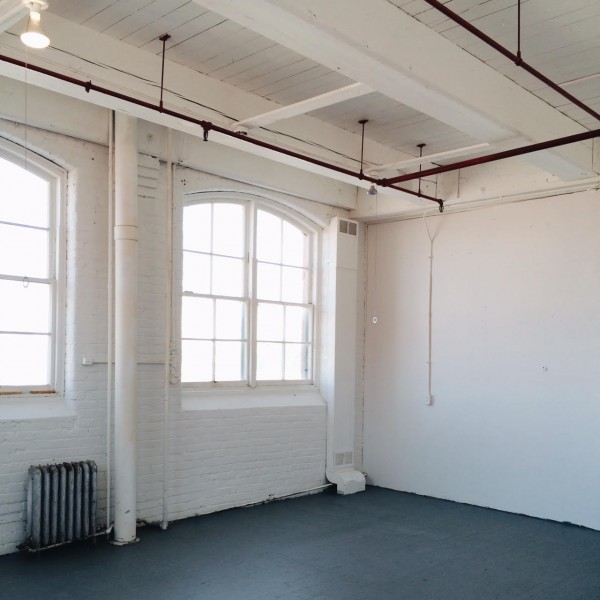
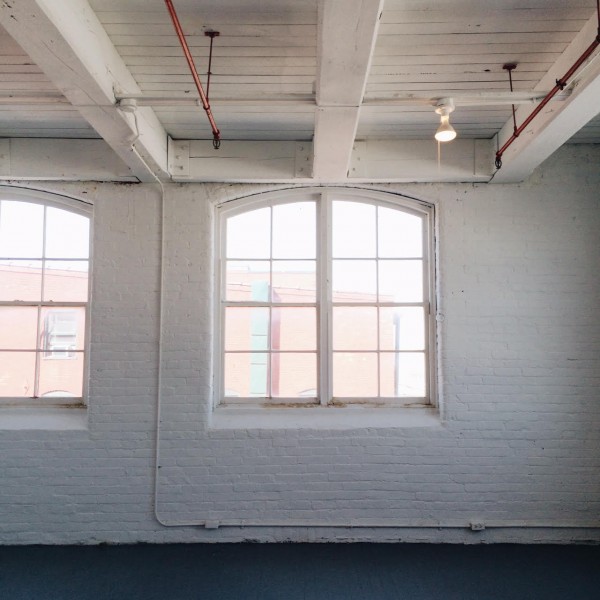
All three kids and I drove downtown to check it out and the rest is history. It couldn’t be any more perfect. It’s a corner room with big windows on two exterior brick walls that let in the most amazing light from the north and east. The soaring 12′ ceilings make the ~350 square feet feel bigger. The floors are the original hardwoods albeit painted. It’s inexpensive. There’s no deposit. Rent is on a monthly basis with no long-term contract. I can do whatever I want to the space! The only stipulation is that the overhead sprinklers must remain red due to code which is totally fine with me. I kinda like ’em. The kids can come hang out with me which is great. They LOVE the warehouse! The working freight elevator is their favorite feature.
The space is rented out through mid-April by a current tenant who rents space elsewhere in the same building. She’s going to be doing some work to her space and will be using the corner room for storage while she fixes up her place. If all goes as planned, I move in sometime next month. IT’S KILLING ME. I wasn’t sure if I should share the news before I actually moved in or not. But, I am so excited I couldn’t wait! I’m a fairly patient person who likes surprises so that should tell you how excited I am. (!!!)
Probably my favorite thing about this entire experience has been discovering the creative / entrepreneurial community right under my nose. How did I not know about it already?! The warehouse is home to a dance studio, photographers, artists, an old barbell gym, small businesses, jewelry makers, interior designers…you name it. I can’t wait to learn more and share with you guys. I’ve never thought of Dayton, Ohio, as a creative hub but maybe I haven’t been looking hard enough.
What exactly will I be doing in this workspace? Initially, I’m going to put my spin on it. And I’m going to call it my studio because that sounds so uppity and official. STUDIO. Anyway, of course I want to create blog content and flush my brain of all the ideas floating around in there. Ideas that aren’t exactly feasible or practical in my own home. My sewing machine and loom (never used) are coming to the studio with me. I’m going to spread out and make messes and walk away when it’s quitting time. I want the kids to be creative here, too. Mabrey will be with me most days while the boys are at school. I will continue to share home-related DIYs and decorating ideas but I’d like to sprinkle in new things, too.
Eventually, I would love for the studio to become a part of the local community. A place to host craft nights or children’s birthday parties or decorating classes, an artsy field trip destination for kids, a photography studio? Clearly, I don’t have tunnel vision at this point. Maybe the biggest drawback is that it is so flexible. I see it as an ever-changing space and that makes me happy. (Refer back to the first paragraph of this post.)
So that’s what I was up to last week. Soul and studio searching. Change is good.
images: Dana Miller for House*Tweaking
It all started with this post. I mentioned my thoughts on Ikea missing the mark by not offering an unfinished wood cabinet door / drawer front that could be painted any color of the rainbow. I absolutely loved all the comments (read through them if you haven’t already) on that post. There was one in particular that grabbed my attention. Megan commented that her sister, Whitney, had used painted Ikea cabinets in a kitchen remodel and linked to an instagram photo of the results. I had to know more. What began as a quest to discover how the painted cabinets came to be and how they were holding up, turned into a full on house tour. Read Whitney’s narrative and see the before, in-progress and after photos below.
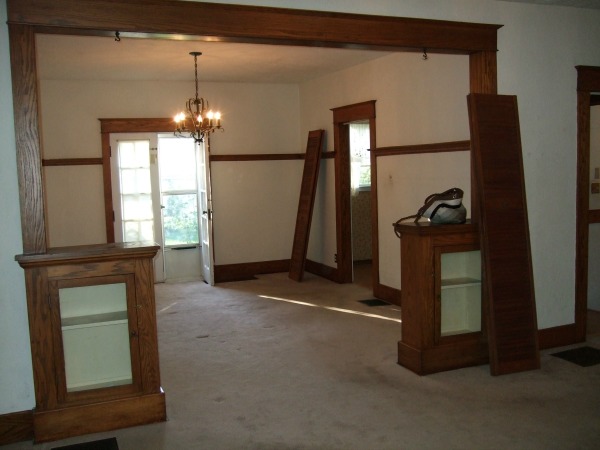
I bought my house three years ago after falling in love with a street in Fort Wayne, Indiana. After studying the block, I noticed one particularly dilapidated / vacant home. When I asked the next door neighbor what the story was she told me that an elderly lady had passed away and the house had been vacant for some time. My soon-to-be new neighbor gave me the son’s information and the rest is now history.
This is my second home. I learned so much the first time around that I knew I wanted to put some of my newfound skills to work on a bigger project.
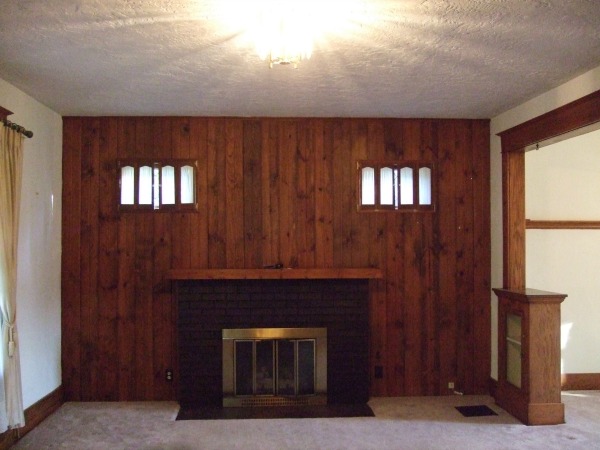
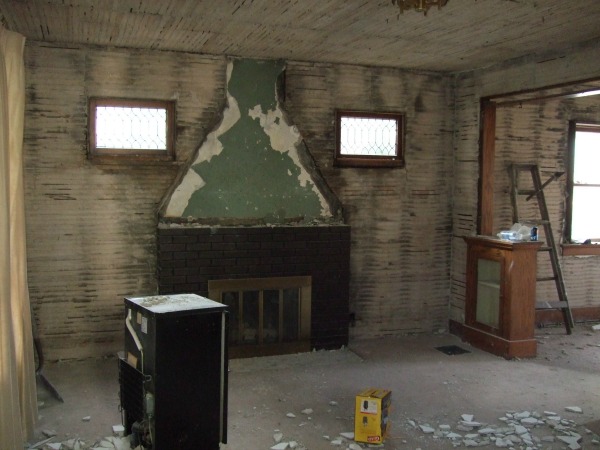
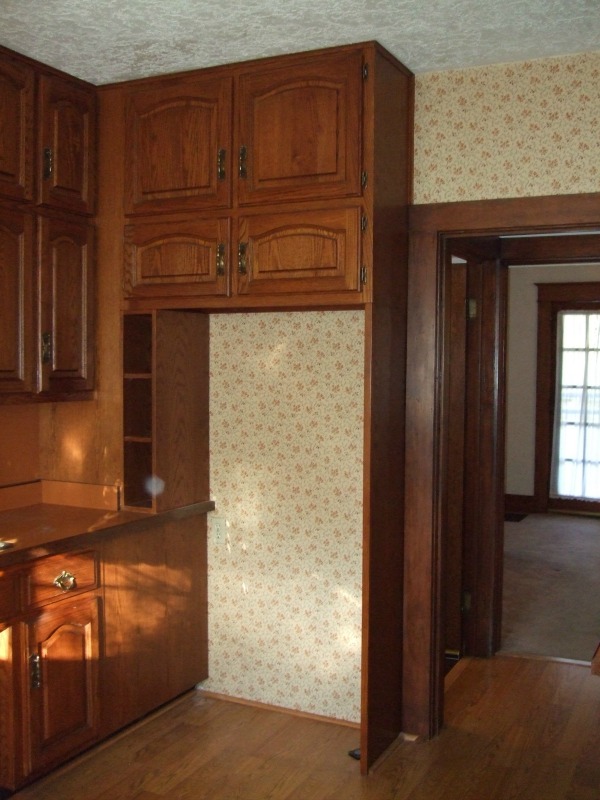
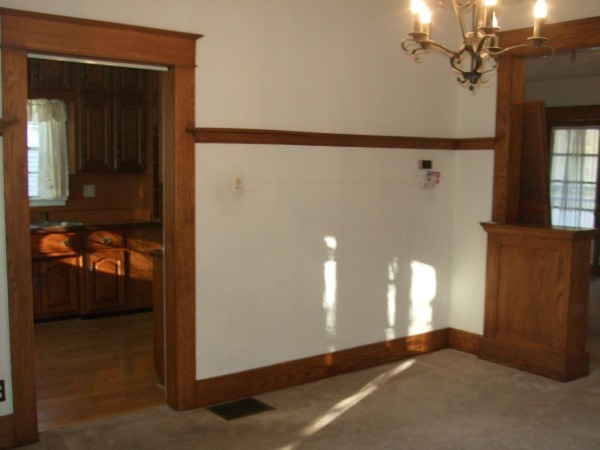
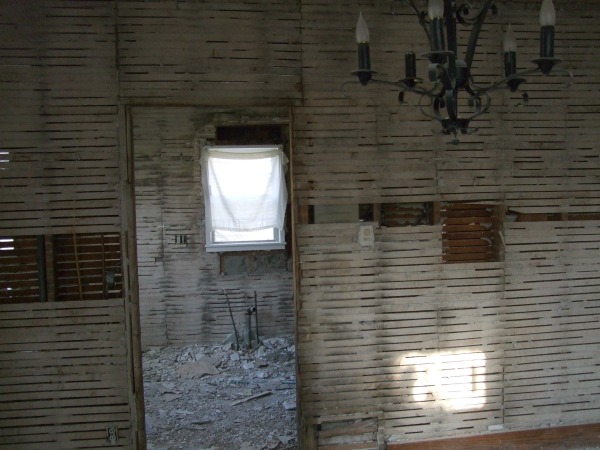
It wasn’t the plan from the start but somehow we decided to remove all the plaster and lath from the walls – ALL the walls. In short, my one-hundred-year-old house was completely gutted down to the studs. My dad, sister, husband and I did almost all the demo ourselves.
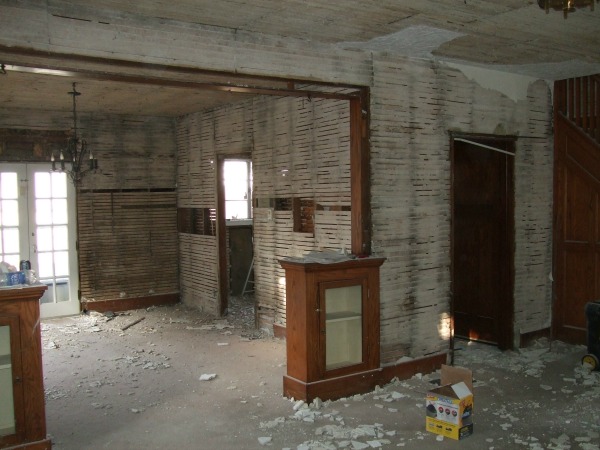
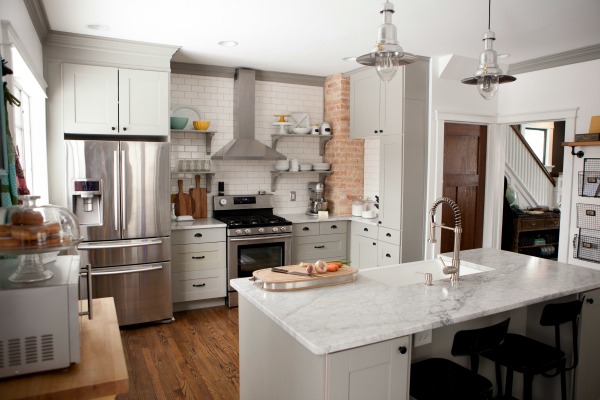
We removed the wall between the dining room and kitchen, closed in a kitchen window, had all the knob-and-tube electrical replaced, properly insulated the walls and, finally, drywalled. After pulling up five layers of linoleum in the kitchen we realized the original pine floors were too damaged to save. We removed all the pine and replaced the kitchen flooring with unfinished red oak to match the rest of the first floor and then sanded and stained both the new and original hardwood a dark walnut finish.
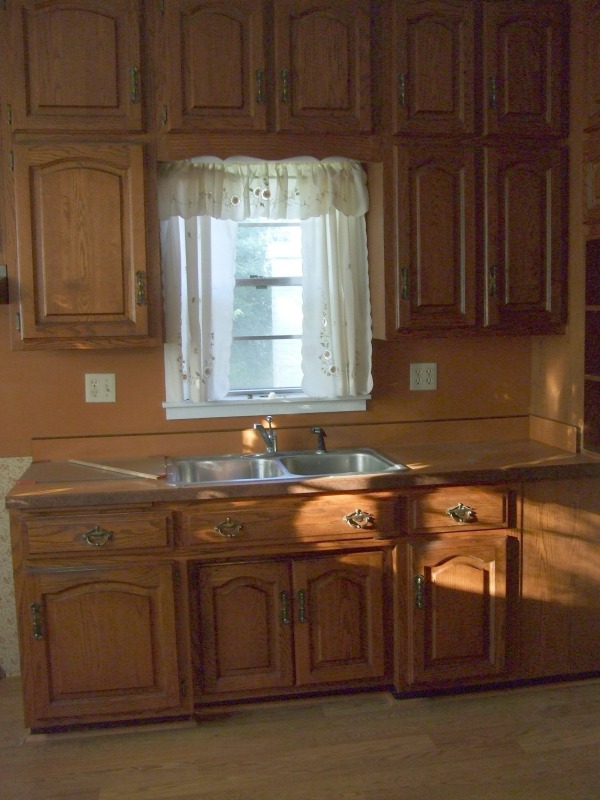
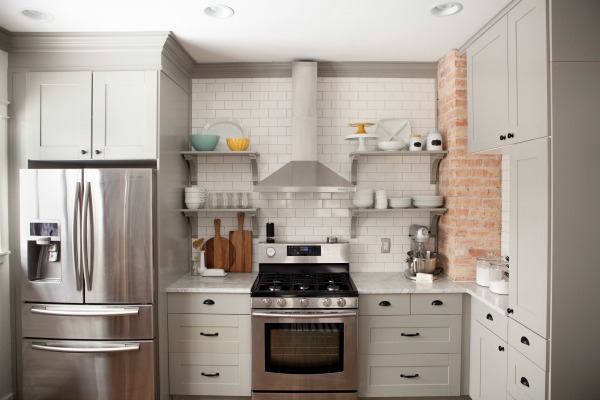
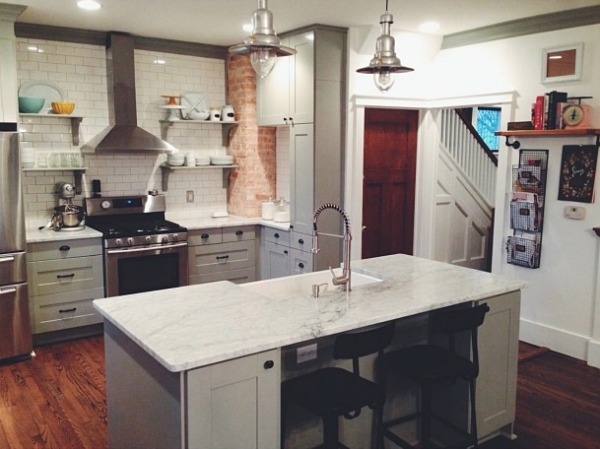
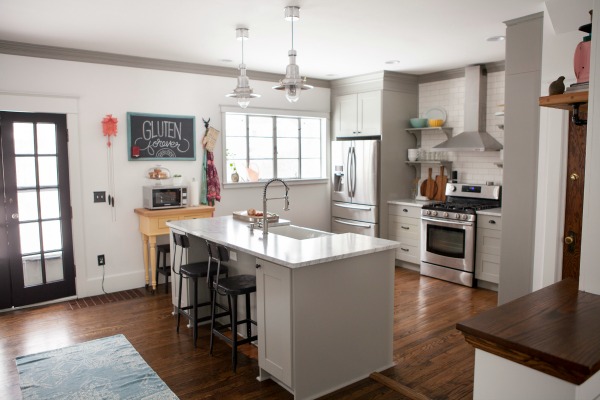
When it came to work on the kitchen cabinets, I knew I wanted them to be gray. It was difficult to find a company that carried a gray cabinet in their line that was still in my budget. I received quotes from Kraftmaid and Clique Studios versus having them custom made. The quotes were between $6K – $9K for my small kitchen. More than I was willing to spend. My sister suggested buying Ikea cabinets and having them professionally painted so I read the reviews, did the math and decided Ikea was the way to go. We chose the white ADEL (no longer available) style as our base, but as a pleasant surprise, when we got to Ikea we found a discontinued ADEL style in birch (not advertised online) that was 50% off.
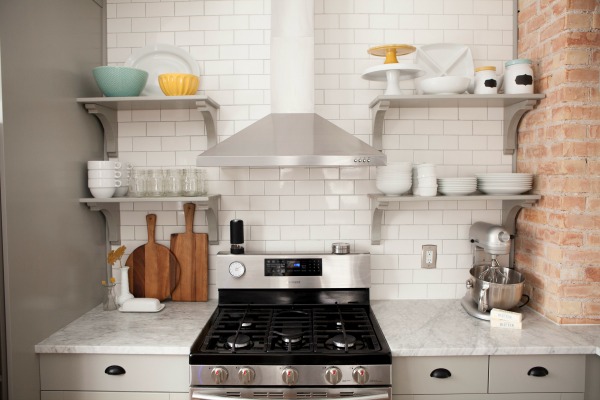
Phenicie Restoration did all the painting for close to $1,500 – all the cabinet fronts, side panels, toe kicks, open shelving (which we bought at Lowe’s and cut ourselves) and eight corbels. In hindsight, I probably would have cut all the trim and side panels first before sending them off to be painted, but because it was going to take a few weeks I was anxious to get the painting started while we installed the boxes.
After the side panels were painted we cut them using a jig saw through delicate painter’s tape to prevent chipping and splintering. The brand of paint Phenicie Restoration used was Sherwin Williams and the color I chose was “Wet Pavement” by Valspar. I was so pleased with how the cabinets turned out. They looked like I bought them gray from the manufacturer. The painters gave me a little jar of paint for touch-ups, knowing they’d need to be made eventually. Two years later I still love them. I have needed to touch up the corners here and there but it blends perfectly.
All in all, buying from Ikea and having them painted was more work but worth it for the money I saved. One great lesson learned was to triple check all the quantities of pieces sent to the painter. It wasn’t until after we got everything back that we realized we still had three drawer fronts tucked away among other Ikea purchases. But I can’t say enough good things about Ikea quality.
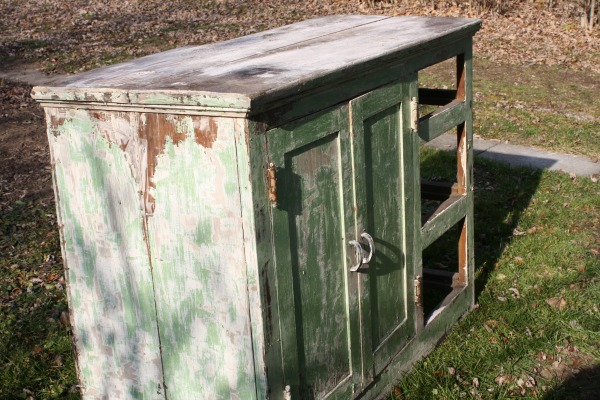
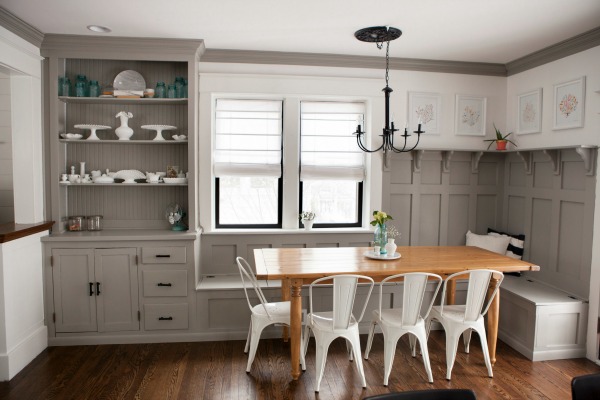
The island we built between the dining room and kitchen encroached on dining space. So the idea for the banquette along the wall came quite naturally. I love all the imperfections in the antique buffet I found in our garage. Incorporating it into the banquette worked wonderfully.
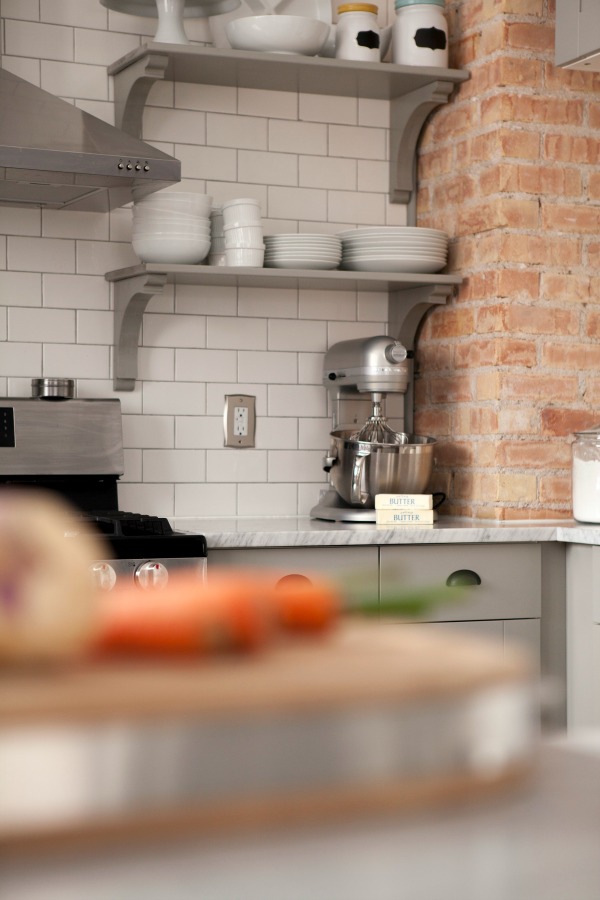
My favorite detail about my kitchen is the brick chimney we painstakingly uncovered under thick plaster.
This house is very much a DIY group effort by myself, my husband, my sister and my dad. My dad has been a woodworker for 50 years. Being raised by a man who is always building something around the house has put home improvement in my sister’s and my blood. And slowly but surely my artist husband, Nate, is becoming one of us. Working on this house with my family has truly been a labor of love. I am looking forward to many more projects.
Resources of note:
KITCHEN
kitchen cabinets – Ikea
cabinet and banquette paint – Sherwin Williams paint, color-matched to wet pavement by Valspar
marble countertops – Marble Uniques in Tipton, IN
apron front sink – Kohler, Lee Supply
kitchen cabinet hardware – Lowe’s
kitchen faucet – Wayfair
appliances – Samsung, Lowe’s
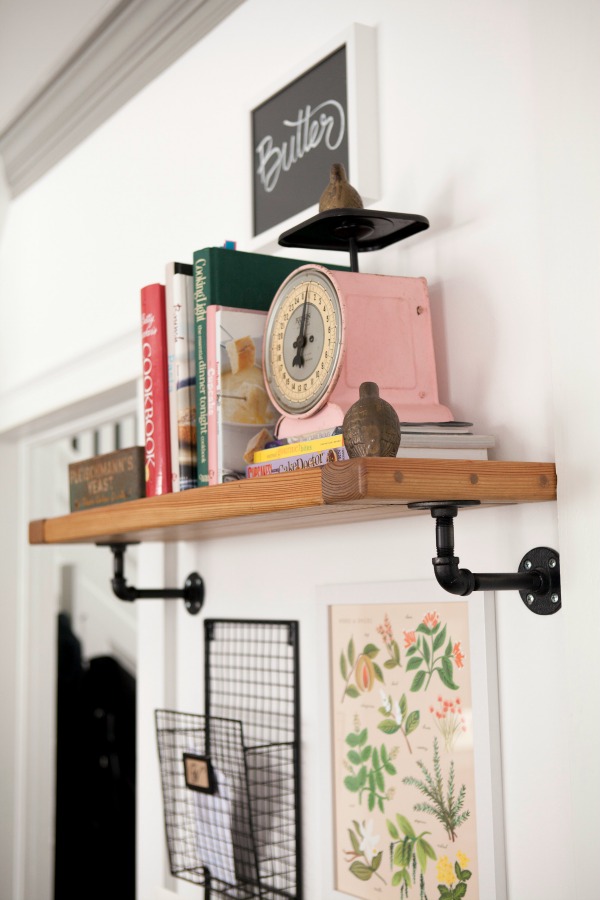
floral prints under cookbook shelf – Rifle Paper Co.
DINING ROOM
pine dining room table, pine & pipe cookbook shelf – DIY, materials from Lowe’s
black glass buffet handles – Hobby Lobby
floral prints above banquette – Little Low Studio
dining chairs – Overstock
barstools – thrifted
LIVING ROOM
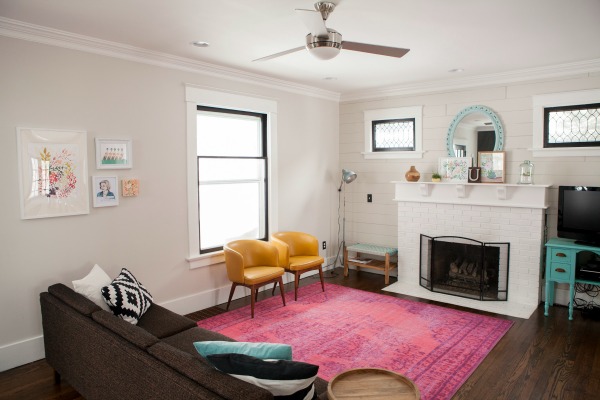
living room rug – RugsUSA
bench, wooden vase, stair wall picture frames – Target
sofa, chairs, industrial light, side table base – thrifted
wall mirror, globe – estate sale
throw pillow – Ikea
floral mantel prints – Lulie Wallace
fireplace mirror, entry table – vintage, thrifted
wall art – Kelly Ventura, Oh Gosh Cindy, Lulie Wallace, Rifle Paper Co., Little Low Studio
glass cloche, side table top – Crate & Barrel
**********************************************************************************************************************
Whitney, thank you SO MUCH for sharing your house-to-home story! And thank you, Megan, for introducing me to your lovely sister. You two make quite a team. I can only imagine how much time, sweat and love went into this transformation.
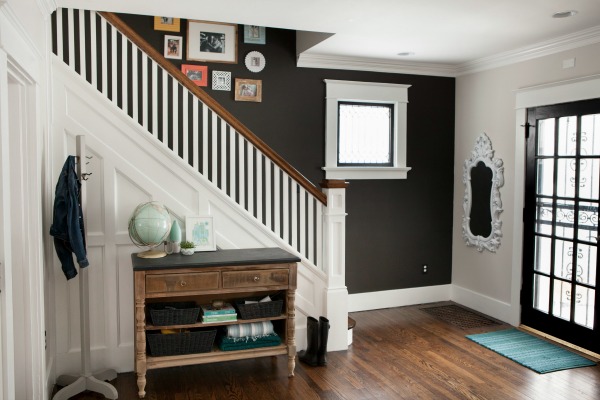
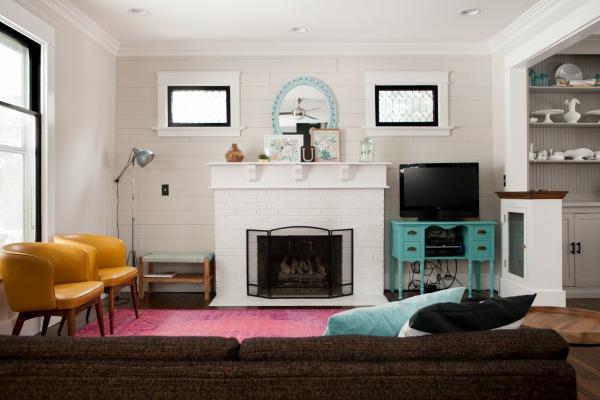
Okay, readers, how blown away are you? Me? Mind. Blown. I can usually spot an Ikea kitchen from a mile away but this one might have fooled me had I not known about the painted cabinets already. The custom cabinet color, exposed chimney, open shelving and fitted moldings give it that extra oomph to take it from just updated to something special. I am so happy that Whitney respected the 100+ year history of her home by choosing finishes and materials that complement the house’s character. Rehabbing the old buffet into a built-in banquette was ingenious. Did you happen to notice the black window frames? I asked Whitney about those. She said they are the original wood frames but she painted them black to make them pop. The cost? $20. Bang for your buck, folks.
This is why I love blogging. I love hearing and seeing others’ renovation stories. Even when the end result isn’t something I could achieve in my own home, I’m always inspired. When the storytellers allow me to share their experiences here with you, it’s icing on the cake. Do you have a project – big or small – that you would like to share on House*Tweaking? Please send submissions for consideration to housetweaking (at) gmail (dot) com. Thanks in advance for letting me peek into your homes and lives.
images: Whitney Clappe-Utesch


family life, inspiration, interior design