(It’s not all bad news. I promise.)
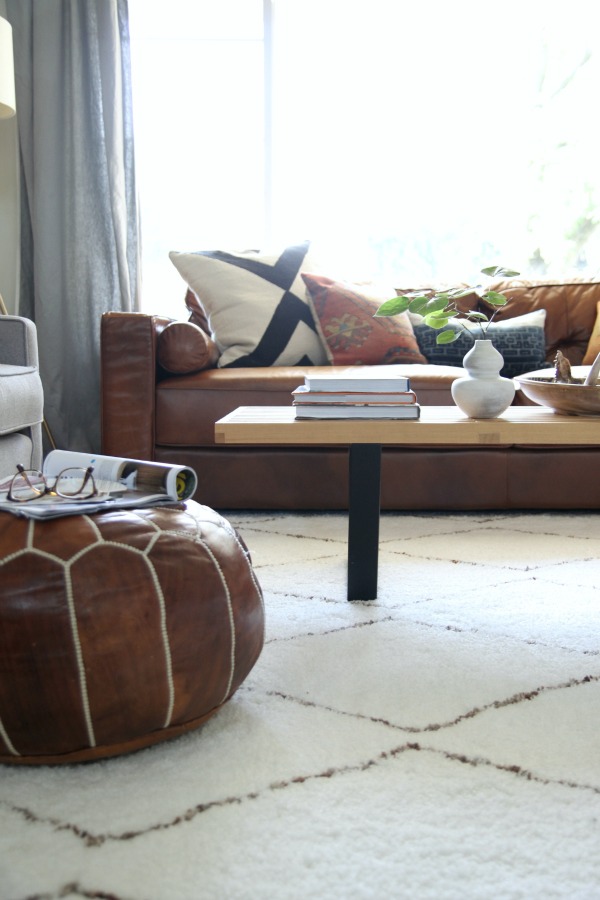
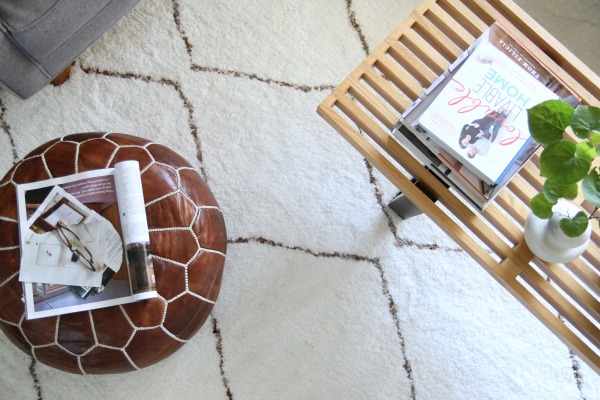
How do you clean your living room rug?
If I had a dollar for every time someone asked me that I’d have a lot of dollars. And I’d probably spend them all on books or Trader Joe’s cookie butter. Or hand soap.
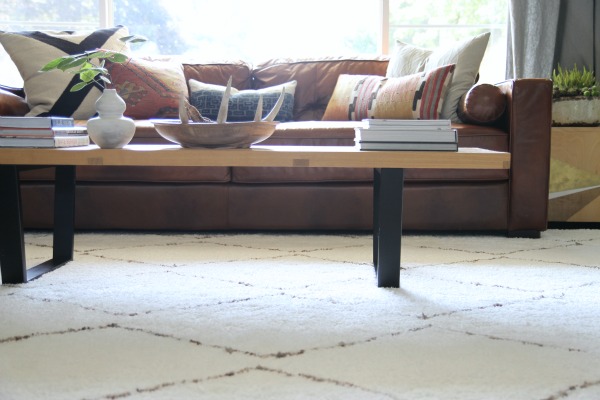
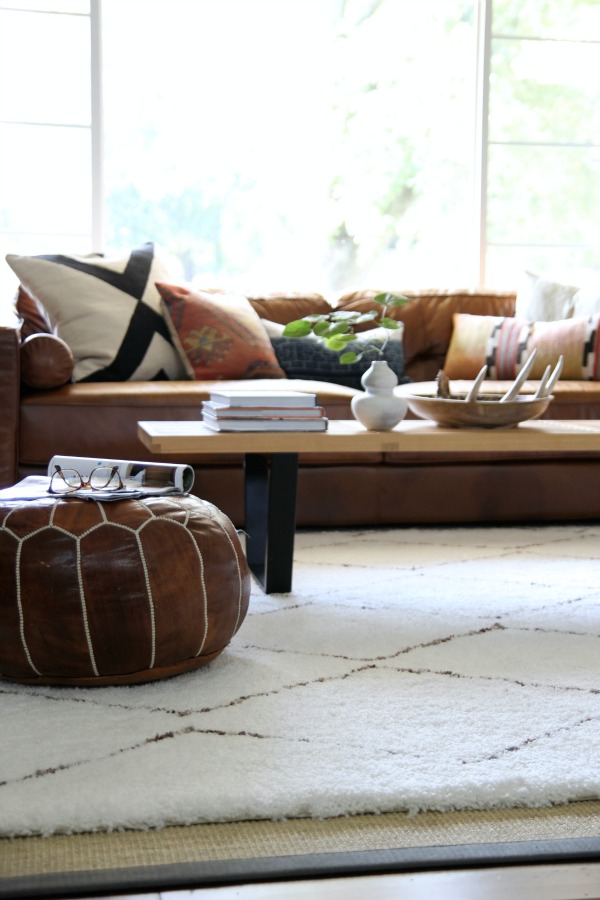
In all seriousness though, up until a few weeks ago the only cleaning our living room rug had seen was frequent vacuuming – maybe once or twice per week – and spot cleaning over the last 2+ years. I’ve always used this vacuum and vacuumed the shag rug with the roller brush turned OFF. We don’t wear shoes in the house and only allow water and popcorn in the living room for family movie nights. Keeping shoes, food and drinks off the rug helped us avoid major spills. (Except for that one time I floundered a glass of rosé. Oops. Luckily, it came right up with vinegar + water.)
However, I was terrible at rotating the rug regularly and, eventually, there was a noticeable difference in appearance between the part of the rug near the kitchen and the part hidden under the sofa. On the rare occasions when we would pull out the sofa to look for a lost library book, we were struck by the pure whiteness of the untouched area under the sofa. It completely called out our family’s filth and made the rest of the rug look dingy. When it was covered up, no one was the wiser. So I left it covered up.
But I kept getting that question.
How do you clean your living room rug? Cha-ching. Kidding.
I started to become a little self-conscious. Was I supposed to be cleaning the rug? According to Martha Stewart, no. The rug was two and a half years old; I had two and a half years of vacuuming and spot cleaning left to go. It really didn’t look bad unless you saw the virgin part under the sofa. But curiosity got the best of me. I called a few local rug cleaners for quotes. Prices ranged from $2-$2.50 per square foot. For our 8′ x 10′ rug, I was looking at $160-$200 for a cleaning. Having only paid $270 for the rug to begin with, a $200 cleaning seemed pricey. But I had already been bitten by the rug cleaning bug and started researching a way to DIY the cleaning to save money.
(It’s worth noting that we had a horrible experience with a reputable big brand carpet cleaning service several years ago. They came in and cleaned the carpet in our first home and told me their methods were “safe” for kids and pets. An hour after they left, our dog had an anaphylactic reaction to whatever “safe” chemicals had been used. She spent an entire weekend in triage loaded up on epinephrine, steroids and antihistamines. We didn’t know if she was going to live and, if she did, if she would be able to come home to our “safe” carpet. Long story short, I don’t trust carpet cleaners.)
I assume you can predict where this is going.
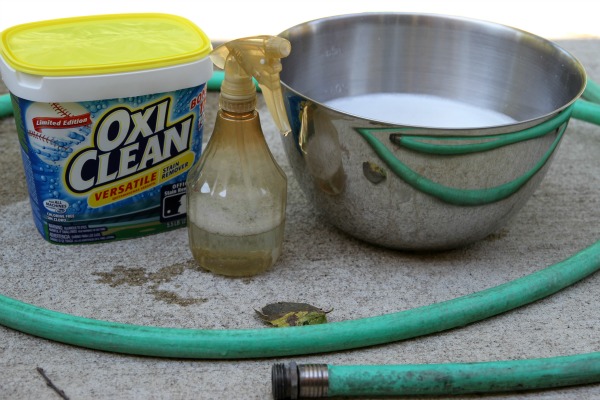
I made up a solution of water + vinegar + OxiClean and poured some into a spray bottle.
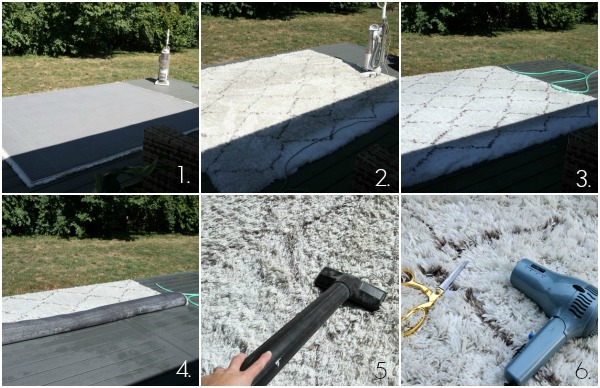
1 – I dragged the rug outside to the deck, a feat in itself. I turned it upside down and vacuumed the backside several times.
2 – I turned the rug right side up and vacuumed it several more times. (You can see how dingy the rug really was!)
3 – Working from the middle to the edges, I saturated the rug with my homemade cleaning solution and let it sit for 10-15 minutes then rinsed it well with the hose. My plan was working! The rug looked brighter and whiter.
4 – I rolled the rug towards the yard end of the deck to squeeze out excess water. Easier said than done. The rug was so SO heavy. I had to put my back into it. I was sweating.
5 – I unrolled the rug and used a wet/dry Shop-Vac to suck up more water (plus miniscule Legos, Play-Doh crumbs and leaf bits). It was slow going. The rug was soaked and I took my time dragging the attachment tool slowly to get up as much water as possible. I had to empty the Shop-Vac canister twice. I got to a point at which the rug felt slightly damp and less slushy. I stopped vacuuming.
6 – I snipped loose threads and used a hairdryer to help dry things a little more. Basically, I groomed and styled that shag. I was happy with how the rug was looking!
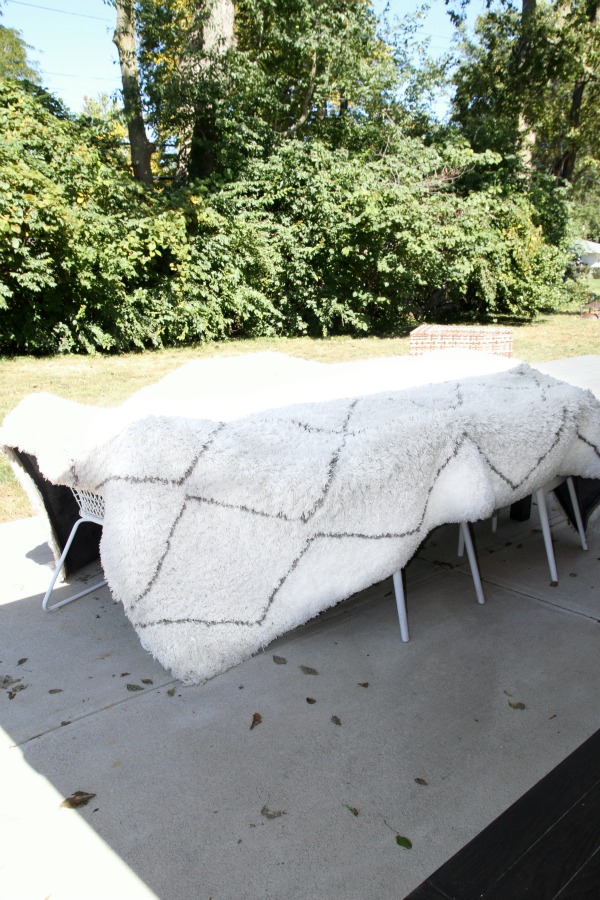
I pulled the rug up and over the outdoor dining table to finish drying. This required more muscles than I anticipated. I rubbed my knuckles raw pulling on the heavy rug and dropped a few f-bombs under my breath. But the rug looked so much better! I patted myself on the back for saving a few hundred dollars. The forecast predicted mild temps, low humidity and plenty of sunshine so I left the rug outside for a few days to allow it to dry completely.
BUT.
But after 3 days it smelled like a big, wet dog. I tried to salvage the rug by hanging it over sawhorses in the garage with a box fan blowing under it. I did a great job of making our garage smell like a big, wet dog.
After several more days, it was apparent that there was no way the rug was coming back in the house. In retrospect, I think I did a pretty decent job of cleaning the rug but a horrible job of drying it. The smell was most likely due to mildew from not drying it quickly or thoroughly enough.
I felt awful. I loved that rug. As bad as I felt about ruining the rug, I felt worse about sending it off to a landfill. Ugh. I promise I don’t hate you earth. I should have listened to Martha’s rug guru.
Having lived with the durable but scratchy sisal rug in the living room for a week while I “cleaned” the shag rug, we discovered just how much our living room’s cozy factor rode on the shag rug. Without it, we found ourselves spending less time in the space and what time we did spend there wasn’t as comfortable as it had once been. Needless to say, the entire family was stoked to discover that the rug is still available from RugsUSA. A 75% off coupon code sealed the deal. We didn’t think twice about buying the rug…again. This time it cost us $280…$10 more than what we paid two and a half years ago…and about $80-$100 more than what it would have cost us to have the old one cleaned.

The rug arrived last week. Our cozy living room is back! We’re completely smitten with the new rug. It doesn’t smell like wet dog. It’s plush and clean and barely sheds. Most likely, it’s better than whatever results a professional cleaner could have achieved with the old rug.
Surprisingly, there are some other differences, too, even though the rugs are technically the same. The pile of the new rug is slightly shorter. (I wish I had measured the previous one for comparison.) While I really LOVED the look of the longer pile on the previous rug, it would get caught in the roller brush of the vacuum which is why I had to turn it off while vacuuming. It made hunting for lost Legos nearly impossible. It’s also the reason why I was leery of using a powered carpet cleaner on the previous rug. I had read that long shags don’t do well with agitation. It can lead to knotting, fraying and unraveling. With the shorter pile of the new rug, I’m able to vacuum it with the roller brush on, no problem! I’m hoping this means I’ll be able to clean it with a powered carpet cleaner in the future. You know, to save money ;)
Another subtle difference lies in the zig-zag pattern. The zig-zags are slightly narrower with more brown in them. The older rug’s zig-zags were more taupe/gray in color. The difference in color isn’t a deal breaker at all – just something we noticed. In case you’re wondering, the light background is pretty spot on when compared to the previous version. Overall, we’re impressed with the new version. It’s already proven to be more family- and user-friendly. I’m calling it a happy accident.
A few things I’m taking away from this whole rug cleaning experience:
*I need to do a better job of rotating the living room rug.
*Extremely shaggy rugs aren’t the most family-friendly rugs.
*Water + white vinegar + OxiClean does a decent job of cleaning grimy rugs.
*Wet rugs are super heavy.
*Sometimes I have really bad ideas.
*I love having no carpet in the house. After seeing what came out of the old rug, I like being able to remove our floor coverings for thorough cleanings (or, um, replacements).
*DIY isn’t always better or cheaper.
*Having a cozy rug in our living room makes a world of difference.
*My kids are horrible at picking up their Legos.
*I like my knuckles best when they have skin on them.
I’ll let you know how things go with the new rug in, oh, two years or so ;) Until then, I’ll be vacuuming and spot cleaning away!
Pssst…if you’ve ever considered using the same rug in your home, it’s on sale through 10/12! #notsponsored
images: Dana Miller for House*Tweaking


budget decor, DIY, family life, housekeeping