The warmer weather has us turning our attention outside. While our home’s interior is mostly done (I use that term loosely…nothing is ever done here), there are a few things we’d like to tackle outdoors. We were hoping to install a few shade sails in the backyard but that project has been put on hold while we wait for the verdict on Everett’s medical bills. Until then, we’re trying to knock out a few smaller scale (i.e., less expensive) projects while the weather is cooperating.
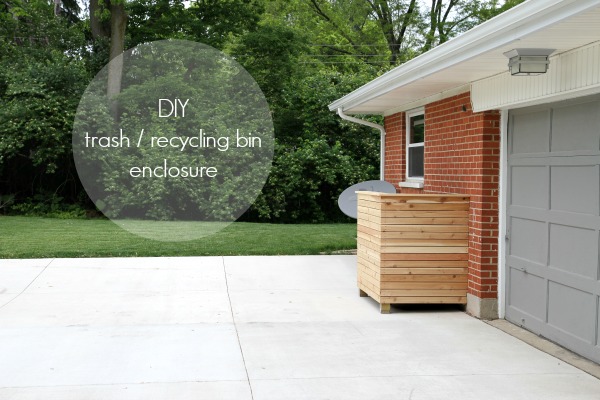
We had been brainstorming a trash / recycling bin enclosure for over a year, and we finally tackled it a few weeks ago. Our trash can and recycling bin sit on the driveway against the house just past the overhead garage door. We wanted something simple in appearance with horizontal slats, without gates or lids. After pricing out materials for a DIY version made with composite decking, we decided to go with plain ol’ cedar for less than half the cost. Here’s what we did:
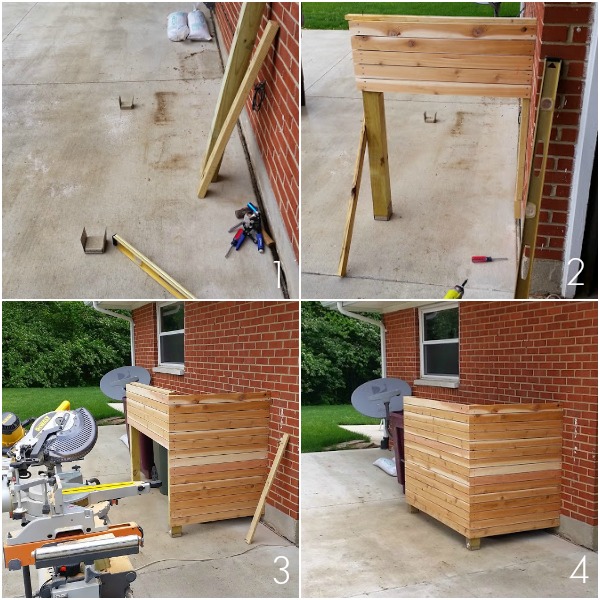
1 – Up until a few weeks ago, the bins sat with their backs against the house. We turned them 90º with the backs facing the backyard. This allowed us to design a simple L-shaped enclosure off the side of the house. We measured the bins in their new orientation, added a few inches for maneuverability, then installed two fence post brackets in the driveway with concrete anchors. We added a treated 2 x 4 to the brick facade with Tapcons. This provided a surface to tie the slats in to.
2 – We wanted the enclosure high enough to hide the bins but lower than a nearby windowsill. (No one wants a trash enclosure staring at them through the window.) We measured accordingly then screwed a treated 4 x 4 fence post into the first bracket. Scrap pieces of lumber stood in as temporary supports to keep the fence post from jostling around. For a narrower slat, we ripped 1 x 6 kiln-dried cedar boards (from Menards) in half. Working from top to bottom (to ensure full top and bottom slats) and using stainless steel deck screws, we installed the first cedar slat and checked it with a level. Subsequent boards were added with ~1/4″ spacing. Each board was cut to size and mitered on the outside corner. To avoid rot, we kept the slats a few inches off the driveway.
3 – Once the shorter side was finished, we moved on to the longer side using the same materials and methods.
4 – The slats are up!
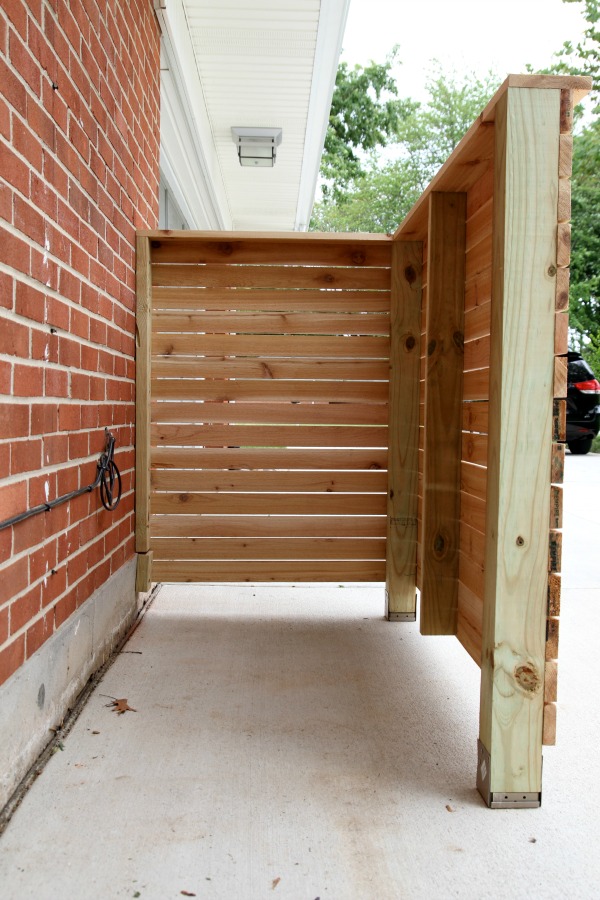
We added a treated 2 x 4 vertically to shore things up on the longer side but didn’t take it all the way to the driveway.
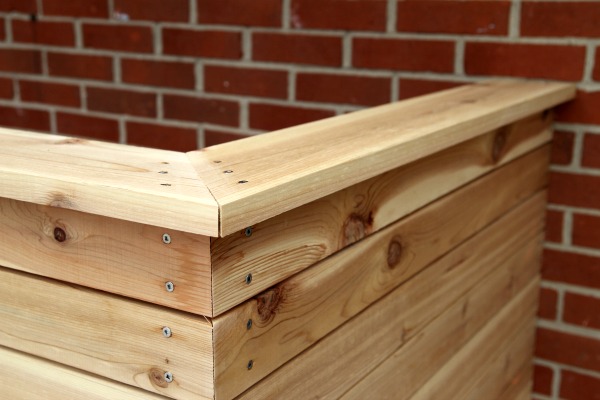
Finally, we capped the enclosure with two (non-ripped) 1 x 6 kiln-dried cedar boards for a finished look. We decided to hold off on sealing the cedar for now and see how it holds up since it’s mostly under an eave and is usually blocked from rain / snow by our parked minivan. (Yep, we held out as long as we could but the minivan was inevitable. I love it and I hate that I love it.)
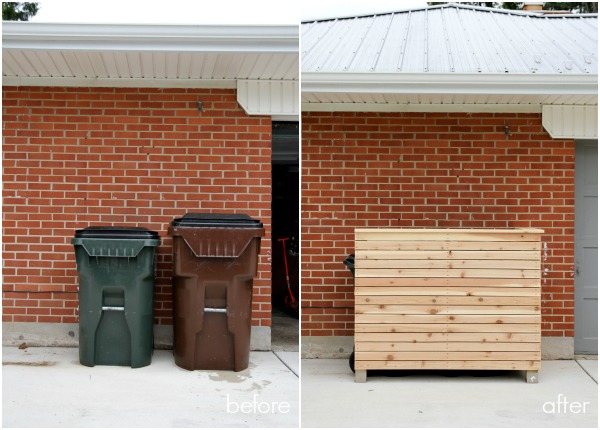
Bins be gone! The fragrant cedar is a welcome distraction when taking out the trash.
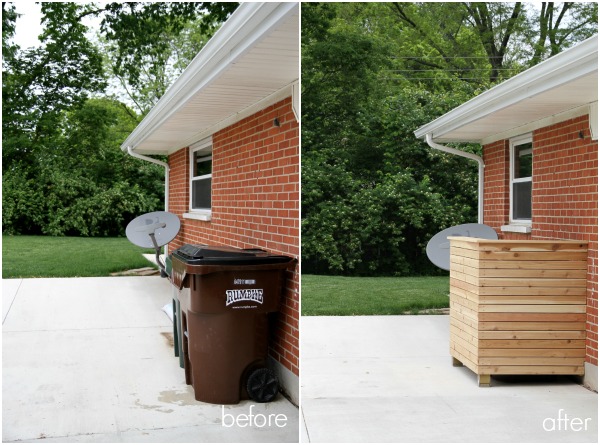
This little area looks so much tidier from the road now. (Btw, I lost the DirectTV battle. HOWEVER, we’re canceling our service once our contract is up later this year so that dish is going buh-bye. Netflix ftw.)

The bins are easily pulled out on collection day.

It’s pretty basic and no-frills but we’re really happy with how the enclosure turned out. I’m a sucker for the narrow slats and natural wood. And tidy is always a winner in my book. We’re going to use a similar design to create a hanging screen / planter to conceal the electric meter on the back of the house. I’m on a mission to HIDE ALL THE UGLY THINGS WITH CEDAR SLATS!
How do you conceal your waste bins? Electric meter? What outdoor projects are you working on this year? Last year I painted the peeling garage door as a stopgap measure and we had the elderly asphalt driveway replaced with concrete. Even if we aren’t able to do the shade sails this year, we’d still like to put in a few raised beds, install a clothesline and start a compost.
images: Dana Miller for House*Tweaking


DIY, housekeeping, inspiration, organization