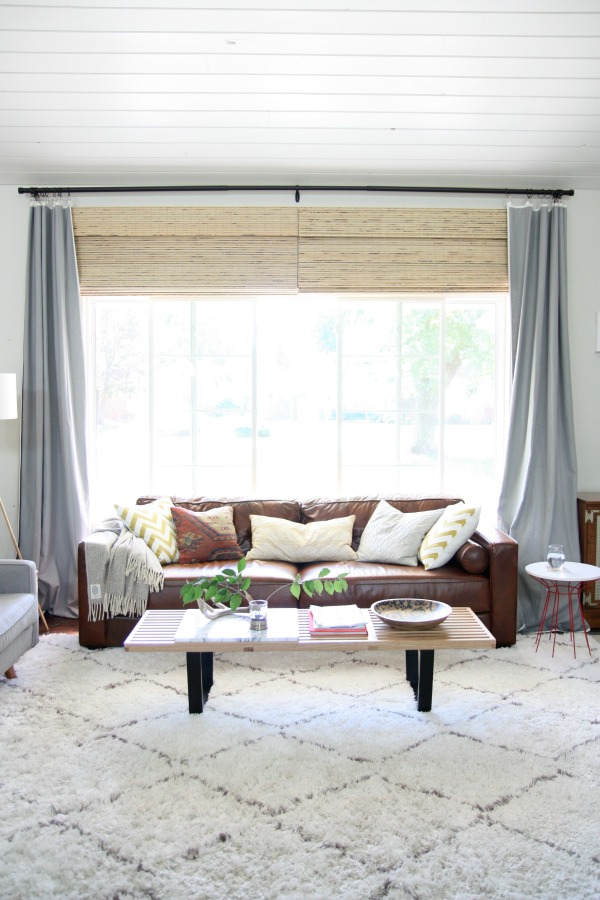
Ever since we DIY’d the wall shelves in the living room, I’ve had my heart set on adding lighting to the wall. That area of the living room can be pretty dark at night unless we turn on the overhead track lighting. But when the kids are in bed for the night and it’s just me and my HH, we prefer dimmer, warmer lighting. It’s about as close to romantic as we get. We have really nice over-cabinet and under-cabinet lighting in the kitchen {another post, another day} that gives our kitchen a cozy warm glow in the evening and I want that same vibe in the living room.
I considered wall mounted sconces above the wall shelving, similar to the popular library lamps you see nowadays. But I wanted something less formal, something undone. When I spotted this gold clip lamp from Land of Nod, it was love at first sight.
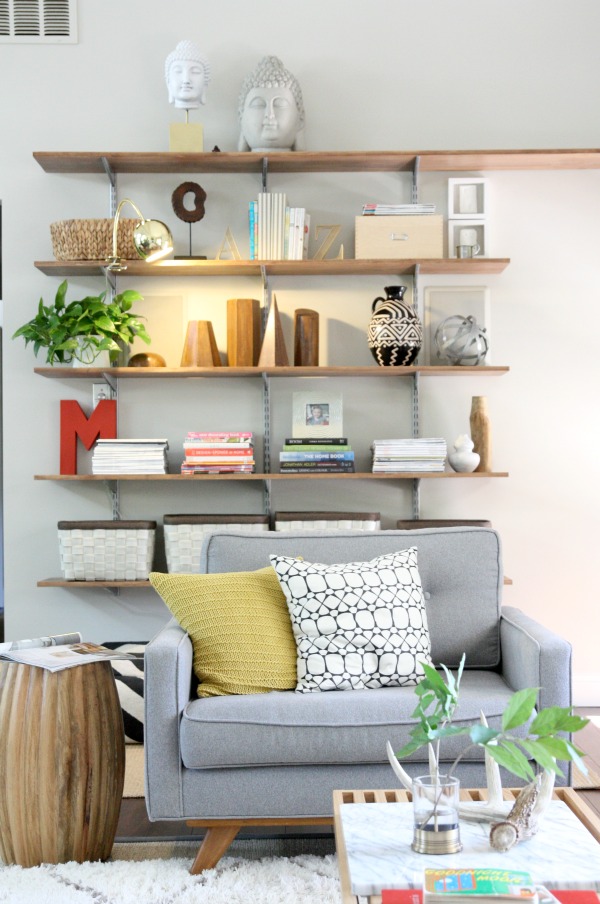
{Oh, and we have acquired another Buddha head. It was black and silver. I spray painted it white and gold. Because.}
The clip lamp is a plug-in with a power switch on the cord. The pothos plant disguises the switch well. I love it when stuff works like that. I ran the rest of the cord behind the wood shelves down along the metal hang rail. There’s a wall outlet below the bottom shelf. I did need a short extension cord to reach the outlet. A zip-tied cord bundle is hidden behind the basket furthest left on the bottom shelf. I tell you this because when I’m looking at interior design online, these are the tidbits I wonder about. Where does that lamp plug into the wall? Where are all the cords? What are these – magic lamps that don’t need plugged in?! And so forth.
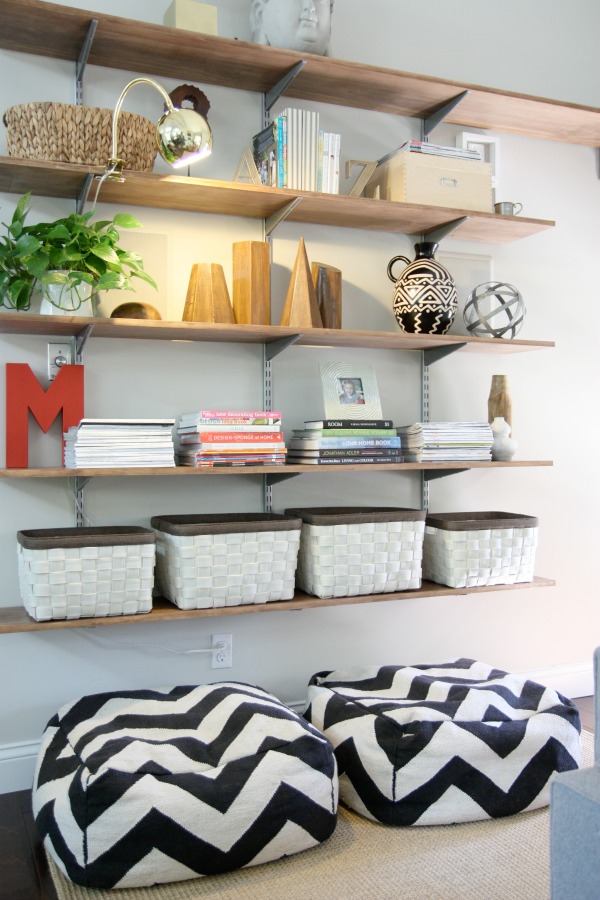
There, see it? No magic lamps here.
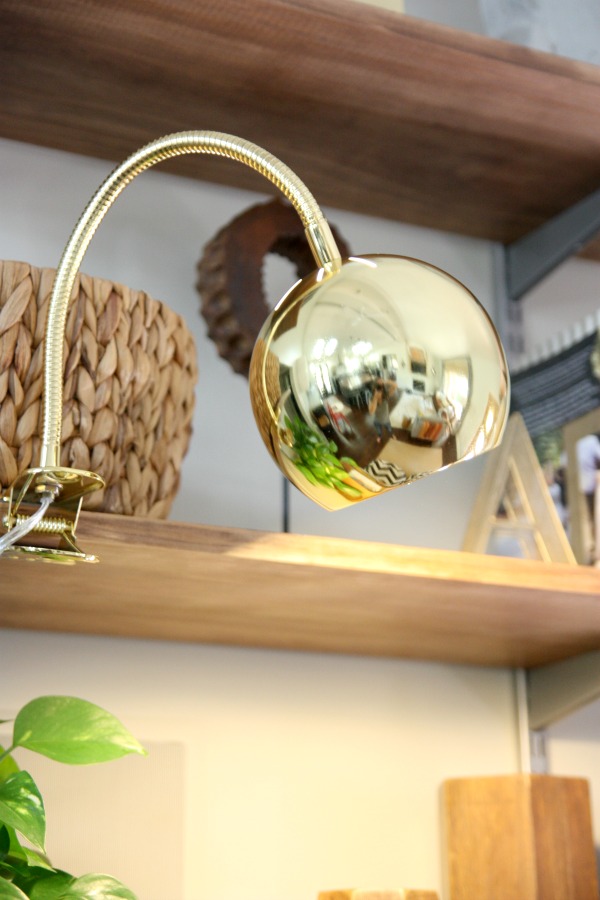
The lamp is super gold and super shiny. {It’s also available in silver if you’re not gold rushing.} A warm white CFL is included with the lamp which is awesome for people like me who need instant gratification upon plugging in a new light and have no patience for dragging three kids to the store for a lightbulb. The clip has squishy pads on either side to protect whatever it’s clipped to. There’s a hole in the clip that looks like you could use it to hang the light on the wall if you were so inclined.
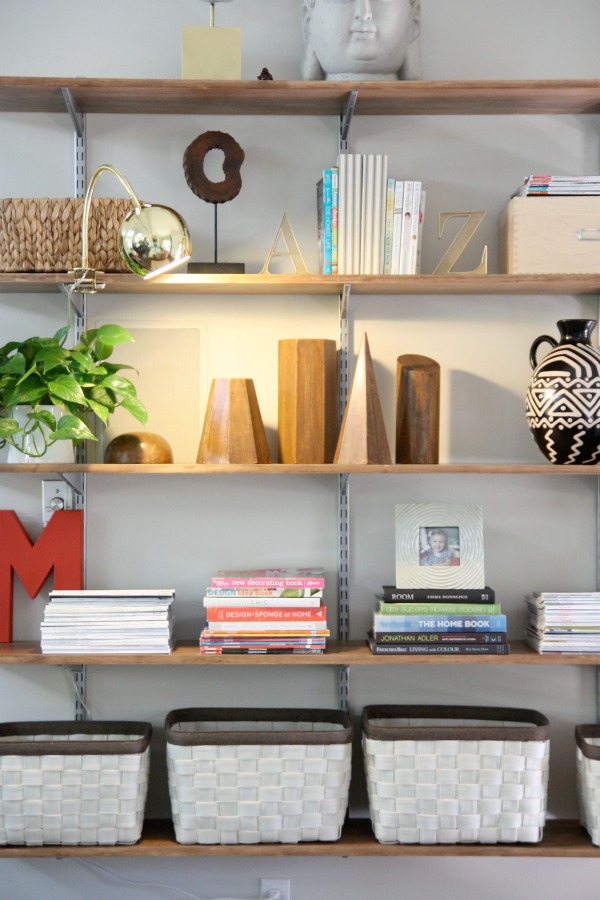
{Look! I put a picture of Mabrey in the picture frame that was empty for months. I’m going places, people.}
The neck is flexible so you can direct the light wherever your little heart desires. Apparently, my little heart desires to spotlight wooden sculptures.
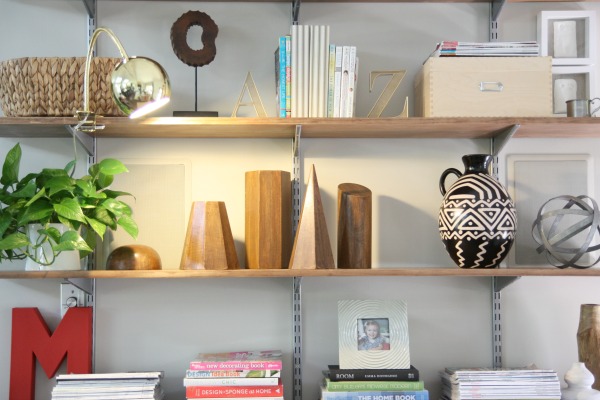
This clip lamp is marketed as a desk lamp by a children’s décor company. I want to point that out because it never hurts to think about products in different contexts when you’re shopping for something specific. I never would have guessed I would find a light for our living room shelves at Land of Nod – and a desk lamp at that. Be open to using things in ways other than what they are intended for.
I can’t wait to see this little guy lit up at night. Maybe an instagram of him later this evening is in order?
Happy weekend, warriors!
images: Dana Miller for House*Tweaking


budget decor, interior design, kid-friendly