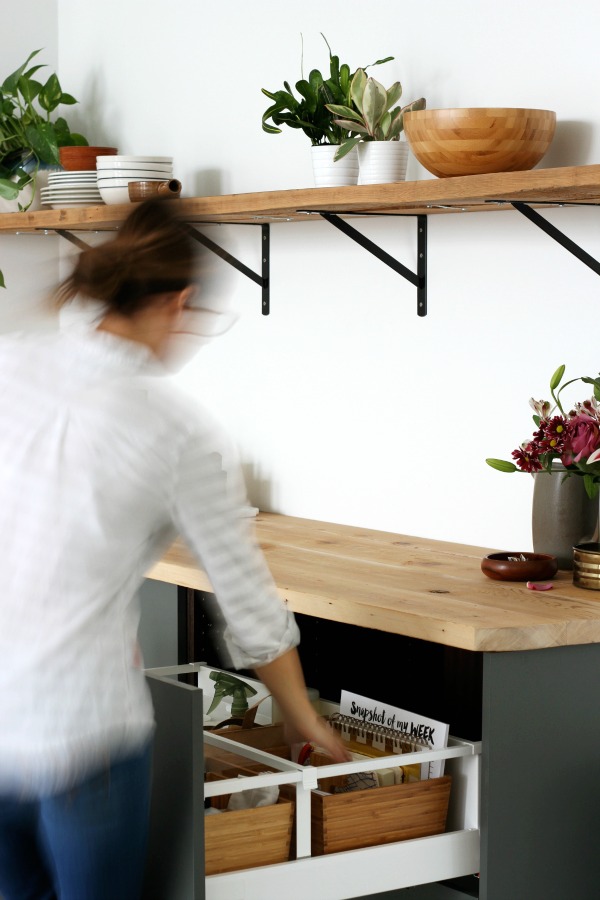
I’ve been working to add more function and organization to the studio. The space is essentially one big room with no closets or closed storage. Thinking outside the box, I built a dry bar and made over a large armoire to create hidden storage. When it came time to load the drawers and shelves, I knew I wanted to incorporate a slew of baskets and bins along with other organizational accessories.
IKEA is one of my go-to sources for affordable and versatile small storage items. I have a mix of fabric and woven baskets from IKEA in Mabrey’s room and various boxes, bins, letter trays and magazine files (all from IKEA) in the kitchen office. Our kitchen is outfitted with many IKEA pieces as well.
It just so happened in the midst of making my shopping list for the studio, I was asked if I would be interested in becoming an IKEA brand ambassadör. Seeing as how I’ve been regaling you all with my fondness for the Swedish company for, oh, six years or so, I was very interested. To make a short story even shorter, I happily signed on to be an IKEA brand ambassadör. I liken it to the marriage of Brad and Angelina. IKEA and I have been living together happily for many years. Why not just make it official? It’s official! Not much will change on my end. I will still only share IKEA products that I would use regardless of a partnership, but the difference is I am being compensated to share those products. I just thought you should know.
My role as an ambassadör actually began a few months ago when I participated in an online program to learn more about the history and mission of IKEA. It was so interesting! Did you know that IKEA is an acronym (Ingvar Kamprad, Elmtaryd, Agunnaryd) incorporating the founder’s name + the name of his family’s farm + the name of a nearby Swedish village? Or that Mr. Kamprad was passionate about life at home and would often visit other people’s homes and open their closets and drawers for inspiration? Or that the flat pack concept started when a designer took the legs off a table to fit it in her car? Or that a product design always starts with a price tag?
There are all these little backstories that have influenced the company in many ways, but the mission has always remained the same: to create a better everyday life for the many people. IKEA enforces this philosophy of democratic design by focusing on five key elements: form, function, quality, price and sustainability. Who knew so much thought went into a lamp or basket?!
Anyhow, let’s get back to organizing. Isn’t that what everyone does in January?
I finished my shopping list and made a quick trip to IKEA. (I strongly suggest making a shopping list before going to IKEA. Otherwise, you will be distracted. You will be tempted. Stay strong. Make a list and stick to it.) My local store is ~25 minutes away by minivan. It’s a blessing and a curse.
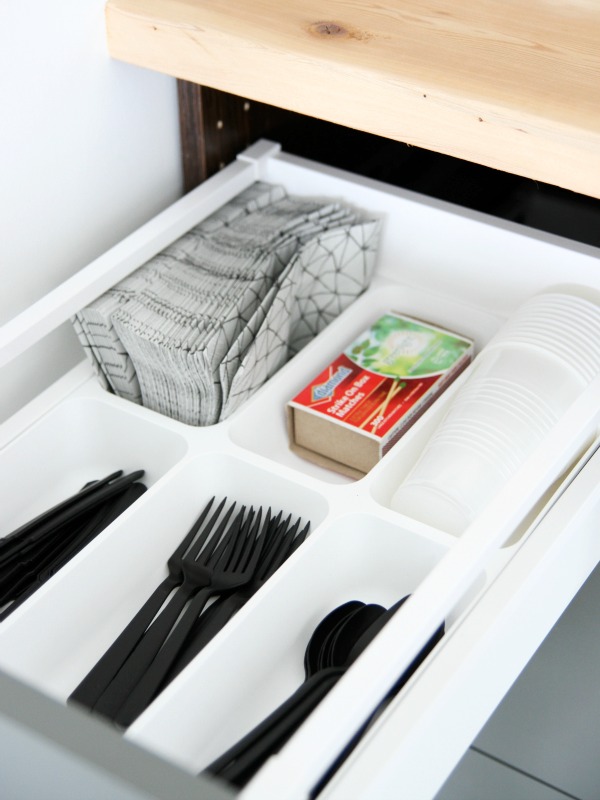
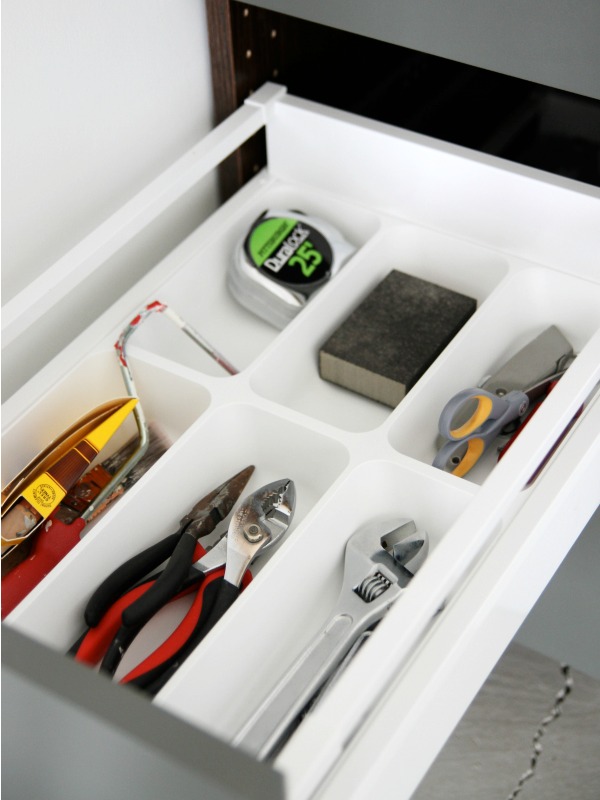
I grabbed two VARIERA flatware trays for some of the smaller drawers in the dry bar. They fit like a glove. I use one to corral kitchen paraphernalia (think break room > kitchen) and the other holds frequently used DIY supplies. Steve gifted me a portable tool box and a bunch of tools. I can’t tell you how convenient it is to have my own tools. Before, I was lugging stuff back and forth from our garage to the studio in paper bags.
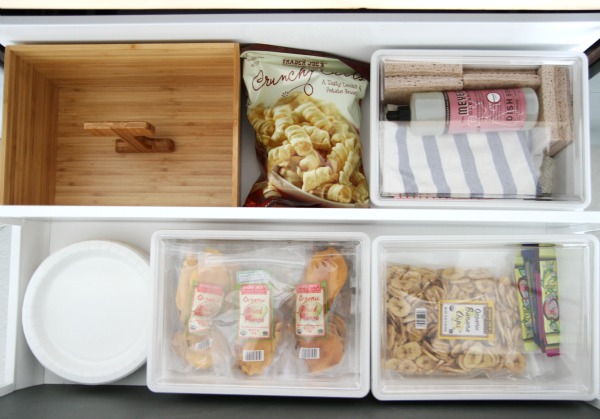
I grabbed a MAXIMERA drawer divider for each of the 36″ drawers. The drawers are deep and roomy. The dividers provide separation and keep loose items from sliding around. I used a variety of VARIERA boxes in recycled plastic and sustainable bamboo to corral everything from snacks to office supplies to toilet paper. The top drawer near the mini fridge holds kitchen items like paper plates, dried fruit and dish towels. There’s no water supply in the studio but there is a shared sink down the hall. When I need to wash dirty dishes, I grab the dishwashing box with dish soap, dish towels and sponges, place dishes in the empty bamboo box and go. I keep a few snacks on hand for me and the kids. We haven’t had any issues with mice in the warehouse and I’d like to keep it that way, so open food goes in TILLSLUTA bins with lids.
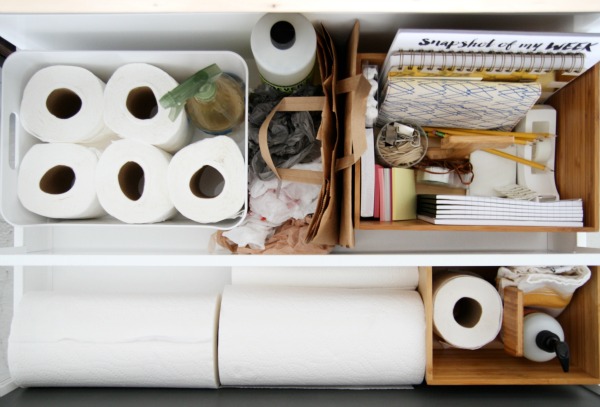
The other top drawer holds cleaning and office supplies. I keep extra toilet paper on hand because no one likes being stranded in a stall with no toilet paper. The little bamboo box in the bottom right-hand corner is the designated “restroom box.” It holds a roll of toilet paper, hand soap and hand towel. (The shared restroom in the warehouse sometimes has soap but often times does not. I like to be prepared.) It has a nifty little handle which makes it easy to carry down the hall and back. The larger bamboo box in the upper right-hand corner holds notebooks, note pads, pencils, rubber bands, post-its, tape and other office supplies.
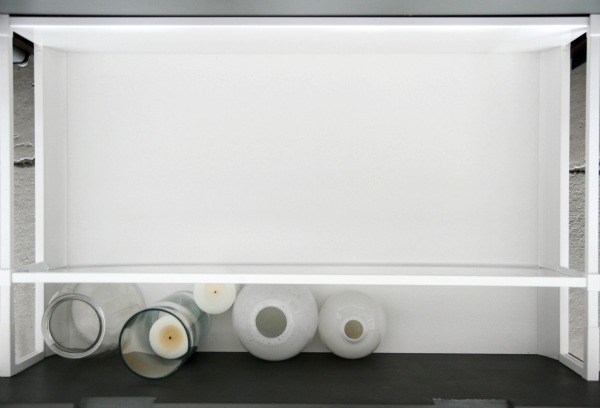
The bottom drawers are mostly empty except for a few vases and pots which are kept in check by the drawer divider. I like having room to breathe and grow. I’d love to share the studio with other creatives.
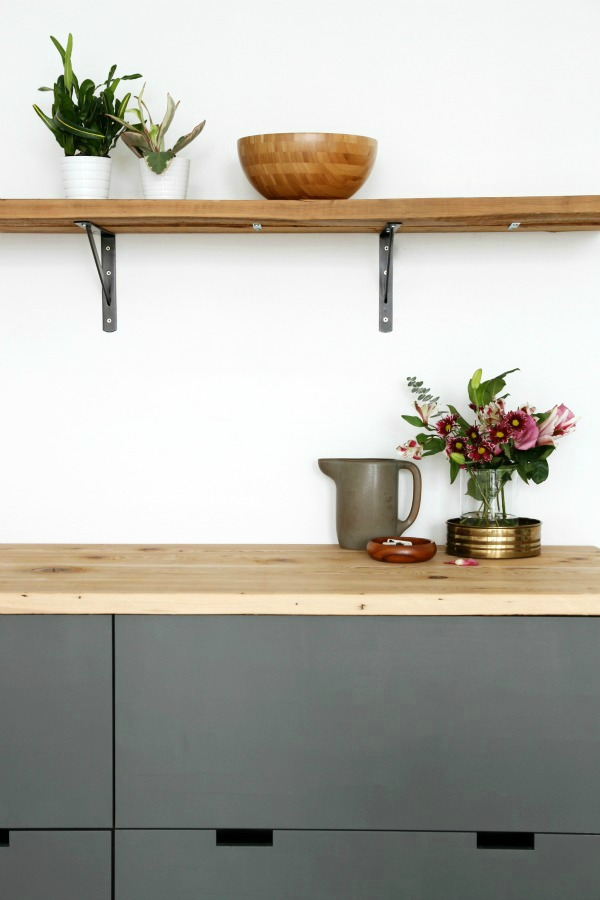
Speaking of vases and pots, they’re also items I particularly like scooping up at IKEA to hold greenery, fresh flowers and even crayons. The SINNERLIG pitcher is great for watering plants or serving drinks.
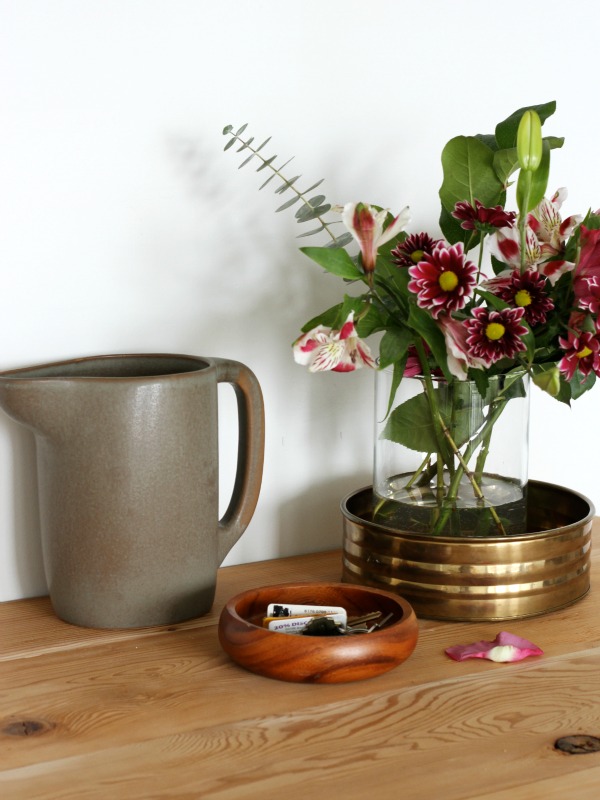
I thrifted the brass bowl for 99¢ and plopped a vase of flowers inside for a layered look. The teeny wood bowl was another 99¢ thrift find that serves as a drop zone for keys.
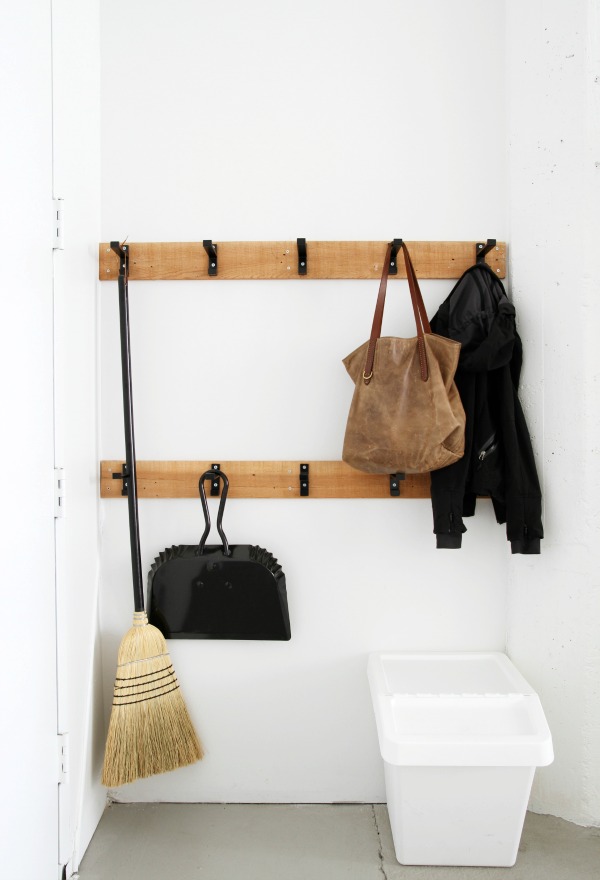
With the dry bar in working order, I turned my attention to the entry. I brought in a SORTERA recycling bin, and the space was in dire need of hanging storage for a broom, dust pan, coats and bags. I picked up ten BJÄRNUM hooks, spray painted them satin black then mounted them to a piece of timber salvaged from our home renovation. I made two hook racks consisting of five hooks each and hung them at adult and kid heights on a sliver of wall between the door and a concrete column. After they were finished, I realized I should have staggered the hooks on the bottom rack. Live and learn.
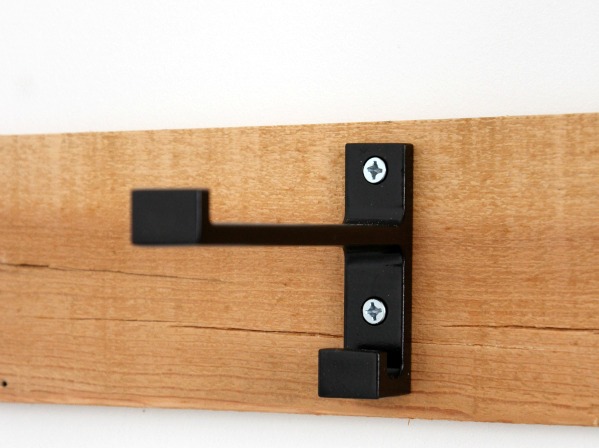
I sanded down the boards but didn’t stain or seal them. I used wood screws to attach the hooks to the boards. I thought about disguising the stainless steel crews with black paint but ultimately decided I like the contrast. It is a warehouse so metal accents and raw wood feel right at home here. Even so, I could totally envision these hook racks in a living space.
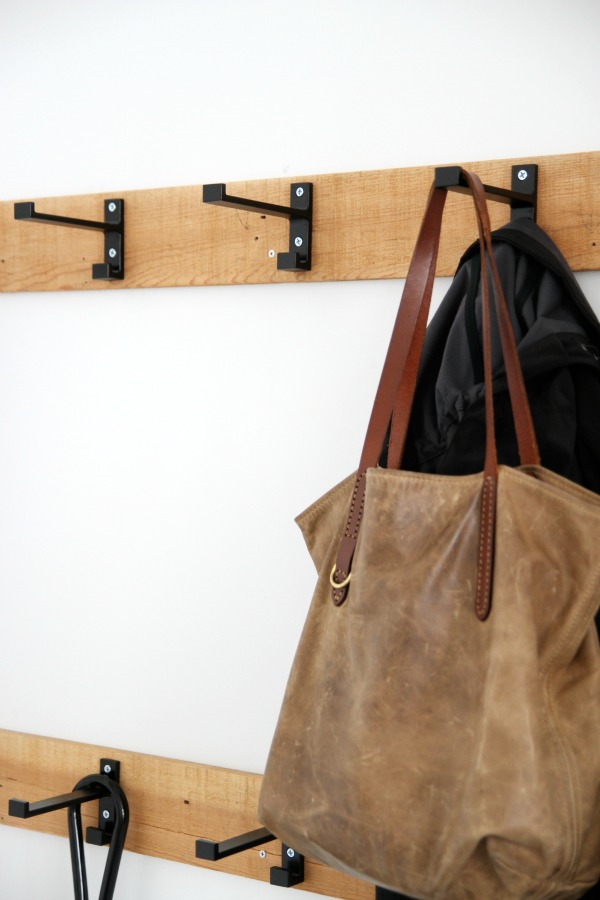
Each hook actually features two hooks so items can be hung in front of or behind one another to double the hanging capacity. One neighboring studio rehabs mopeds; the other is a rotating art gallery. Inevitably, grease, grime, paint and sawdust migrate into the space. It’s so great to finally have a place for hanging everyday items and keeping them off the floor.
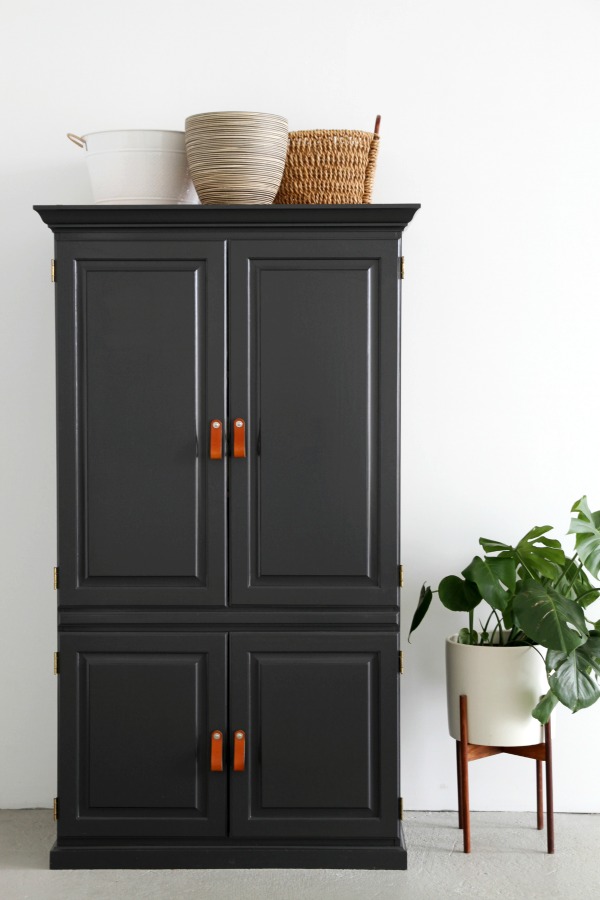
I love how the storage armoire turned out. To make it more functional, I loaded it up with a ton of baskets and bins.
The bottom serves as a mini garage of sorts and houses leftover paint, a tool box, a few battery-powered tools, a bucket, my sewing machine and looms.
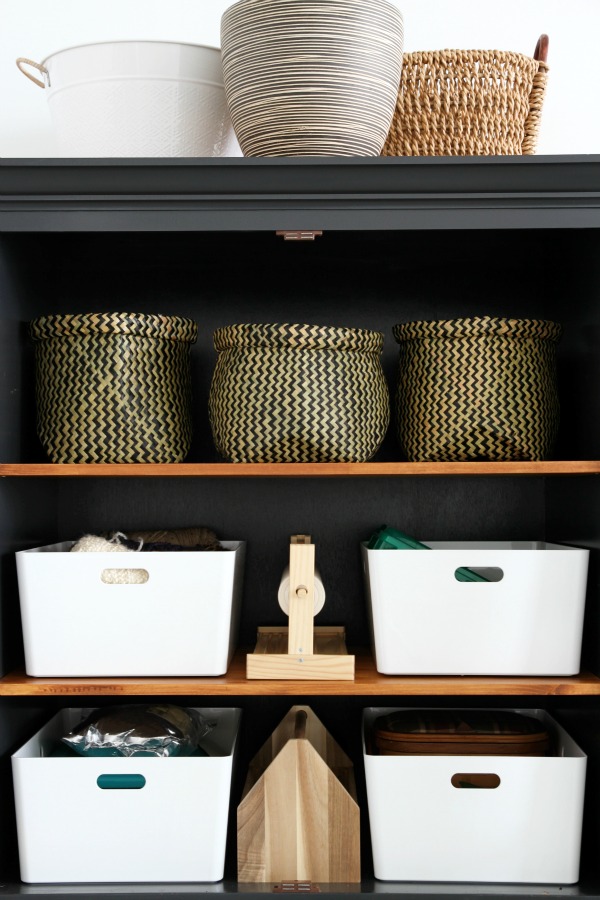
The upper portion holds crafting and sewing supplies along with paint and fabric samples. I left the lids off the KUGGIS boxes so they can hold even more. They’re 21″ long which means they extend to the back of the armoire and minimize wasted space. They’re made of recycled PET plastic, an added bonus. The SKOGSTA box is made from renewable acacia and is beautiful. It’s great for grabbing supplies from the cabinet and carrying them elsewhere to work on projects. The MÅLA paper holder and watercolor paints keep Mabrey occupied for hours. (Cheaper than a babysitter!) I love the texture of the MAGGA seagrass baskets against the black cabinet. Again, there’s plenty of room to grow as I take on more projects. I can easily move things around as needed for maximum efficiency.
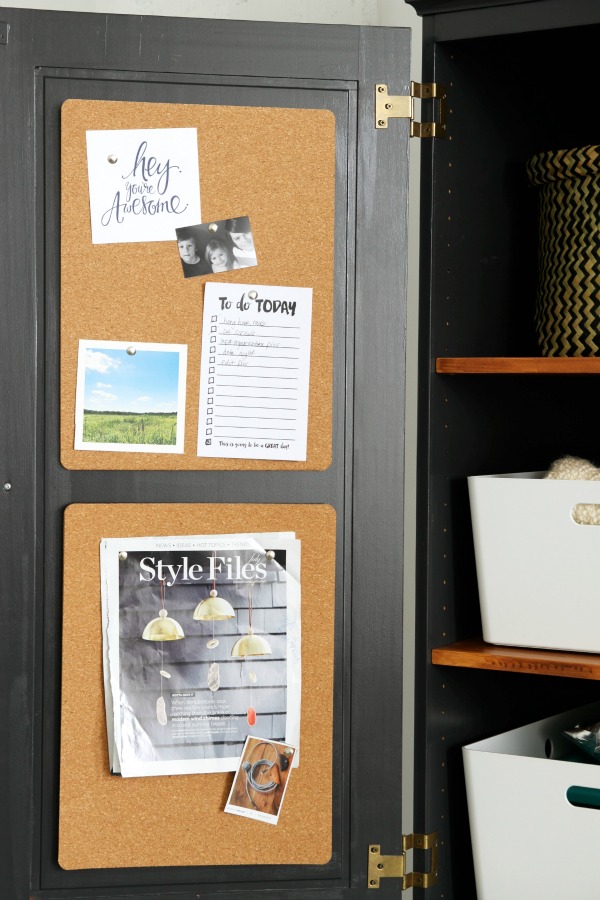
I wanted to hang a noticeboard of some kind on the interior side of one of the doors, but everything I found was too deep or too wide and would have interfered with the door closing properly. When I spotted the AVSKILD cork placemats ($4 for a 4-pack), they sparked an idea. I used wood glue to glue two placemats together, front to back. The result is a pair of noticeboards thick enough to push a tack through yet thin enough for the doors to close properly. Problem solved! I used damage-free hanging strips to attach the noticeboards to the door. They’re perfect for displaying photos, to-do lists and project ideas. I used an adhesive hook to hang a calendar on the inside of the other door (seen in the gif above).

The new storage zones ensure that there’s a place for everything. With portable baskets and bins, nothing is permanent so I can easily switch things up or move things around if necessary. Everything is so functional! Finally!
What are some of your favorite pragmatic items from IKEA? We use the BEKVÄM step stool on a daily basis. I use it to reach items in cabinets above the microwave and fridge. Steve has used it as a stand-in step ladder for home projects. The younger kids use it to help out in the kitchen. Sometimes Mabrey even sits on the bottom step and uses the top step as a “table” to eat her lunch. Cheetah likes to nap on it next to the humming refrigerator.
*I am a brand ambassadör for IKEA. This post sponsored in part by IKEA. I received product and payment for this collaboration. IKEA is a registered trademark of Inter IKEA Systems B.V. and is used with permission. The views, ideas and opinions expressed here are my own. Thank you for supporting the brands that support this blog!
images: Dana Miller for House*Tweaking
It seems the consensus is that you guys would like to continue seeing and reading about Ikea kitchens regardless of which cabinet line – AKURUM (previous) or SEKTION (current) – is featured. For that reason, I will continue to share the best of the bunch that come my way. Thanks for reading!
Obligatory preamble rambling: When we were renovating our kitchen, I searched high and low for any information I could find on Ikea kitchens. The results were few and far between. We did end up with an Ikea kitchen (which we love) but I’d like to shed more light on Ikea kitchen renovations from the perspective of other real life homeowners. It’s something I wish we would have had access to when we were considering Ikea for our own kitchen remodel. Plus, it’s fun to see how others use Ikea to suit their personal style and needs in the kitchen. I hope you find these posts helpful and inspiring – whether you ultimately end up with an Ikea kitchen or not. Enjoy!

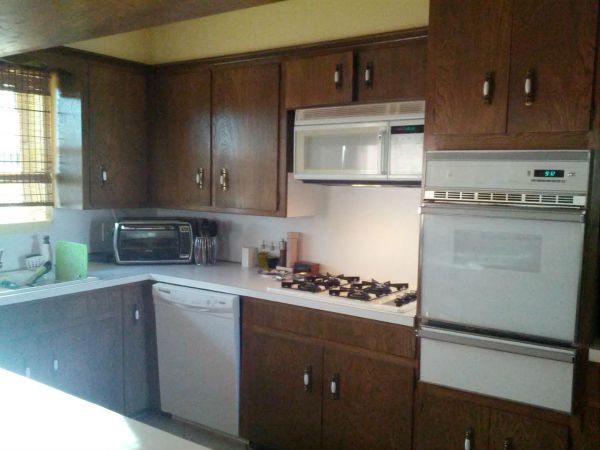
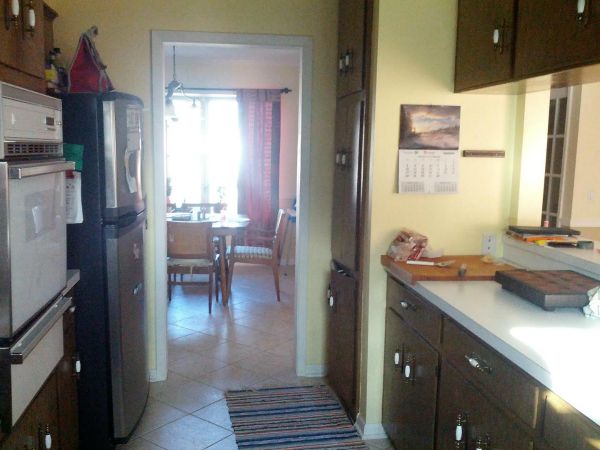
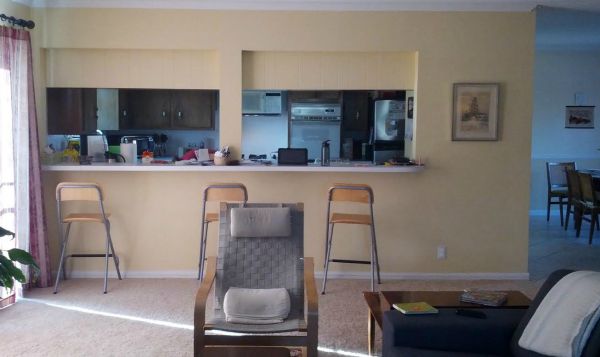
Weslie and Kristina bought their 1970s fixer upper in early 2014. Right away, they set to work bringing improved functionality to the kitchen. The original layout was cramped and closed off from the rest of the house. The location of the dishwasher made it nearly impossible to stand at the kitchen sink with the dishwasher door open. (Which pretty much defeats the purpose, right?) A small doorway leading to the dining room was the only means of entry / exit. A pair of awkwardly placed pass-throughs provided limited views to the adjacent living area and left a lot to be desired.
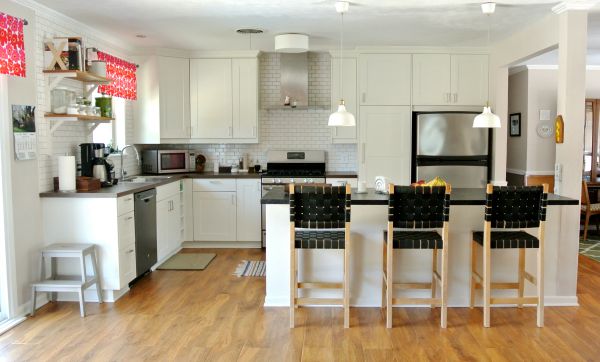
In an effort to improve traffic flow & sight lines, add function and incorporate Kristina’s Finnish heritage, the couple created a new floor plan for the space (bye, bye pass-through wall!) and utilized Ikea cabinets. Weslie was kind enough to answer several questions about the renovation. (Kristina was off doing important things like giving birth to baby #2!) Find his answers and images of the cheerful space below.
Which items in your kitchen hail from Ikea?
Cabinets, sink, vent hood, shelf brackets, perimeter countertop, step stool, drawer organizers, lighting, curtain rods, storage containers, bookends, shelf liners and dish drain.
What made you decide to source these items from Ikea?
Aesthetics, durability, price and ease of DIY.
Who designed your kitchen? What aesthetic were you aiming for?
We created a fairly detailed design and then utilized Modern Family Kitchens which was completely worth the relatively small designer fee. One of the greatest benefits of using the outsourced design service is that they know all of the little spacing tricks and, perhaps most importantly, upload the entire design to Ikea with a pick list for the employees. Because of their knowledge, our conversation with the employee in the Ikea kitchen department was about 30 minutes. Compare that to another poor soul who sat down at the same time as us with a different employee with a list of ideas. She may still be there a year and a half later!
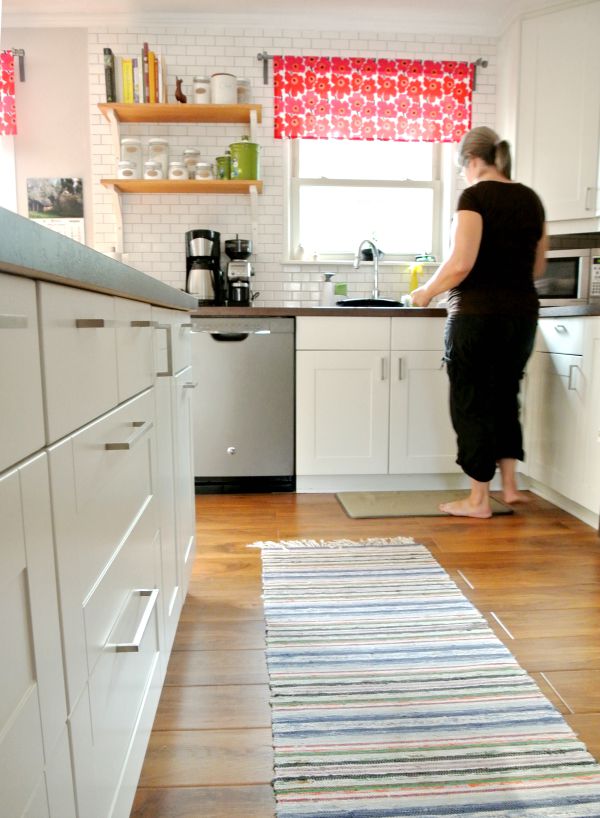
The aesthetic we were aiming for is probably something like Scandinavian modern. Kristina is from Finland. Our kitchen looks like the average kitchen there. Though I’m a pastor now, my undergrad studies were in design and photography. Our kitchen design was a complete collaboration. One goal was to add touches from Kristina’s home in Finland into our north Texas home. For example, the long runner in the kitchen is a handmade vintage piece which was a gift from our sister-in-law in Finland. These are very typical in Finland and most Nordic countries.

Likewise, the curtains (the biggest block of color in the kitchen!) were a gift from both of our parents. The pattern is the iconic Unikko design from Marimekko, one of Finland’s most well-known design exports. The fabric was a gift from Kristina’s parents. My mother, Sylvia, sewed everything to perfection. The little painting of lemons is from my dear great aunt, Edith, whom our daughter is named after. We love collecting vintage pieces as well which is evident throughout the kitchen.


Did you assemble and install all Ikea kitchen components yourself? If not, what did you seek help with?
We did everything. My parents were in town for the demo and helped with that and watching our daughter, Edith. They also helped greatly by bringing their big truck! We live a little over two hours away from the closest Ikea, so we took the truck down to the Dallas metroplex and spent the night with a friend. The next morning we rented a large U-Haul trailer for the cabinets. We also picked up approximately 750 sq. ft. of flooring the same morning, drove everything white-knuckled back that evening and unloaded everything in the garage late into the night. All of the demo, electrical, gas, plumbing, carpentry, sheetrock, painting, trimming, flooring, countertop laminating (for the peninsula), and tile work (completed with consultation from a friend) was done by us!
How did you customize your Ikea kitchen to suit your needs and preferred aesthetic?
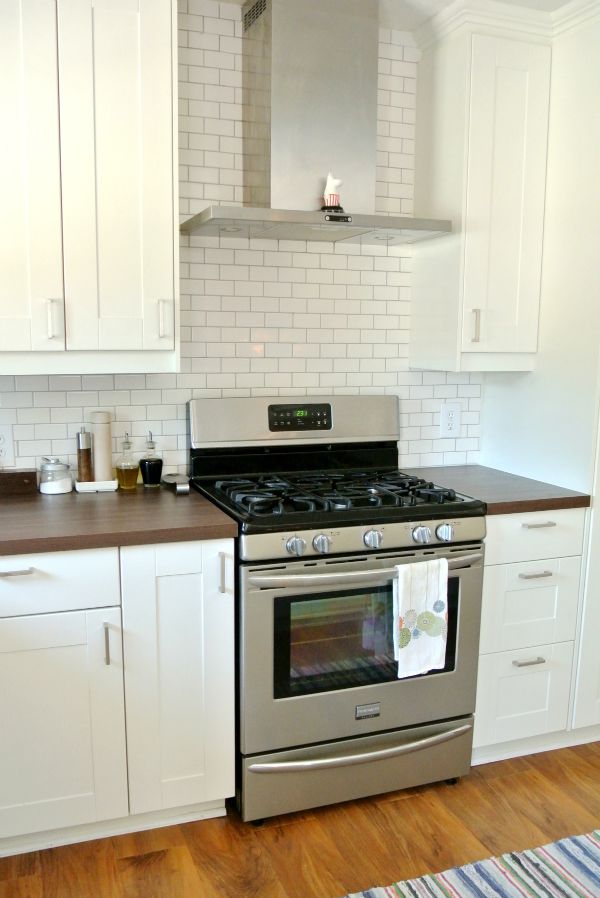
The main goal was functionality. Our old kitchen didn’t function well. It was the original one from 1970 and included a small wall oven that always ran 50 degrees too hot. Our first itch was to deal with that, but a new wall oven that would have fit the space (24″) would have been more expensive than our current stainless steel, five burner convection oven! If we were to go with a regular stove, we would have had to figure out what to do with the hole in the wall left by the nonexistent wall oven. Secondly, when the dishwasher was open you couldn’t reach the sink. It needed to be moved. Lastly, good access to the backyard was high on our wish list. This led us to decide on a complete gut and wall removal. We expanded the original entrance to the kitchen as well. We cook and bake a lot, so we wanted the kitchen to function well for us. Since our funds were limited, we decided to keep the plumbing and gas lines in the same place though we did add and move electrical.
How long was it from design to the final product?
We closed on the house on Valentine’s Day in 2014 and started designing immediately after. It took about six weeks from the day we started gutting until the kitchen was usable again. That includes flooring throughout the house except the bedrooms. I didn’t take a day off work but worked on the kitchen every spare hour of the day. Kristina, who is a stay-at-home mom, worked as much as she was able to during the days. She assembled nearly all of the cabinets herself. It took 18 months to completely finish the kitchen, including crown molding and trim. The long timeframe was due to laziness on my part! Once the kitchen was usable and decent-looking, we were so exhausted that the finishing touches were put on the back burner.
How long have you lived with your Ikea kitchen? Have you encountered any problems?
We’ve lived with it for ~16 months. It was a complete DIY and some things were harder to do than we had imagined. I laminated the countertops using materials from Home Depot, but the result on the perimeter cabinets was not as good as we had hoped for. Rather than trying to fix them, we ended up switching them out for one of the newer Ikea countertop options. We kept the countertop I made for the peninsula, and we are really happy with that decision.

What is your favorite thing about your kitchen? Least favorite?
We love the openness to the living and dining rooms now and the functionality of the drawers and pantry. Our least favorite aspect is probably the fact that the white doors are a little hard to keep clean.
Would you recommend Ikea as a source for a kitchen remodel? If so, which items?
Yes, absolutely! The cabinets are as high of quality as you can find without paying tens of thousands of dollars for 100% wood cabinets. In fact, after we completed our work we visited some dear cousins in Austin who had just finished their own kitchen remodel with very beautiful, all wood cabinets. Their kitchen looks amazing but we’re just as satisfied with ours – no regrets. We’re also very pleased with the perimeter countertops we decided to buy. The texture on the laminate is a nice touch.
Would you consider Ikea for a future kitchen remodel?
Yes, without a doubt.
Resources of note:
paint – Lowe’s Olympic gray beige (light color) and eiffel tower (darker color)
cabinets – AKURUM, Ikea. (We did not use Ikea trim because it was rounded. We found 8′ sections of door jamb trim at our local Habitat Restore for $1! We simply turned it around, cut it down, painted it and used it as under-cabinet trim and upper cabinet spacers. The upper spacers give the crown molding something to rest on.)
shelf brackets – Ikea
perimeter countertops – SÄLJAN, Ikea. (We’re very pleased with them.)
peninsula countertop – textured slate laminate, special order via Lowe’s
flooring – Lamton Madagascar oak laminate (discontinued), Build Direct (They’re 12mm thick, commercial grade and we’re very happy with them. The nice thing about Build Direct for us – besides the price – is that they have no sales tax and are located somewhat near our local Ikea.)
subway tile – Home Depot
grout – pearl gray, Home Depot
sink – BOHOLMEN, from the “as-is” section of Ikea! One of our great victories! They had just taken it off of the floor. It was about $85, a steal!
faucet – Kraus, eFaucets with a coupon
dishwasher – GE, Home Depot return inventory
stove – Frigidaire Gallery, Best Buy
microwave – GE
refrigerator – Kenmore Elite, a generous gift from friends
vent hood – NUTID, from the “as-is” section of Ikea! Another great victory! It, too, had just been taken off the floor and was marked half off.
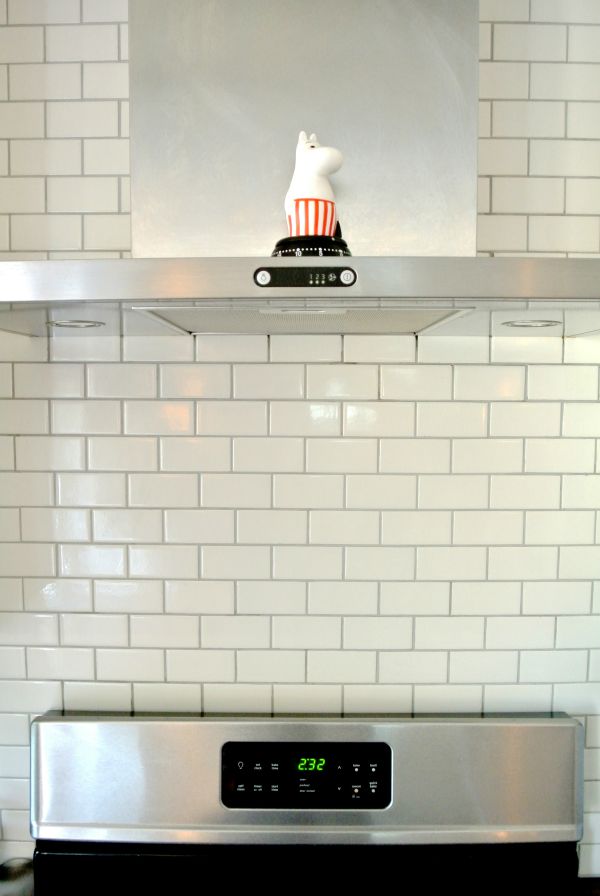
kitchen timer (on hood) – Moomin Mamma from the well-known Finnish stories of Tove Jansson
pendant lights – RANARP, Ikea
ceiling light – ALÄNG, Ikea
LED light above sink – Lowe’s
curtain rods – Ikea
curtains – Unniko fabric design by Marimekko, DIY
runner – vintage
counter stools – J. Persing Arborline stools, Craigslist

Thank you Weslie and Kristina for sharing your kitchen! I love the new layout and all the Finnish-inspired touches. And to think you did it all yourselves?! Kudos. For the record, putting off finishing touches like trim and molding is par for the course in my book. After seeing your kitchen transformation, “lazy” is the last word that comes to mind. Congrats on your newest (human) addition! Hope all is well. I can’t thank you enough for taking time out of your busy lives to help bring this feature to fruition.
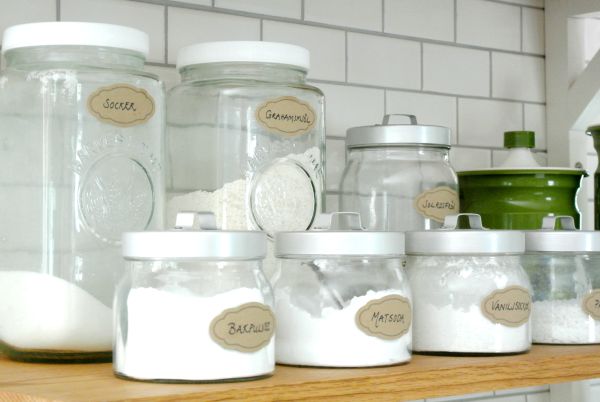
Okay readers, what ideas are you stealing from this remodel? I love the overall happy, cheery vibe. Before I even read Weslie’s answers, I was thinking Scandinavian. The mix of black, white and wood tones is classic while meaningful touches like the vintage runner, handmade curtains, baking ingredients labeled in Swedish and heirloom art create a homey atmosphere. The end result feels personal not sterile like some Nordic kitchens. FYI: socker = sugar and matsoda = baking soda. Don’t say you’ve never learned anything from this blog. Ha!
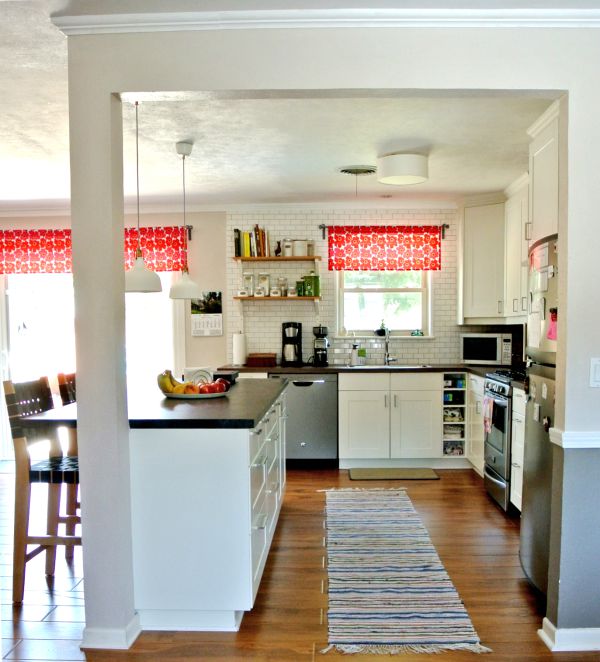
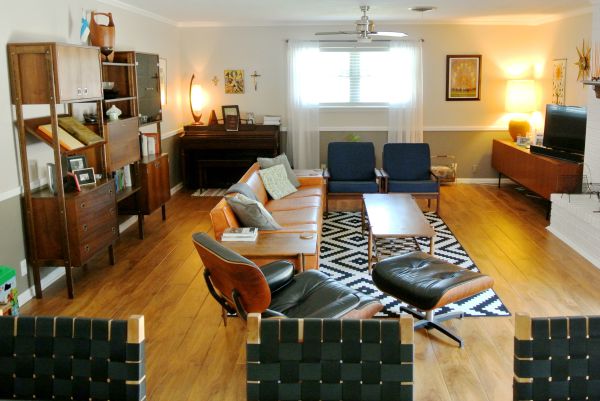
By removing the kitchen-living room wall and widening the doorway to the dining room, the homeowners were able to create a workable layout with improved traffic flow, loads of natural light, better access to adjacent rooms and direct access to the backyard via nearby sliders. I’m always amazed by the impact of wall removal. You can see more behind the scenes action of this remodel over on the homeowners’ blog right here.
Another possible takeaway for those of you considering an Ikea kitchen is enlisting the help of Modern Family Kitchens. Honestly, I had never heard of them before but taking advantage of their knowledge of the ins and outs of Ikea kitchens sounds like a wonderful thing. Paying a few hundred dollars to have full confidence in your kitchen design (regardless of whether you plan to DIY or hire out the installation) seems pretty reasonable to me. Has anyone else worked with them? I’d love to know more.
Want more kitchen inspiration? I finally created a banner in the side bar that will take you directly to the Ikea kitchen series. Just click “See Real Ikea Kitchens” and all the posts will pop up. I’m working on creating a simplified landing page for the series but, for now, you have to scroll through the posts. Sorry fingers.
Do you have a project (big or small, Ikea or non-Ikea) that you would like to share with House*Tweaking readers? Email me at housetweaking (at) gmail (dot) com for consideration. Thanks in advance!
images: Weslie Odom


budget decor