Welcome to my workspace!
I don’t have a separate room designated as an office. Instead, I carved out a home office in a corner of my kitchen. This is where bills are paid, mail is sorted, the kids’ school communication lands, grocery lists are written, design work is completed, blog content is created, and – let’s be honest – falling down the virtual rabbit hole happens. It’s a small space with many functions and, up until a few weeks ago, it wasn’t living up to its full potential. I was finally able to give it some much needed attention and turned it into an organized and inspiring place to werrrrk.
First, let’s take a look at the evolution of this lil’ corner.
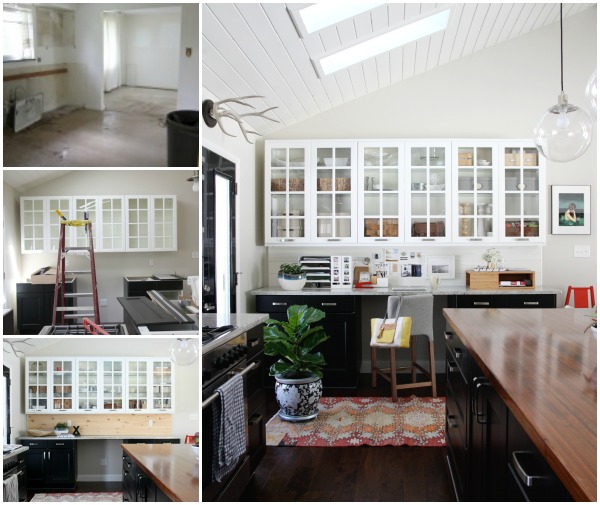
During renovation, we removed walls to open up the kitchen to the living room. This space was originally a teeny dining room off the kitchen. We relocated the dining room to the mudroom (sounds strange, works beautifully for us) to make better use of the space. We vaulted the ceiling, added skylights and replaced the original dining room window with french doors.
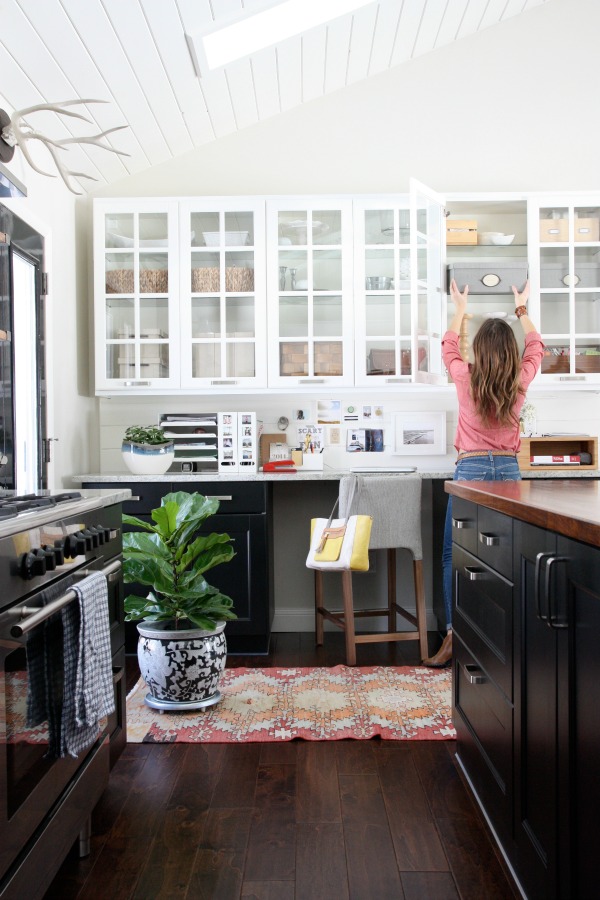
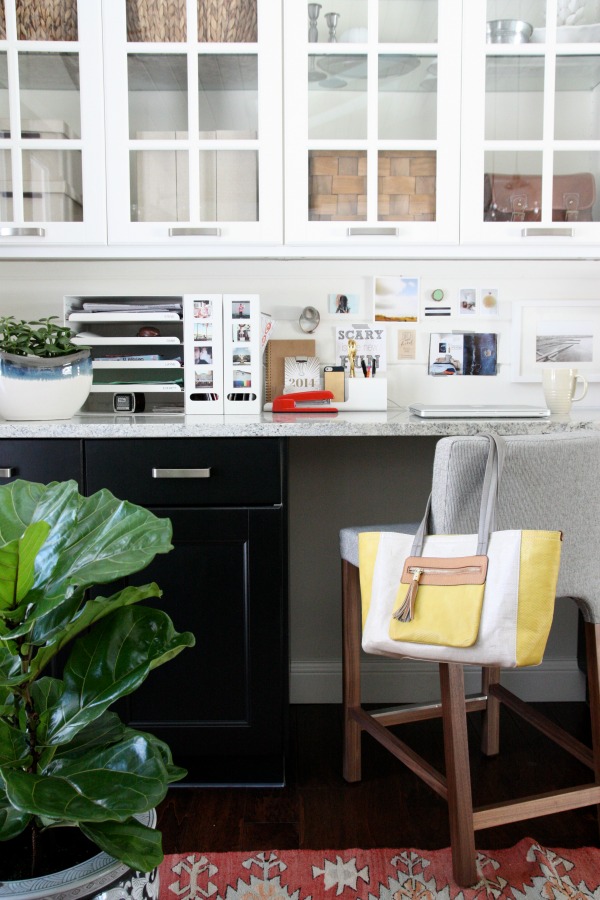
We installed Ikea cabinetry, including a 9′ island. For the office portion of the kitchen, we created a built-in desk with plenty of closed storage. The base cabinets house the printer, paper, kids’ art supplies, gift wrap and even a charging station for battery-powered tools. The glass front cabinets hold glassware, decorative accessories, my camera bag and plenty of baskets and bins which corral everything from vitamins to paint decks to the kids’ flash cards.
We added a tongue and groove backsplash (it matches our TV wall) to the desk area and painted it white. The backsplash links the upper cabinets to the base cabinets. Before, the upper cabinets “floated” on the wall and felt disconnected from the lower desk area.
Recently, I organized the contents of the glass front cabinets and moved the shelves in line with the grids on the doors for a more unified look. I added accessories to make the workspace more appealing from both practical and visual standpoints.
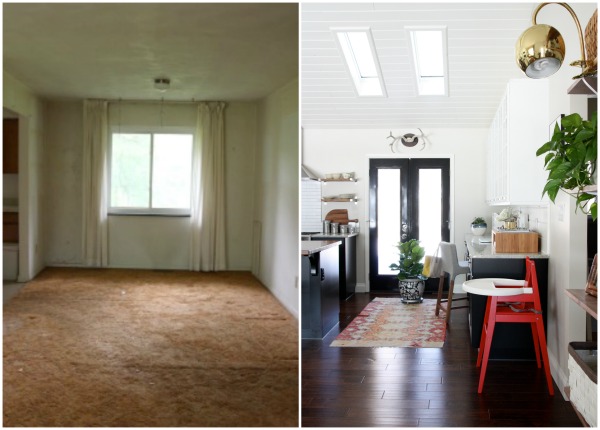
The photo on the left was taken the day we closed on the house. It’s a view of the original dining area from the front door. The image on the right is the view from the front door now. It’s safe to say I don’t miss the orange shag carpet or 8′ ceiling one iota.
Let’s take a closer look.
For the upper cabinet contents I stuck to mostly glass, white, wood and silver for an organic feel. I threw in a pair of textured gray letter boxes to tie in to my desk stool and other gray elements in the adjacent living room.
(My fiddle leaf fig is still alive! I just wanted to point that out. I think he likes it here.)
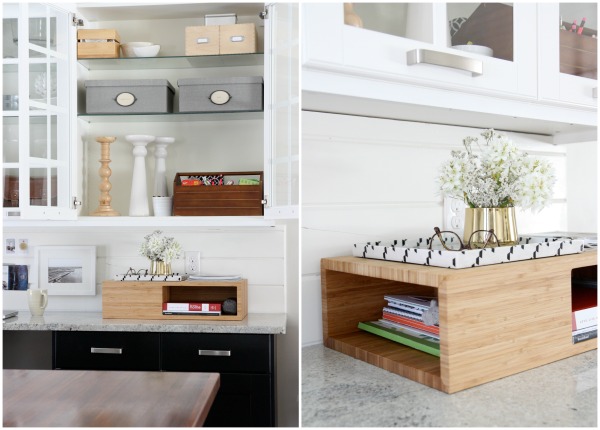
The glass front cabinets work great for me. They force organization and discourage clutter while providing a display area protected from dust. The right side of my desk has always been a natural dumping zone so I brought in a wood cubby with hidden storage to give inevitable clutter a sightly place to chill. A decorative tray on top holds fresh flowers and my glasses.
There are two items in my office that always spark compliments from visitors: the wood cubby and the fiddle leaf fig. I guess you could say they are the popular kids.
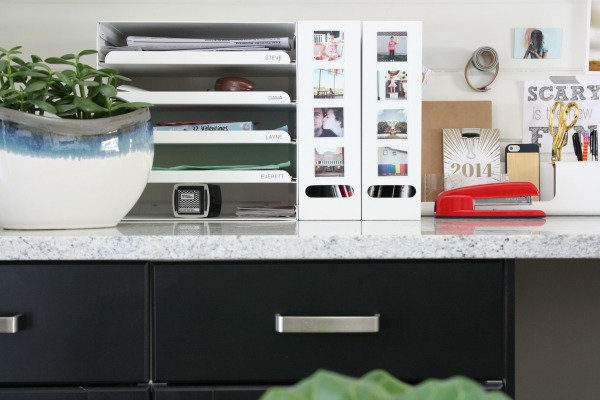
At the opposite end of the desk, I brought in a letter tray to address my family’s never-ending paper trail. Each family member has their own (labeled!) pull-out tray. I temporarily store current catalogs and glossies in the magazine files until I get a chance to read them. #printlimbo For fun, I personalized the metal files with photo magnets.
A desktop organizer holds smaller items like pens, pencils, planners, a tape dispenser, scissors, a tape measure and my phone. I splurged on a fire engine red stapler after a decade of living with a mini stapler that constantly jammed. And, yes, it reminds me of Office Space which makes me laugh out loud.
“…but then they switched from the Swingline to the Boston stapler but I kept my Swingline stapler because it doesn’t bind up as much and I kept the staples for the Swingline stapler and it’s not okay because if they take my stapler then I’ll set the building on fire.” – Milton Waddams
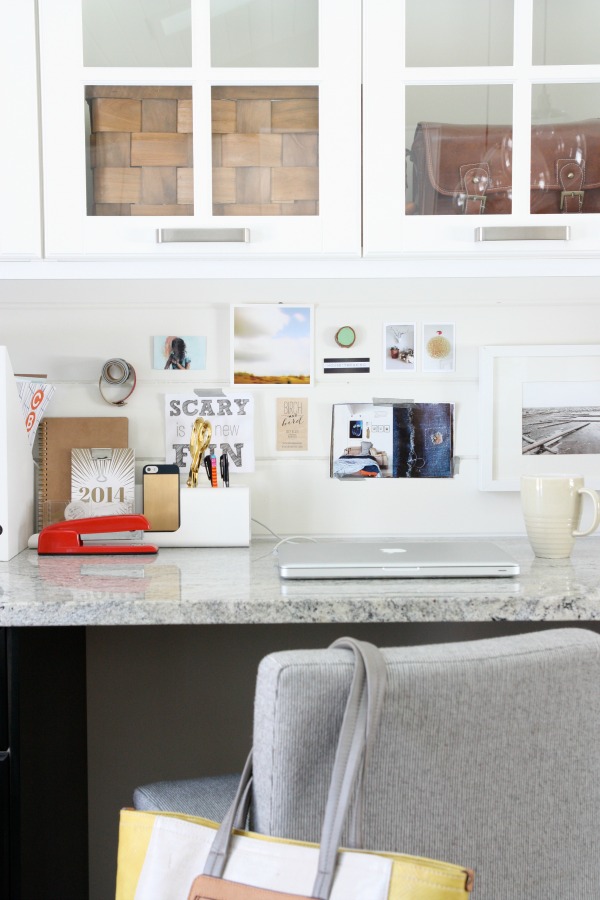
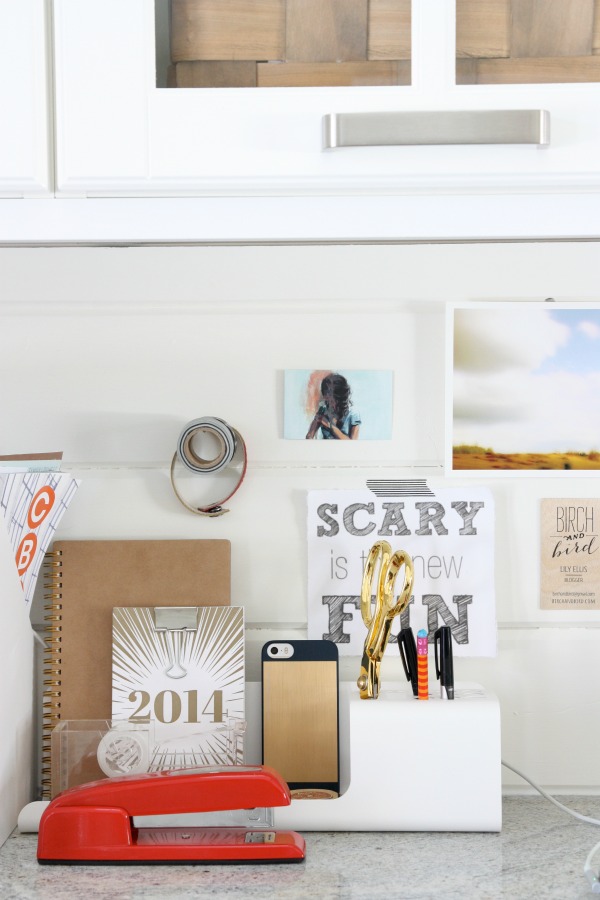
I’ve long admired loosely arranged inspiration boards. It makes for a casual display that can be easily changed when boredom strikes. I decided to try one myself. I used washi tape and double-sided tape to tack business cards and inspirational images to the backsplash. I hung a framed print with 3M adhesive strips. I tapped a finish nail only partially into the tongue and groove and hung a few rolls of washi tape and a leather bracelet. I shopped my house for the items displayed on my inspiration board so this project was free yet completely fulfilling. It’s so nice to work surrounded by items and images that inspire me in some way.
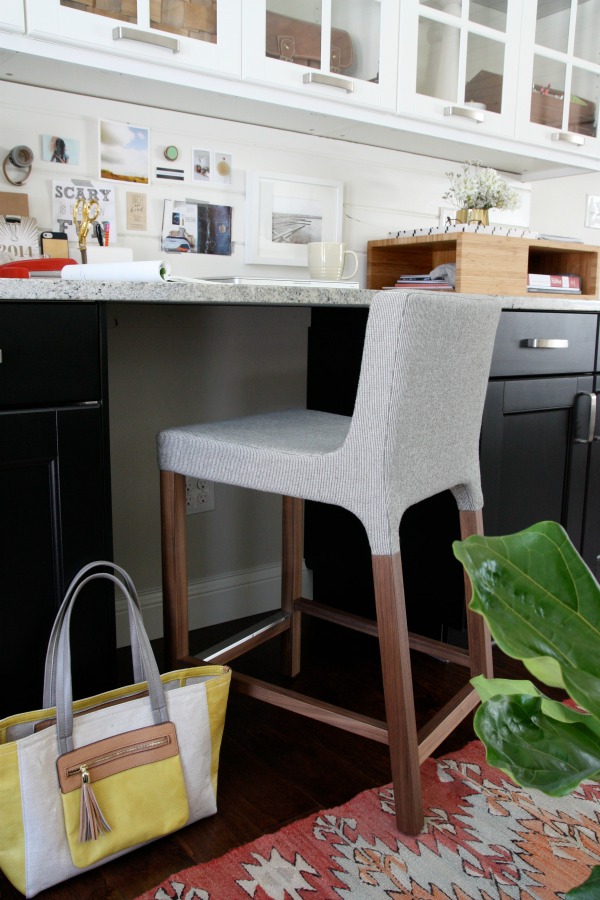
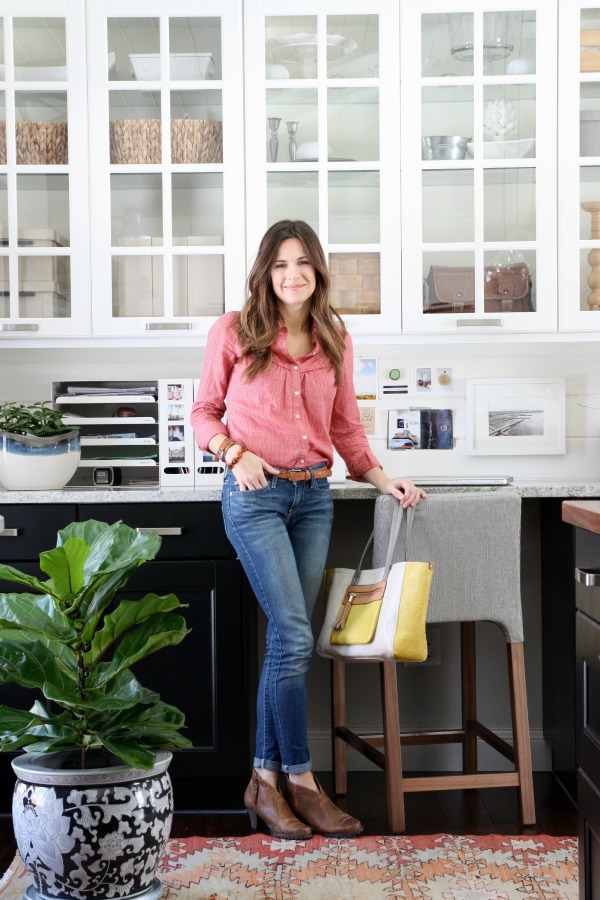
I spent months searching for a comfortable stool that would go along with the modern organic vibe I had envisioned for my workspace. When I stumbled upon this clean-lined upholstered counter stool, I knew it was the one.
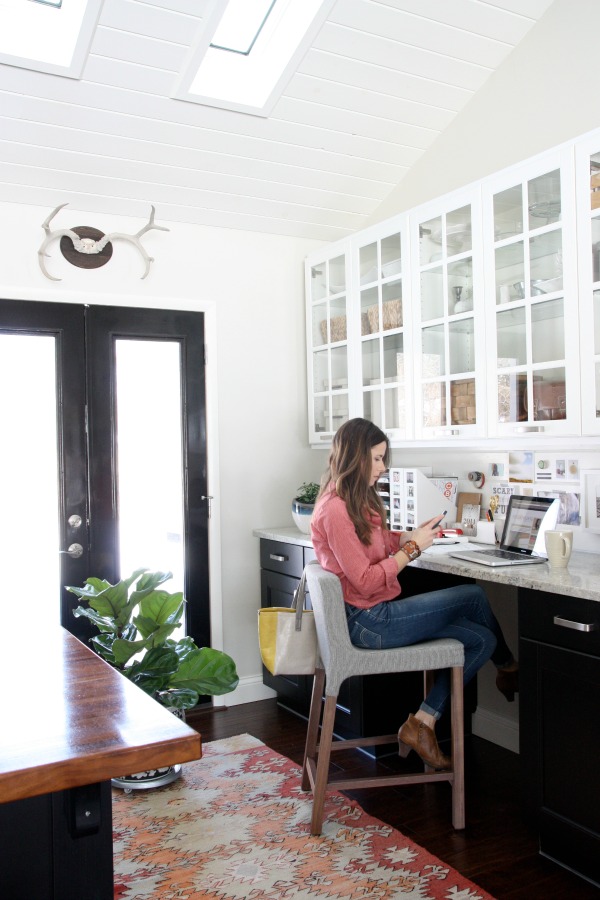
The cushy seat, supportive back and appropriately placed footrest are conducive to long blogging sessions. The simple silhouette and rich wood base are in line with the aesthetic of our open kitchen-living space. I’ve been using the stool for a few months now and it looks and feels just as good as the day it arrived. I am much more productive when my legs aren’t falling asleep.
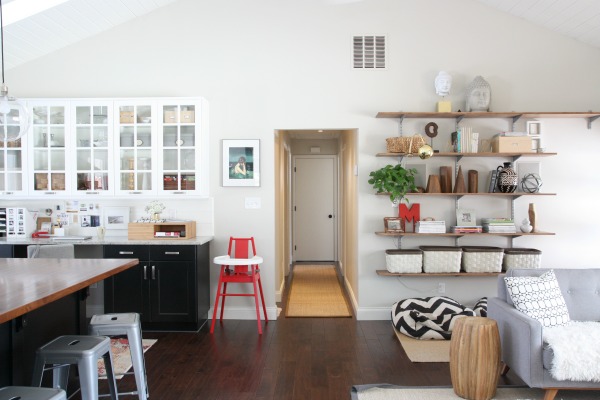
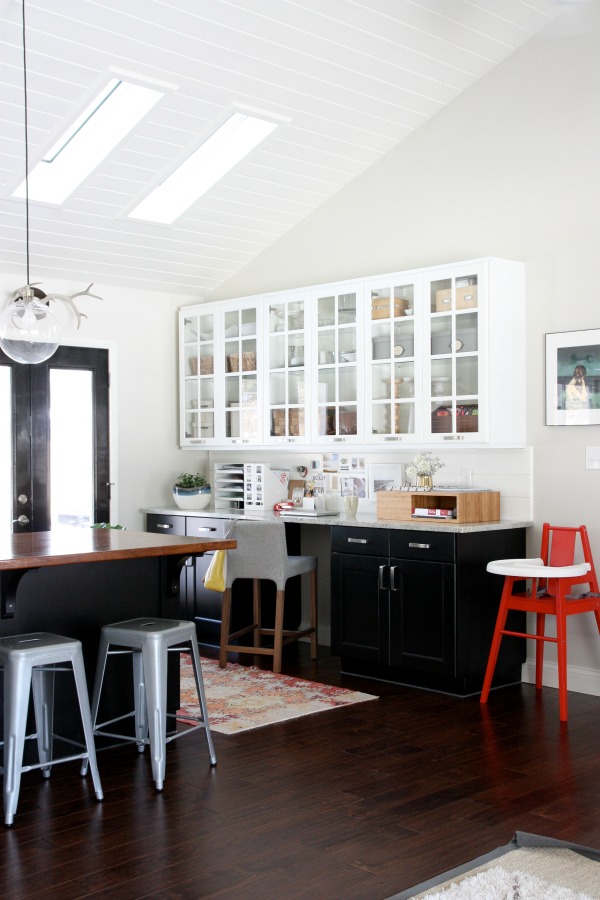
I always appreciate a pulled back shot to help me visualize how a niche, nook or corner fits into the bigger picture. I thought you might, too. Our kitchen is on the left; our living room is on the right. Can you see how the DIY shelves balance out the desk area on this wall?
I need more Buddha heads. Obviously. Also, I think I may be the only person I know with a high chair in their office. It’s for my assistant.
And that’s my home workspace in a nutshell – almost literally. It’s modest in size yet totally functional and so me. I love working here! I want to work here. Ever since I made organization and inspiration priorities in this lil’ space, I have been waaaaayyyy more productive.
After working for over a decade in a career field that sucked all inspiration out of me, I feel EXTREMELY lucky and am so grateful to be able to do the work I do now and to do it here. I have you guys to thank for that. Thank you! From the bottom of my stripe-lovin’ heart.
Sources:
wall color – Benjamin Moore tapestry beige
backsplash color – Benjamin Moore white dove
cabinets – Ikea
letter boxes – Ikea
framed wall art – Clare Elsaesser
high chair – Ikea
wood cubby – Wayfair*
letter tray – Ikea
magazine files – Ikea
desk organizer – Ikea
photo magnets – StickyGram
counter stool – Wayfair*
photography prints – Walter Helena
blue & white desktop planter – JoAnn’s
black & white floor planter – vintage
rug – vintage
*This post was sponsored in part by Wayfair. Items marked with an asterisk were chosen by me and donated by Wayfair. All opinions and images are my own. Hop on over to Wayfair to see my top five tips for creating a functional and stylish workspace.
Happy start to the work week, my friends!
images: Dana Miller for House*Tweaking


budget decor, DIY, interior design, organization, renovation