UPDATE: Apparently, I was operating on no coffee / no sleep / no brain cells at the time this post was written. So sorry for all the confusion! I have edited the post to clarify the main points and terminology. I hope it makes a little more sense. Thanks for all your feedback!
A few years ago, I shared my bunk bed making secrets. Two and a half years later, I want to edit that post…starting with the removal of the cheesy lead shot. (Ugh.) But no, for real.
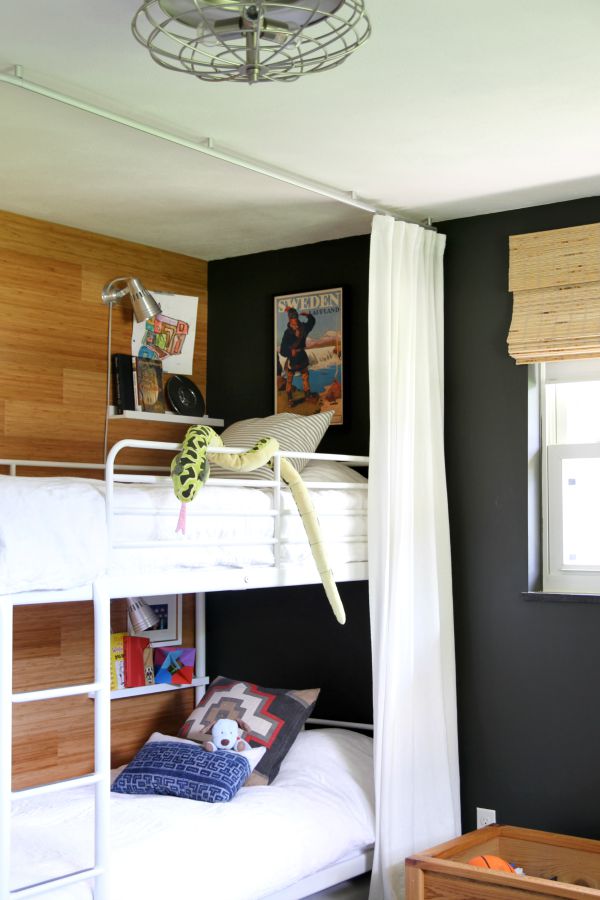
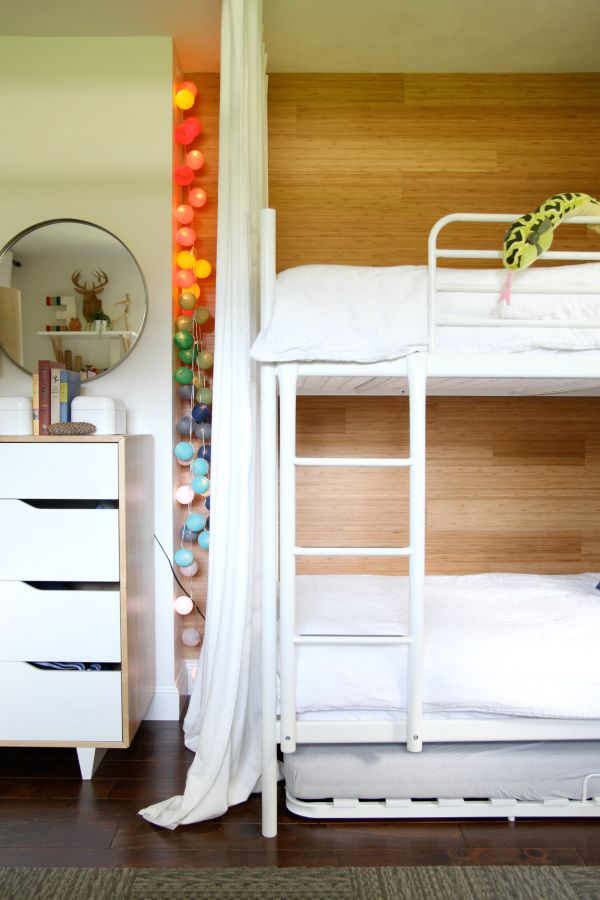
For the most part, the tips I shared are still in full force over here. I still use a step stool and sheet clips. (They’re like suspenders for your sheets.) I still keep pillows to a minimum. I’m still nixing the flat sheets. (They’re pointless with kids.) But there is one little thing that has been making my life even easier when it comes to making the boys’ bunk beds.
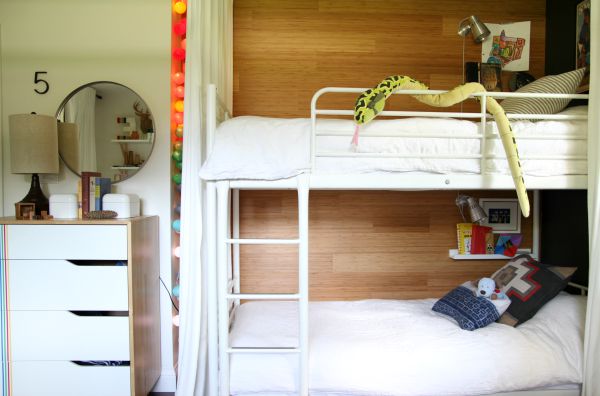
They’re linen duvet covers in European sizes. Let me repeat. Linen duvet covers. European sizing. They will change your life. No more ironing. (Who am I kidding? I have never ironed bedding.) No more baggy, ill-fitting duvet covers. No more balled up, bunched up comforters inside said duvet covers. No more comforter clips.
European-sized duvet covers are smaller (narrower & shorter) so they actually fit the comforters. There’s less shifting of the comforters inside so I’ve been able to lose the comforter clips. (I still use sheet clips on the fitted sheet on the top bunk.) Also, the smaller sizing means less fabric to tuck around the mattress. Less tucking = less linen wrestling = less sweating = happy mama.
I went with white European singles from this etsy shop and opted for the zipper closure for the boys’ twin mattresses. (If you are thinking of purchasing a European duvet cover, double check that it says EUR sizing. Not every listing in this etsy shop has EUR sizing available at this time which is why I didn’t link to a specific item.) For me, I prefer the zipper closure over any fold over, button or tie closure. It’s convenient and there’s no comforter slipping out over time.
I made the switch over a year ago. At the time, it seemed like such a splurge but now it feels like money well spent, an investment in my sanity. Bed making is quicker and the wrinkly linen is super kid-friendly. I’m hoping the white will stand the test of time. I can always pair it with something more colorful when boredom strikes.
When the BHG crew was here last month, the stylist brought in different bedding for the bunks. She was huffing and puffing, sweating and cursing by the time it was all said and done. We agreed that making bunk beds is the worst.
Thank goodness for those linen duvet covers that always look great with little effort. I’m tempted to make the switch in my bedroom, too.
images: Dana Miller for House*Tweaking


DIY, family life, housekeeping, kid-friendly