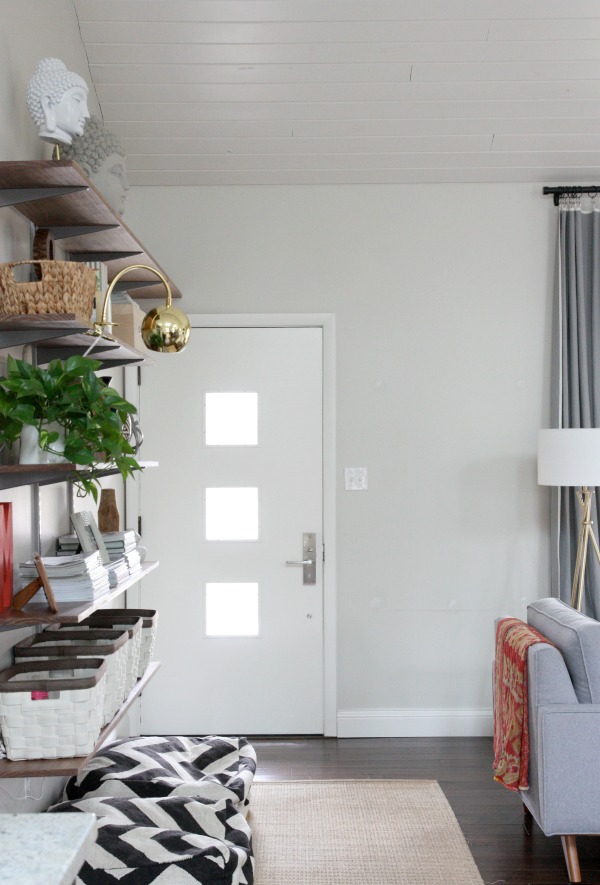
I’m so happy to share our front entry with you! To avoid a lengthy photo laden post, I’ll be sharing the entry’s exterior and interior in two separate posts. Look for a second post later today. Now, onto the exterior!
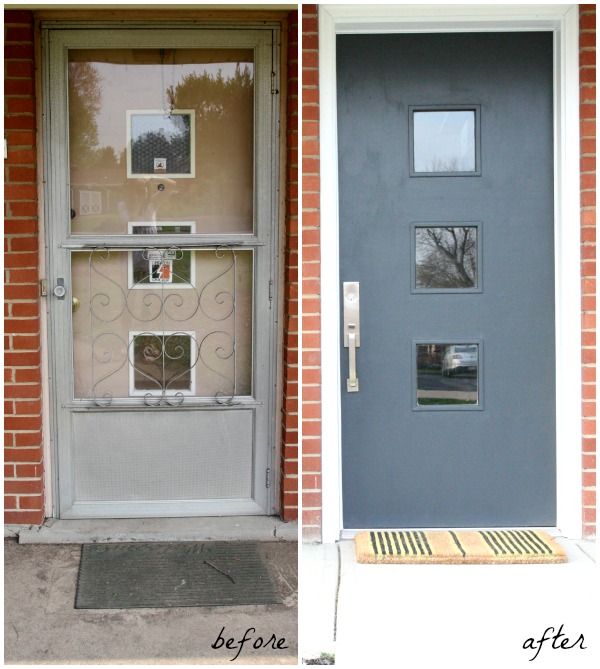
The biggest undertaking in improving the entry was rehabbing the front door. When we moved in, using the front door was cumbersome. There was a heavy screen door that was so LOUD when opened and closed. The process of opening one door outward only to open another door inward didn’t make sense to us so we removed the screen door to reveal the original front door. We loved the midcentury vibe of the front door and decided to keep it.
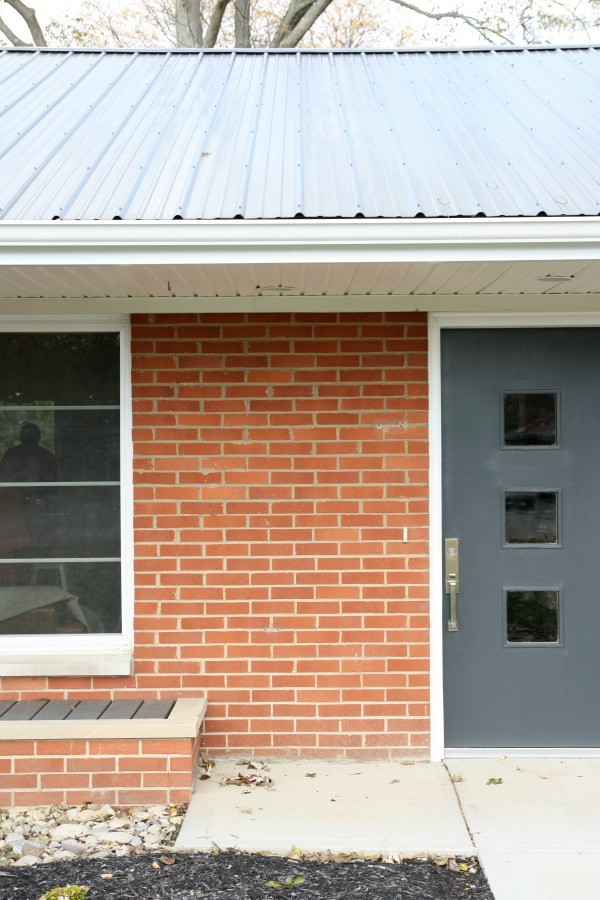
Steve rebuilt the jamb and added a new threshold so the door would open properly. (We rarely used the front door during the first year of living in the house because it was so difficult to open.) Once the door was working we focused on modernizing it with hardware and paint. Steve installed a sleek mortise handset. A mortise lock is one that requires a pocket to be cut into the door. Installation isn’t for the faint of heart but the handset comes with a template – whether you choose to DIY or hire out the installation. The new handset immediately brought a high-end quality to the door. Its simple design fit the midcentury door perfectly.
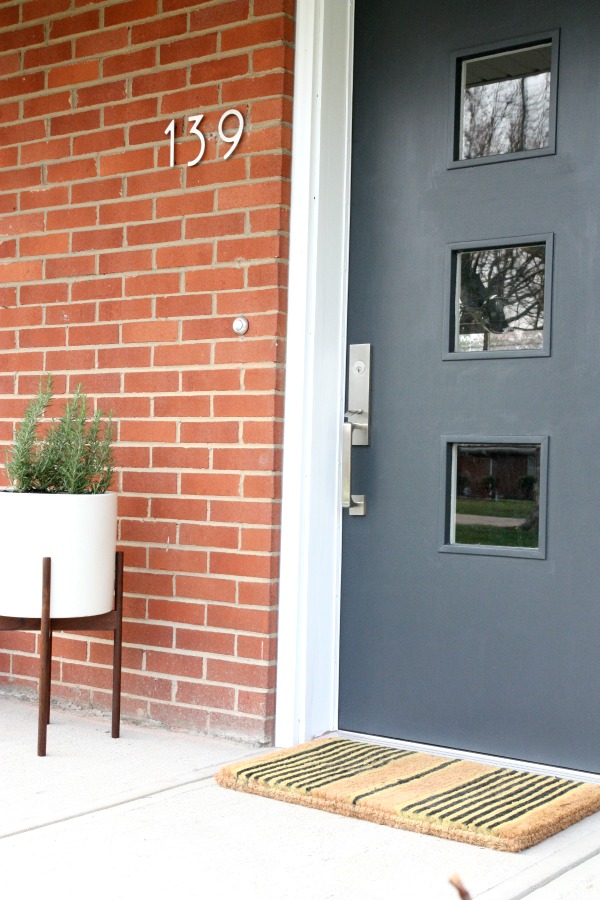
With the handset in place, Steve filled the holes left behind from the old deadbolt. I removed privacy screens and security stickers from the trio of windows then painted the exterior side of the door in a deep, moody blue-gray to contrast with the red brick. We also added new trim and painted it out in crisp white. Our old door looked brand new!
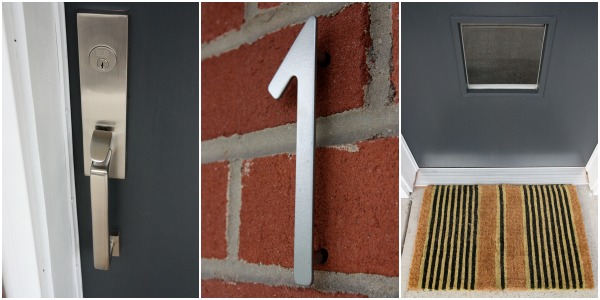
No longer embarrassed by the state of the front door, we were itching to bring in a few details to make the entry feel more welcoming and fit in with our simple modern style. The previous house numbers were so small and difficult to read from the road. We switched them out for 3″ stainless steel numbers with a standoff mount. A striped doormat made of natural fibers hints at what to expect from the decor inside. (I love stripes and natural textures.)
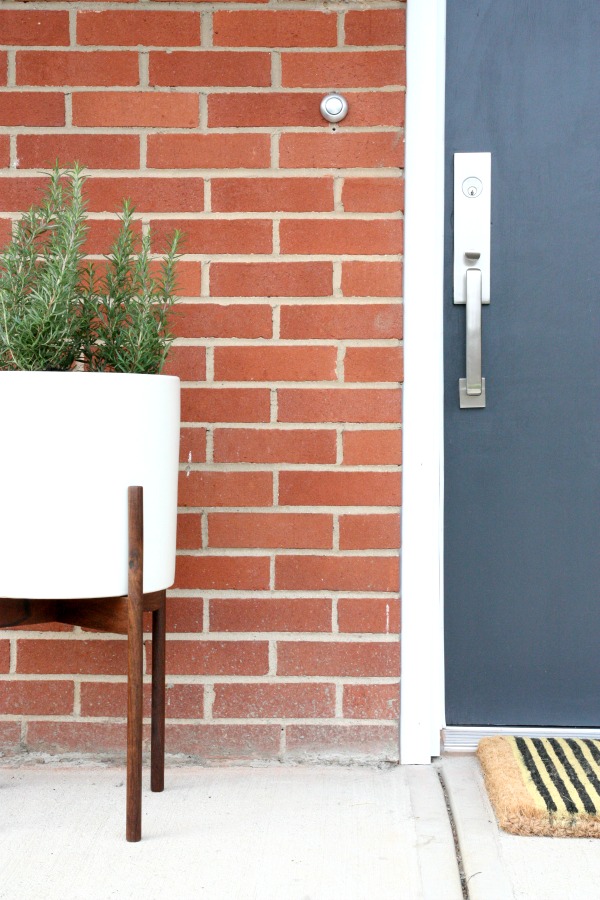
We also switched out a boring doorbell for a larger button-like one. The metal finish is similar to that of the handset and house numbers to keep things cohesive.
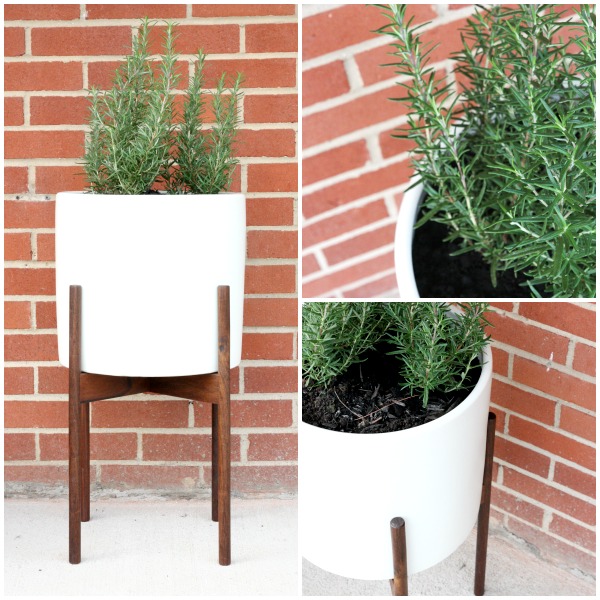
I brought in a modern plant stand to hold greenery. The planter fills an awkward bare spot next to the door and the height brings the eye up to the doorbell and house numbers. Our front door faces south so I wanted to choose foliage that thrives in the sun. I went with rosemary! I love the color, texture and fragrance that it adds to the space. The scent of rosemary is such a welcome surprise at the front door.

I hope you enjoyed the mini tour! We’ve received so many compliments on the improvements from visitors, neighbors, passersby and even the UPS man. (The futuristic doorbell is a hit with the neighborhood kids and the UPS man.) I used to be embarrassed by our front entry and was always apologizing to guests for it. But now I love it!
Our entry isn’t much. There are no steps leading to a covered porch, no double doors, nothing fancy. And we didn’t want to make it something it’s not. The goal was to respect the original entry but modernize it. A few tips to keep in mind when making the most of a small exterior entry:
*Make a statement with the front door. Choose a style that suits your home’s exterior and paint it an unexpected color to contrast with the facade.
*Focus on quality hardware. Splurging on little details like an entry set, door knocker, house numbers or even a fun doorbell can make all the difference. For a cohesive look, stick to one finish for all hardware.
*Less is more. Use only a few favorite decorative items to avoid cluttering a small exterior entry. Accessories should hint at what to expect inside.
*Get creative with greenery. Consider color and texture when choosing greenery. Think outside the box. Fragrant herbs can be a fun and fragrant choice. *BONUS* You can cook with them!
Sources:
door – original, vintage
door paint – Behr Evening Hush
house numbers – Wayfair*
entryset – Emtek*
doorbell – Wayfair*
planter – Modernica
doormat – Wayfair*
*This post was sponsored in part by Wayfair and Emtek. Items marked with an asterisk were chosen by me and kindly donated by Wayfair and Emtek. All opinions and images are my own. Read more about my entry over on Wayfair.
Stay tuned for a look at the interior entry!
P.S. – I know showing house exteriors and house numbers online is a touchy subject. We have a security system and a neighborhood watch program so we’re comfortable with the decision to share images of our entry.
images: Dana Miller for House*Tweaking


budget decor, DIY, inspiration, renovation