Let’s not beat around the bush and just get to it, shall we?
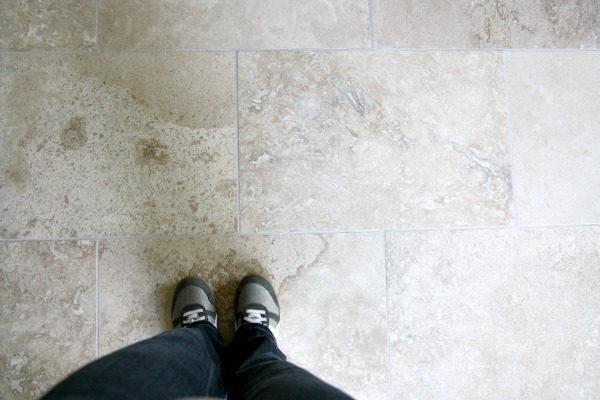
The travertine tile in the mudroom / dining room / laundry nook is down and done. {Thank you, Handy Hubby!} I can’t believe how much bigger the space feels with a light-colored floor! I’d post ‘during’ pics but I didn’t take any. That’s what a newborn and two other kiddos will do to you – keep you away from any renovation sites!
Once the grout cured and the tile was sealed, HH quickly moved onto the next mudroom project…one I’ve kept a secret until now. Can you say horizontal plank wainscoting? If you can, try saying it three times fast.
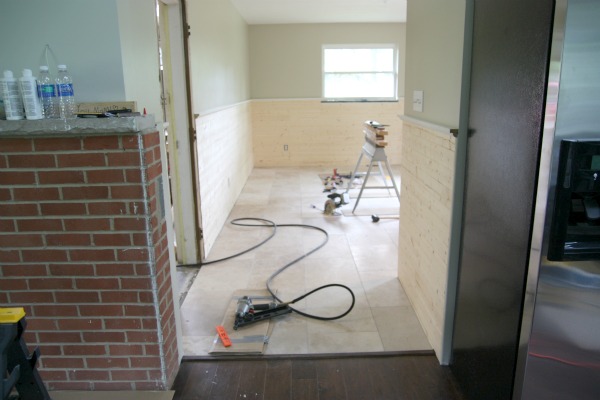
From the family room, there’s a clear view into the adjoining mudroom / dining room. The idea was to create some sort of wainscoting about the same height as the mantel in the family room to keep things feeling cohesive. My first thought was to DIY a traditional wainscoting using trim and molding. Something along the lines of this. But the more I turned the idea over and over in my head, the more it felt, well, traditional.
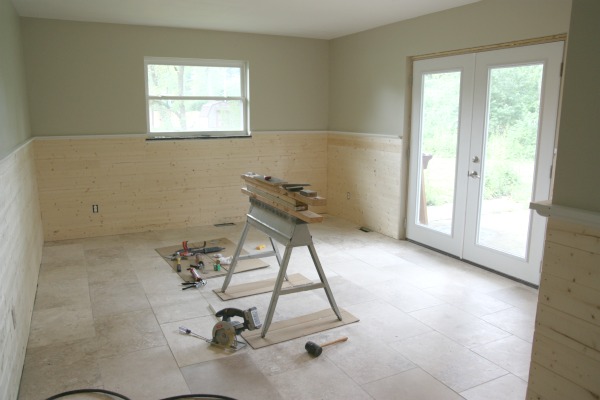
Then I found this image {the one at the top of the page} and knew that horizontal planks were the way to go.

So HH has been busy installing those.
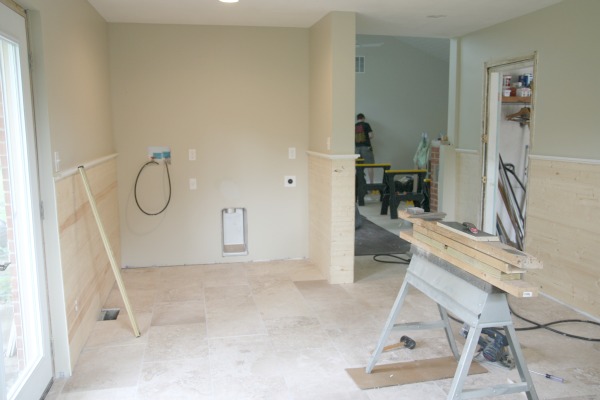
We left the laundry nook’s back wall bare since you wouldn’t see the planks anyway. They would have been hidden behind the washer and dryer. I have big plans for that little nook.
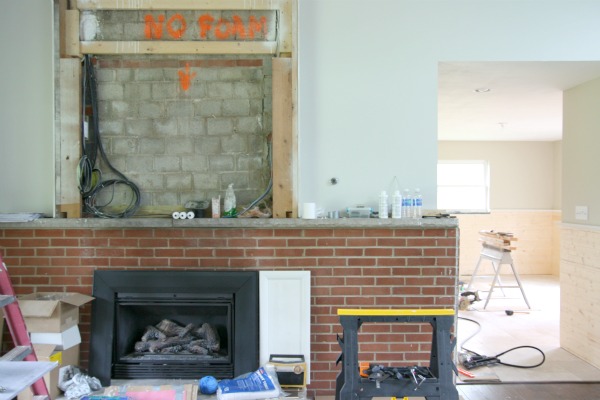
You can see how the planks mimic the mantel’s lines from the family room.
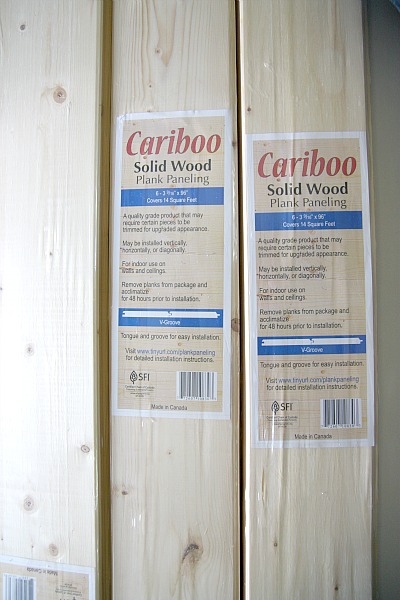
The 4″ tongue-and-groove plank paneling HH used came from Menard’s. That’s it above. Ideally, I would have preferred a 6″ plank {like the ones we used for the ceiling in the great room}, but the 4″ packs were on sale BOGO {buy one, get one free!!}. We couldn’t resist a good deal. It cost us $160 to get enough for the mudroom. That’s pretty amazing seeing as how the planks add a much needed architectural detail to the space.
I should mention that the planks are pretty thin so using them on a wall, like we did, works great. But I wouldn’t recommend them for a ceiling or other feature that doesn’t have a solid, continuous support for the planks to rest on. Things could get a little wavy.
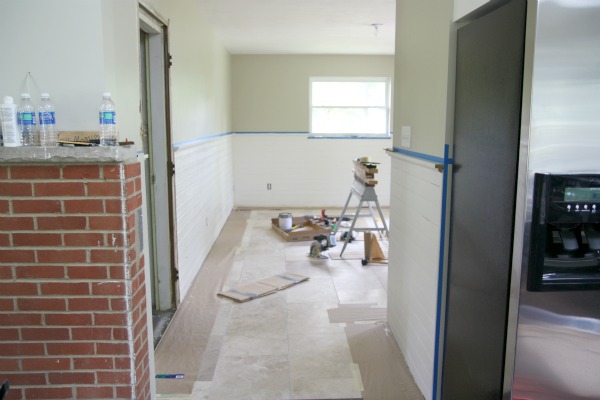
Of course, we’re painting the planks white to match the tongue-and-groove ceiling in the great room. No natural pine left untouched at the Underdog!
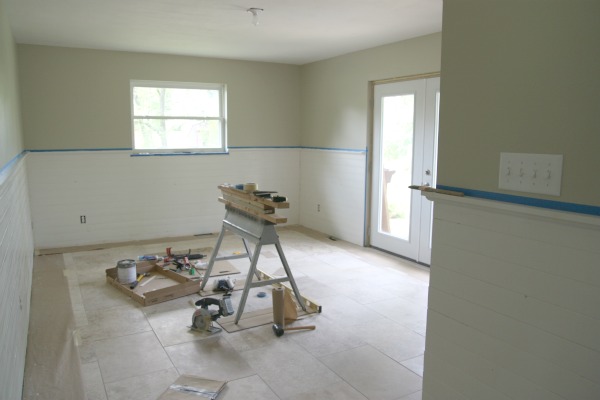
HH is using the same primer and paint that he used on the vaulted ceiling.


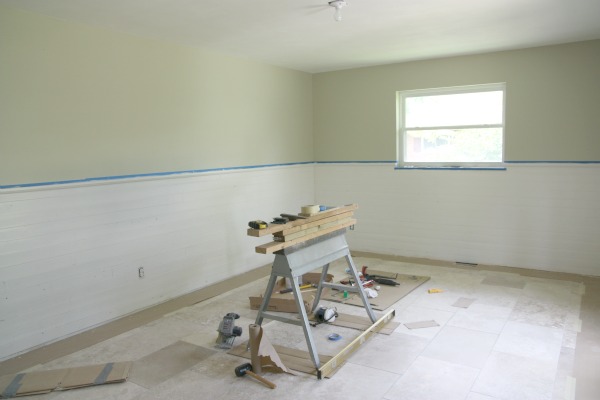
All of these images are showing two coats of primer – no paint yet. The paint will be the same as the trim…Benjamin Moore White Dove in semi-gloss.
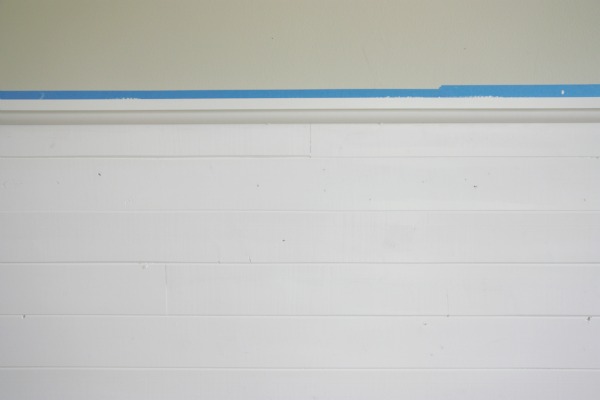
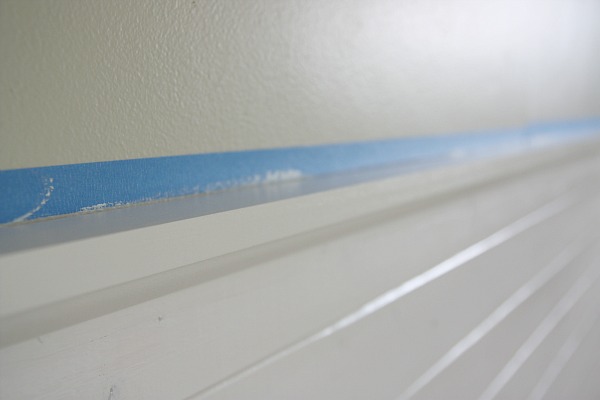
At the top HH added a 1″ x 2″ and quarter round.
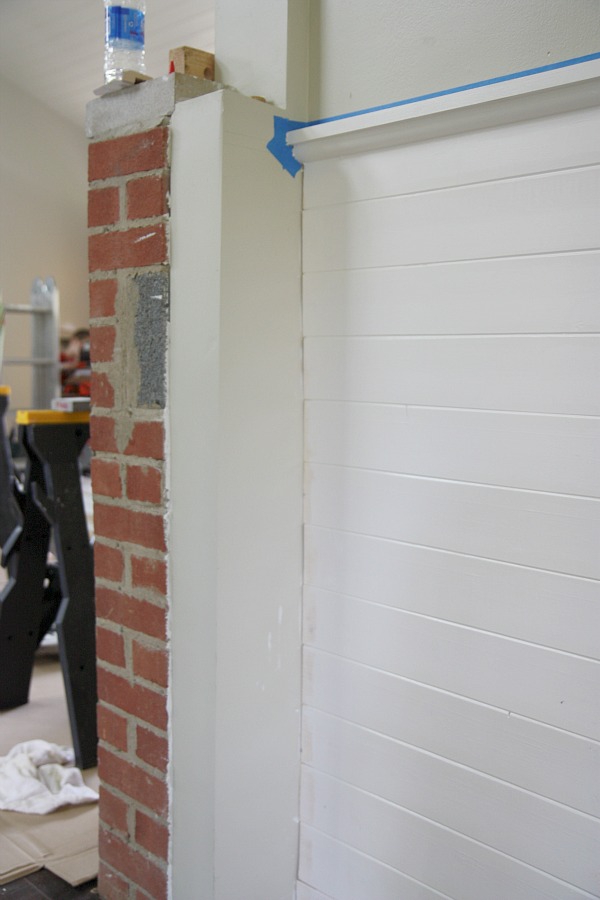
HH dead-ended the planks into the back of the mantel wall. Notice how the planks start a few inches down from the mantel’s height.
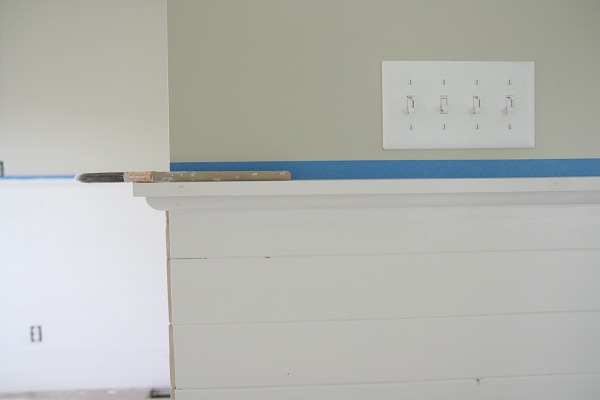
That’s because we were trying to avoid planking {not the Lying Down Game} around the light switches. We thought that would look strange. This way the plank wainscoting runs along nicely just below the switch plates.
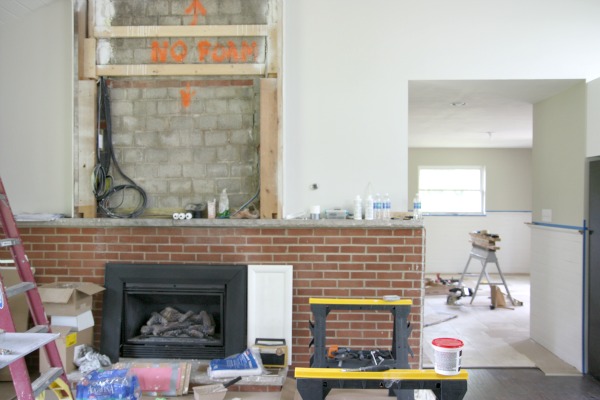
See how the horizontal line of the mantel is now continued into and around the mudroom / dining room? For consistency, we’ll also install tongue-and-groove planks over the bump-out above the mantel…and paint them white. {Right now, it’s where you can read ‘no foam’ spray painted in orange.} That won’t happen until after we move in since we’ll need to hang our flatscreen above the mantel first.
Speaking of moving in…doesn’t the Underdog look move-in ready?? NOT! We’ve got so much to do! I’ve been purging things at the apartment so I can start packing and moving some of our smaller things next week. I plan on taking a carload every day when I drive over to get Layne off the bus in the afternoons. I’m thinking of it as my postpartum workout.
Happy Mother’s Day to all the beautiful women out there who are busy raising kids, have raised kids and/or are preparing to raise kids! It’s a wild ride.
Click here to see who won this week’s Home Depot giveaway!
images: Dana Miller for House*Tweaking

Today I’m sharing how I DIY’d the mobile in baby’s corner. It was super easy and inexpensive. Plus, it’s completely temporary so when we blow this joint {our interim apartment housing} we should have no problem taking it with us.
First, let’s talk supplies.
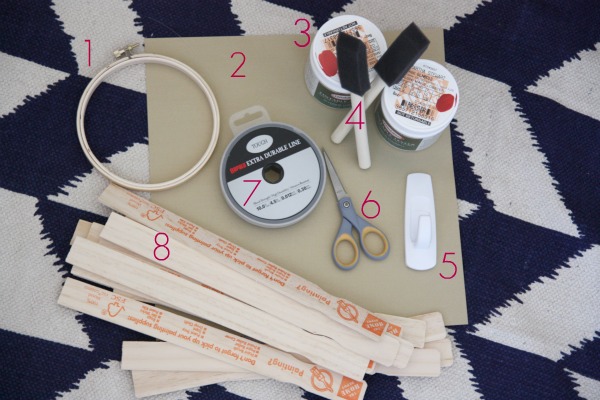
1 – embroidery hoop I bought a small one {~16″ circumference} at JoAnn’s for $1.
2 – double-sided scrapbooking paper I found this metallic gold 12″ x 12″ sheet at JoAnn’s for $1.
3 – paint samples I chose coral and red swatches {Martha Stewart’s Bergamot MSL019 & Maine Lobster MSL024} and had a sample jar of each mixed up at Home Depot in the Glidden brand. This was more than enough paint but I wasn’t able to find the colors I wanted at my local craft store in a smaller container. Also, purchasing the paint samples at the home improvement store made asking for 16 paint sticks more palatable. The two jars of paint cost me $6.
Of note: The paint desk employee informed me that Home Depot will no longer be carrying the Martha Stewart Living paint. However, they will have MSL formulas in their computer so they can color match them in their Glidden brand.
4 – small foam brushes I bought cheap foam brushes to apply each of the paint samples to my paint sticks. They cost me $2.
5 – 3M Command hook I always have a slew of these on hand. With a hanging weight capacity of 5 lbs, this hook is strong enough to safely support the light mobile from the ceiling.
6 – scissors I used these to cut the scrapbooking paper into circles.
7 – fishing line Another item I always have on hand to hang decor. It’s extremely durable and invisible. I used the fishing line to suspend the paper circles from the mobile and to secure the mobile to the adhesive ceiling hook.
8 – paint sticks Since I was buying paint samples, I kindly asked the paint desk employee if I could have 16 paint sticks. He was more than happy to let me take as many as I wanted because I was a paying customer.
I’ve always been on the fence when it comes to ‘borrowing’ paint swatches/sticks for DIY craft projects. Although they are free products, I’m assuming home improvement stores tack on the cost of that lost inventory to other items somewhere down the line. Who knows? Maybe someday we’ll have to pay for our swatches and sticks. Remember when you could put air in your tires at no cost?
To determine the number of paint sticks you’ll need, simply measure the circumference of your embroidery hoop in inches.

Mine was ~16″ around. Paint sticks are roughly 1″ wide, so I grabbed 16 paint sticks knowing there would be a little space in between each stick on the mobile. I ended up only using 15 sticks.
9 – pencil {not shown because my baby brain hadn’t thought of it yet} I traced circles onto the scrapbooking paper with a pencil.
10 – tape {not shown because I think Everett was playing with it} I used clear packing tape because that’s what we have on hand at the apartment for moving day.
11 – hot glue gun & glue sticks {not shown because I had it plugged in} This is what I used to secure the paint sticks to the hoop.
Once I had everything set out, I got to work.
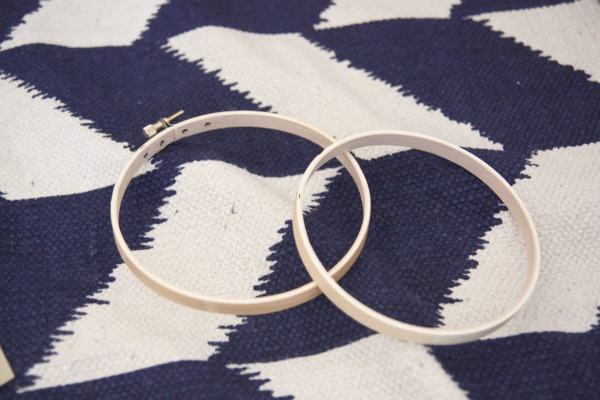
I removed the inner embroidery hoop {the one with no tightening screw} from the outer ring {the one with the fastener} to use as my mobile base. Essentially, you could make two mobiles from one store bought embroidery hoop if you wanted.
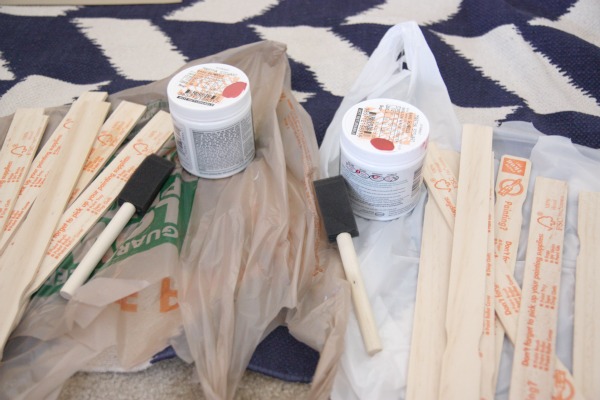
I separated my paint sticks into two equal piles and placed plastic shopping bags under them to use as drop cloths. I reused my JoAnn’s and Home Depot bags…waste not, want not!
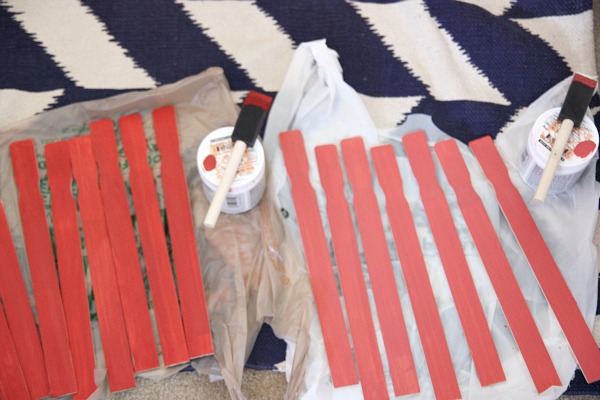
Using the foam brushes, I gave each paint stick two coats of paint front and back. I didn’t bother with the sides since I wanted a homemade, imperfect look. I thought the raw wood edges would give me that. I made sure to let them dry in between each coat.
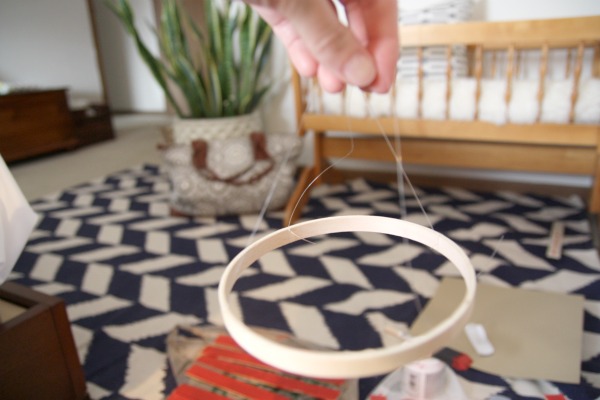
Before glueing the painted sticks onto the hoop, I tied some fishing line onto my hoop so that I’d have something to hang the mobile from.

Once all the painted sticks were dry, I started hot glueing them to the hoop. I found it easier to place the sticks by applying the glue directly to the hoop…not the sticks. I chose to attach the sticks about 2″ – 2.5″ down from the flat end {not the end with the curved indentations that are meant to act as handles when used to stir paint} and left about ¼” gap between the sticks. I held each stick firmly in place for 10-20 seconds after glueing it. I alternated coral, red, coral, red, coral…you know what comes next.
Placement wasn’t perfect. I didn’t measure as I went along glueing. I just eyeballed it and figured I could make adjustments at the end if I ended up with a gap or two reds next to each other…you know, just hang that part facing the wall. Ha! Luckily, it all worked out and the worst that happened was that I had to squeeze in my last paint stick. In the end, I used 7 coral sticks and 8 red sticks.
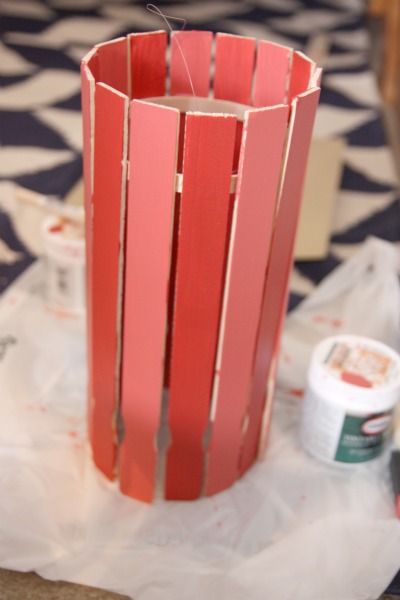
I let the glue dry while I moved onto the paper circles that would dangle from the mobile.

To keep things simple {and to keep me from getting up off the floor!}, I used one of my paint sample jars as the template for my circles. I traced around the bottom of the jar and filled my paper with circles.
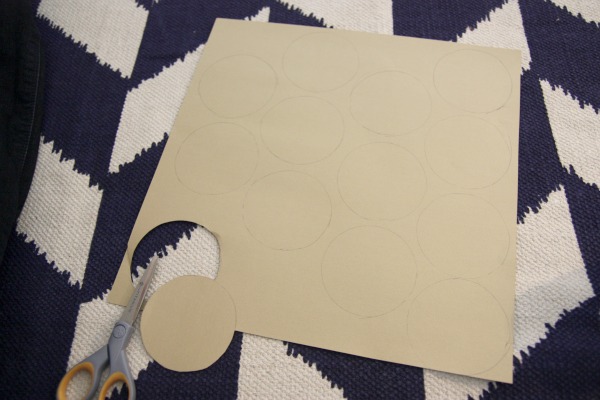
I cut out the circles by hand. An easier option would be to use a large circle punch but I don’t have one and wasn’t willing to spend $10+ to buy one. Yes, to me, cutting by hand for 10 minutes is definitely worth the $10 saved!
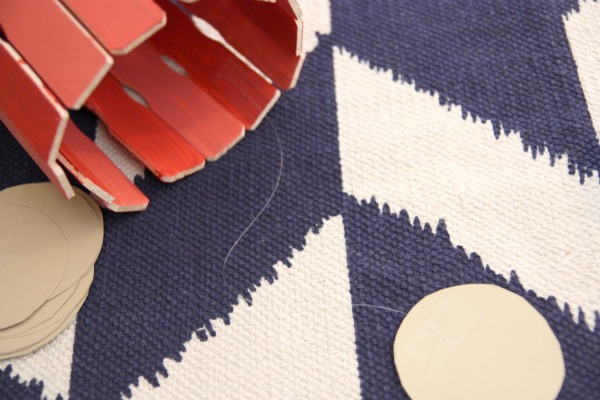
Using tape and fishing line, I attached my gold paper circles to the inside of the mobile. I found this step easier when I hung the mobile from something {in my case, a floor lamp so I could stay on the floor…still} which let me see how the circles were falling and vary their heights accordingly. Basically, I hung the circles at random distances from the bottom of the mobile for a loose, casual feel. Oh, and I didn’t use all the circles I cut out. After suspending 10 circles, I felt any more would feel too busy.
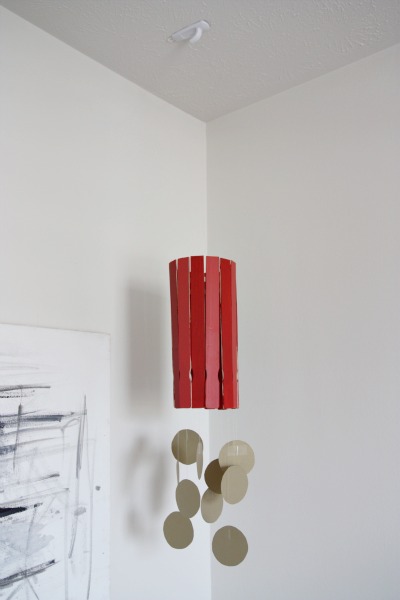
Then I hung the whole thing from the ceiling via a 3M Command hook and more fishing line. I tried taking a picture of this so you could see it in more detail but fishing line is invisible and the ceiling is white, so this is what I got…
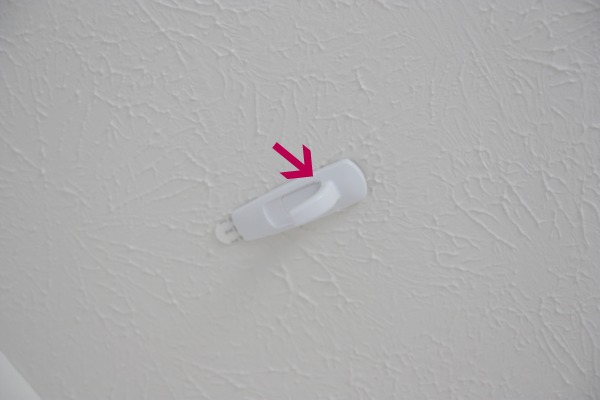
Instead of looping the fishing line around the hook as you would if you were hanging something from a wall, I looped the fishing line around the back of the adhesive hook {yup, right where the adhesive is} and just in front of the actual hook part that juts out. That arrow is pointing to where the fishing line is tied since it’s not highly visible. You could always use a screw-in ceiling hook but, again, I was trying to keep things as damage-free as possible since we’re renting. The adhesive hook is working really well so far. I’ve had it up for over a week now with no signs of it pulling loose – even with the textured ceiling.

I said it before. I just love the playful pop of color and whimsy that the little DIY mobile brings to baby’s corner.
Of course, there are all kinds of ways you could tweak my design into something different:
- use even more paint colors for a happy, striped effect
- use a larger hoop and more paint sticks for something bigger…like a tween girl’s faux chandy
- fold/cut paper into different shapes
- leave the outside of mobile natural {not painted} but paint the inside a bright hue for an unexpected surprise
- add inexpensive cord lighting to create a pendant
Do you have any other ideas for alternative spins on my DIY paint stick mobile? I’d love to hear your brainstorming!
In other baby news, well, nothing really. I’m 38 weeks. I was 3cm dilated at my last OB appointment. Just last night I had several hours of regular contractions {about every 5-6 minutes, lasting about 1 minute}. I took a shower to see if that would stop things, thinking then I’d know if it was the real thing. The shower had no effect. We had my dad and his wife come to pick up the boys in case things progressed. I called my doula just to let her know what was going on but assured her that my contractions – while quite strong and regular – were not crazy intense and that I was coping well. She encouraged me to rest, so I did. I got some sleep off and on for a few hours with contractions still coming and going. Then all of a sudden at 8am this morning {nearly 10 hours after the contractions began} everything came to a screeching halt. HH is working from home today and I’m just going about my day, pretending last night didn’t happen.
The popular midwife adage is holding true for us: Firsts are long. Seconds are fast. Thirds are unpredictable.
FYI – Click here to see if you won the BrideBlu giveaway this week! I really enjoyed reading about all the creative ideas for ‘something blue’ on a wedding day. So much has changed since HH and I got married!
images: all Dana Miller for House*Tweaking


DIY, renovation