...because home doesn't happen overnight.

It’s Feature Friday!  On Fridays, I’ll be featuring one room in my house in its current condition even if there are some things I’d like to change about it.  If I do happen to improve something later, I can always revisit it when the time comes.  Plus, I’d kinda feel dishonest if I only focused on “finished” rooms in my house.  And if what they (the professionals) say is true, a room is never really finished anyways…you’re always tweaking it.  Concentrating on just one room weekly should give me some time to tidy it up a bit, too.  At least, I can throw all the toys into another room!

If you’re an avid reader of H*T, you’ve probably noticed the absence of my kitchen from the downstairs part of my house tour.  Well, that’s because it’s been in disarray for the last few weeks but I’m happy to share it with you today!  For fun, let’s see what my builder grade spec kitchen looked like before we tackled any DIY upgrades.
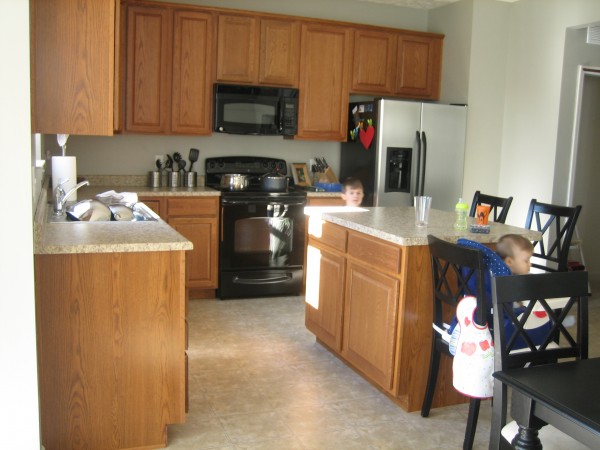
builder basic kitchen

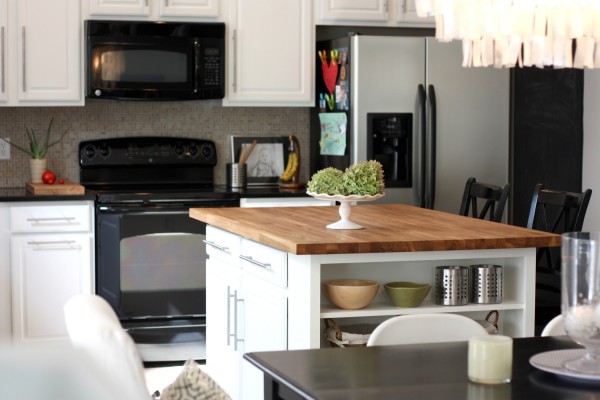
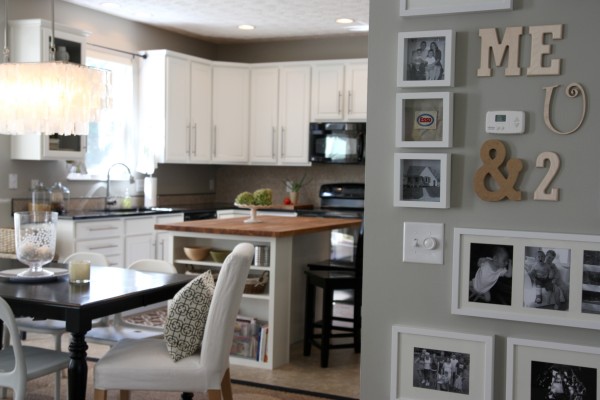
And here it is now after painting the cabinets, upgrading countertops, installing a new sink/faucet/backsplash and extending the island.
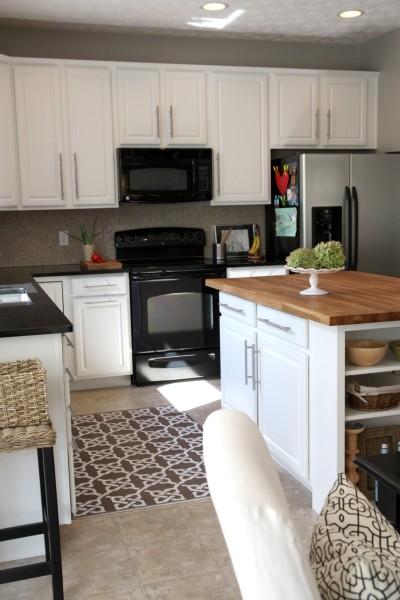
Pretty different, huh?  In total, the renovations cost us roughly $3,400.  We saved money by waiting to buy all purchases until we were able to pay full in cash.  Which is why it’s taken almost a year to get thus far.  In most cases, on large purchases you can get quite a deal offering to pay cash.  We saved 10% on our granite countertops…complete with installation of the sink and faucet.  It feels really good knowing that we haven’t put ourselves into financial jeopardy during the process of making our kitchen ours.

We replaced our builder sink and faucet with a Kraus undermount sink (9″ deep!) and chrome faucet-and-sprayer in one.  Both were purchased from Overstock.  We added IKEA hardware to the cabinets and drawers.

After a lot of thought, we decided to only do a 6″ backsplash along the window wall because 1) it may have looked strange just going up a few inches on either side of the window 2) it was cheaper than going all the way to the upper cabinets 3) we found inexpensive pewter tile to make a unique mod border that complements the cabinet hardware.  All tiling supplies came from Home Depot.

I stole a very ingenious idea from some friends of ours who thought of hanging their kitchen towels from rings attached to their upper cabinets.  (Thanks Jeff & Erin!)
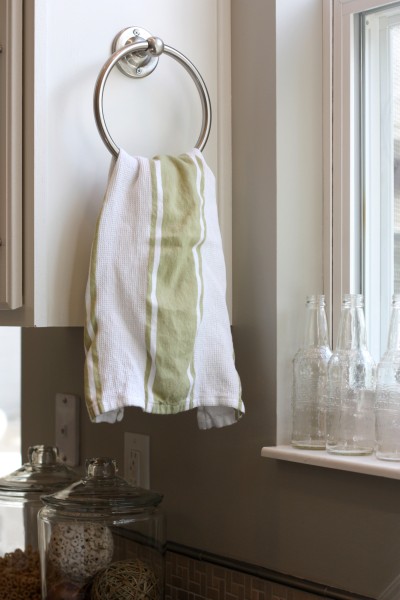
Still need something for the window but nothing has jumped out to grab my attention yet so I’m holding off.
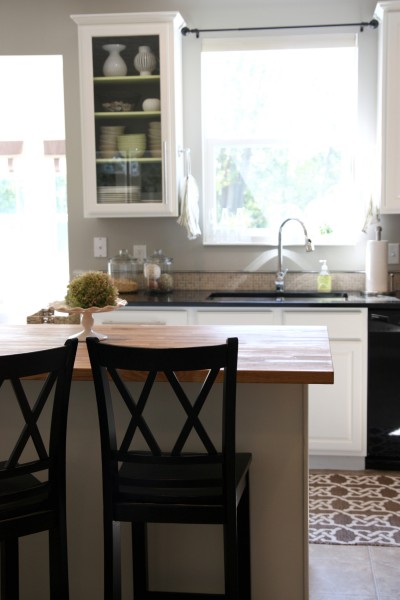
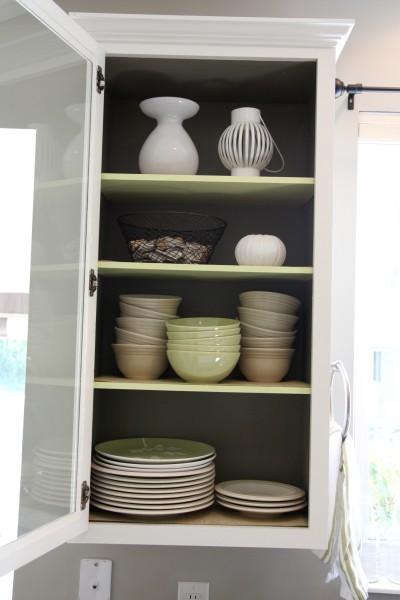
Handy Hubby DIY’d our glass front cabinet and I painted the interior gray with contrasting lime shelves for a pop of color.
The oven and refrigerator wall got tiled to the cabinets.  I love the subtle geometric pattern and concrete-like texture of the backsplash.  It’s a great contrast to the shiny black counters.
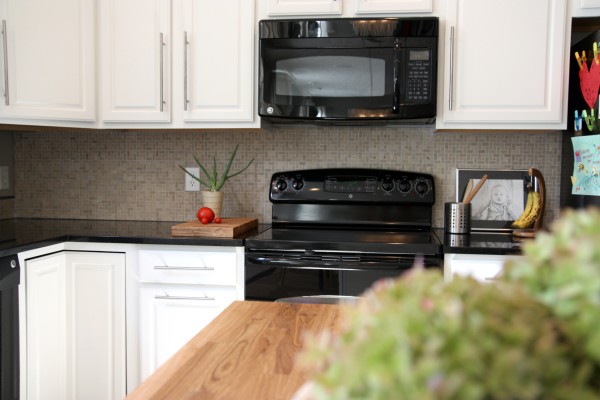
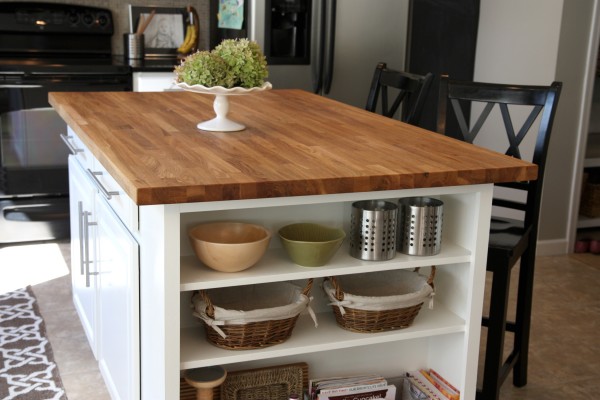
And then there’s the island.  Oh, how I love that little island.  It’s rustic and modern and warm and crisp all wrapped into one.  To see how we DIY’d it, check here.
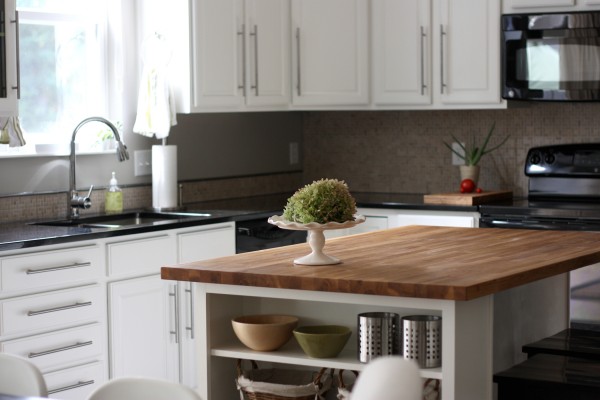
As strong as the urge was to go out and buy a bunch of new stuff to display on the open shelves, I filled them with bowls, baskets and cookbooks that we already had on hand.  Another unnecessary shopping spree thwarted.  Go me.

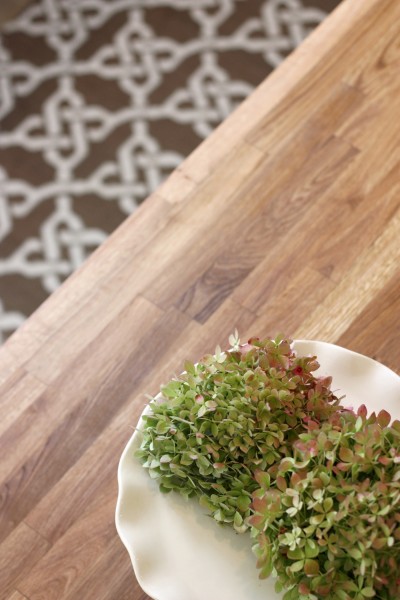
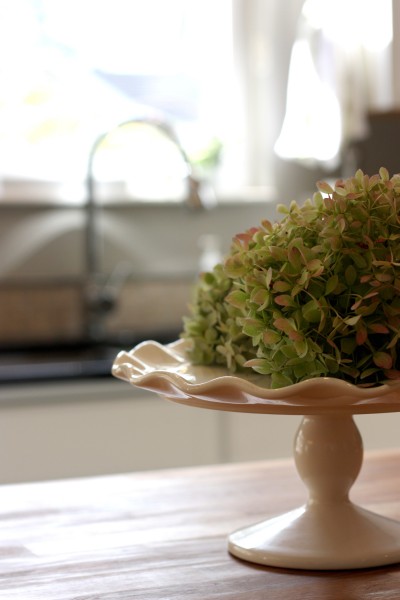
I even clipped a pair of blooms from my hydrangea bush and plopped them atop my scalloped cake plate to make a quick, FREE centerpiece for the island.  I’m a little giddy over the fact that I’ve managed to keep that sucker alive long enough to enjoy clippings.
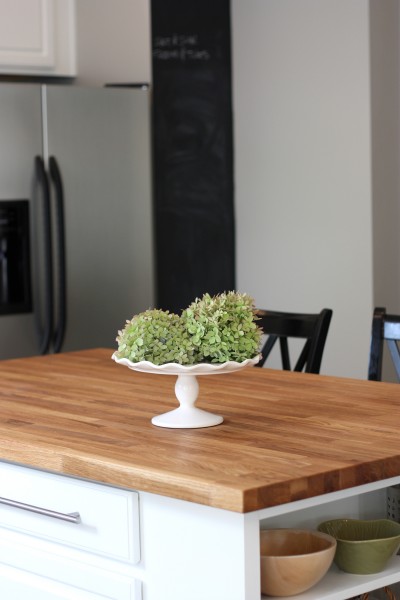
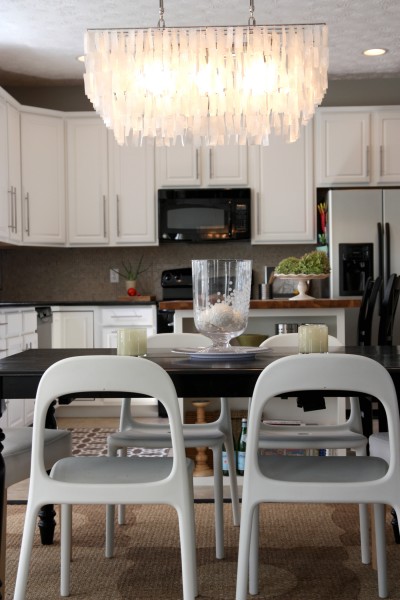
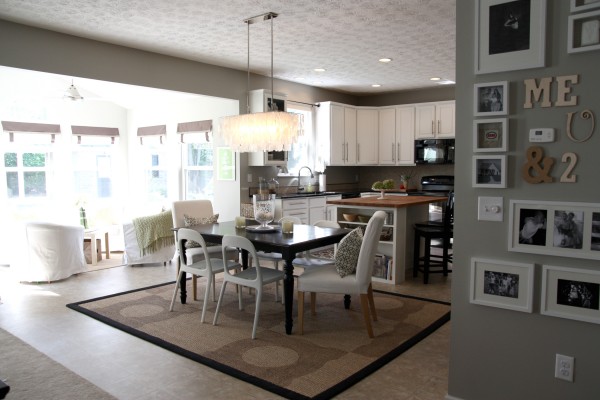
Our kitchen is open to the dining area.  (We have no dining room).
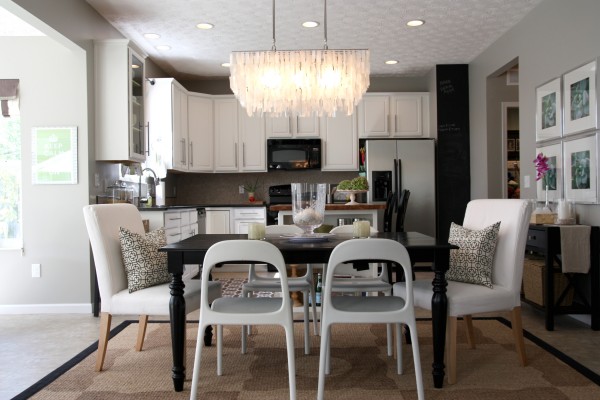
The capiz chandelier helps to ‘dress up’ the kitchen and its utilitarianism.

And here’s how our kitchen fits into the bigger picture…

This is my “workin’ with whatcha got” kitchen.  I still have some tweaks (window treatment, new flooring, creative way to hide my dishwasher, pendants above the island, etc) in mind but those will come all in good time when we can afford them and are willing to put in the time and effort to DIY them.  For now, Handy Hubby and I are enjoying everything we’ve created and accomplished in this room…and it tastes good.

79 Comments

03.September.2010

nice job on the photos–it’s hard to capture such a large room, but you’ve done it! your kitchen is so put together, and even though you have a list of things to do, you have a much longer list of things you’ve already done :)

I’m thinking of making kitchen window treatments like this (from Making it Lovely):
http://www.flickr.com/photos/pinklovesbrown/1251585437/

relaxed roman shades are fun, too, I made them for my old house. You have a good eye for cute fabric, so I’m sure when you see “the one”, you’ll know!

03.September.2010

Carole – I adore Making It Lovely’s kitchen curtain! It’s been on my inspiration list for a while.

03.September.2010

Everything looks great! What a difference those tweaks make!

04.September.2010

Your kitchen is gorgeous! I love it! would you mind telling me what color paint you used on the walls? thank you!

04.September.2010

love the room! Can I ask where you got your chairs around the island? thanks!

05.September.2010

I am loving your kitchen!! The color scheme and details are just beautiful!! =)

Michelle @michellekroll.blogspot.com

05.September.2010

Candy – The kitchen wall color is Valspar (Lowe’s) Bonsai…an airy gray with greenish undertones. We love it!

05.September.2010

Beth – The stools around the island are from Target.com a few years ago. We scored them on sale and with free shipping. They’ve served us well so far!

07.September.2010

Hi Dana! Found your cute blog through BYW class. What a great blog! Look forward to checking back in again soon!

08.September.2010

Found your blog through BYW, thought I’d drop by and say hello. Your kitchen is breathtaking!! I am still in the planning (and money saving) process. I really love how the lighter cabinets opened up the space. Mine are oak (uggh). Your blog is so nice too =) xoxo

08.September.2010

Hi Dana, another BYW classmate here. I love your blog too! Something about your writing brought me over here and I’m glad I came. My husband will hate you though because you have just inspired me to go ahead and paint our cabinets white instead of complaining about them all the time. More work for him! Your kitchen looks wonderful as well as the rest of your place. Congrats!

08.September.2010

Kathryn – Paint ’em and never look back!

09.September.2010

Wow – I love seeing before and after pictures and you’ve done such an amazing job. It all looks really fab but that light is tooooo gorgeous for words.

12.September.2010

Wow, your photos are beautiful and your kitchen is too!

I love that island… and your new white cabinets… and all of the little details….

:)

12.September.2010

Love you makeover! Love your style! I will definitely be following you. Excited to see your furture projects!

18.September.2010

Love your blog and love your style. You’ve given me the umphh to make some changes.
Can you tell us where you got the rug? LOVE IT!! Thanks

18.September.2010

Becky – I actually wrote a post devoted entirely to my kitchen rug because I had so many people ask me about it. Find it here…

https://www.housetweaking.com/2010/06/06/you-asked-for-it/

Hope that gives you what you need to know! I love that rug. Not sure I’ll know what do when/if I ever have to replace it.

28.September.2010

I absolutely love the rug in your dining area. Where did you get it from? I have similar colors in my breakfast nook and it would be perfect!

29.September.2010

Trena – The dining area rug came from Natural Area Rugs (http://www.naturalarearugs.com). It’s a seagrass rug and then I stenciled the design onto it myself using wood stain. See how I did that here. The rug and stenciled design are holding up great against my 2 boys!

22.October.2010

Another questions about your beautiful kitchen/dining area. Where did you get your table and chairs? Are they all from Ikea?

25.October.2010

Jill – Our black dining table is from JCPenney a few years back. {It has a self-storing leaf that folds out to seat 8 when necessary.} The white chairs are from IKEA. Mixing and matching is always good in my book!

12.November.2010

Hello Dana, Great job on your kitchen! And your blog. I love to see other people in our profession being so creative! Where did you get your island butcher block? My mother-in-law got one from Ikea and loves it. How did you finish it? We are looking for one for the house we are building now that is more matte like yours looks in the pics. Thanks and again, great job with the blog! ~Tracy

13.November.2010

Tracy – We love our butcher block! It’s from IKEA, too. I’ve only used mineral oil {from the drugstore vs $$$ home improvement stores} on it to seal it. For the first few months, I sanded and oiled it about 2-3 times per week. After it was pretty much saturated and water resistant, I’ve just been oiling it maybe once or twice a month as needed {‘prn’, hehe}. It holds up great to our kids. Markers, food stains, etc come out easily with just a fine sanding and then some oil. It’s so easy!

05.December.2010

Great job on the kitchen! I’m moving into a new (old) ranch home this week, and looking for inspiration for our future kitchen re-do. II’ll be painting the cabinets immediately, and then working around the ho-hum granite they already installed- that caramel color with black speckles. I’m loving your shell chandelier- can you share where you got that great find? Brava!!

05.December.2010

Jessica – The capiz chandelier is from West Elm. I got it a few years back {on sale!…I stalked it for months} but it’s still available!

19.December.2010

LOVE your kitchen. So sharp looking! Where did you get the brown and white rug in your kitchen? Thanks!

19.December.2010

Melinda – Here’s everything you could ever want to know about my kitchen rug…

https://www.housetweaking.com/2010/06/06/you-asked-for-it/

30.December.2010

Hi can you tell me what color you painted your cabinets? Great job on the kitchen!!! Looks awesome:)

01.January.2011

Irma – Most of the paint colors we’ve used in our home are listed in this post…

https://www.housetweaking.com/2010/09/14/you-asked-for-it-paint-colors/

…including the paint color we used on our cabinets. It’s SW’s Greek Villa in semi-gloss.

[…] She is frugal, creative, and has great taste – right up my alley!  I already stole her idea and hung a hook on the side of the cabinet right above the sink.  I have been wanting another […]

17.January.2011

Gorgeous!! I am so excited to see what you have done with your cabinets, which appear to be the exact builder’s grade ugly ones we have in our entire house (kitchen, bathrooms, laundry room). UGH! I have so far tried unsuccessfully to convince my husband to let me paint them (I’m thinking a subtle gray). I think I will show him this post as I continue my argument… ;)
And your added storage to the end of the island? Genius! We have enough overlap of countertop at the end of ours that we could easily do that without even having to change the counters (our island is more of a peninsula, so it’s attached to the rest of the counters). I’ve also wanted to put glass inserts in the 2 cabinet doors over the island, and now that I see how easy it is, I think that’s next on the list…
Thank you so much for the inspiration!!

20.January.2011

First off, your site is fabulous! So many wonderful ideas…I have been on the fence about painting our cabinets, but after seeing this post, I am putting in on our “to-do” list as soon as the weather warms up. And I am your newest subscriber!

Chelsea

21.January.2011

I love your kitchen makeover! This is my first visit to your site! Love your house and your style!

Quick question….I’m on the hunt for a white pedestal cake stand…where did you buy yours?

~ Ali

22.January.2011

Ali – The cake stand was an outlet find at a nearby Ballard Designs Outlet.

23.January.2011

I love your home! Your kitchen makeover is beautiful. I have a question about your dishes. I love the plates and bowls (looks like a cream or buttery color), and the small green bowls in your upper cabinet. Could you tell me where they are from?

24.January.2011

Linda – The cream dishes were a wedding gift. It’s Pfaltzgraff. Not sure if it’s still available? I think Pfaltzgraff has an outlet website…maybe you could check there?The green dishes are from IKEA and are still available…I want more of them as the Pfaltzgraff is pretty heavy for everyday use. {We don’t buy paper plates.} Hope that helps!

27.January.2011

Love Love your wall art, especially the Me U & 2, may I ask where you found them?Thanks for all the inspiration!

27.January.2011

Laurie – For the whole story, click here. For the short story, I got ’em at Hobby Lobby.

08.February.2011

wow I love your island! I would love to know how you DIY – your link to it doesn’t work though can you please send the correct link?

08.February.2011

Wendy – Sorry about that glitch. Got it all straightened out. You can now link to the DIY or just see it here…

https://www.housetweaking.com/2010/09/02/diy-kitchen-island-upgrade/

Thanks for letting me know the link was broken!

15.February.2011

Love your blog and your kitchen! I am trying to convince my husband that we need to paint our builder basic cabinets. He doesn’t believe in painting perfectly good wood! I showed him your kitchen, and he agreed that it looked better white. Maybe we are headed in the right direction. Also, I love your island and would love to add something like that. Could you tell me what the dimensions of your kitchen are? I am not sure we have enough space for an island. Thanks!

17.February.2011

Wow, I love how your totally redesigned it. I’m getting my first apartment end of this summer and am looking around for ideas on how to decorate… Loving your blog!

19.February.2011

Hi! I really like your kitchen and like others, would like to use a few parts as inspiration for my own kitchen. I have a question about your kitchen hardware pulls. I’ve searched all over your site and I found the pulls you used and found the source (Ikea), but I was wondering what size you used. Ikea has several sizes of this particular pull. They all might look good, but I particularly like the look of the size you chose in your kichen. The whole house looks really good!!! Thanks.

19.February.2011

Great job on everything! I am remodeling my condo bit by bit and came across your blog after googling “dry riverbed” which is what I’m painting my kitchen this evening. I had used it in the dining area and decided to carry it over to try to connect the two rooms. The kitchen has been all white (appliances, cabinets, walls, etc.) except for a black granite countertop and I was trying to come up with ideas for the walls. I LOVE your backsplash! Do you remember if it came from Lowe’s or Home Depot and/or what it was called? That’s the next project I want to attempt :-) Thanks!

20.February.2011

Kris – The backsplash came from Home Depot. I don’t remember the name, but it came in 12″x12″ sheets and we actually found it in the bath section!

[…] House Tweaking […]

25.February.2011

Thanks! I didn’t even look in that area – I was just looking at the tiling section. I’ll check tomorrow. Thanks again :-)

13.March.2011

First of all, I love your website and your home! I have all of these ideas for things, but always have trouble actually putting it all together!
Your kitchen ceiling doesn’t look like it’s plain white from the pics, is there a design on it?

13.March.2011

Renee – Our ceiling has a ‘stomped’ design on it. It came with the house {we didn’t do it}, but basically it’s done by using a stomping sponge on the end of a long handle to stomp a design into the drywall mud/plaster. It helps to hide imperfections but isn’t as intense as the infamous ‘popcorn’ ceiling.

16.March.2011

I LOOOOVE the way you decorated your whole entire house. I have a question about the chandelier. I’ve been looking for a chanedlier for my house for six years and fell in love with the one you have. Luckily it is still available at West Elm, however, there is a note that it won’t work in home with vaulted ceilings. I have vaulted ceilings and was bummed that I couldn’t buy this chandelier. Does Handy Hubby have any suggestions on how to possibly make that work?

Thanks and love the blog. You keep inspiring me to have a clutter-free house with two young kids. : )

16.March.2011

Lesley – I’ll have Handy Hubby look at your comment and reply!

18.March.2011

Lesley – Hi, it’s Handy Hubby. They say you can’t mount to vaulted ceilings because the rods that the light hangs from screw directly into the mounting plate. So in other words, the light is not hinged so it can hang straight down if it’s mounted to a slanted surface.

If you’re mounting at the peak, you could build a box that would fit into the peak and give you something flush and level to mount the light to. If you opted for this, you’d need to make sure the box spanned at least 2 ceiling rafters so you’d have good solid support for the fixture.

Mounting on one slanted side will be a little tougher. Without changing the mounting plate, you’d need to find a ring with the same threading as the rod. Screw that into the mount instead of the rod, and then use a D-ring or S-hook to connect the rod. Then the light would be allow to hang naturally straight down. You might be able to find some parts that will work at a light fixture store. They have tons of replacement parts. They might even have a better idea!

I hope that wasn’t too confusing or long winded. Feel free to send a pic to Dana if you’d like me to look into this further.

24.March.2011

Thank you for responding. The ceiling is high, but it is not on a slanted surface, so it is level and flush. I’ll look into it further. So would it work with a level and flush, high ceiling? I was thinking that they cord or the rods might not be long enough for it to hang at a decent height above the table. It may be awhile before I purchase the chandelier. I’m having my countertops re-done and lighting put in the kitchen and family room now. So I will wait to buy this so I don’t give my husband a heart attack! Thank you for your help!

Lesley

02.April.2011

OK I hope I’m not being a pest – one more question about the backsplash :-) I think I found it but it’s not in the 12×12 sheets just in the smaller version. Is that what you used? Thanks for answer all of our questions!!

05.April.2011

Kris – We used 12″ x 12″ sheets and cut them to size when necessary. I’m not familiar with the smaller version that you mentioned, but it should work fine as long as it’s the tile you want. Good luck!

27.June.2011

The pictures of your kitchen have officially inspired me to move forward with my mini kitchen remodel! I’m so ready to say goodbye to the hideous 10 yr old oak cabinets. I think we’ll definitely paint the main cabinets white but I’m tempted to paint the island cabinets charcoal grey or black. I love the look of black granite but my husband isn’t sure. We recently went to a friend’s house and they’re busy people like us. Looks like it’s tough to keep black granite clean. They said they’re constantly wiping theirs down. I would rather be able to see the dirt and clean it than hide it and not realize it’s there. For some reason my hubby thinks they’re lower maintenance. We’ll see who wins this one. Our house is also a grayish color but doesn’t have the hint of green. We actually have a mix of cool and warm neutrals wall colors (all have gray undertones). The kitchen is grey but the formal dining room is a tannish-gray (not in same room). All of the lighting and ceiling fans are oil rubbed bronze with a slight mission style so I’m thinking I have a design identity crisis. Not sure how to keep mixing warm and cool tones. For the kitchen, I’d love to do white cabinets, black granite counters with a cararra marble/glass mosaic backsplash and a cararra marble slab on the island. It just might be too “cool” toned and could clash with the rest of the house… Any advice?? — Shannon

29.July.2011

Do you think your West Elm Capiz light fixture puts out enough light to be a main light source in a kitchen? I am having a terrible lighting dilemma!

Michelle
http://www.pinqueblog.com

31.July.2011

Michelle – I guess it depends how large your kitchen is. Our open dining area is probably 9′ x 11′ and it is enough light for that area…plus we do get some light from the kitchen overheads as well. We have the capiz chandy on a dimmer as well for mood lighting.

06.September.2011

Hi Dana! I love your blog! We are going to be redoing our kitchen counters. I really like black granite but I’ve heard that some designs show dust pretty bad. I was wondering what counters you used and if you had that problem? Thanks!

06.September.2011

Bobbi – We had Absolute Black granite in our previous home. I ‘absolutely’ LOVED it! At the end of the night after all dishes were done and the kitchen was cleaned up, I simply wiped it down with a little Mrs. Meyer’s Clean Day All Purpose Cleaner {Lemon Verbena scent}/water mixture. No problems with dust at all and it got lots of natural light so it would have shown up if there had been some.

16.September.2011

Did you already have your walls painted before you started on your cabinets, or ?? Because I am going with your theme, and I wanted to know if I should pain first, or after the cabinets?

16.September.2011

Ki – The walls were already painted prior to us painting the cabinets. We taped off the frames of the cabinets and just had to do a small amount of touch up to the walls afterwards. I think you could do it either way. I would just be cautious of putting painters tape on painted cabinetry {if you should decide to paint the walls after the cabinets} so it doesn’t pull off any paint. Hope that helps!

28.October.2011

LOVE your kitchen! Especially the backsplash…And the dark countertops. Trying to decide if that’s what we want in our future home.

05.May.2012

oh my gosh!! my divine kitchen has a twin!! we almost have the same kitchen….so similar!! open lay-out kitchen with dining area..you should see mine!!

i love your chandelier and the console/buffet that you used at the end of the dining table..I am so inspired by your kitchen with dining area…

23.June.2012

Hi. I love your style and love what you did with this kitchen. The layout is very similar to mine. I am trying to update mine as well so it’s given me loads of ideas. Hope I’m not bothering you but I wanted to ask if your cabinet pulls are from Ikea. I’m guessing Lansa, yes? Just wanted to ask you which length. Also, I don’t see a knob/pull for the lazy susan cabinet in the corner. What did you use there? Lastly, I had my cabinet painted by a pro but I see brush marks and it’s really annoying. Do you have any solutions (short of having it painted again). Thanks so much!! Sorry for so many questions.

25.June.2012
25.June.2012

Ack! Sorry I didn’t see that. Thank you!!

27.September.2012

I LOVE this kitchen (and your new one!!) I really want to paint our cabinets white, but we have all black appliances…do you have any tips on how you made your black appliances work so well with your white cabinets so there’s not too much of a contrast? Thanks so much for your help, I LOVE following your blog!! :)

27.September.2012

I think it helped that the granite countertops we had installed were black. Absolute black, to be exact. Also notice that the black dishwasher and oven/stove are usually hidden out of direct view thanks to the island.

just came across your gorgeous site and great pictures of your new kitchen. Incredible detail. Love the wall decor, including the Me, U and 2 signs and the terrific storage. Thanks for the inspiration!

17.February.2013

Lovely kitchen you did a great job! One question, what thickness is your black granite top? Home Depot has a special on granite but the special is only on 3/4″ thick granite. I’m not sure if it will be strong enough for the length needed. Thanks for your time.

Al

18.February.2013

The kitchen was in our previous house. I believe it was 1 & 1/4″ thickness.

10.July.2013

Can you share how you sealed your granite counter tops

[…] been browsing for (and pinning) inspiration pictures.  I think my kitchen role model will be Dana from House*Tweaking‘s awesome kitchen […]

[…] been browsing for (and pinning) inspiration pictures.  I think my kitchen role model will be Dana from House*Tweaking‘s awesome kitchen […]

07.December.2013

Your “before” looks just like my kitchen, lovely golden oaky cabinets and all. Seeing how beautiful you’ve made it makes me almost want to cry because it’s actually possible mine could look like that! Who knew I’d get so emotional about cabinets?! Thanks for showing me the potential.

24.June.2014

Love! What is the color of your gray paint?

17.March.2016

I am so inspired. Did you sand or treat the cabinets in any way before you painted them?

20.March.2016

You can read more about the painted cabinets here…

https://www.housetweaking.com/2010/01/21/we-painted-the-kitchen-cabinets-white/

Be sure to check out the comments section for a bunch of additional info!