You’ve heard of The Sock Monster, right? You know, that lil’ critter that sneaks into your laundry room and steals single socks leaving you with numerous unmatched mates. Sure. But have you heard of the The Shoelace Monster? No?! Well, The Shoelace Monster doesn’t steal your shoelaces. He just messes with them. Take a look…

He “messes with them” as in he weaves them over and around and through each other and twists them up into tiny, tight knots that are nearly impossible to detangle. He’s sneaky, too. No one has caught him in action yet. (He likes to wait until Gigi and Great Grandpa are napping on the couch to attack their shoes.) And he’s getting better. Just yesterday at the gym after work, I pulled my tennis shoes from my gym bag to find the shoelaces knotted. It took me a good 8 minutes to free them so they were wearable. (I’m pretty sure the other people in the gym were wondering why the hell it was taking me so long to change my clothes and shoes.) The knots seem to be getting tighter and more intricate.

Oh, and he’s moved onto other strings now that he’s mastered the whole shoelace thing. Like Handy Hubby’s swim trunks that tie at the waist. Handy Hubby spent nearly 20 minutes de-knotting his trunks one day. He really needed a dunk in the pool after that.
I’m pretty sure The Shoelace Monster is of the male species with brown hair and blue eyes. My guess is he weighs about 40-45 pounds and stands under 4′ tall. If you see him, let me know. I’ve got a bone to pick with him.

My transformation of a canvas dropcloth into matching twin headboards turned out nice enough that I looked to the dropcloth fabric again when I found myself at a loss for window treatments in the boys’ bedroom. I had planned on hanging striped panels on either side of the single bedroom window (seen below).

I envisioned wide, horizontal stripes…something like this…

(courtesy of Apartment Therapy)
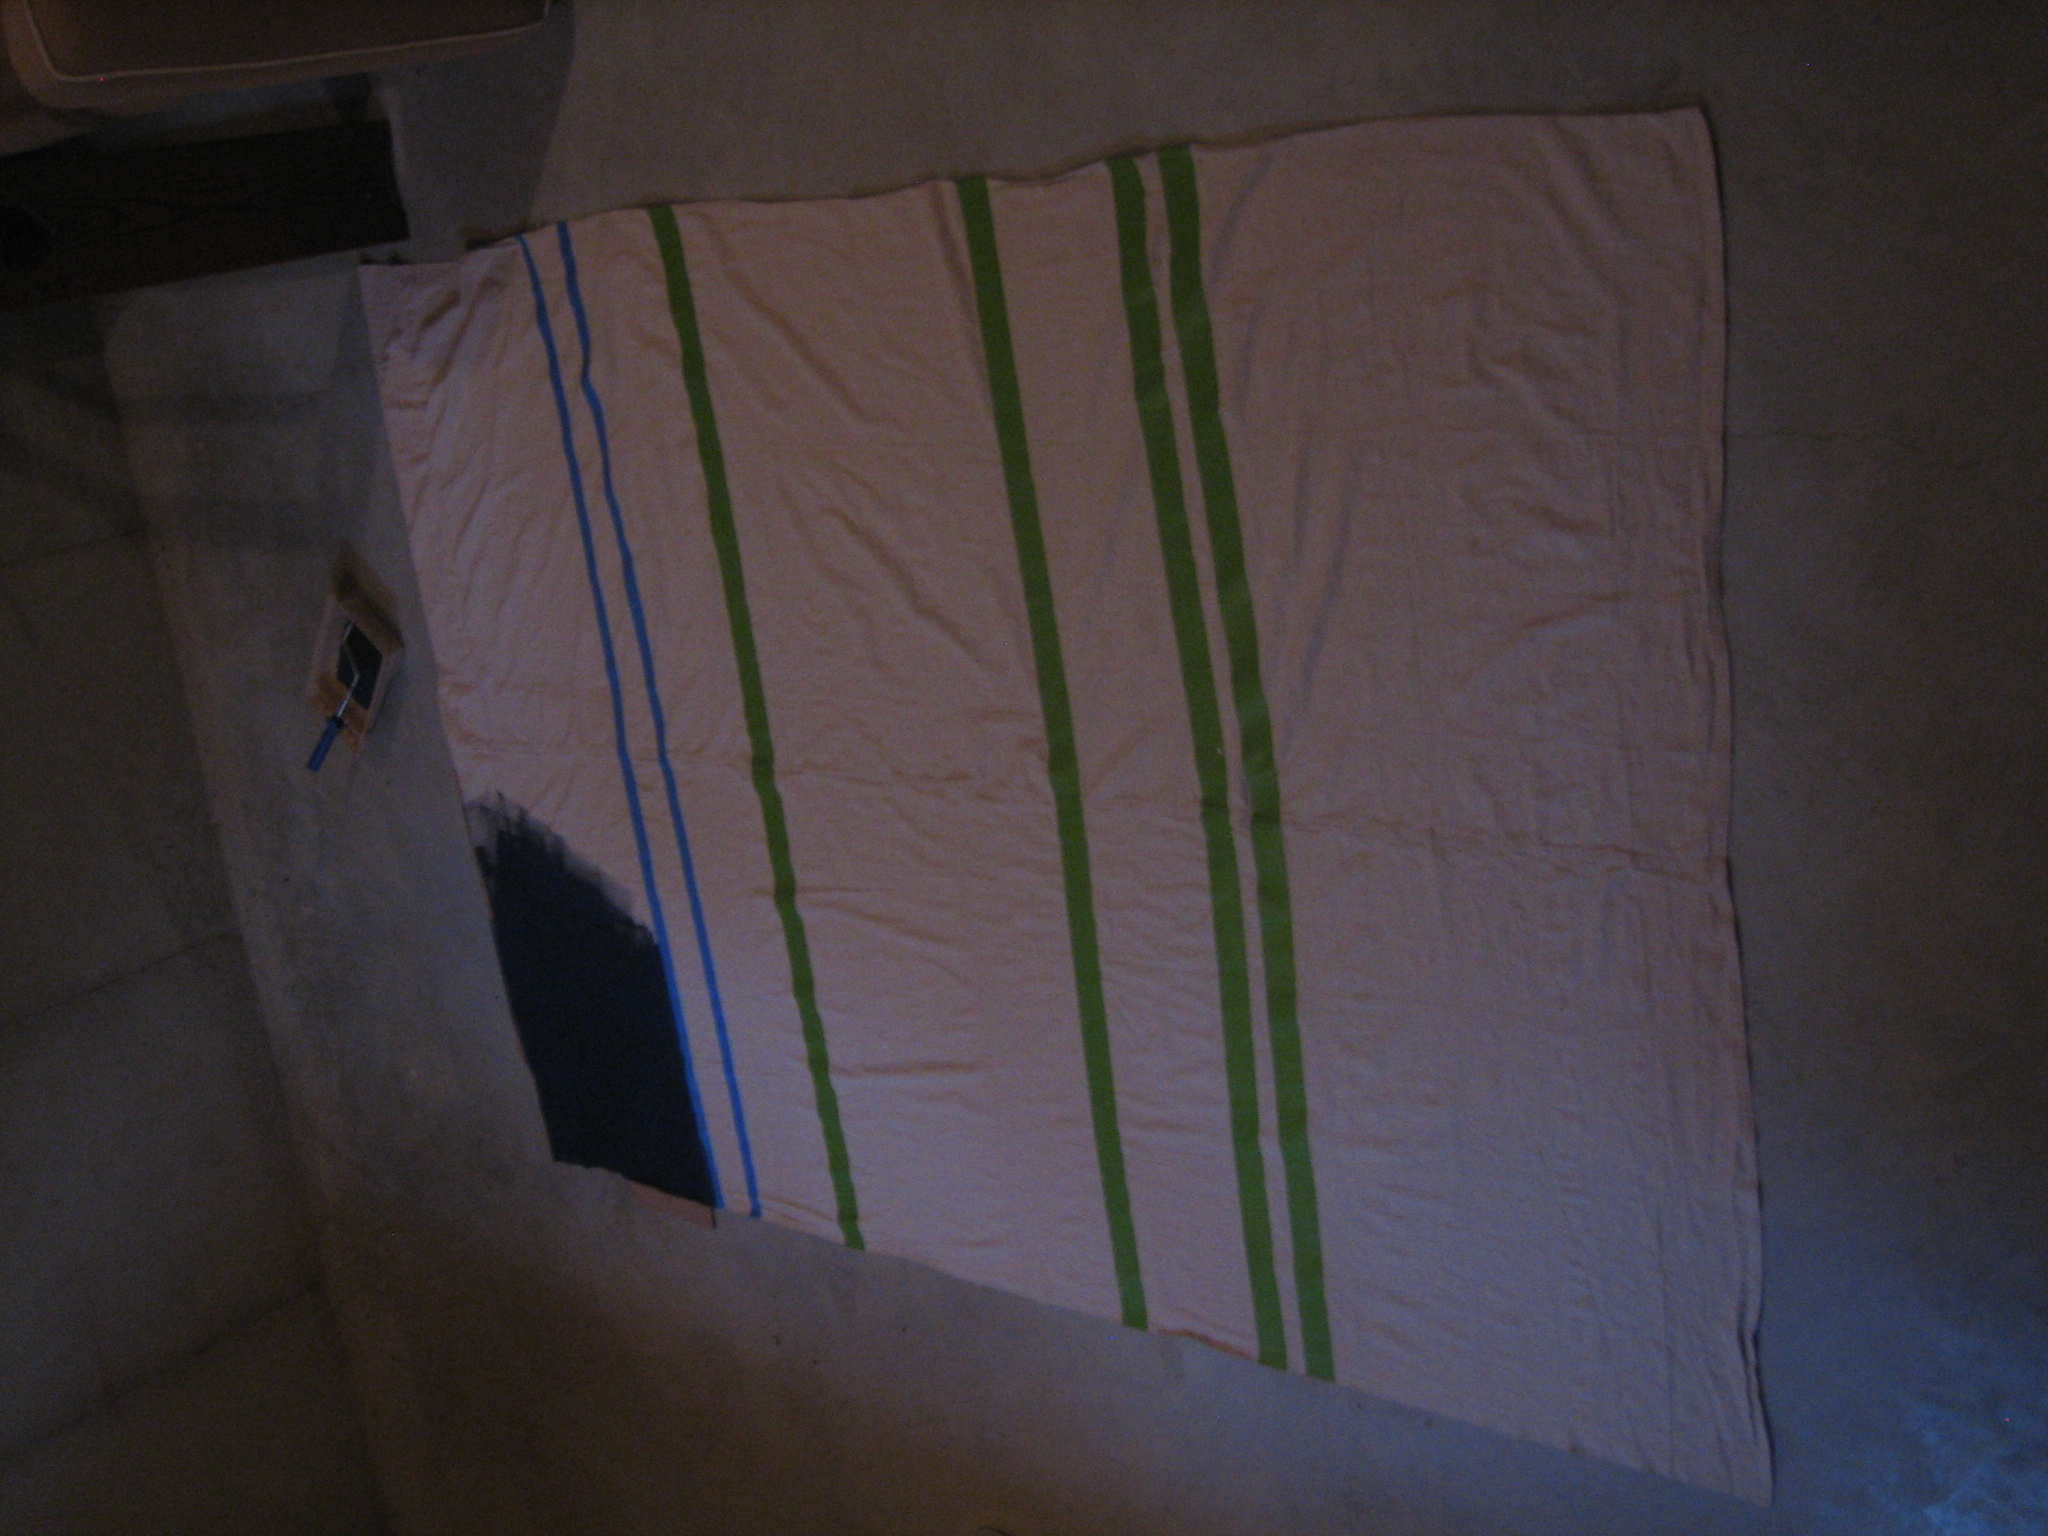
It wasn’t the first time I knew exactly what I wanted but couldn’t find it – at a reasonable price. So, I did what I normally do when I’m in need of budget decor…I made the curtains myself. You guessed it. I used 2 of the same dropcloths that I had employed for the headboards. I washed the 6’x9′ pieces of fabric to preshrink them. They shrunk to about 5’x8′ each but that was still plenty wide and long enough for a hefty curtain panel on each side of the bedroom window. Next, I sewed a curtain rod pocket (kinda like a tunnel for the rod to go through) into the top of my dropcloths and instantly I had curtains! (The nice thing about the dropcloths are that the edges are already finished so all you have to do is make a rod pocket and hem the length to your liking. Mine didn’t need hemmed, woo hoo!) But they weren’t striped…yet. I hung them up to get a feel for where I wanted my stripes and taped off one panel at the edge.

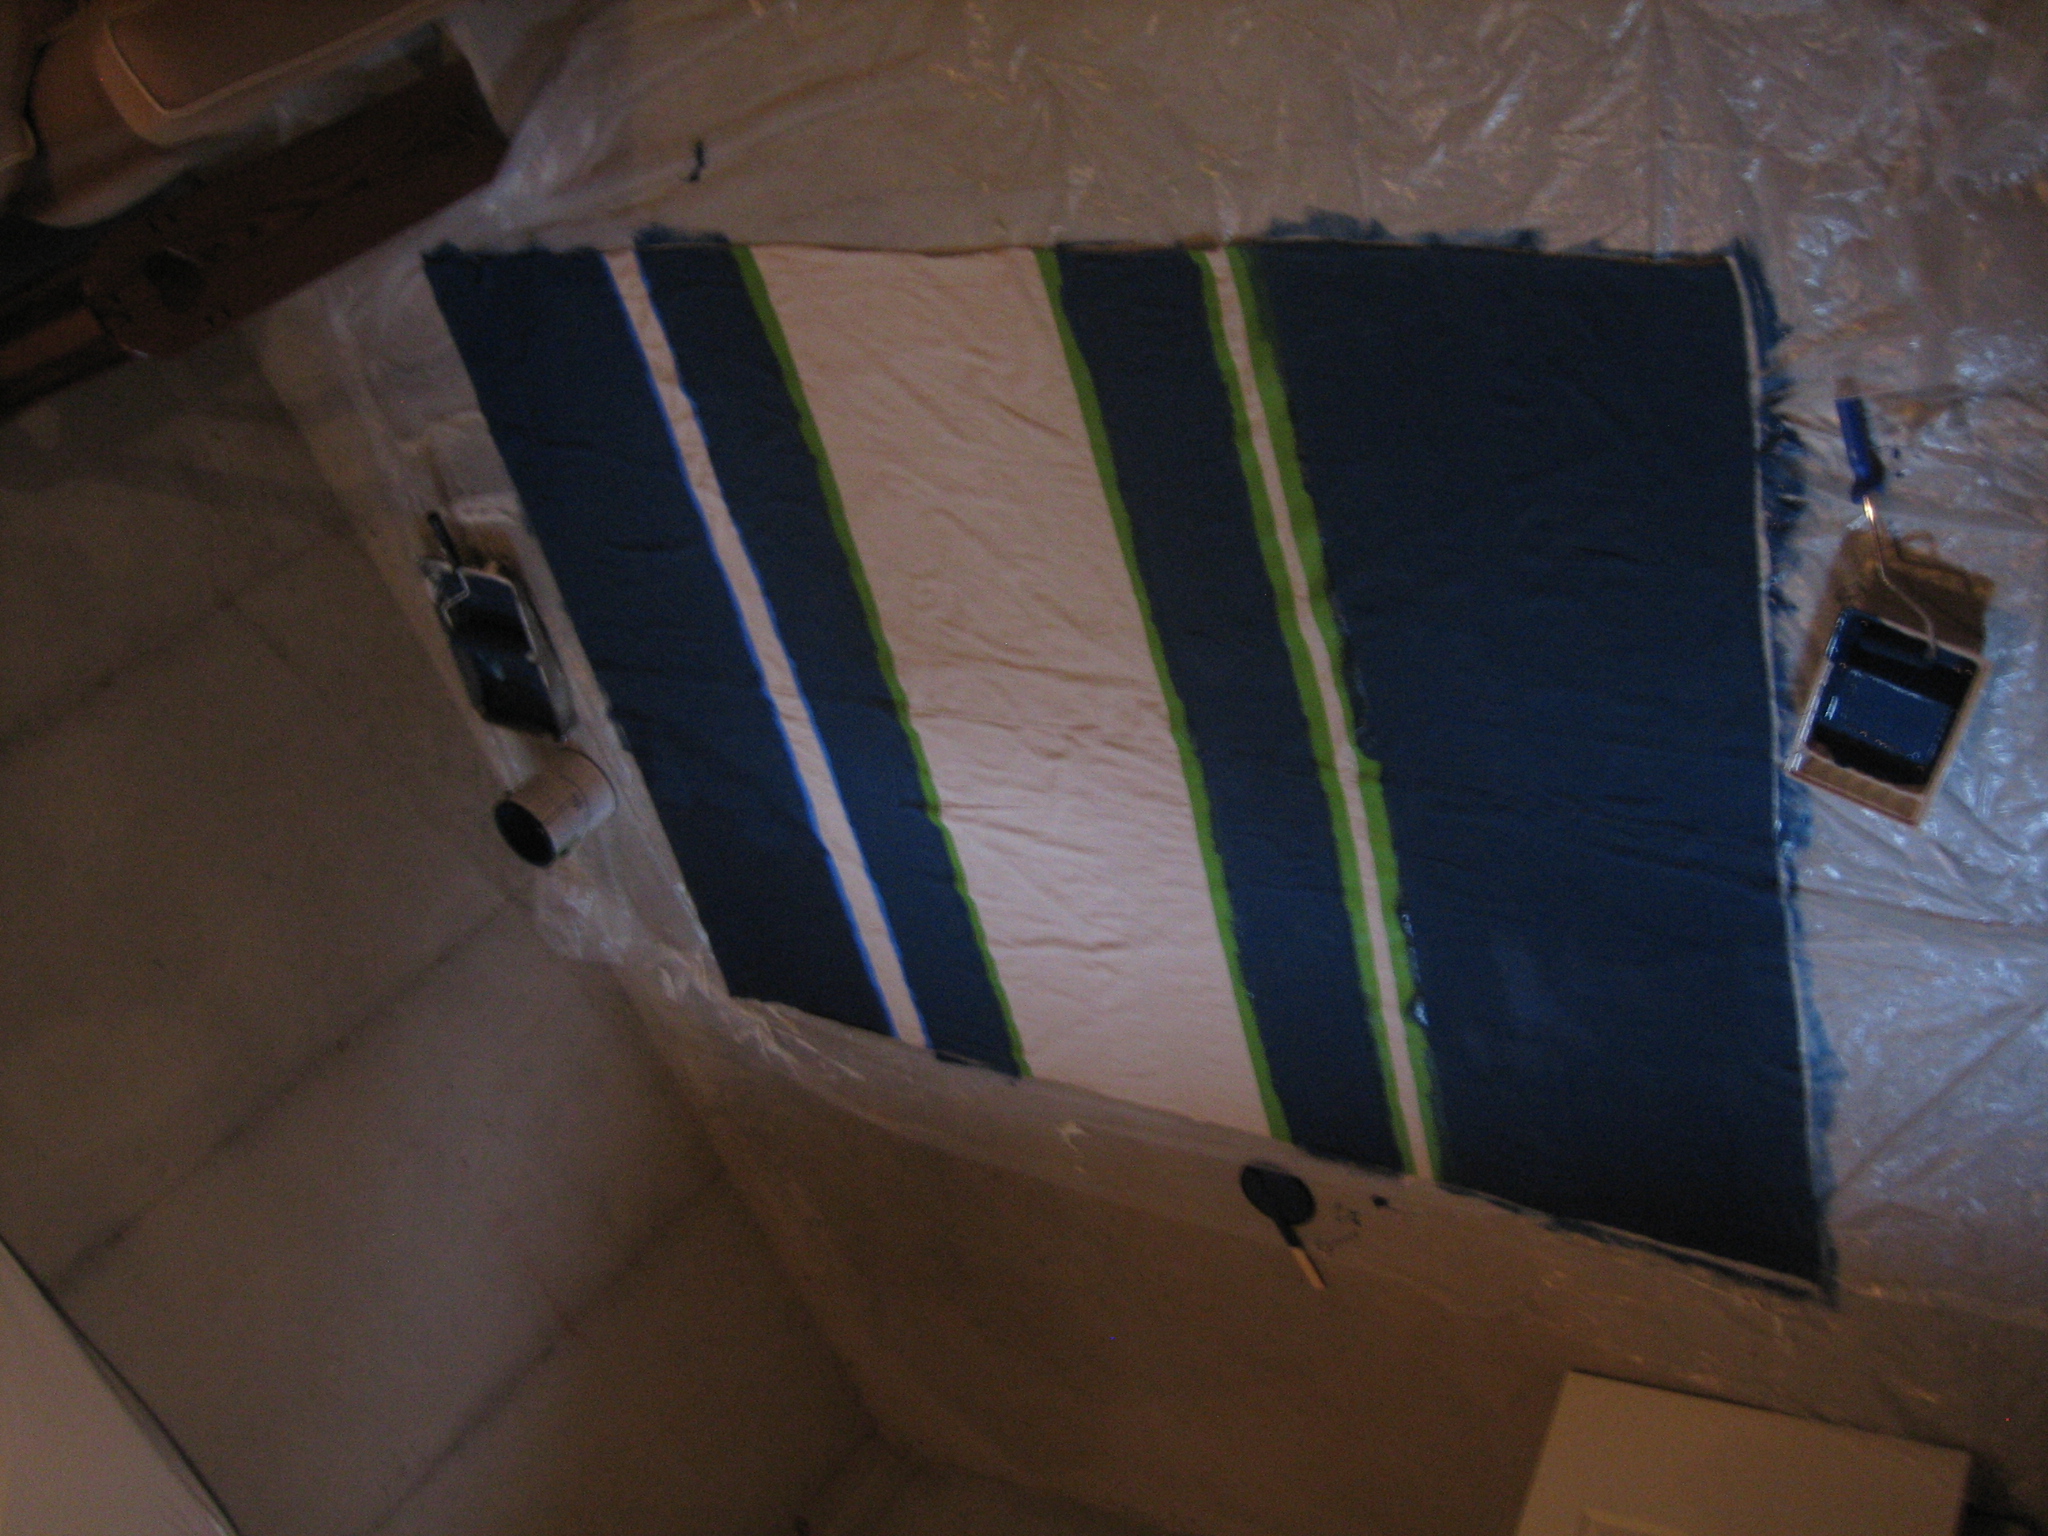
As you can see, I decided to go with varying stripe widths and leave a large section in the middle blank. I didn’t want it looking too Tigger-ish. Then down to our dungeon of a basement where I taped off each panel completely using the first tape marks as my guide. I had originally planned on using fabric paint to paint navy stripes but I quickly cursed myself realized that would require all the fabric paint in the Midwest. This is how far one bottle of $5 fabric paint got me…

Good thing I saved my receipt for the other 2 bottles. For some inspiration and a much needed break, I headed to my local Lowe’s store. I hit up the paint department manager and explained to him my dilemma. I could tell he had never heard of anyone meaning to paint a dropcloth. After the initial shock, he gathered himself and scrunched his face in thought. I told him I’d like something eco-friendly if possible that wouldn’t make the curtains terribly stiff when it dried. Then it was the Oprah “Aha!” moment I’d been waiting for. The paint department manager said that Olympic’s line of NO VOC paint might work…its acrylic content is more than that of regular latex paint…and acrylic makes the paint a little more flexible when it dries. AND…they were offering a $5 mail-in rebate for a gallon! I picked my color swatch and he had me fixed up in no time. Over the next few days, I made several trips down to the basement to finish off the stripes.

The good news? They turned out great and only cost me $30!! ($35 counting the one bottle of fabric paint that didn’t get me very far) The bad news? You have to wait to see them in action.


kid-friendly