Last Thursday was Thanksgiving. It was also my birthday. It was also the day HH hung a bunch of stuff in our house. He knows me all too well. I’ll take home decor projects over traditional birthday gifts anytime.
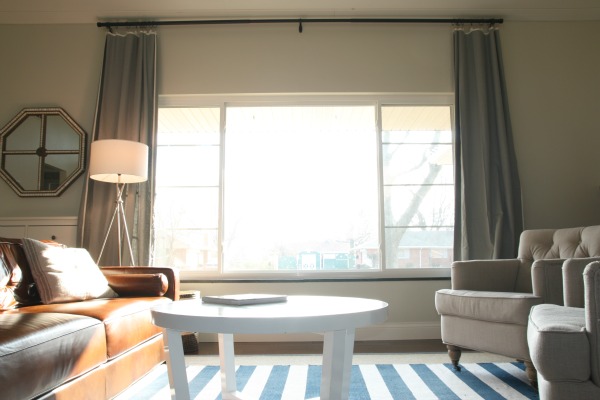
We finally added curtains to the picture window in the family room. It’s an improvement. What hasn’t improved is my ability to shoot directly into a window.
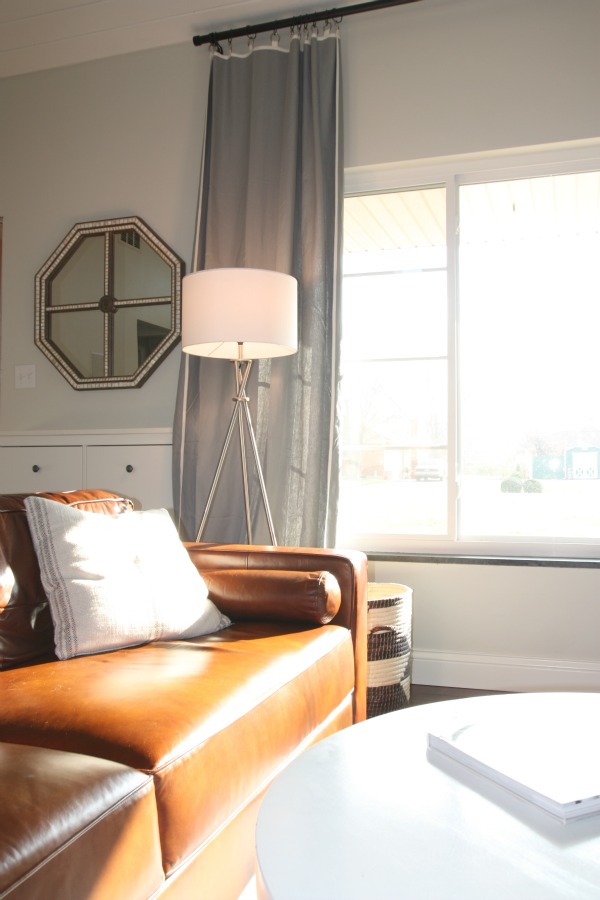
The curtain panels are from West Elm and you can find them here. I bought them over a year ago when they were on sale with free shipping and I had a stash of gift cards. The rod that West Elm suggests using with the panels doesn’t come long enough to work with our large window. Ideally, I was wanting a plain matte black curtain rod with enough thickness to it to hold its own above the big window. I finally found this less expensive simple rod that fits our window but the diameter doesn’t allow for the curtain rings to slide over.
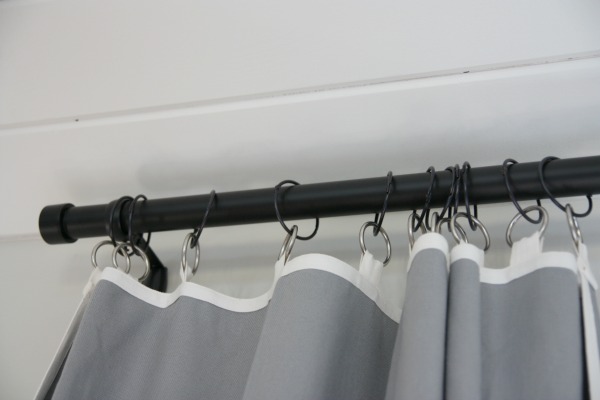
I resorted to buying two $7 packs of metal shower curtains rings from Meijer to hang the curtains. I actually don’t mind the ring on ring action. It feels casual and undone. If I ever tire of the look, there’s enough length to the panels for me to remove the tabs & rings and sew a rod pocket into the top. By then, maybe our kid/guest bathroom will be complete and I can use the shower curtain rings in there??
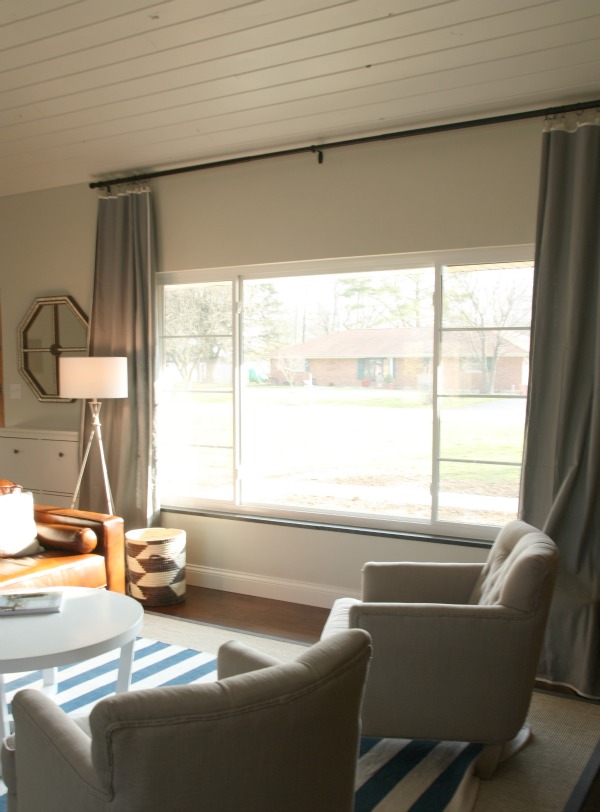
One day we’ll add some textured woven blinds to fill the gap between the top of the window and the curtain rod. I’m thinking I’ll probably have to buy two or three narrower blinds to extend the full width of the window as a single blind that size would be crazy expensive and might sag. I’m also going to woo HH into building a window seat bench with open cubbies in it for toy and book storage. Or I might go all Ana White and bust it out myself. I keep asking HH to show me where all his tools are and how to use them but he keeps doing everything for me. I think he’s afraid I’ll mess it up. Which is highly possible. But it wouldn’t be the end of the world, would it? I should totally start wielding some power tools.

The curtain panel on the right is doing one of my favorite curtain tricks: hiding the big a$$ subwoofer on the floor. My feelings towards this piece of home entertainment equipment are similar to my feelings towards the surround sound speakers in/on the wall. As long as HH keeps hanging stuff for me, I’ll keep covering up his ugly speakers. Hehe.
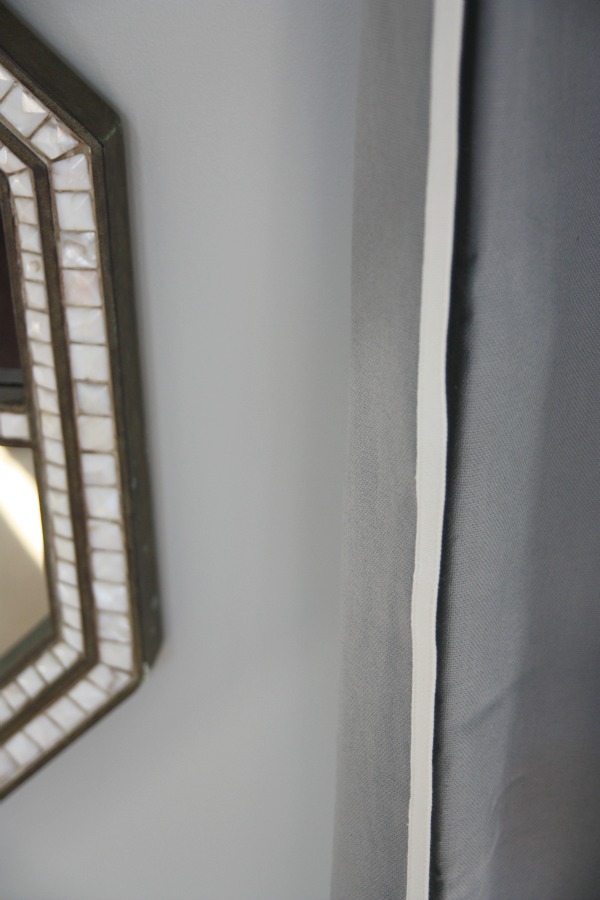
Love the narrow ivory frame around the panels. You could DIY something like this with inexpensive gray curtains from IKEA by hot gluing narrow ribbon along the edges or even painting the narrow frame around the panels. In fact, you should do this. Don’t be lazy like me.
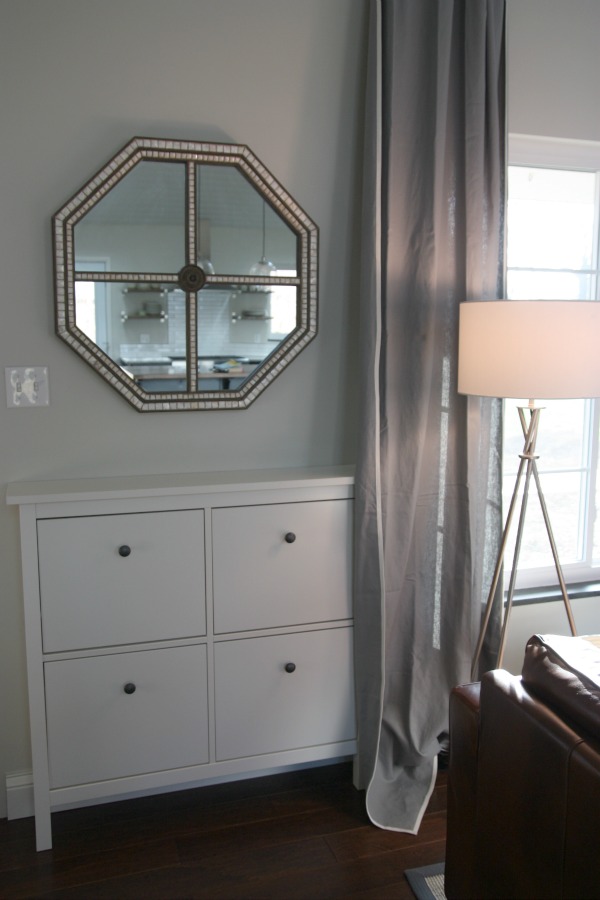
HH assembled and installed this shoe cabinet next to the front door months ago. I don’t speak of it because we don’t use it yet. Our original front door is, well, original and still out of order. Once we start accessing the house through the front door, this slim cabinet is going to be all the rage. Last week, I was feeling brave and ventured up into the attic to rescue the capiz mirror. It’s from a Ballard Designs outlet near Cincy and it used to live in the master bedroom of our previous house. It’s found a new home in our new old home. I love seeing the reflection of the kitchen in it.

Eventually, we’ll hang something on the other side of the window to balance out the mirror on the left. Not necessarily a round mirror though. That would be too matchy.
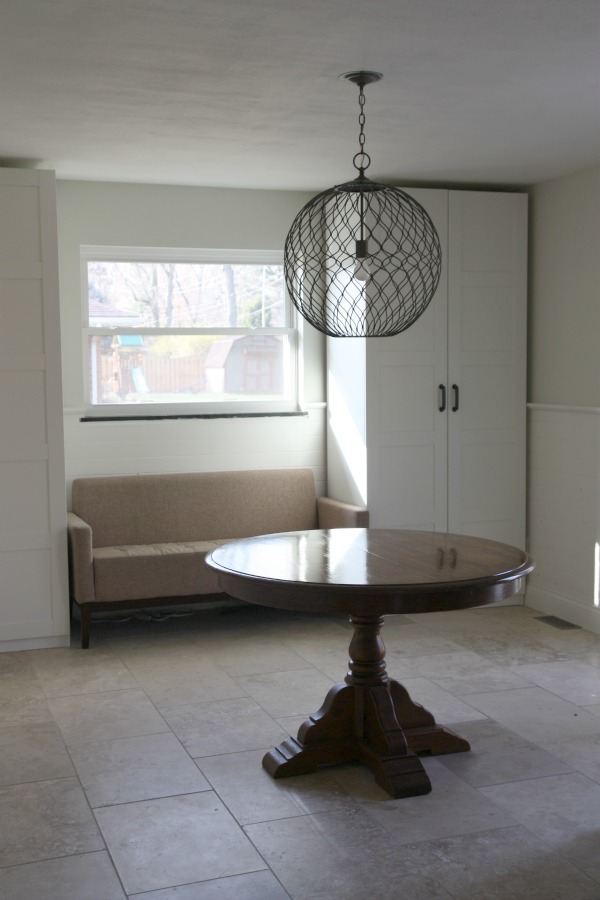
HH also hung a light over the dining table. Surprise! It’s the Hoyne pendant and it’s pretty much the most amazing light ever. We had purchased a really inexpensive FOTO pendant from IKEA and spray painted it matte black. HH had been trying to install it for months with no success due to a missing bracket part that IKEA was refusing to send us and HH was fuming over the idea of having to go buy one. After the snafu, I realized the solid pendant probably wasn’t a great choice for the room. The dining table needs direct light and the FOTO would have provided that but the rest of the room also needs lit. The ceiling light is the main artificial light source in the mudroom. There is a small can light in the laundry nook but it doesn’t provide enough lighting for the rest of the room.
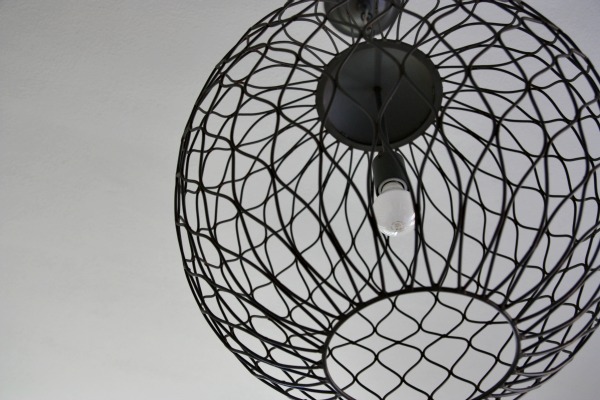
This pricier pendant is the result of a new collaboration in the works {I can’t divulge all the details yet!} and it was my inspiration light. It’s the light I was dreaming would live in our dining room/mudroom and if I’d have had $350 burning a hole in my pocket I would have snatched it up before now. With the open weave of the Hoyne, the rest of the room recevies light – not just the dining table. The shadows that the light casts onto the ceiling at night are beautiful! And I like how the pendant lets natural light from the window and the french doors pass through.
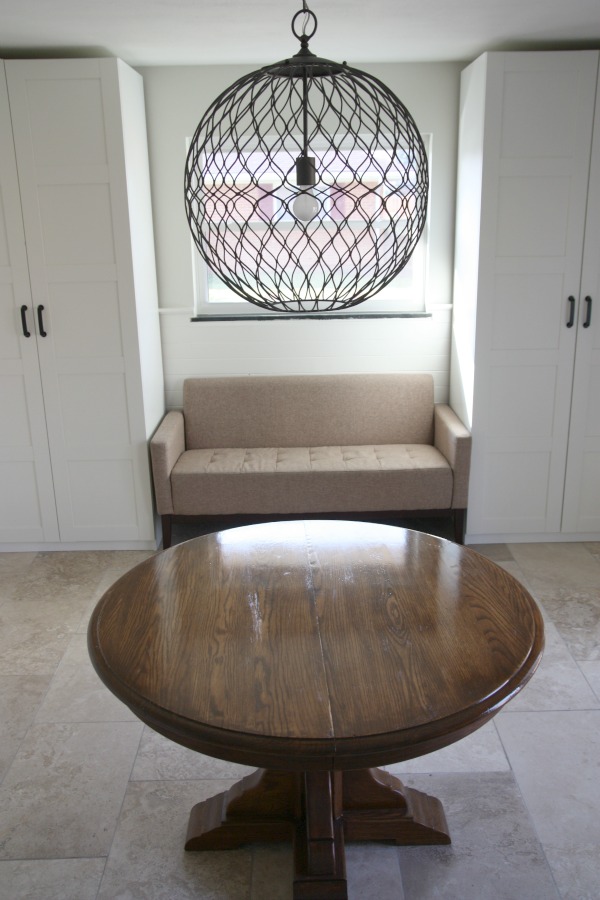
Did you notice a change in the location of the dining table? When we moved, we thought we’d like to have the table over by the sofa for a casual place to eat. But after living with our mudroom/dining room for a while now, we’ve found that placing the table in the center of the room works better. We toss mail on it when we come in. I fold laundry on it sometimes. It’s multipurpose. Of course, we still need chairs around the table but having the table in the middle of the room makes the room flow so much better and keeps all the big furniture from tilting the visual weight of the room to one side. It reminds me of those fancy entries you see in magazines where there’s a big pedestal table gracing the middle of the foyer.
The sofa is staying put but I’m going to make a slipcover for it. And add pillows. Ahhhhh. Pillows.
So stuff is happening here. Slowly but surely. It’s starting to look and feel more like home with each tweak.
images: Dana Miller for House*Tweaking
Sometimes HH and I get overwhelmed, discouraged and even struck with fear when looking at the long list of things left to do on our Underdog. Especially when many of the projects are right here in plain sight for us to see on a daily basis. We’ve found that the best way to turn our frowns upside down is to look at ‘befores’ of our house and see just how far we’ve come.
We bought the house in May 2011 but didn’t really start any work {aside from tree removal and demo} until after our previous home sold in mid-August 2011. During the nearly 9 month renovation, we lived in a two-bedroom apartment away from the chaos. Even though our apartment was far from lovely, I am so thankful we were able to have a safe haven separate from the renovation.
I thought you would appreciate seeing the progress on our home as well so you’re in for a little before-and-progress/after action today! {I’ll warn you. The ‘befores’ may be frightening to anyone who suffers from claustrophobia and the ‘afters’ are far from done.}
Here’s our Underdog in all its untouched and then renovated glory…

That’s the view from the front door looking towards the dining room and kitchen.
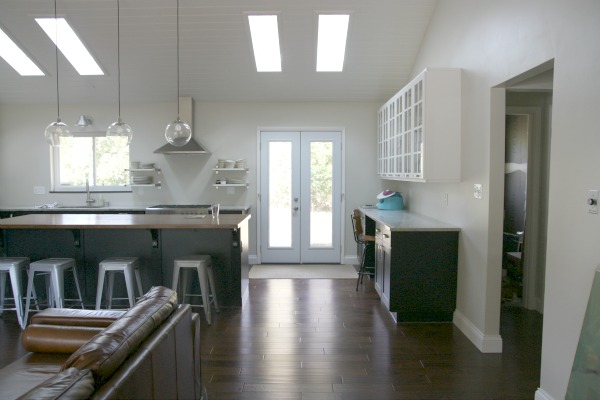
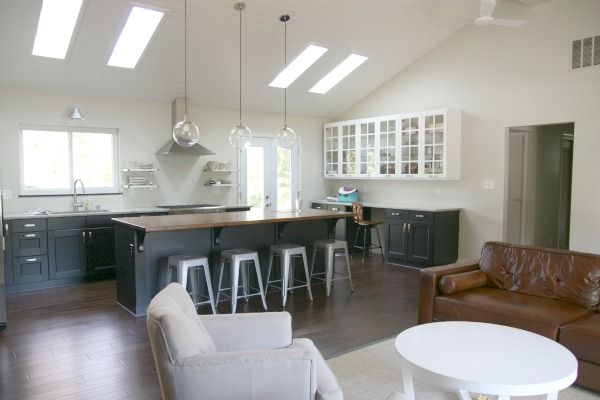
We removed the walls dividing the kitchen, dining room and family room. We vaulted the ceiling and added skylights. The original dining room window was replaced with french doors. The doors need painted and we still have a little work to do in the kitchen {backsplash, window treatment and styling}.

The original kitchen cabinets were rotted and falling apart.
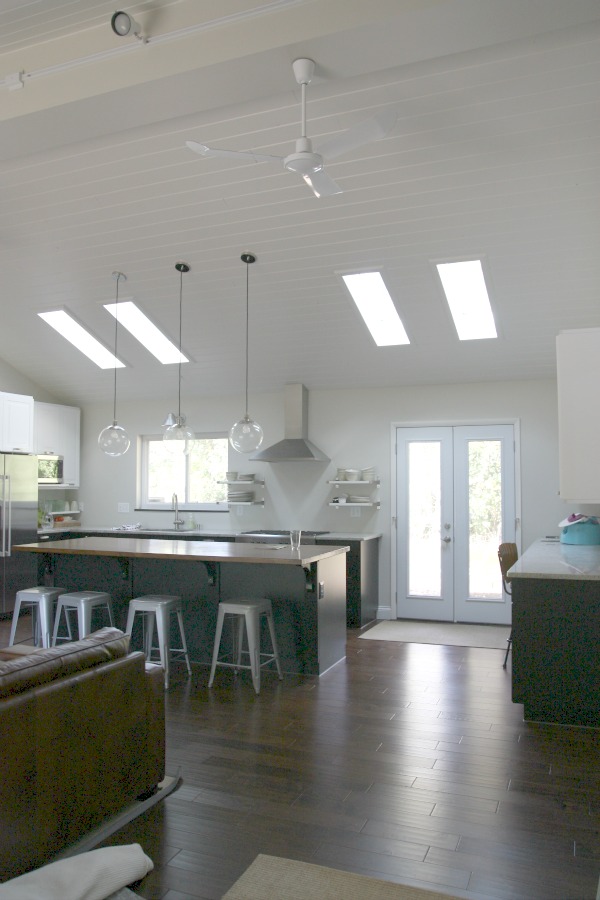
We installed an IKEA kitchen.

That’s the interior wall we took out to open up the space.
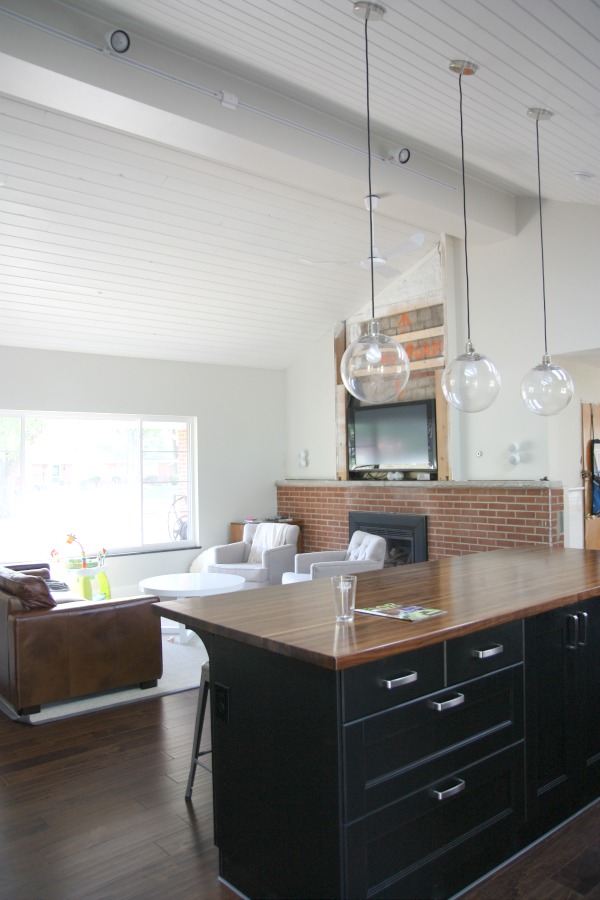
A large 9′ island adds storage where wall space was lost and serves as a casual dining spot for everyday meals.
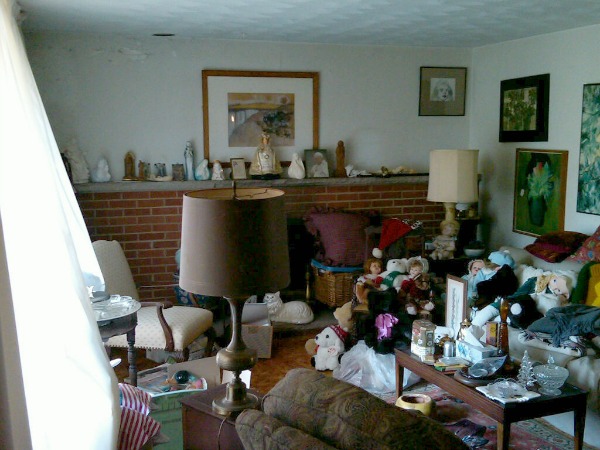
That’s the family room. If you look closely, you can see paint peeling and water damage along the wall and ceiling above the mantel.

And that’s the family room as of this week. Eventually, painted white tongue-and-groove planking will surround and frame in the TV. An original painting {created by the previous owner no less} will hang in front of the TV and raise/lower via a motorized pulley system. HH is still fine tuning the design. Other than buying a rug, new sofa and chairs, this room hasn’t been decorated. We need window treatments, a bench under the picture window and accessories.
Some more shots of the great room after…

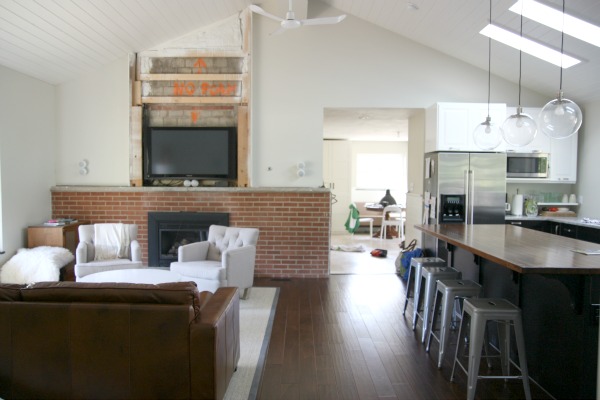
The only decision we’ve made about the original brick fireplace surround is to live with it a while. I have nothing against painting brick but HH and I both like exposed brick. We’ll see.
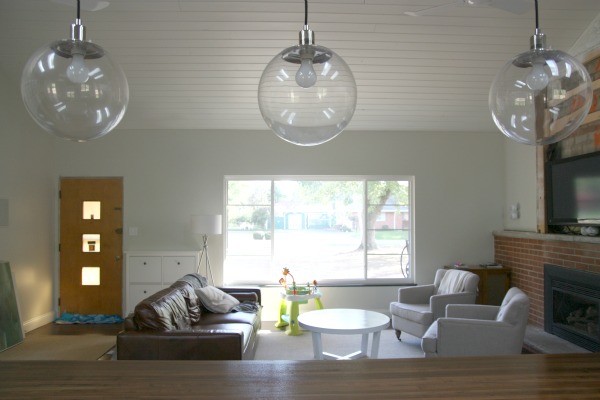
We haven’t addressed the front door yet.

I have plans for a gallery wall behind the sofa to disguise the surround sound speakers and balance out the upper cabinetry on the other side of the room.
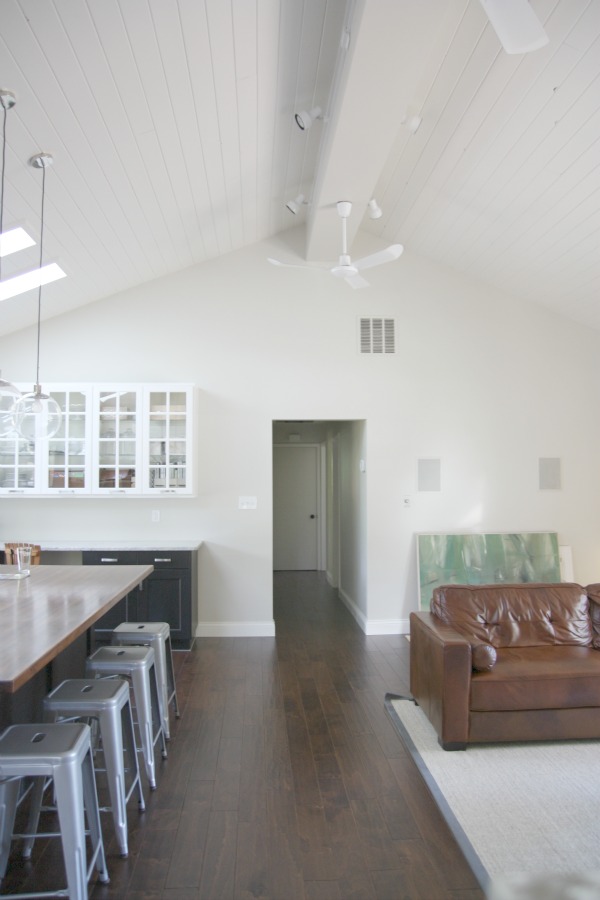
The leaning artwork is the piece that will raise above and lower over the TV.

Onto the former den…

The window unit was the only form of air conditioning in the house.
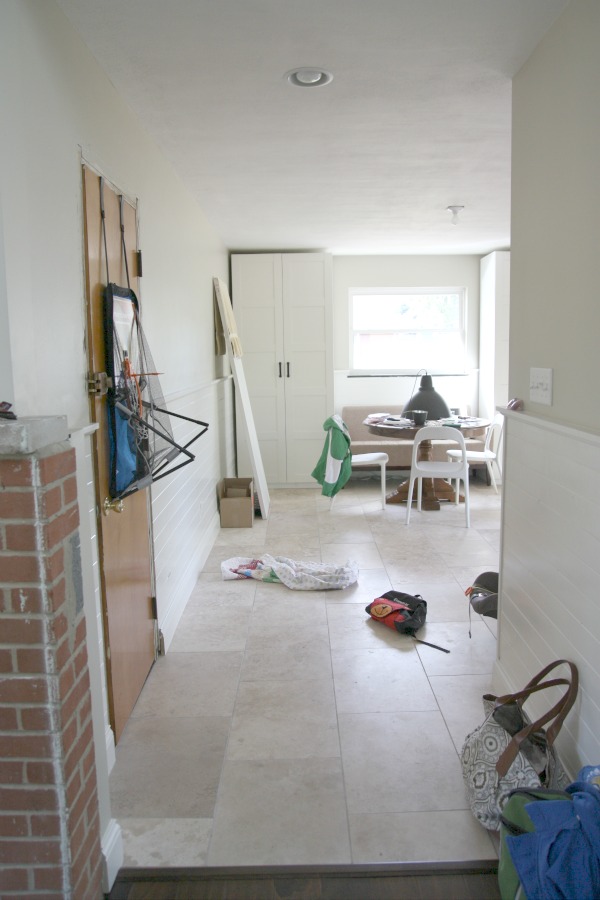
We removed the unit and installed a heat pump heating & cooling system.
We’ve repurposed the room as a dining room/mudroom/laundry room although it still needs a lot of work. HH added tongue-and-groove wainscoting and laid durable travertine tile. Even with the two PAX wardrobes, I need to address storage & organization. Somehow, shoes and backpacks aren’t making it all the way to the wardrobes. We also need to repair the man door to the garage, hang the light and hang the last interior door {to the kid/guest bathroom} that’s leaning against the wall.

The dysfunctional sliders were replaced with french doors. Just like the ones in the kitchen, we’ve yet to paint them. The dining chairs are actually outdoor chairs that will live outside in the future. For now, they’re inside.
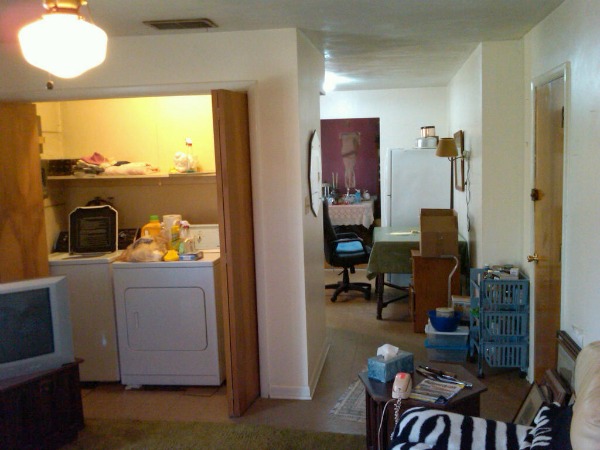
The other side of the room housed a laundry closet.

We demo’d the closet and added upper cabinets. The plan here is to install a wood countertop above the washer/dryer and to conceal the machines so that this corner resembles a dry bar.
The opposite side of the house is where the bedrooms and bathrooms reside.
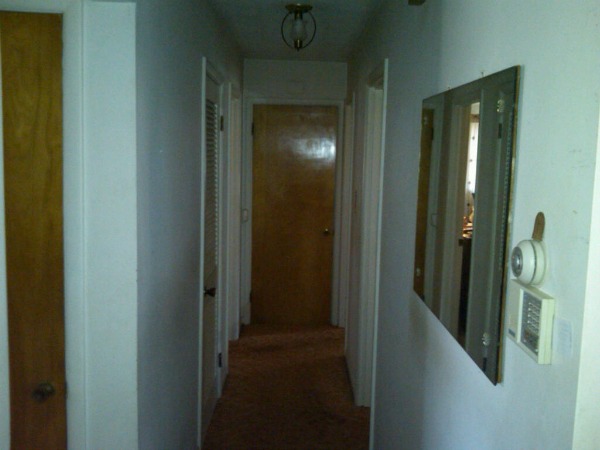
The old hallway was dark and dirty.
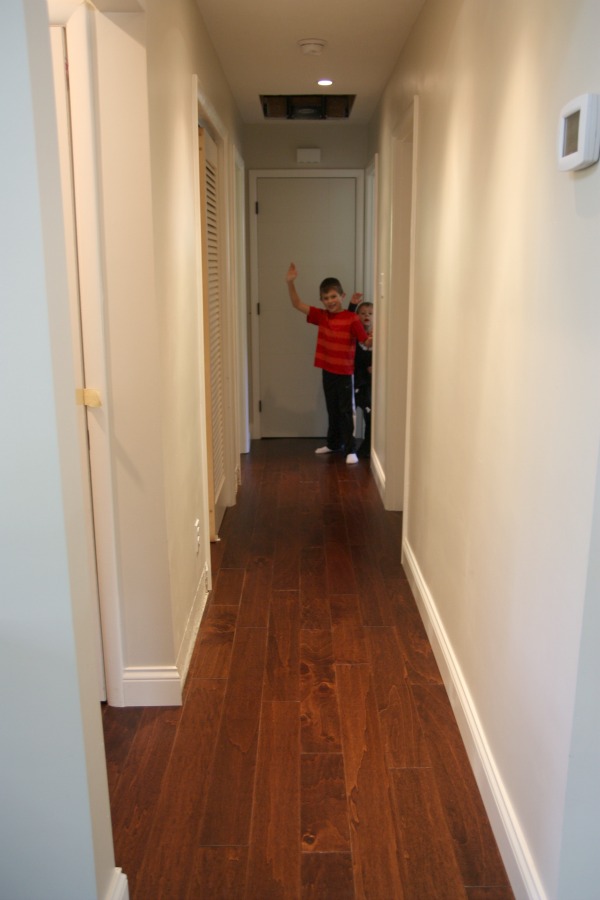
Recessed lighting was installed to wash the walls and brighten the passageway. {Hi boys!} The interior doors were replaced but they aren’t painted yet. We need to build a door for the attic access.

The first of the two bathrooms had cracked tile and mold within one wall.
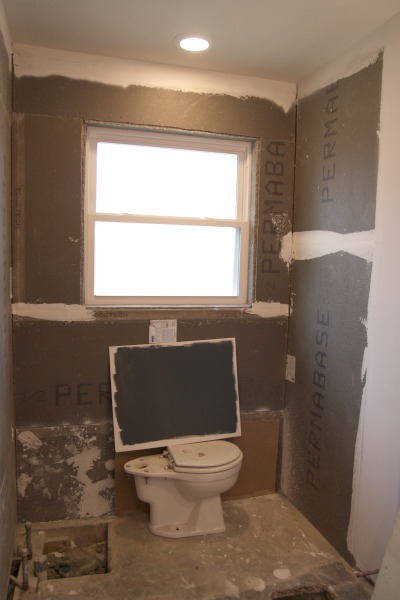
The bathroom was gutted and is prepped, awaiting finishes. It’s on our winter to-do list. It will become our kid/guest bathroom. Yes, that means our family of five is sharing one bathroom right now.
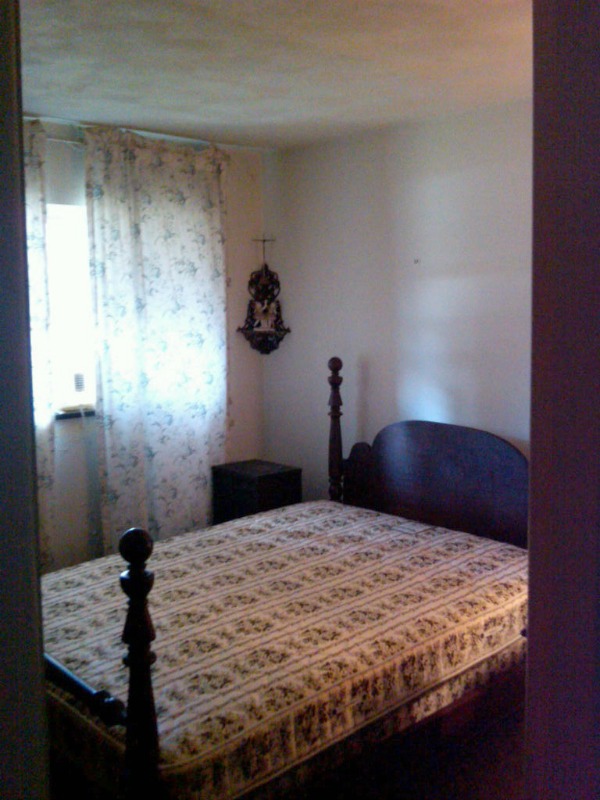
The first teeny {smaller than 10’x10′} bedroom had peeling paint on the walls, matted shag carpet and a bed took up the entire room. It was a nice four poster bed though, no?
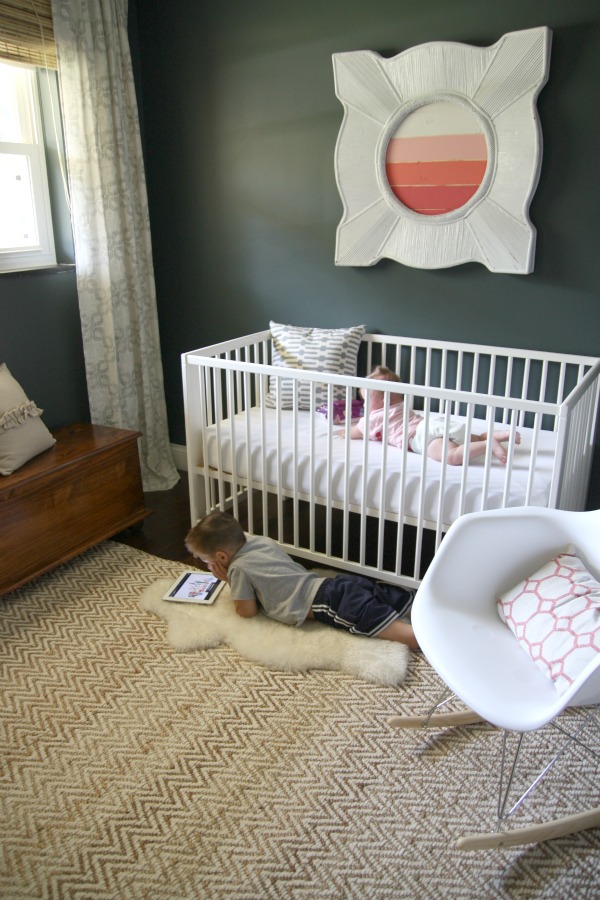
This room is the closest to being ‘done.’ As in the rest of the house, we demo’d the room to add insulation to the cinder block exterior walls, updated the electrical, hung drywall, installed new flooring & baseboards and painted.
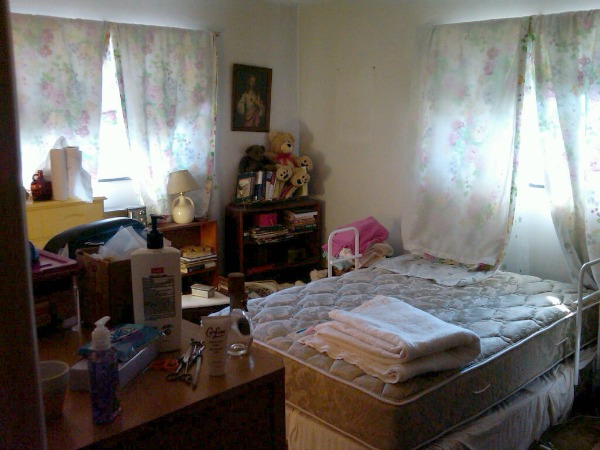
The second bedroom was a decent size but crowded with furniture and clutter. The baseboards in this room were deteriorating from termite damage.
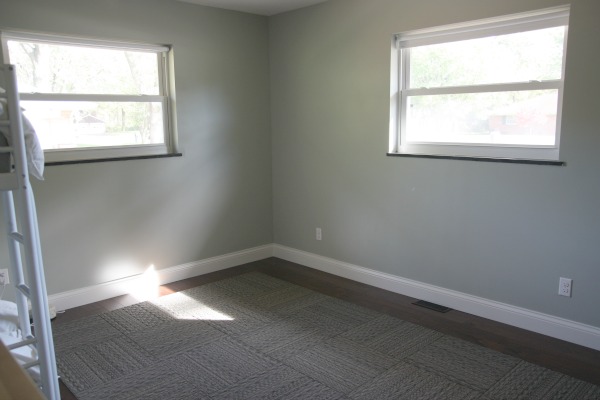
Our boys share this room now. {Surprise! You get a sneak peek of their new rug. More on that next week.} I can’t wait to add built-in desks and open shelving so the room can double as a workspace for the kids.
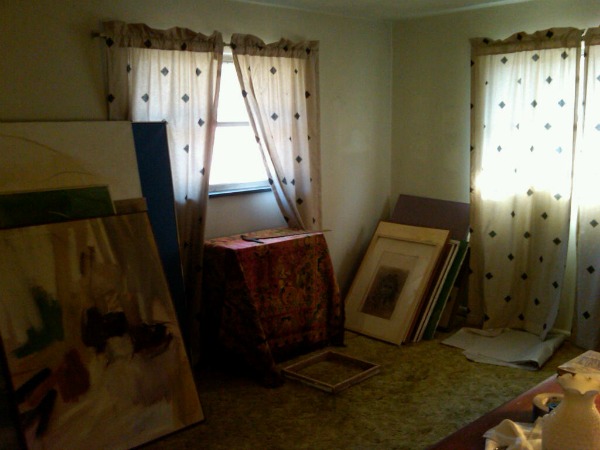
The master bedroom was being used as an art studio. It was dark, dirty and outdated.
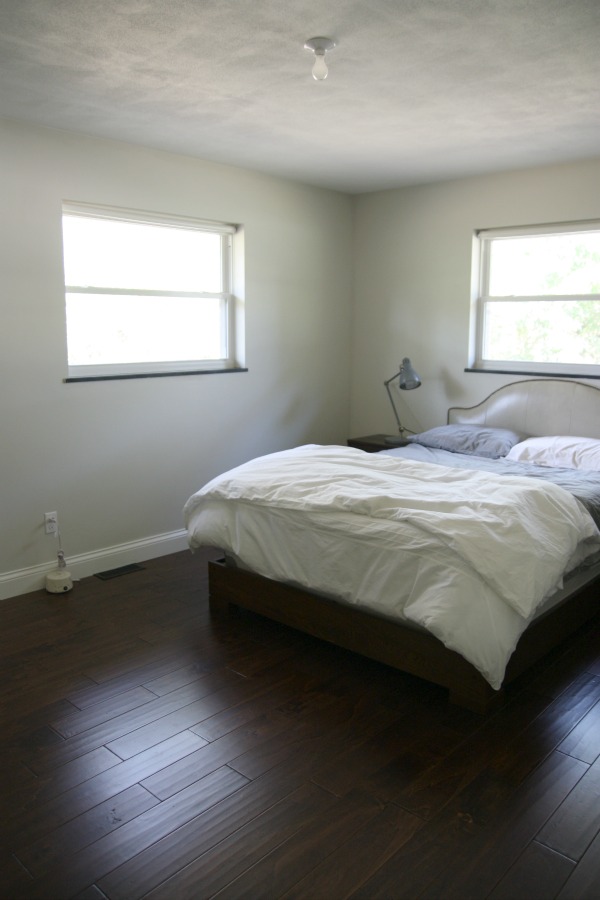
It’s now a true bedroom but needs some tweaking. Don’t mind the sloppy bed with mismatched pillows. Everett made the bed and I didn’t have the heart to tell him he did it wrong.
I have to be honest. I’m not 100% happy with the wall color. It’s Benjamin Moore tapestry beige and it’s the same color we used in the hall and great room. While I LOVE it in the hall and great room, I don’t like it in the master bedroom. The problem with the bedroom is that it faces north and receives little natural light. I thought painting it light would make it appear lighter but this particular color just accentuates the shadows and comes across as dingy. I’ll probably end up repainting it. Any suggestions for good paint colors in a north room are welcome!
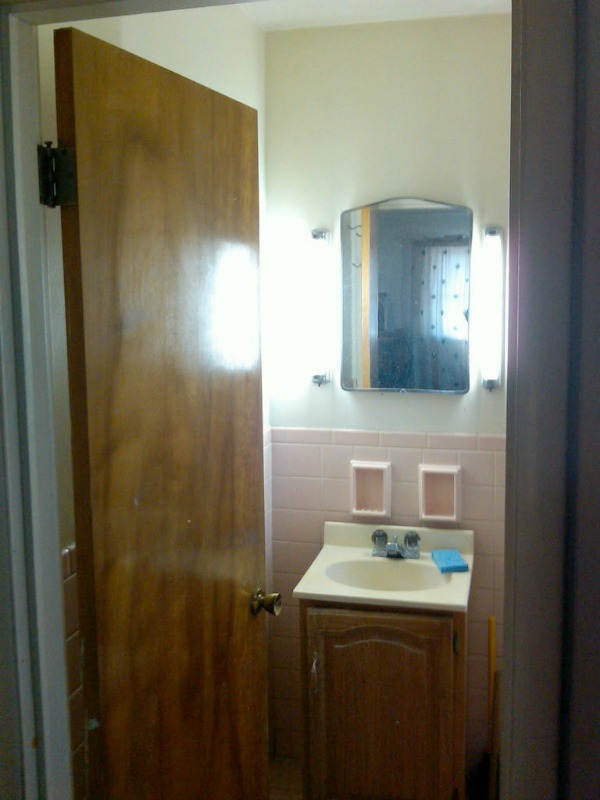

The adjoining master bathroom had many of the same problems as the other full bath. The original tile was cracked and the entire space was outdated.
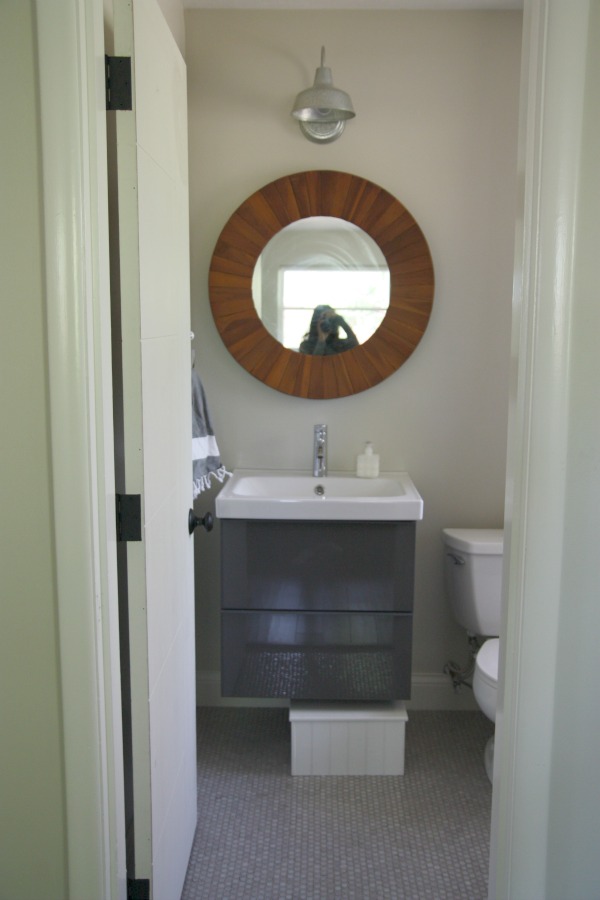
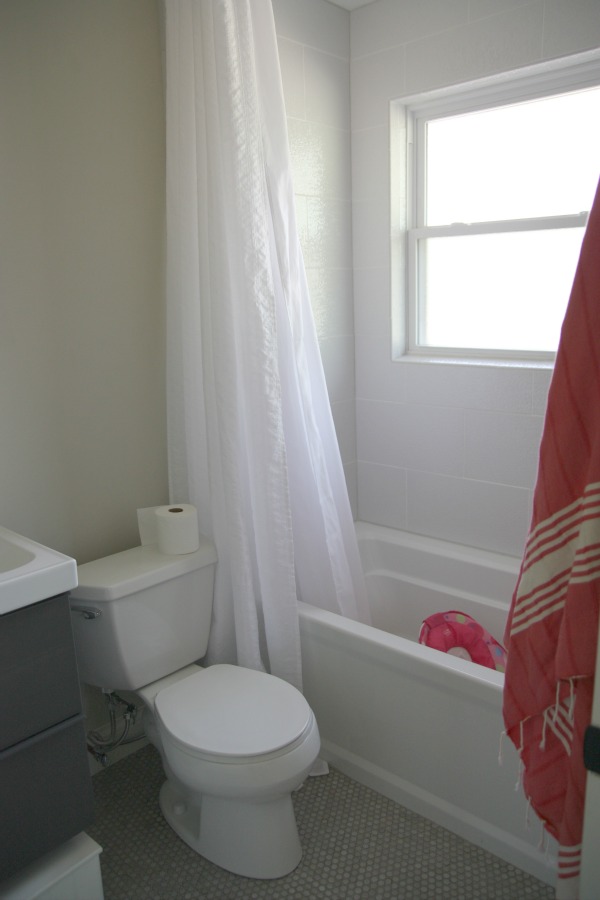
We did a full gut job. I need to get creative with storage and organization in this bathroom. A toilet paper holder would be a good place to start. I have the same feelings about the paint color in here as in the master bedroom.
Currently, this is our only functioning bathroom. While it isn’t impossible for a family of five to share one bathroom {I do love having only one bathroom to clean}, I am looking forward to the day when the kids have their own bathroom.
So. There you have it. A look at our house from the first time we walked through it to current day.
Whew. That was cathartic. I’m feeling much better about our progress. And that’s only the inside of the house. Maybe I’ll crank out a similar post for the exterior. Can you believe HH and I walked through the house the first time with it looking like that and left with smiles on our faces? Yeah. We’re crazy.
To answer a very popular question…the house was an estate sale in a highly sought school district and listed at $99,000. It was the black sheep of the neighborhood with most homes in the area going for $140,000 and up with minimal updates. We offered $85,000 and got the house. At closing, we learned that all of the money from the sale of the house went to charity.
While tweaking this house into our home isn’t always easy or fun {damn you, concrete slab and cinder blocks walls!!}, we love it a little more each day.
Check to see who won this week’s Stella & Dot and Signs by Andrea giveaways!
images: Dana Miller for House*Tweaking


budget decor, DIY, interior design