I showed you how I sealed my granite countertops recently. Surprisingly, many people commented asking about the care of the kitchen island’s butcher block countertop. So, today while I was giving the island its routine rub down, I documented it all for you to see. Before we get started, please know that there are many different recommendations on the care of wood countertops. This is just how I take care of mine if you’re curious. It works well for me. You should do whatever is most comfortable for you.

Okay, so our kitchen island is topped with IKEA’s NUMERÄR oak countertop. It is not sealed with polyurethane or any other permanent sealer. I simply used the method I’m about to show you 2-3 times per week for the first month after installation to get a good moisture/stain barrier in place. Since then, I just re-oil the butcher block when needed. Which is usually every 1-3 months depending on its usage and the humidity in the house. Typically, I can go longer between oilings in the summer when the wood doesn’t dry out as easily. Here are the only products I use:

A – A clean, damp rag.
B – A fine sanding block. Fine as in not so coarse. Not as in NKOTB fine. You could easily substitute the block with fine sandpaper.
C – Mineral oil. Home improvement stores sell versions specifically marketed towards wood countertops but I buy my mineral oil in the laxative aisle of the grocery store. It’s a lot cheaper, works great and is safe. Plus, we eat directly off the countertop to keep our family regular, if you know what I mean. Just kidding. Not really.
D – Oiling rags. These are just old rags that I’ve dedicated to the sole purpose of oiling the butcher block. I don’t wash them for fear of messing up my washer {they get very saturated!} but instead keep them in a plastic Ziploc bag under the sink just for this purpose. No, they don’t stink. Mineral oil has no odor.
To routinely oil the countertops I…

1 – Wipe all dirt, dust, crumbs and stickiness from the butcher block with my damp rag. I let it air dry for a few minutes.
2 – Drizzle some mineral oil on the butcher block. I don’t measure it but if I had to guess I’d say I use about 1/3 cup.
3 – Rub oil into the countertop with my oiling rag, following the wood grain. Don’t forget the vertical edges!
4 – Let the oil penetrate and soak in for 24-48 hours. I try to remind my kids that the island is greasy to keep them from getting into it, but they sometimes forget. No biggie. The oil won’t hurt them. If I’m impatient, I’ll wipe away excess oil with a dry cloth but I really like to let it sit for a day or two to really soak in. The wood drinks it up and loves it. I’m always amazed by how revitalized it looks after each oiling. Like new!
With two little kids in the house, the wood countertop frequently gets stained. I’ve had juice, markers, crayons and wet colored tissue paper stains so far but they are easily removed. Let me demonstrate. A la Billy Mays style. Minus the alleged cocaine use.

Say I find a Sharpie mark. {For demonstrative purposes, yes, I made a mark with a Sharpie onto the countertop. That’s how much I love you guys.}

I take my handy dandy, fine sanding block and sand away the mark.

I’m left with a slightly lighter area where the mark once was.

Nothing my trusty mineral oil can’t handle.

Cue the ‘APPLAUSE’, ‘CHEESY SMILING’ and ‘DISBELIEF HEAD SHAKING’ cards. The once marked, now slightly lighter area will continue to fade away as time and more routine oiling go on.
Sound like too much maintenance for you? Then don’t get butcher block countertops. Like the idea of saving money with inexpensive butcher block even if it means a little more elbow grease? Then I’ll see you in the laxative aisle. Happy weekend!
images: all Dana Miller for House*Tweaking
Ohhhhh, the kitchen.
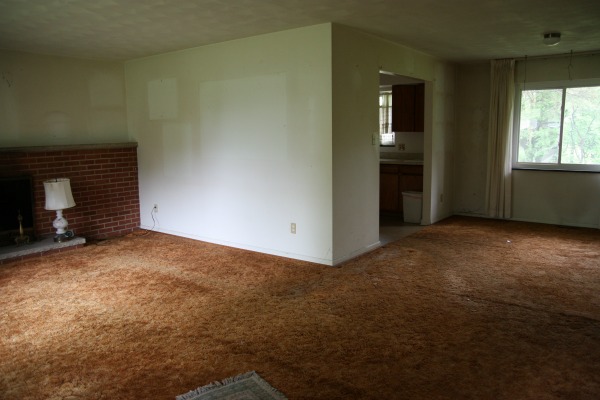
The original kitchen was walled off from the living and dining rooms.
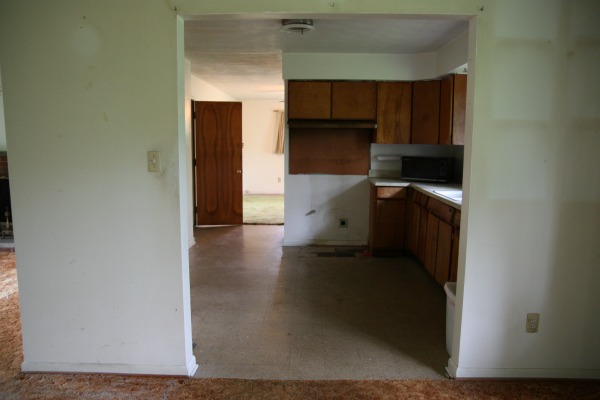
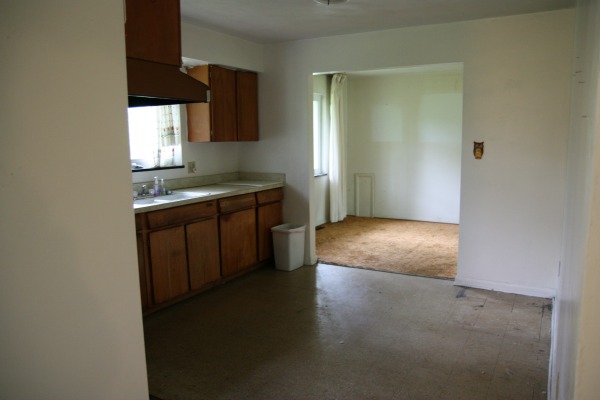
If the cabinets had been in better shape, we might have tried to work with them but, sadly, they were rotted and the doors / drawers didn’t open or close properly. The odd layout assigned the refrigerator to a lone corner with no storage or counter space nearby. There was no dishwasher.
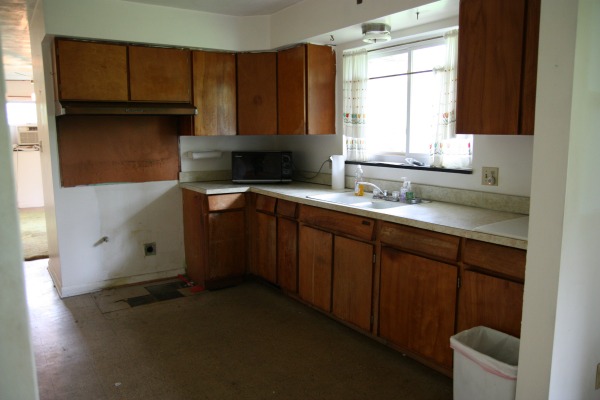
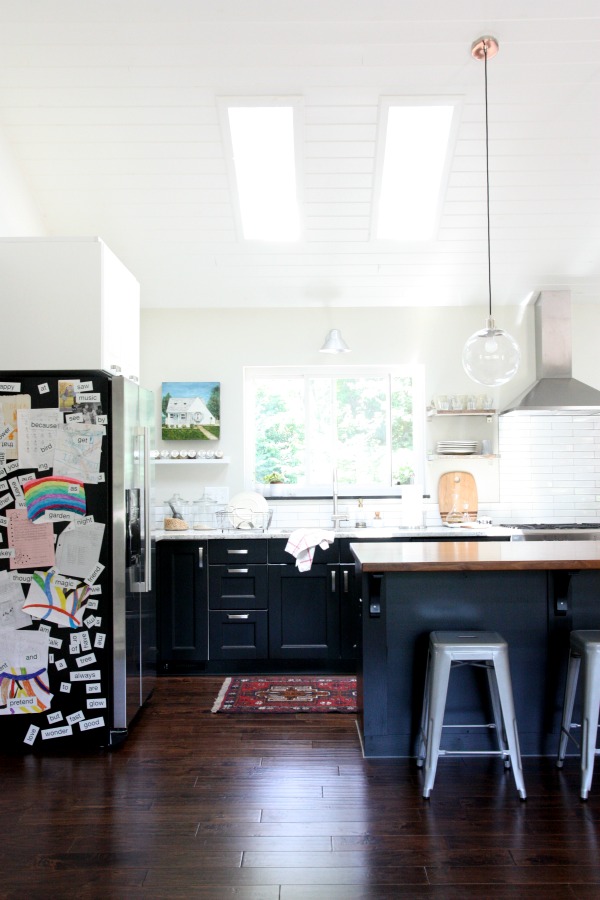
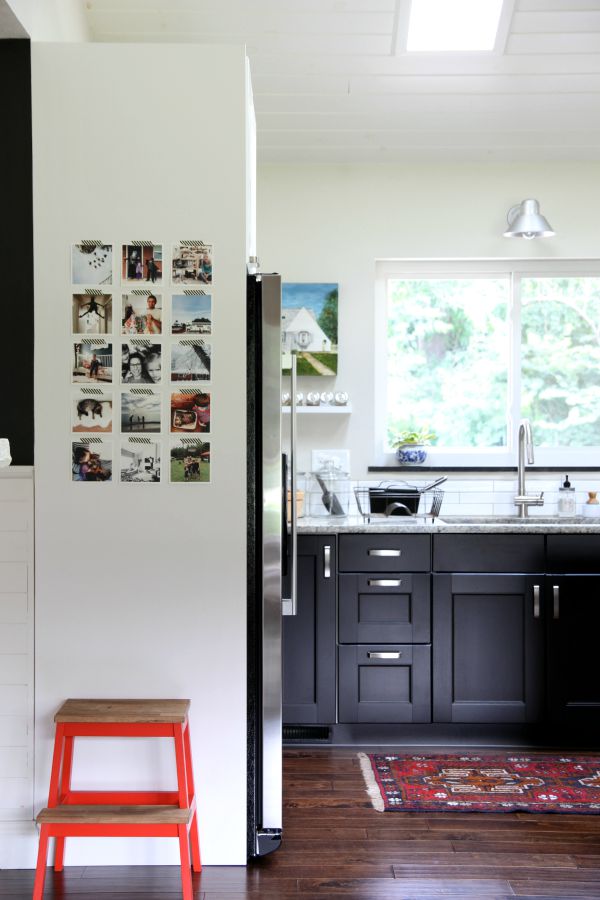
One thing we liked about the kitchen was the window above the sink which looks out onto the backyard. It was one of the few windows that had been replaced by the previous owner.
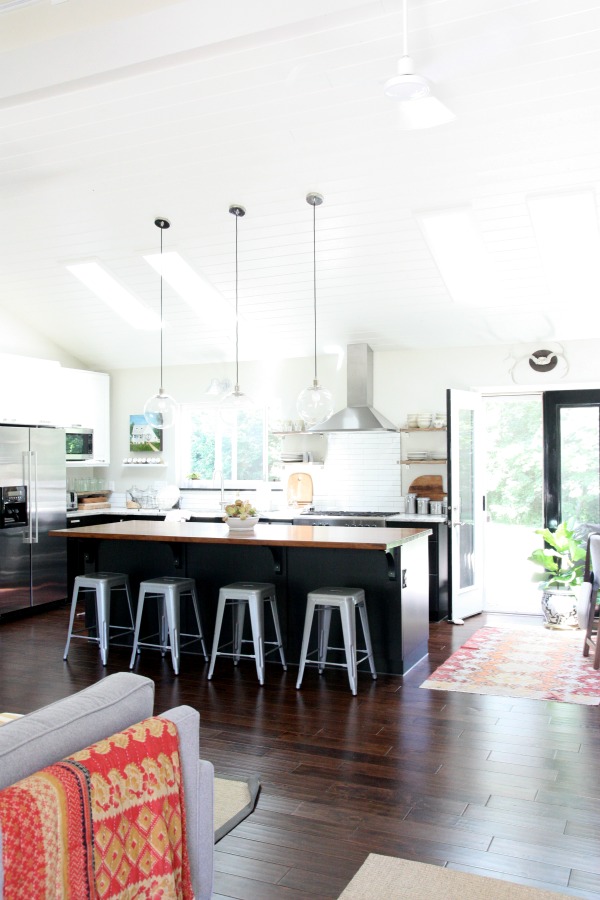
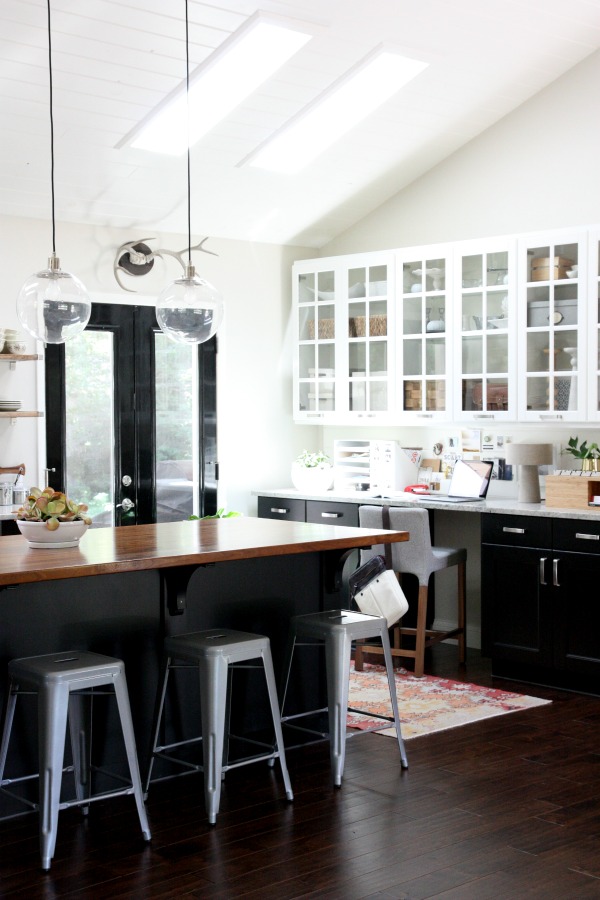
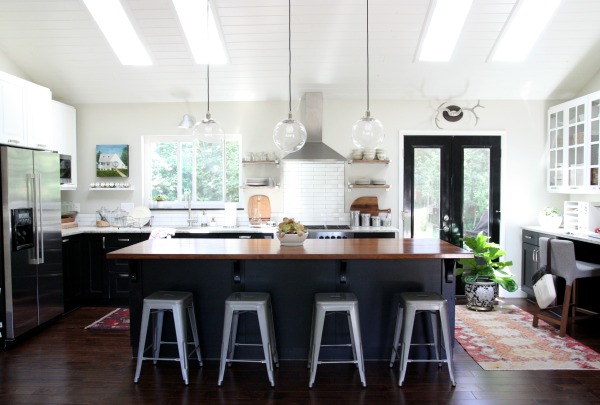
To enlarge the kitchen and create a more functional layout without altering the house’s original footprint, we removed walls separating the kitchen, living and dining rooms. We aren’t formal people so the small dining room was relocated to allow for a large island. The dining room window was replaced with french doors to connect the kitchen to the backyard. A vaulted ceiling and skylights flood the north-facing space with natural light. It’s a far cry from the dark, soffit-heavy room we started with.
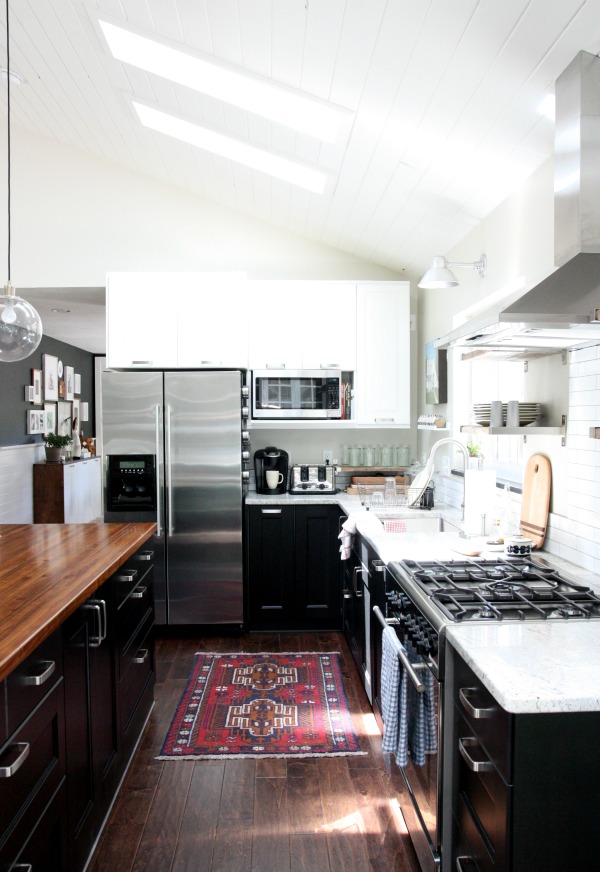
We had our plumber run new water and gas lines to accommodate the current layout. A counter-depth refrigerator stands where the stove once lived. A freestanding range occupies the site where a wall used to separate the kitchen from the original dining room. A new dishwasher is located to the right of the sink. It’s hidden behind a cover panel that matches the base cabinetry. When the house came to us, a microwave sat in a corner eating up precious counter space. We added a shelf next to the refrigerator to house the microwave and a few cookbooks which freed up counter space for a coffeemaker, toaster and shelf of drinking glasses.
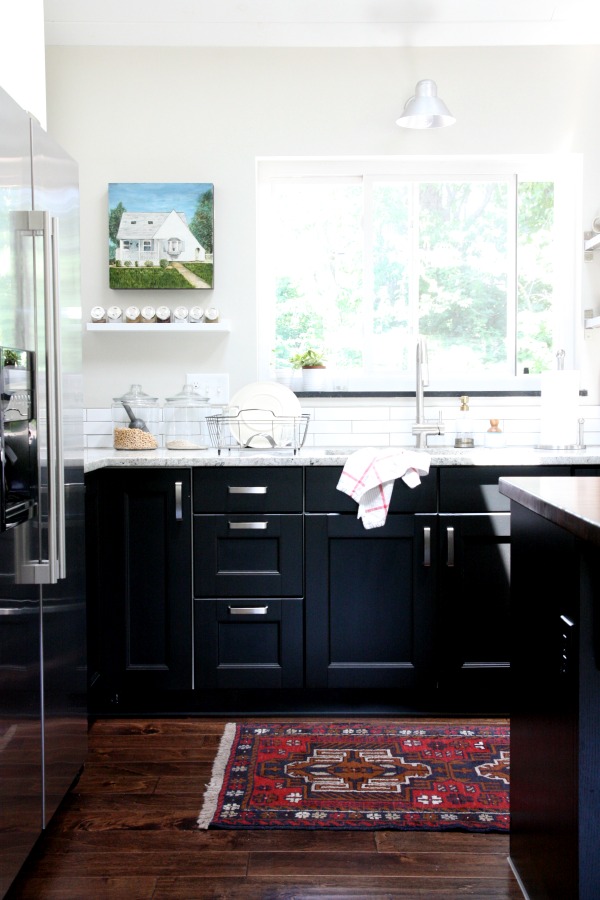
One thing we didn’t change was the location of the sink. I like that I am able to look out the window when I’m washing dishes to admire the greenery or watch the kids playing.
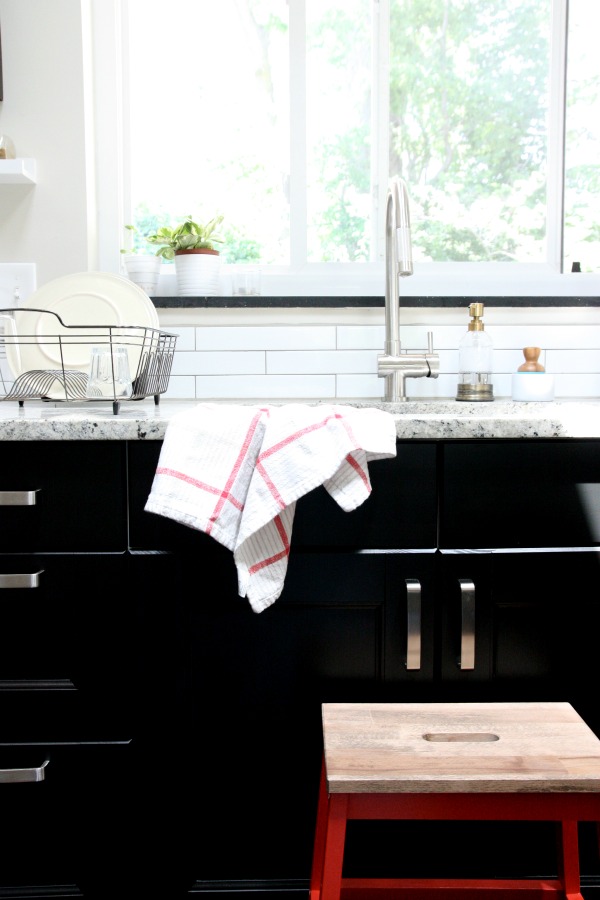
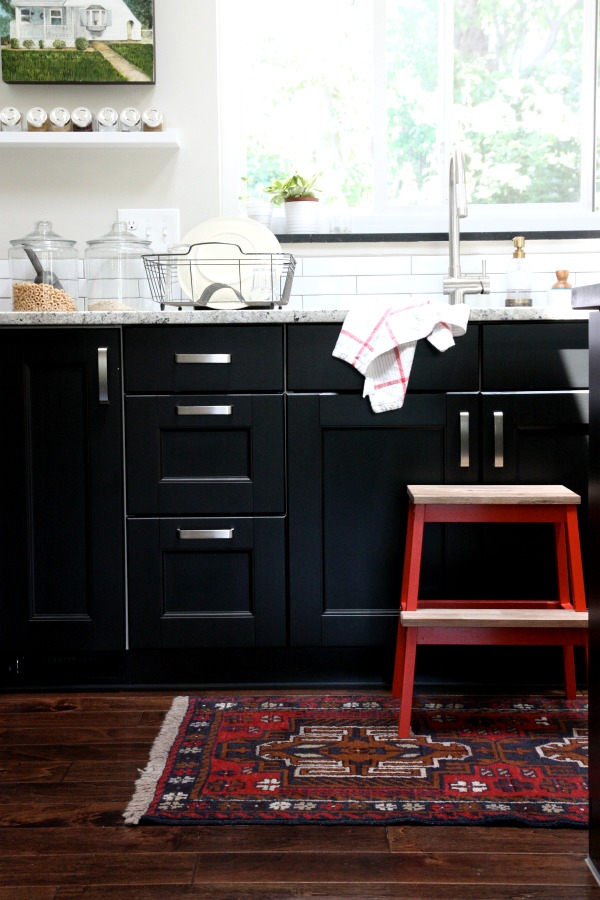
We opted for solid surface countertops around the perimeter of the kitchen for easy maintenance. An extra deep, under-mounted, single basin sink makes cleanup a breeze.
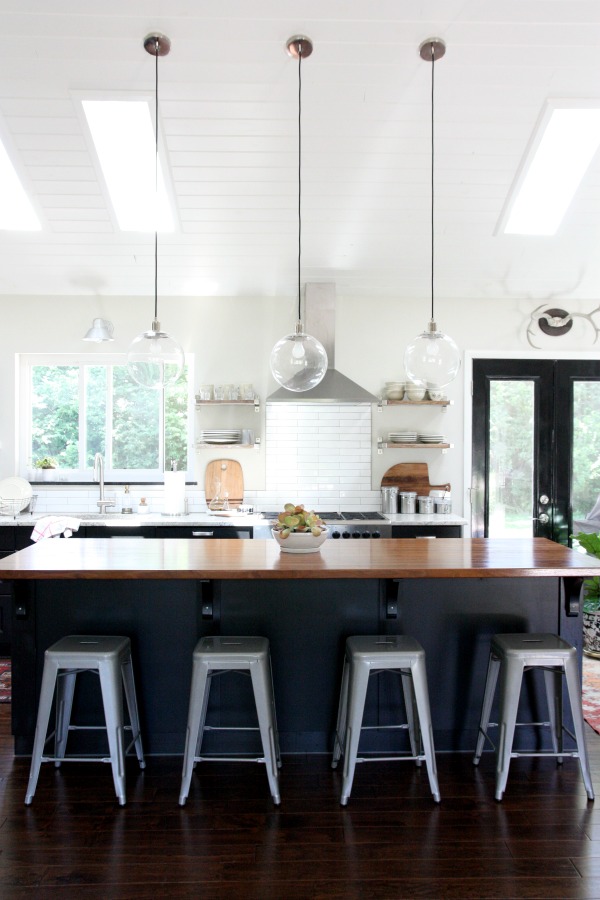
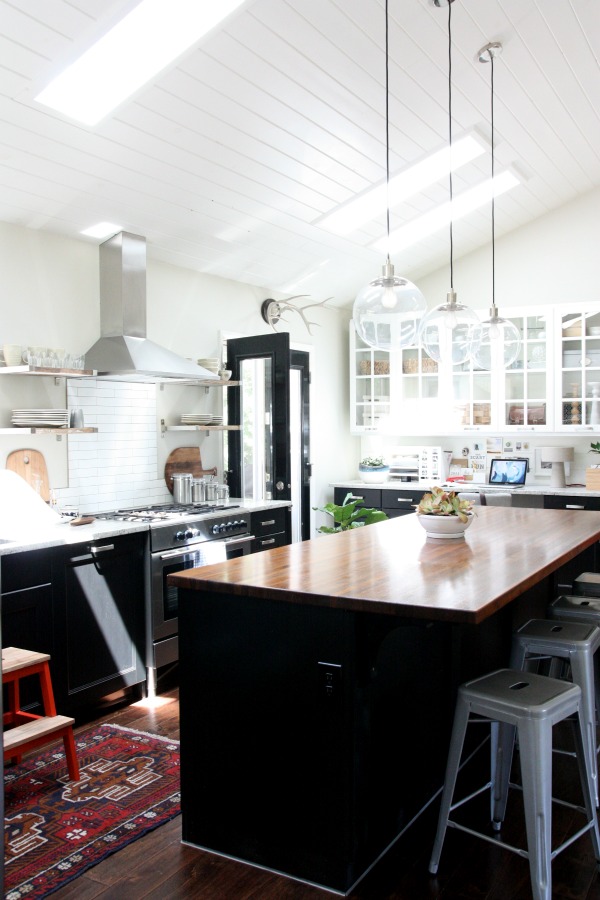
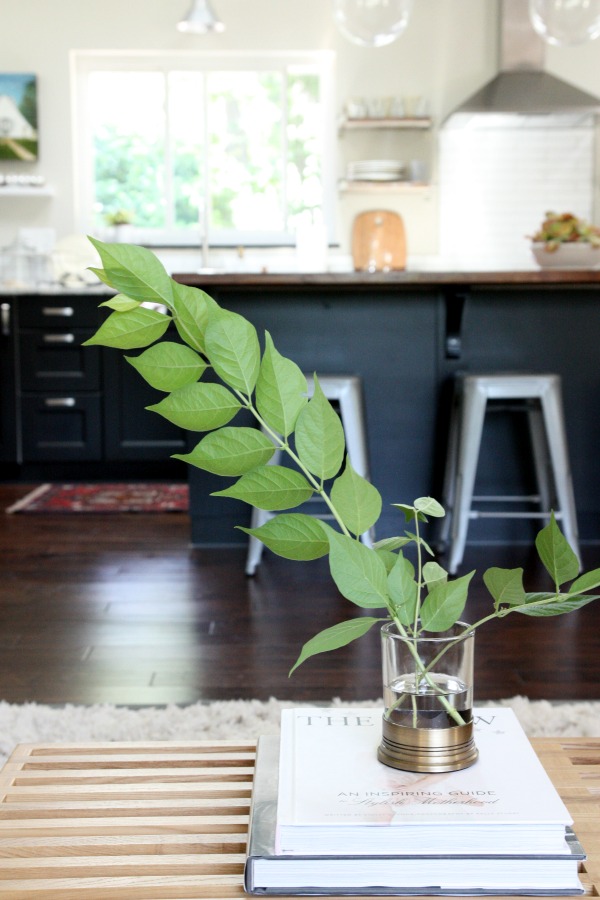
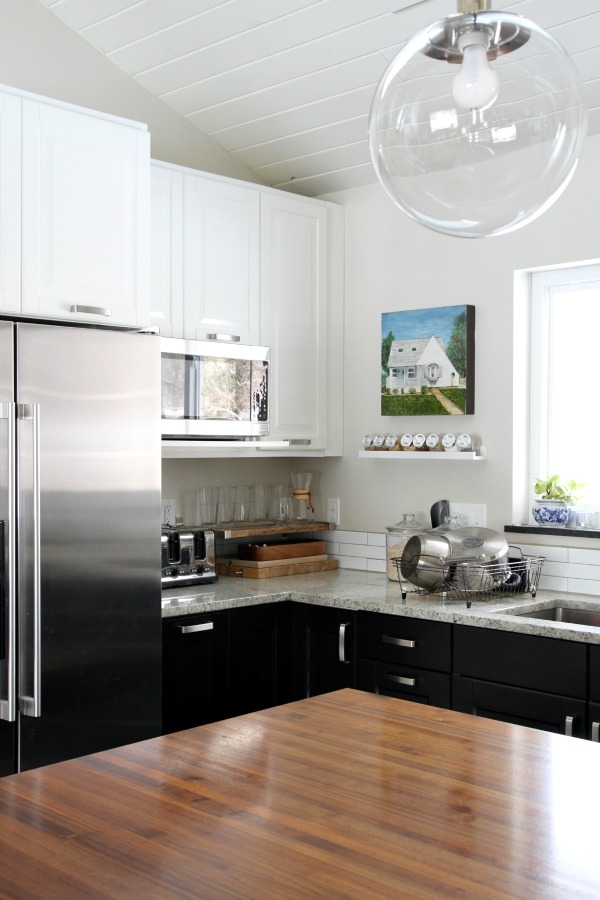
The nine-foot-long island is the hub of the house. It sees as much Play-doh, crafting and homework as it does meal prep, entertaining and casual dining. We topped it with a walnut slab to give it the feel of a wood table since we eat most of our meals here. It’s a warm contrast to the granite in the rest of the room. Guests always comment on the island and wood top saying they feel like they’re at a bar. We take it as a compliment.
We suspended a trio of pendants above the island. I wanted something that would punctuate the island but not impede the view of the kitchen from the adjoining living space. Clear globe lights were an ideal choice. I especially like the black cloth cords. The pendants are on a dimmer so we can have bright light for food prep or low light for dining and ambiance.
I chose durable metal counter stools to stand up to the kids and their inevitable messes. I wipe them down with a wet cloth and they look brand new. To keep the view from the living room to the kitchen uninterrupted, the stools are backless. This feature also makes it easy to turn around to talk with someone in the living room. Initially, I had some reservations about using backless stool with kids but it hasn’t been an issue.
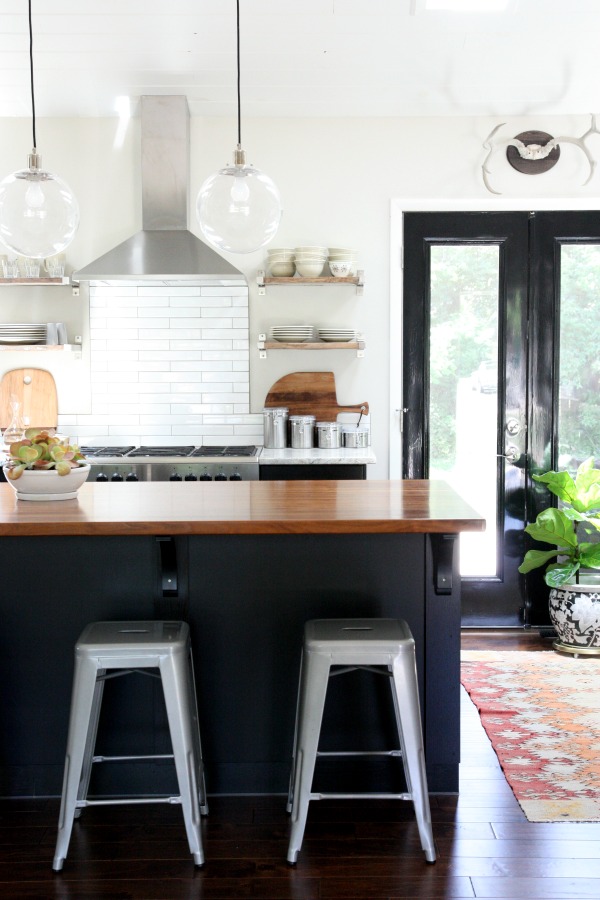
We kept the back wall free of upper cabinetry and installed reclaimed wood shelves. A sleek range hood and minimal backsplash add to the open feel. It’s nice to look over from the living room and not be bombarded with a slew of wall cabinets or an entire wall of tile. I really wanted the kitchen to feel like an extension of the living space instead of a kitchen thrown into a living room. To achieve this, we continued the engineered hardwood flooring into the kitchen. The wood flooring, walnut island top and reclaimed wood shelving help bring warmth to an innately utilitarian room.
The cabinetry is Ikea. From the get-go, I had my heart set on a tuxedo kitchen: dark lowers, white uppers. I wanted dark base cabinets to ground the kitchen in such an open space. I wanted white wall cabinets to keep things light. A mix of black and white just made sense.
We fell hard for the Ramsjö black-brown base cabinets but were disappointed with the slightly pink tone of the coordinating white wall cabinets. In the end, we used three different door styles. (Ramsjö black-brown, solid front for the bases and Lidingö white, solid and glass-front for the uppers.) I was a little worried about the mix on paper but in real life I think it goes a long way in helping the kitchen feel less generic.
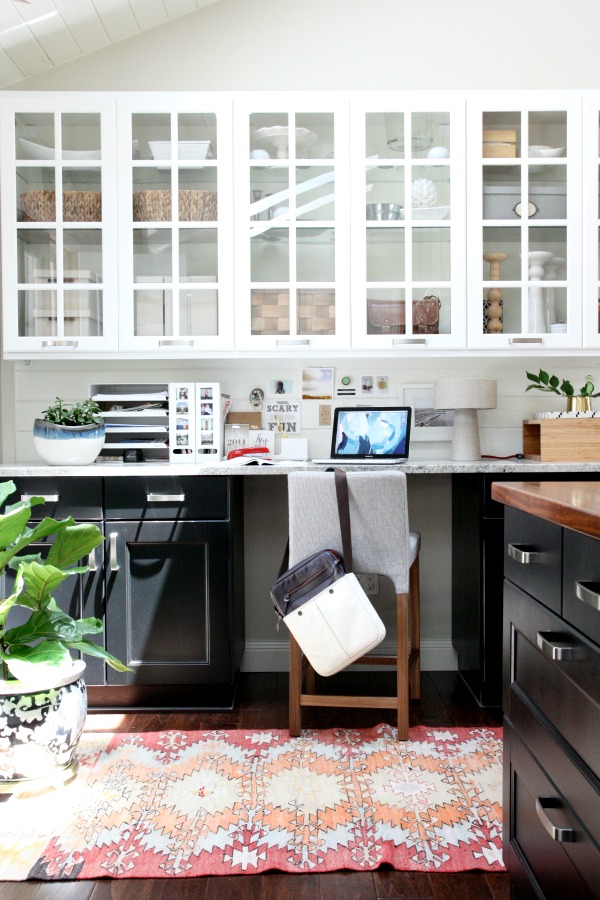
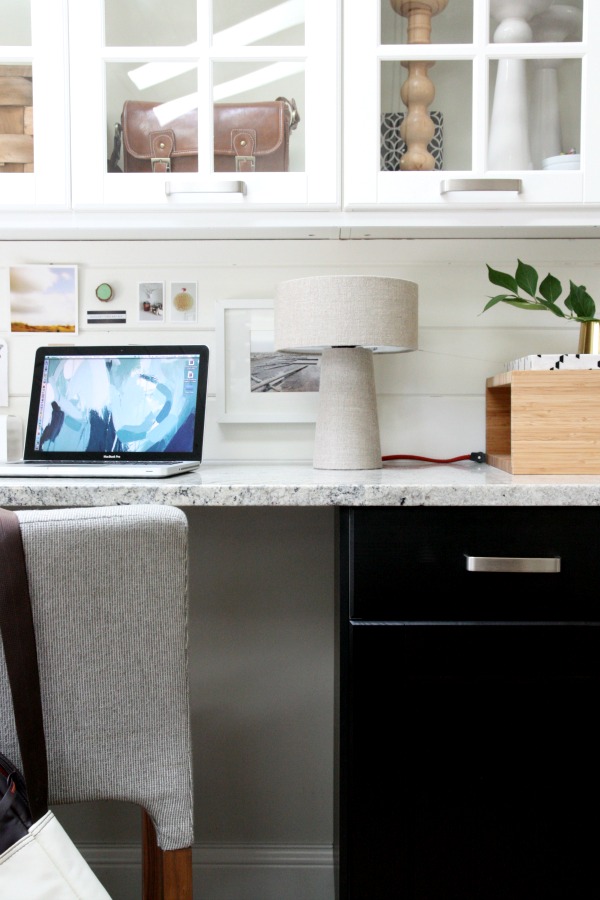
One end of the kitchen is devoted to paying bills, making grocery lists, creating meal plans and all the other secretarial tasks that go along with running a household. It’s also where I do the majority of writing and photo editing for the blog. Essentially, it’s a home office. Base cabinets hold a printer, office supplies and the kids’ crafting supplies. Upper, glass-front cabinets provide pretty storage. I use an assortment of baskets, bins and boxes to corral vitamins, batteries, camera accessories, receipts, crayons and a bunch of other miscellaneous. The planked backsplash is a repeated element also found on the ceiling and TV wall.
To give the kitchen space a cozy vibe, I added greenery, artwork, vintage rugs, an upholstered desk stool and a linen-covered lamp. It feels lived. It is lived in.
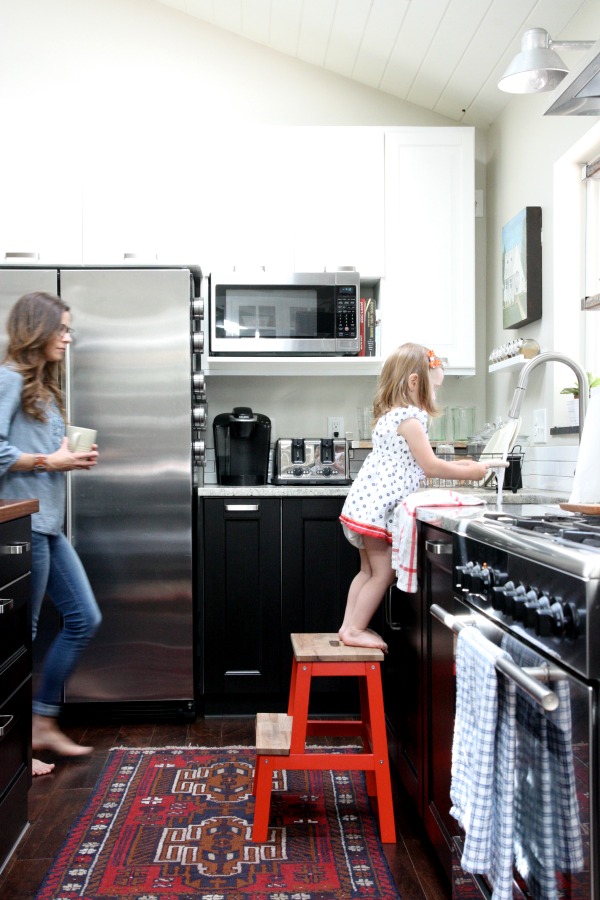

There are a few tweaks yet to be made in the kitchen. (We need to add a trim piece next to an upper cabinet in the corner near the microwave and I’m brainstorming an interactive side panel for the refrigerator.) But I’m very lucky to be able to spend the majority of my time in this bright and airy space. In the evening when the kitchen is tidy after dinner and the dishwasher is humming away, I pour myself a glass of wine and golden light glows through the skylights. It’s my happy place.
UPDATE: The trim piece and side panel are done! See the trim piece here and the side panel here.
Resources of note:
wall paint – Benjamin Moore tapestry beige
trim, ceiling, planked backsplash paint – Benjamin Moore white dove
french door paint – Glidden trim & door oil paint, extra high gloss in deepest black
flooring – Jasper engineered hardwood handscraped birch in Texas brown via Build Direct
base cabinets – Ikea, Ramsjö black-brown
wall cabinets – Ikea, Lidingö white
perimeter countertop – kashmir white granite via Stone Design
walnut countertop – Hardwood Lumber Company
island corbels – The Home Depot
hardware – Ikea (Värde handles sans rosettes)
refrigerator, dishwasher, gas range, range hood – Ikea
microwave – LG
sink – Kraus 32″ undermount single bowl
faucet – VIGO stainless steel pull-out
backsplash tile – imperial bianco gloss 2″ x 12″ via The Tile Shop
backsplash grout – Laticrete epoxy grout in natural grey
globe pendant lights – West Elm
counter stools – Overstock
wall sconce above sink – Barn Light Electric
house artwork near sink – gift
spice rack – Ikea
glass storage containers – Wal-mart
kitchen towels – Crate & Barrel
step stool – Ikea, painted & stained
rug near sink – ebay (seller was manhattanrugs)
open shelving – DIY using Ikea brackets and reclaimed wood
oil & vinegar drizzlers – Amazon (These are the best!)
stainless steel containers – Target
antlers – etsy
black & white planter – vintage
rug near desk – etsy
desk stool – Blu Dot knicker stool
laptop bag – STM
blue & white planter – JoAnn’s
letter tray – Ikea
magazine files – Ikea
linen lamp – Crate & Barrel
wood cubby – Kalon Studios
highchair – Ikea
art above highchair – Clare Elsaesser
mat & frame – Utrecht art supplies
tongue & groove planks – Home Emporium
skylights – Velux
In case you’re interested in seeing how this space came together over time, a slew of kitchen-related links:
KITCHEN RENOVATION
*https://www.housetweaking.com/2011/08/21/kitchen-island-pendants/
*https://www.housetweaking.com/2011/08/30/a-few-new-things
*https://www.housetweaking.com/2011/10/25/light-skies/
*https://www.housetweaking.com/2012/02/03/let-there-be-light-and-some-cabinets/
*https://www.housetweaking.com/2012/04/14/if-you-cant-stand-the-heat/
*https://www.housetweaking.com/2012/05/22/finishing-the-walnut-butcher-block/
*https://www.housetweaking.com/2012/05/24/installing-the-walnut-butcher-block/
*https://www.housetweaking.com/2012/05/25/countertops-are-in/
*https://www.housetweaking.com/2012/11/01/kitchen-backsplash-tweaked-shelves/
*https://www.housetweaking.com/2013/12/06/cabinet-lighting/
*https://www.housetweaking.com/2014/03/11/our-pantry-a-tasty-giveaway/
IKEA KITCHEN
*https://www.housetweaking.com/2011/06/03/an-ikea-kitchen-in-the-making/
*https://www.housetweaking.com/2011/06/15/an-after-dinner-ikea-run/
*https://www.housetweaking.com/2012/06/29/ikea-appliance-reviews/
*https://www.housetweaking.com/2012/07/09/designing-our-ikea-kitchen/
*https://www.housetweaking.com/2012/07/12/purchasing-our-ikea-kitchen/
*https://www.housetweaking.com/2012/07/20/installing-our-ikea-kitchen/
*https://www.housetweaking.com/2015/07/21/fridge-side-panel-in-a-tuxedo-kitchen/
DECOR
*https://www.housetweaking.com/2011/08/21/kitchen-island-pendants/
*https://www.housetweaking.com/2012/08/06/those-stools/
*https://www.housetweaking.com/2012/08/22/our-kitchen-cabinets-color-matched/
*https://www.housetweaking.com/2012/10/05/ill-take-it/
*https://www.housetweaking.com/2013/03/14/a-new-desk-rug/
*https://www.housetweaking.com/2013/08/11/what-happened-to-the-wall-planter/
*https://www.housetweaking.com/2013/09/30/a-kitchen-rug/
*https://www.housetweaking.com/2013/12/01/sink-hole-quick-fix/
*https://www.housetweaking.com/2014/02/04/the-cheapest-most-loved-fiddle-leaf-fig/
*https://www.housetweaking.com/2014/04/11/how-im-not-killing-my-fiddle-leaf-fig/
*https://www.housetweaking.com/2014/02/24/i-call-it-the-stop-stool/
*https://www.housetweaking.com/2015/01/20/how-i-clean-the-globe-lights/
*https://www.housetweaking.com/2015/01/23/how-i-clean-the-wood-floors/
*https://www.housetweaking.com/2015/01/28/lots-of-little-things/
*https://www.housetweaking.com/2015/05/19/a-play-kitchen-before-and-after/
*https://www.housetweaking.com/2015/07/21/fridge-side-panel-in-a-tuxedo-kitchen/
KITCHEN DESK
*https://www.housetweaking.com/2012/09/27/organizing-the-kitchen-desk/
*https://www.housetweaking.com/2013/12/12/kitchen-desk-backsplash/
*https://www.housetweaking.com/2013/12/16/the-kitchen-desk-backsplash-painted/
*https://www.housetweaking.com/2014/03/04/baby-steps-in-the-unfinished-bathroom/
*https://www.housetweaking.com/2014/02/16/my-home-workspace/
*https://www.housetweaking.com/2014/02/26/diy-sueded-cord-cover/
*https://www.housetweaking.com/2016/02/03/diy-wood-bead-styling-strand/
For ease, you can access this kitchen tour under the “See My House” tab in the side bar along with a general house tour and other room tours. Thanks for reading!
images: Dana Miller for House*Tweaking


budget decor, DIY